Steps to make a note-taking app
- Create a form
- Pick your text editor
- Create a table
- Make your app
There’s no shortage of note-taking apps out there, and there are many things to consider when picking one. They’re available as web apps and desktop apps. Some are free. Others can cost an arm and a leg. There are very simple ones and incredibly complex ones.
The vast number of options can lead to analysis paralysis. But there’s a surprisingly simple solution: You can make your own.
Jotform offers a collection of business tools that provide a wide variety of functionality. Jotform Apps combines the functionality of all of Jotform’s products into a single no-code app builder. Let’s take a look at just how easy it is to build a note-taking app with Jotform.
Create a form
Forms are the foundation of Jotform — after all, “form” is in the name of our product — and our apps start with them.
If you think about it, most apps have some way to enter data. That’s pretty much all a form is: a way to gather data. It’s a way to add data to an app as well.
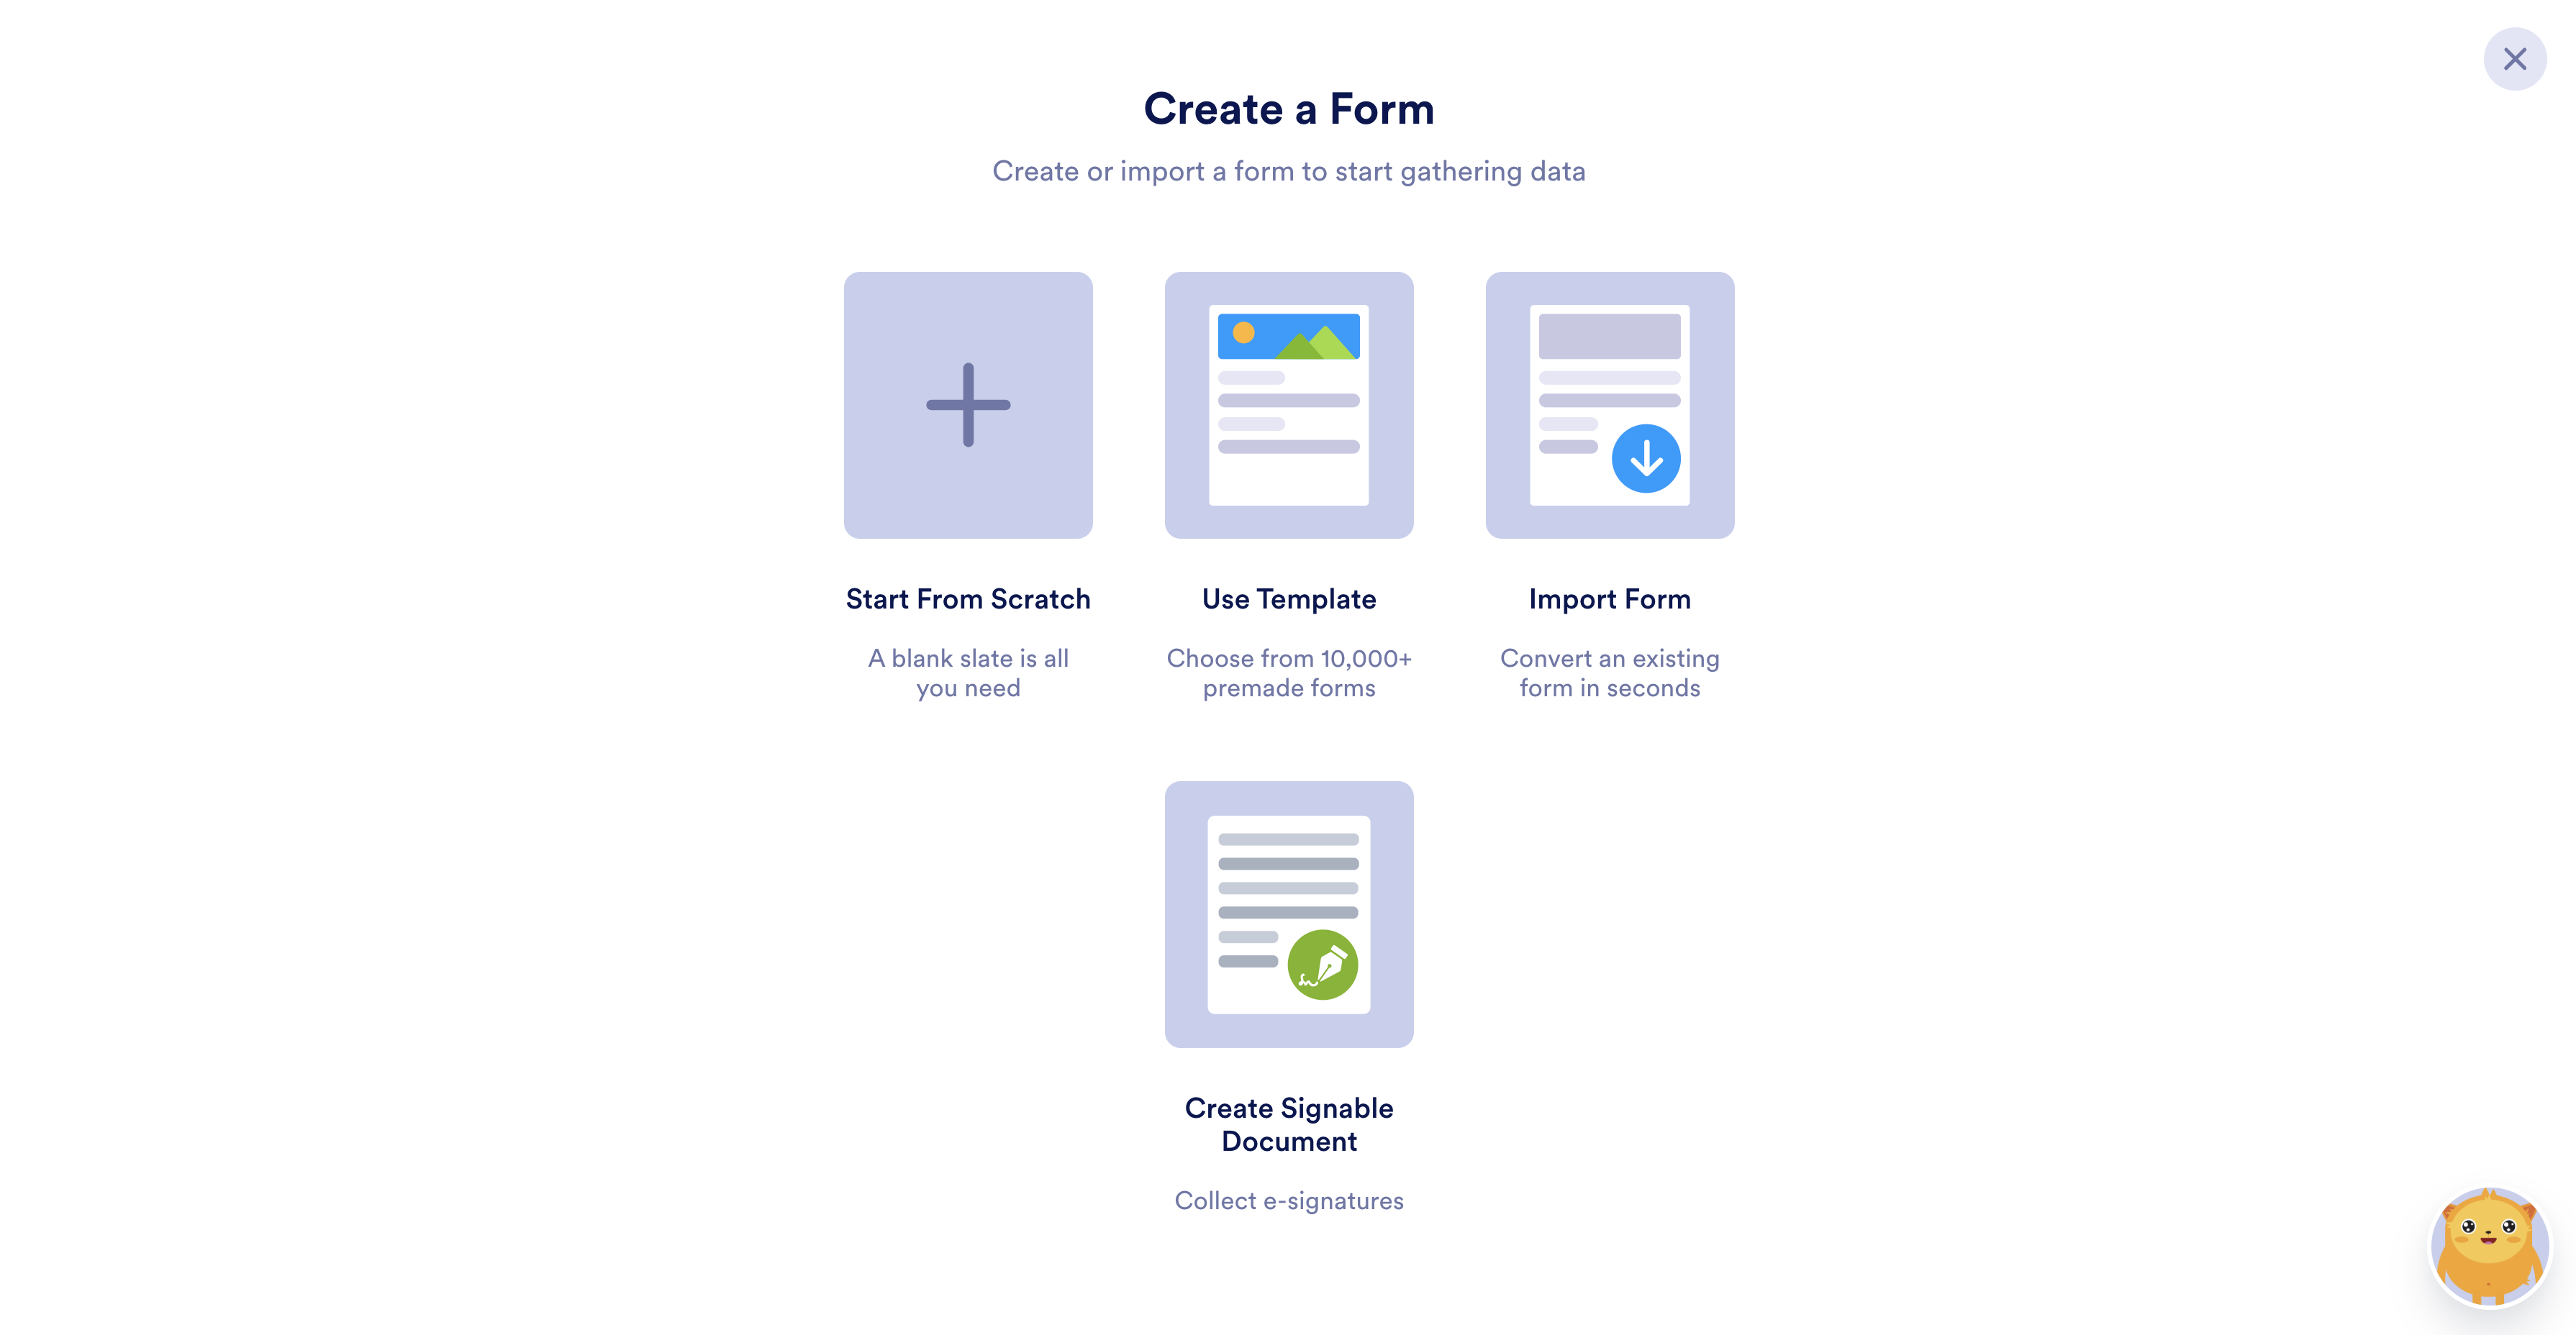
Start by creating a new form from your Jotform dashboard. On the form creation screen, select Start From Scratch.
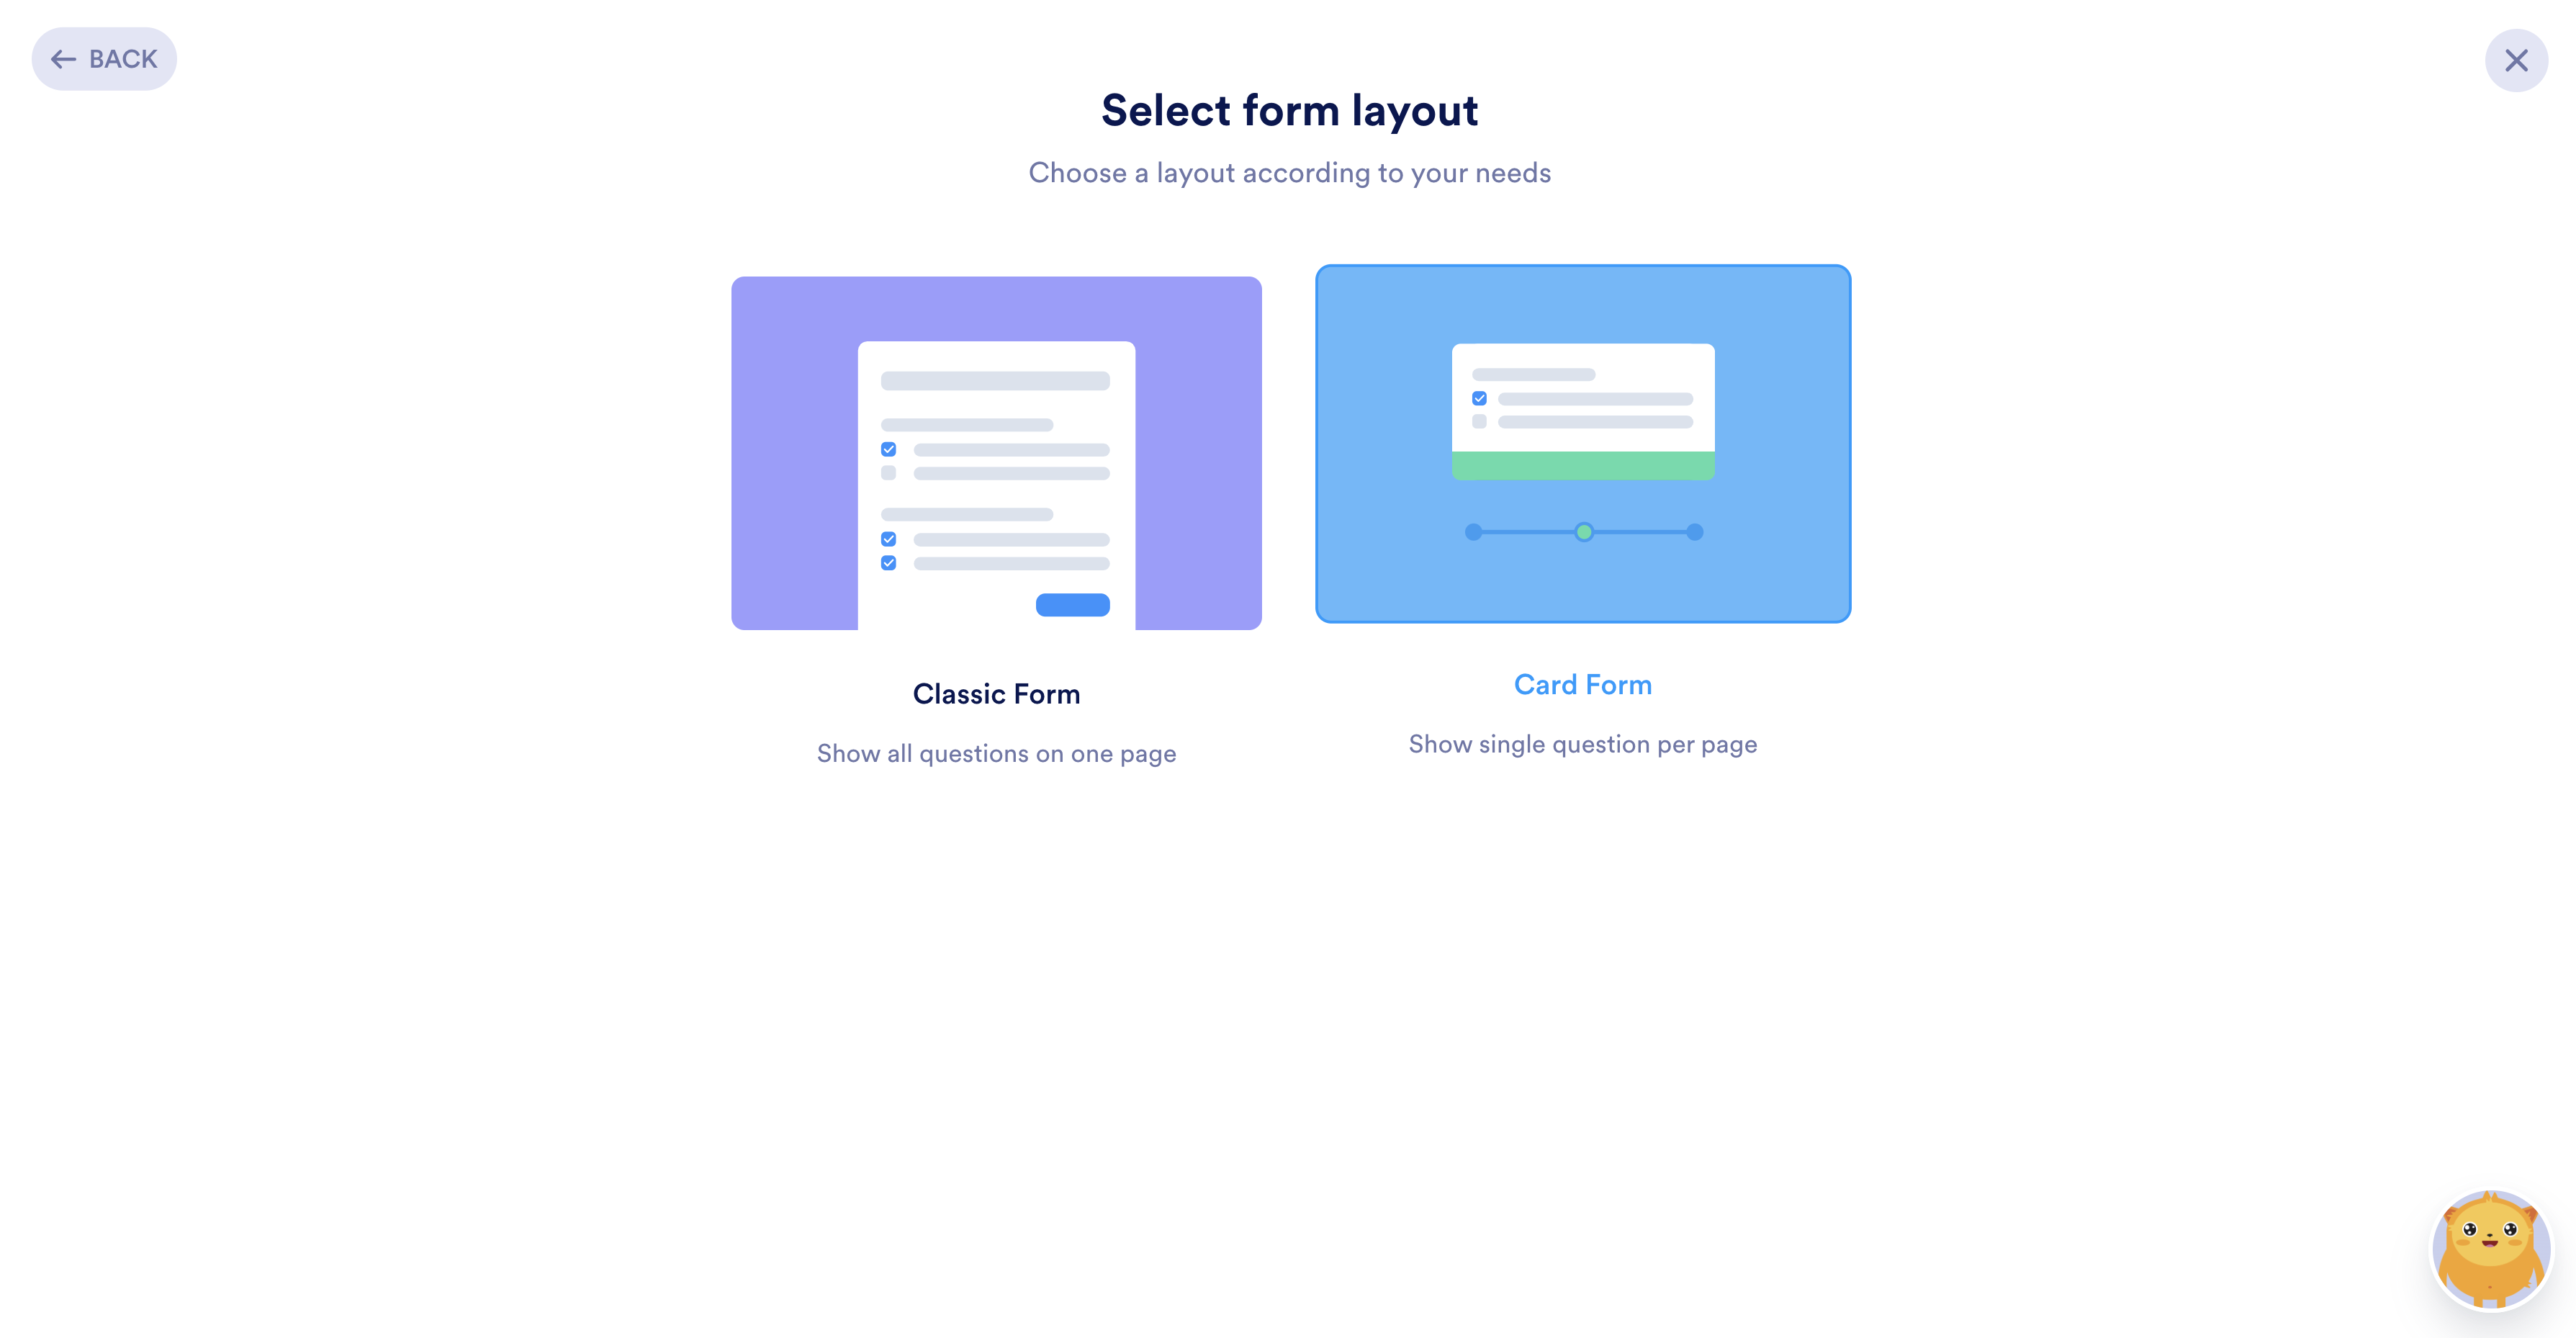
Then use the Classic Form for your layout. The card format is nice, too, but the classic one is a little simpler for this quick tutorial.
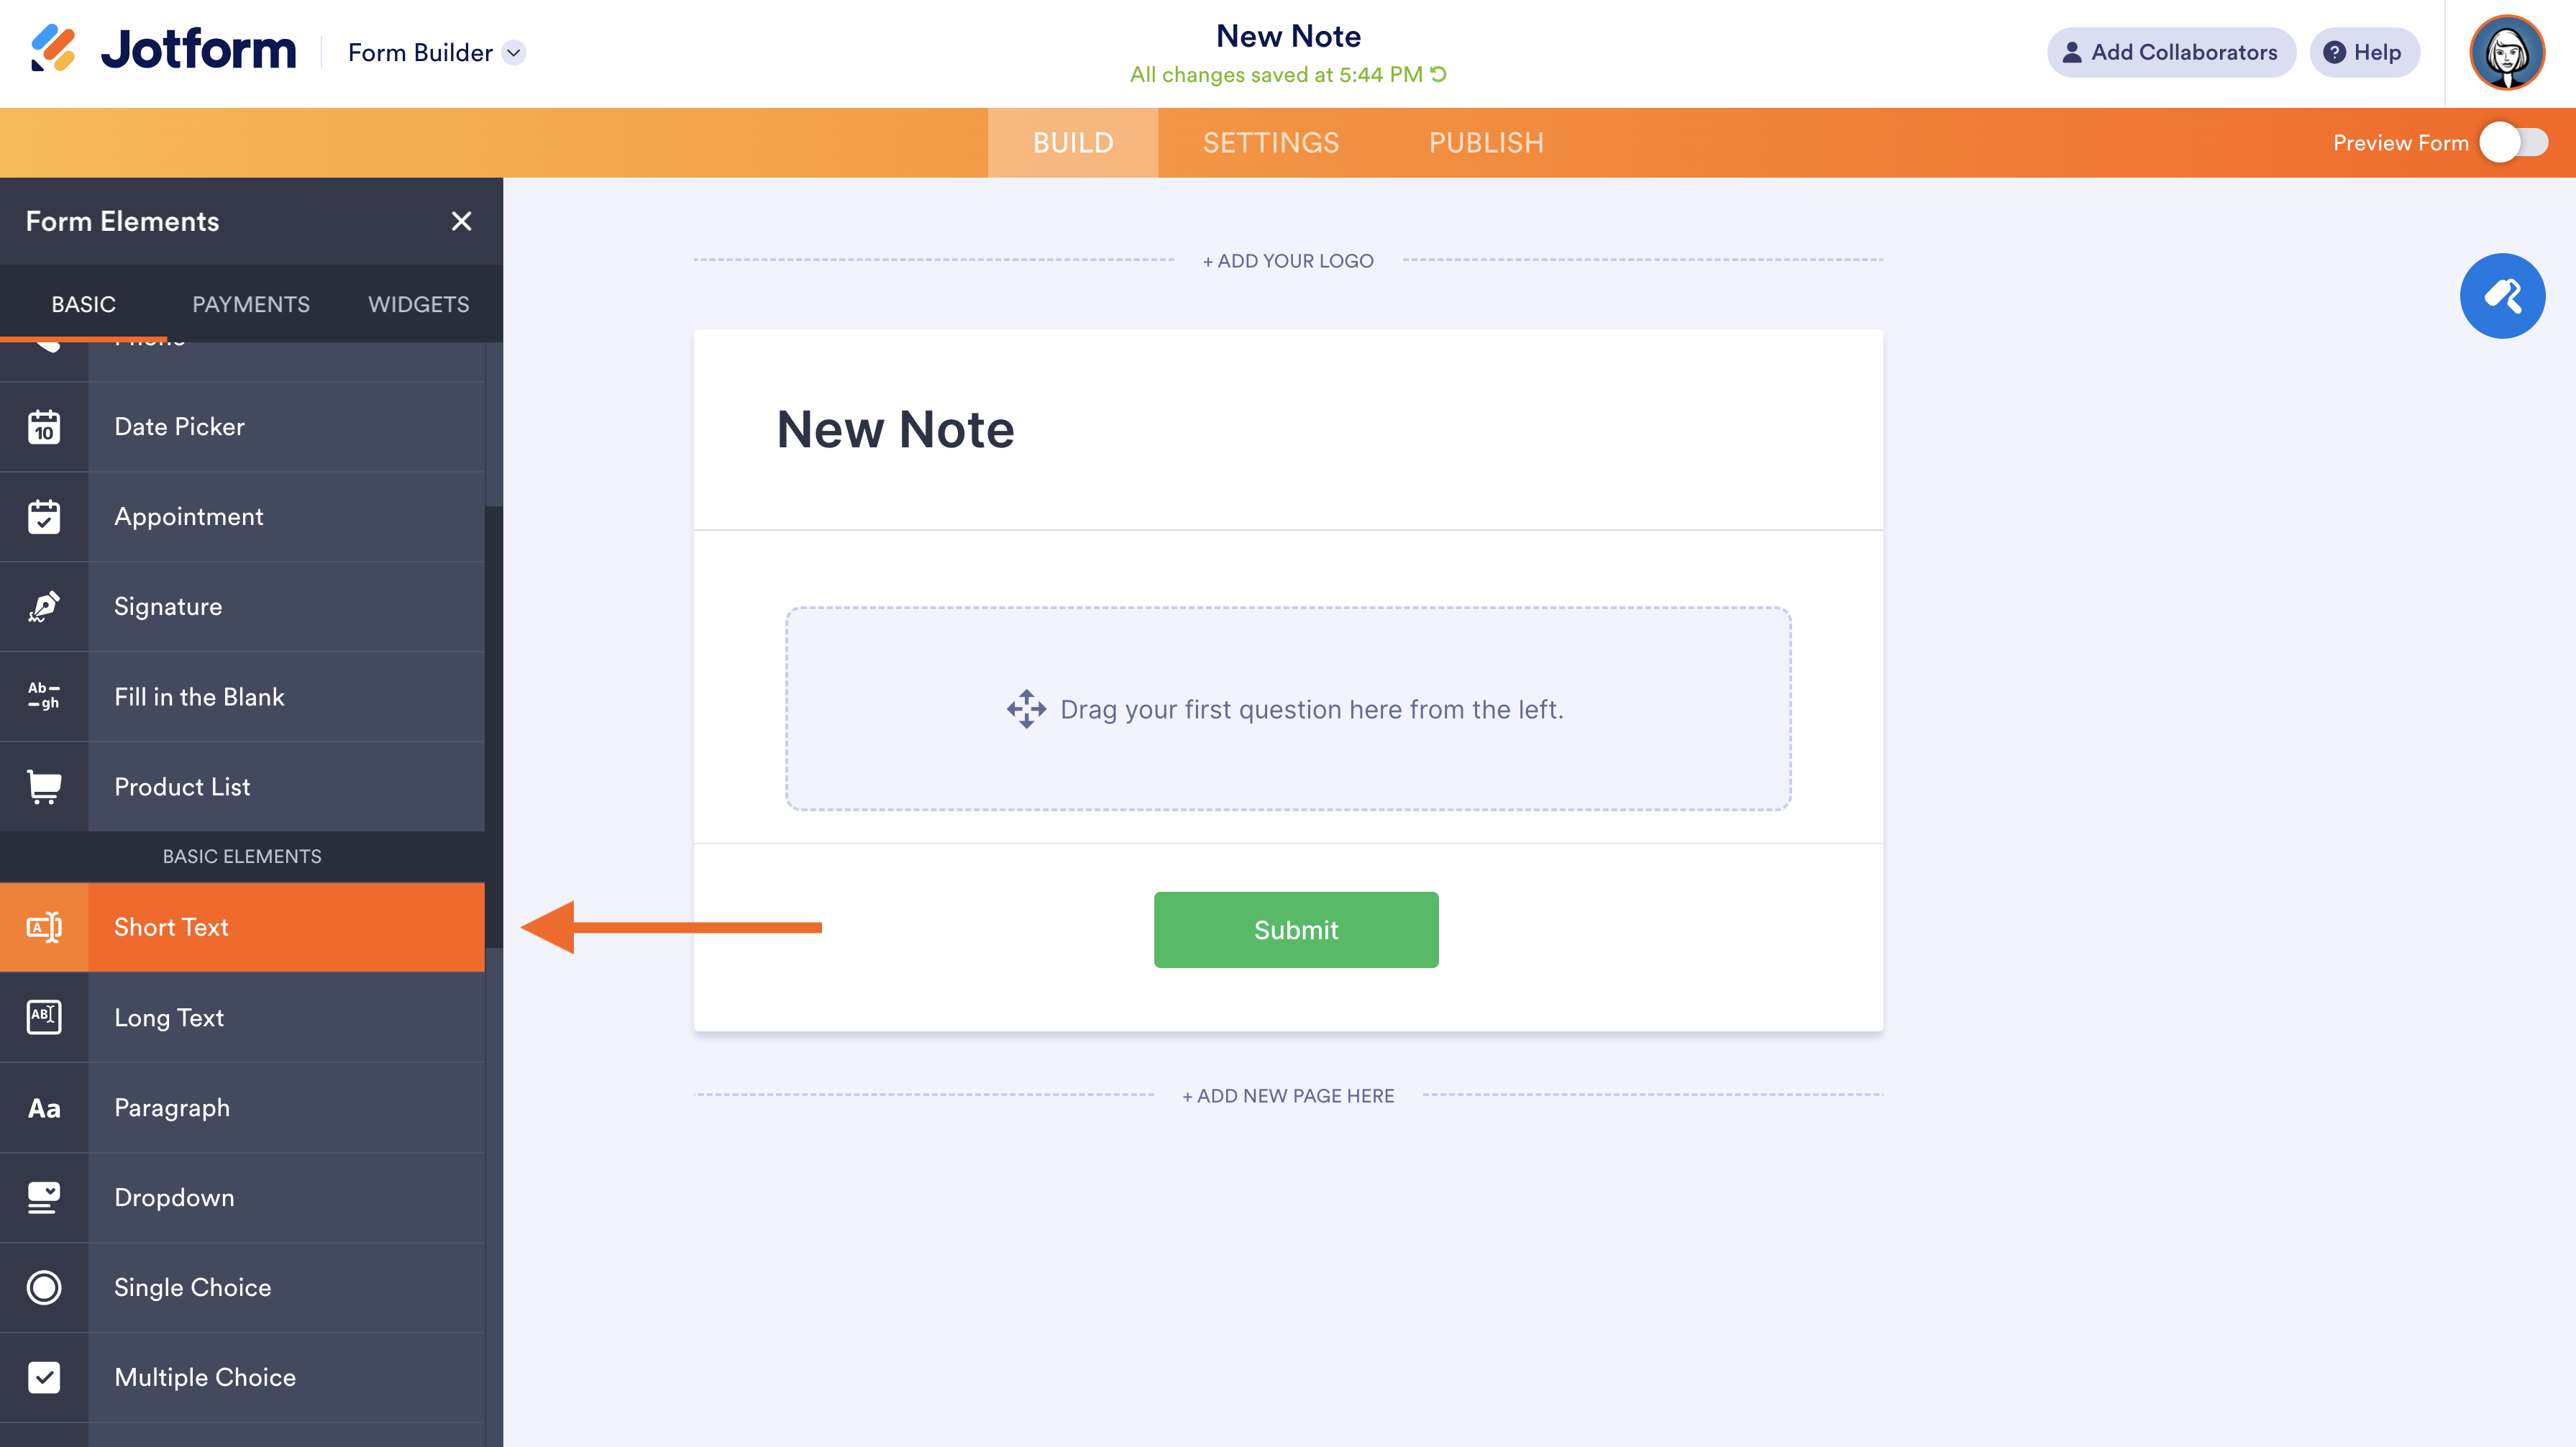
Change your form’s header to New Note. The title of the form should update as well — if it doesn’t, you can add it manually. From the menu on the left, drag a Short Text element onto the form. Then call it “Note title” or whatever you want.
Pick your text editor
Here’s where things get interesting. In the left menu, switch to the Widgets tab.
Widgets are custom form elements created by Jotform and the Jotform community. There are hundreds of them, including some high-quality text editors.
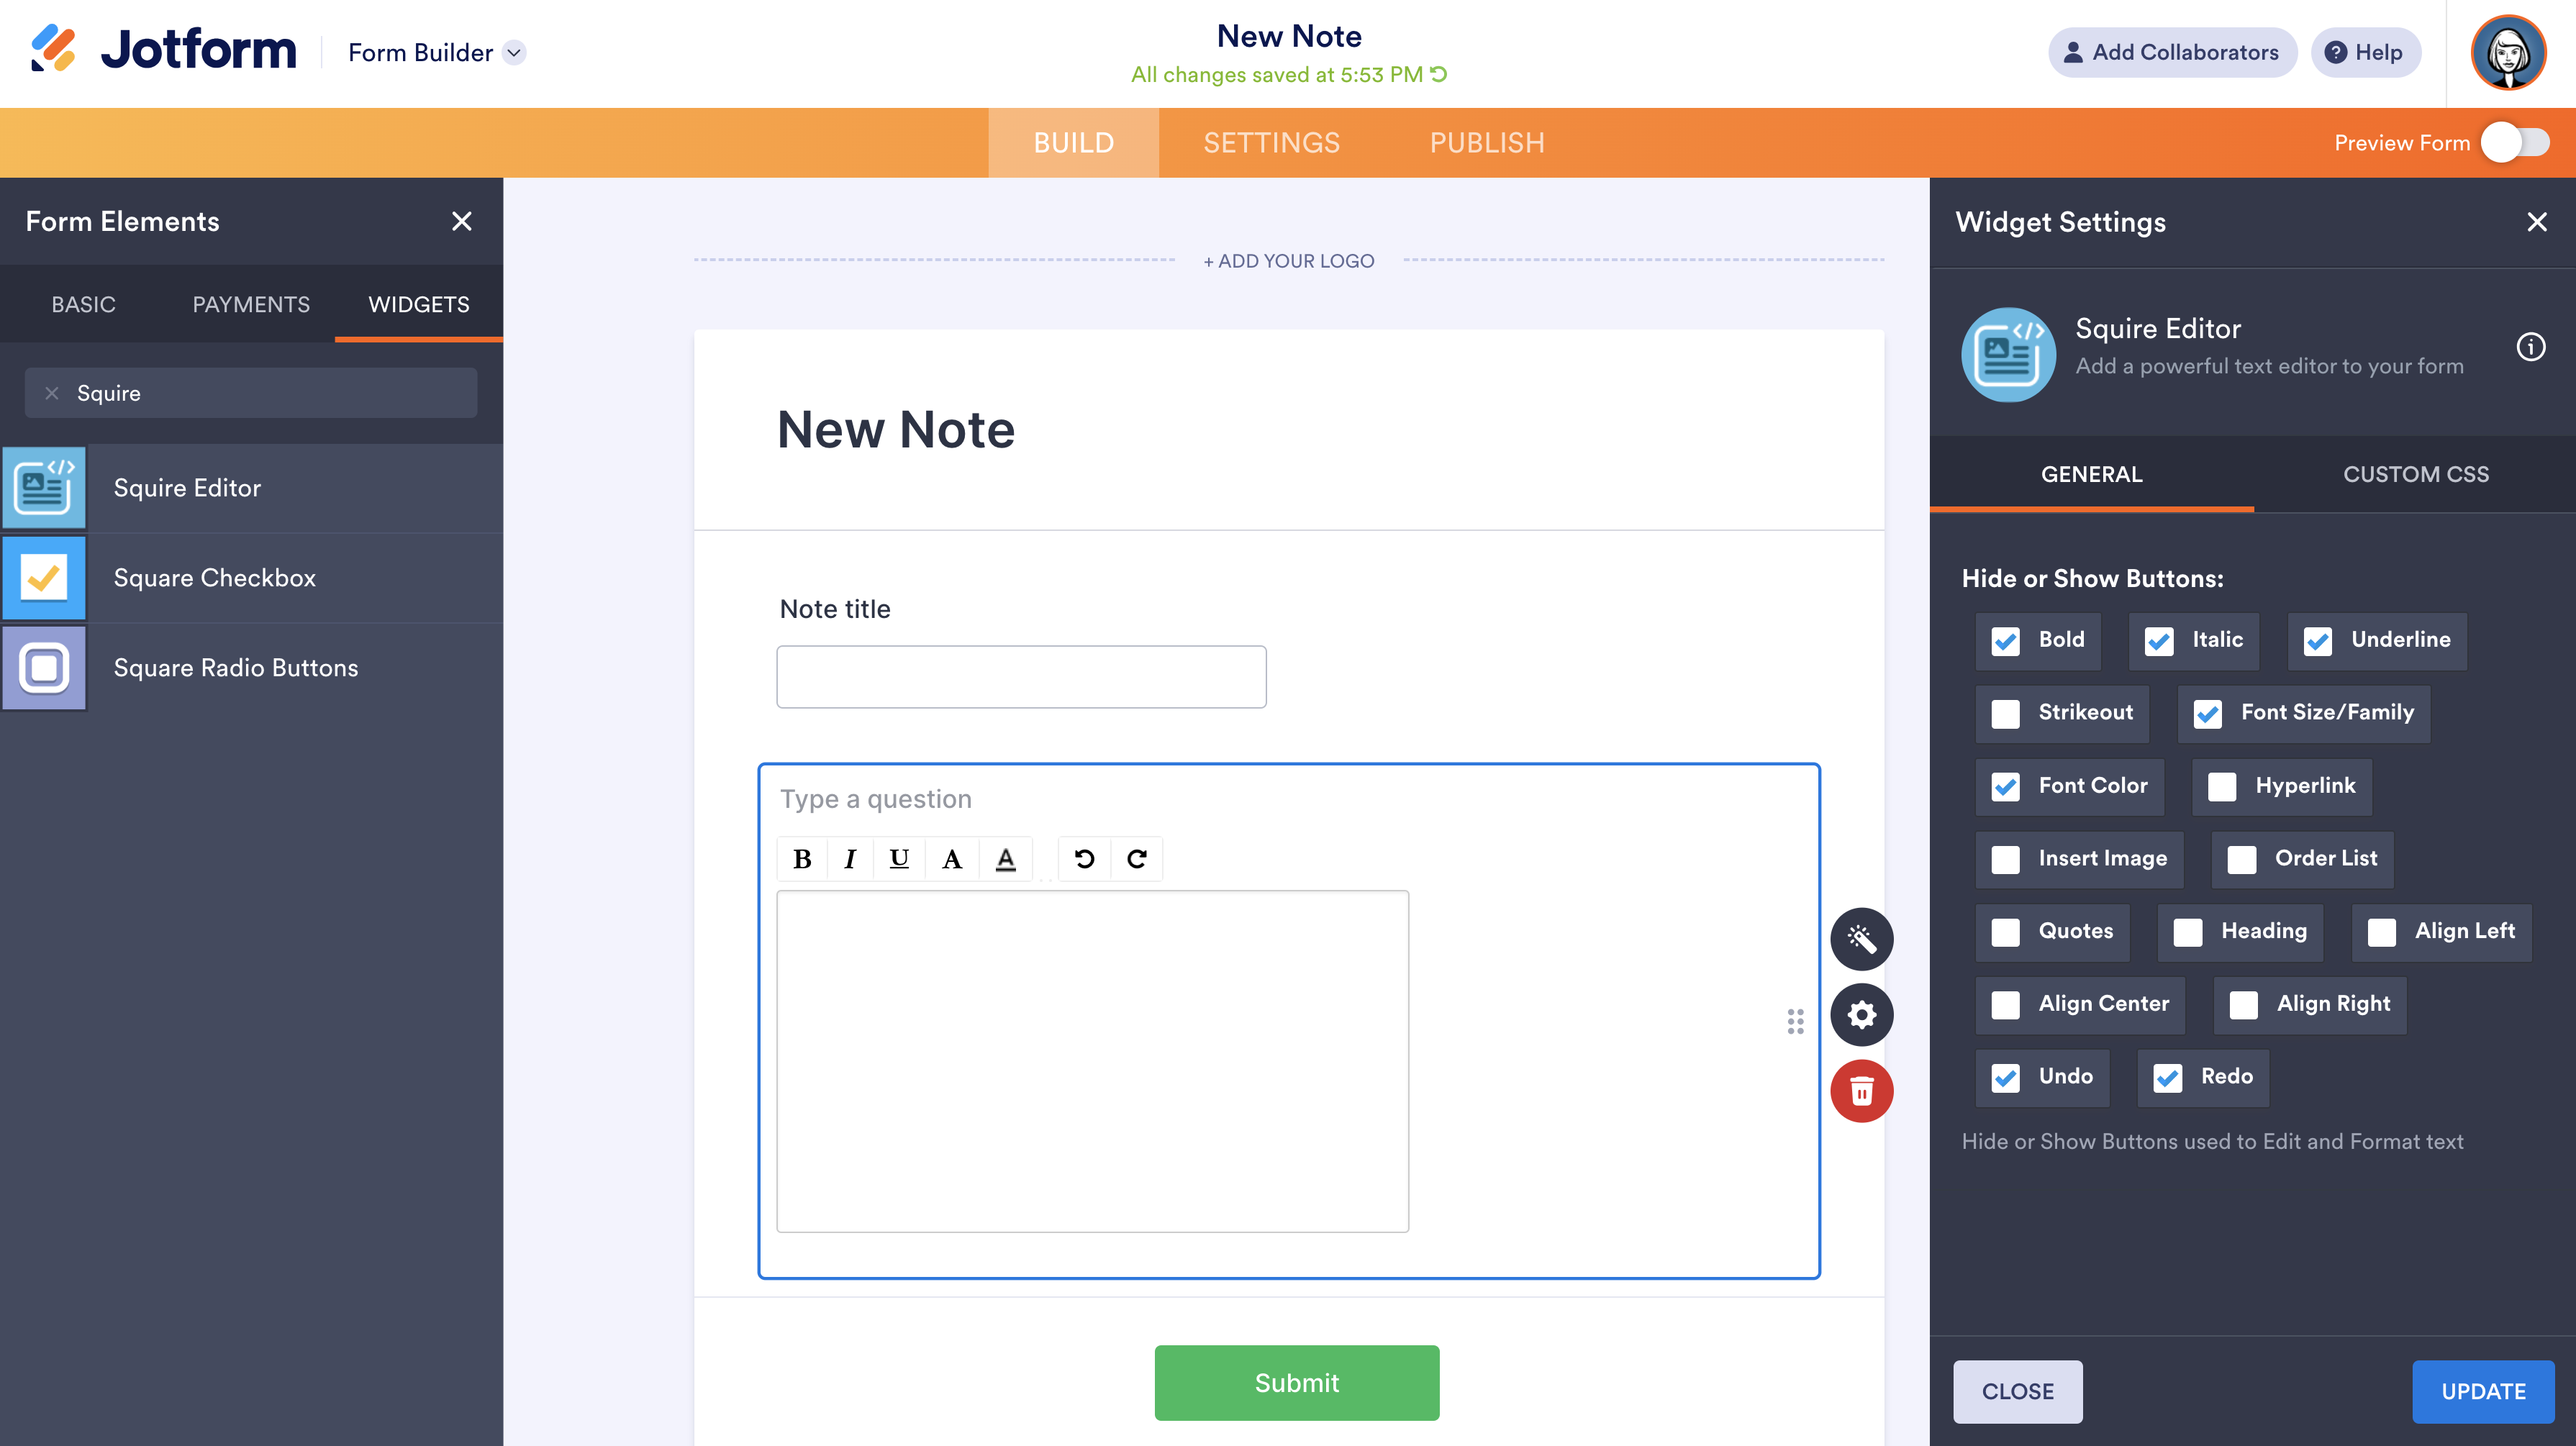
The simplest and most configurable text editor widget offered is Squire. Squire lets you customize the rich text editing menu your users see. You can include all the bells and whistles, or you can strip it down to just the basic options, like adding bold text, for example. However, Squire isn’t as advanced or pretty as the other editors.
The most advanced rich-text widget Jotform offers is TinyMCE. TinyMCE looks and feels like a traditional text editor. It has dropdown menus, numerous formatting options (including text alignment), and much more. There really are no drawbacks to TinyMCE, and it will give your app a professional finish.
Alternatively, CKEditor is nothing to sneeze at, either. CKEditor lets you insert media, images, and tables into your document.
If you’re a coder, you might be interested in the Pastebin widget. The drawback is that it only displays an existing project, and you can’t edit it in the form. You’ll need to edit your code in Pastebin, and the changes will then be reflected in the form.
There’s also a dedicated code editor widget, which lets you pick from a bunch of languages and themes. It’s perfect for knocking out a few quick lines when you have a great idea on the subway.
Once you’ve made your decision, just find the text editor you like in the widgets menu using the search bar. Then drag and drop it into your form.
Alternatively, you can drag them all into your form to try out each one. Just click the Preview Form toggle in the upper-right corner to play with them.
Create a table
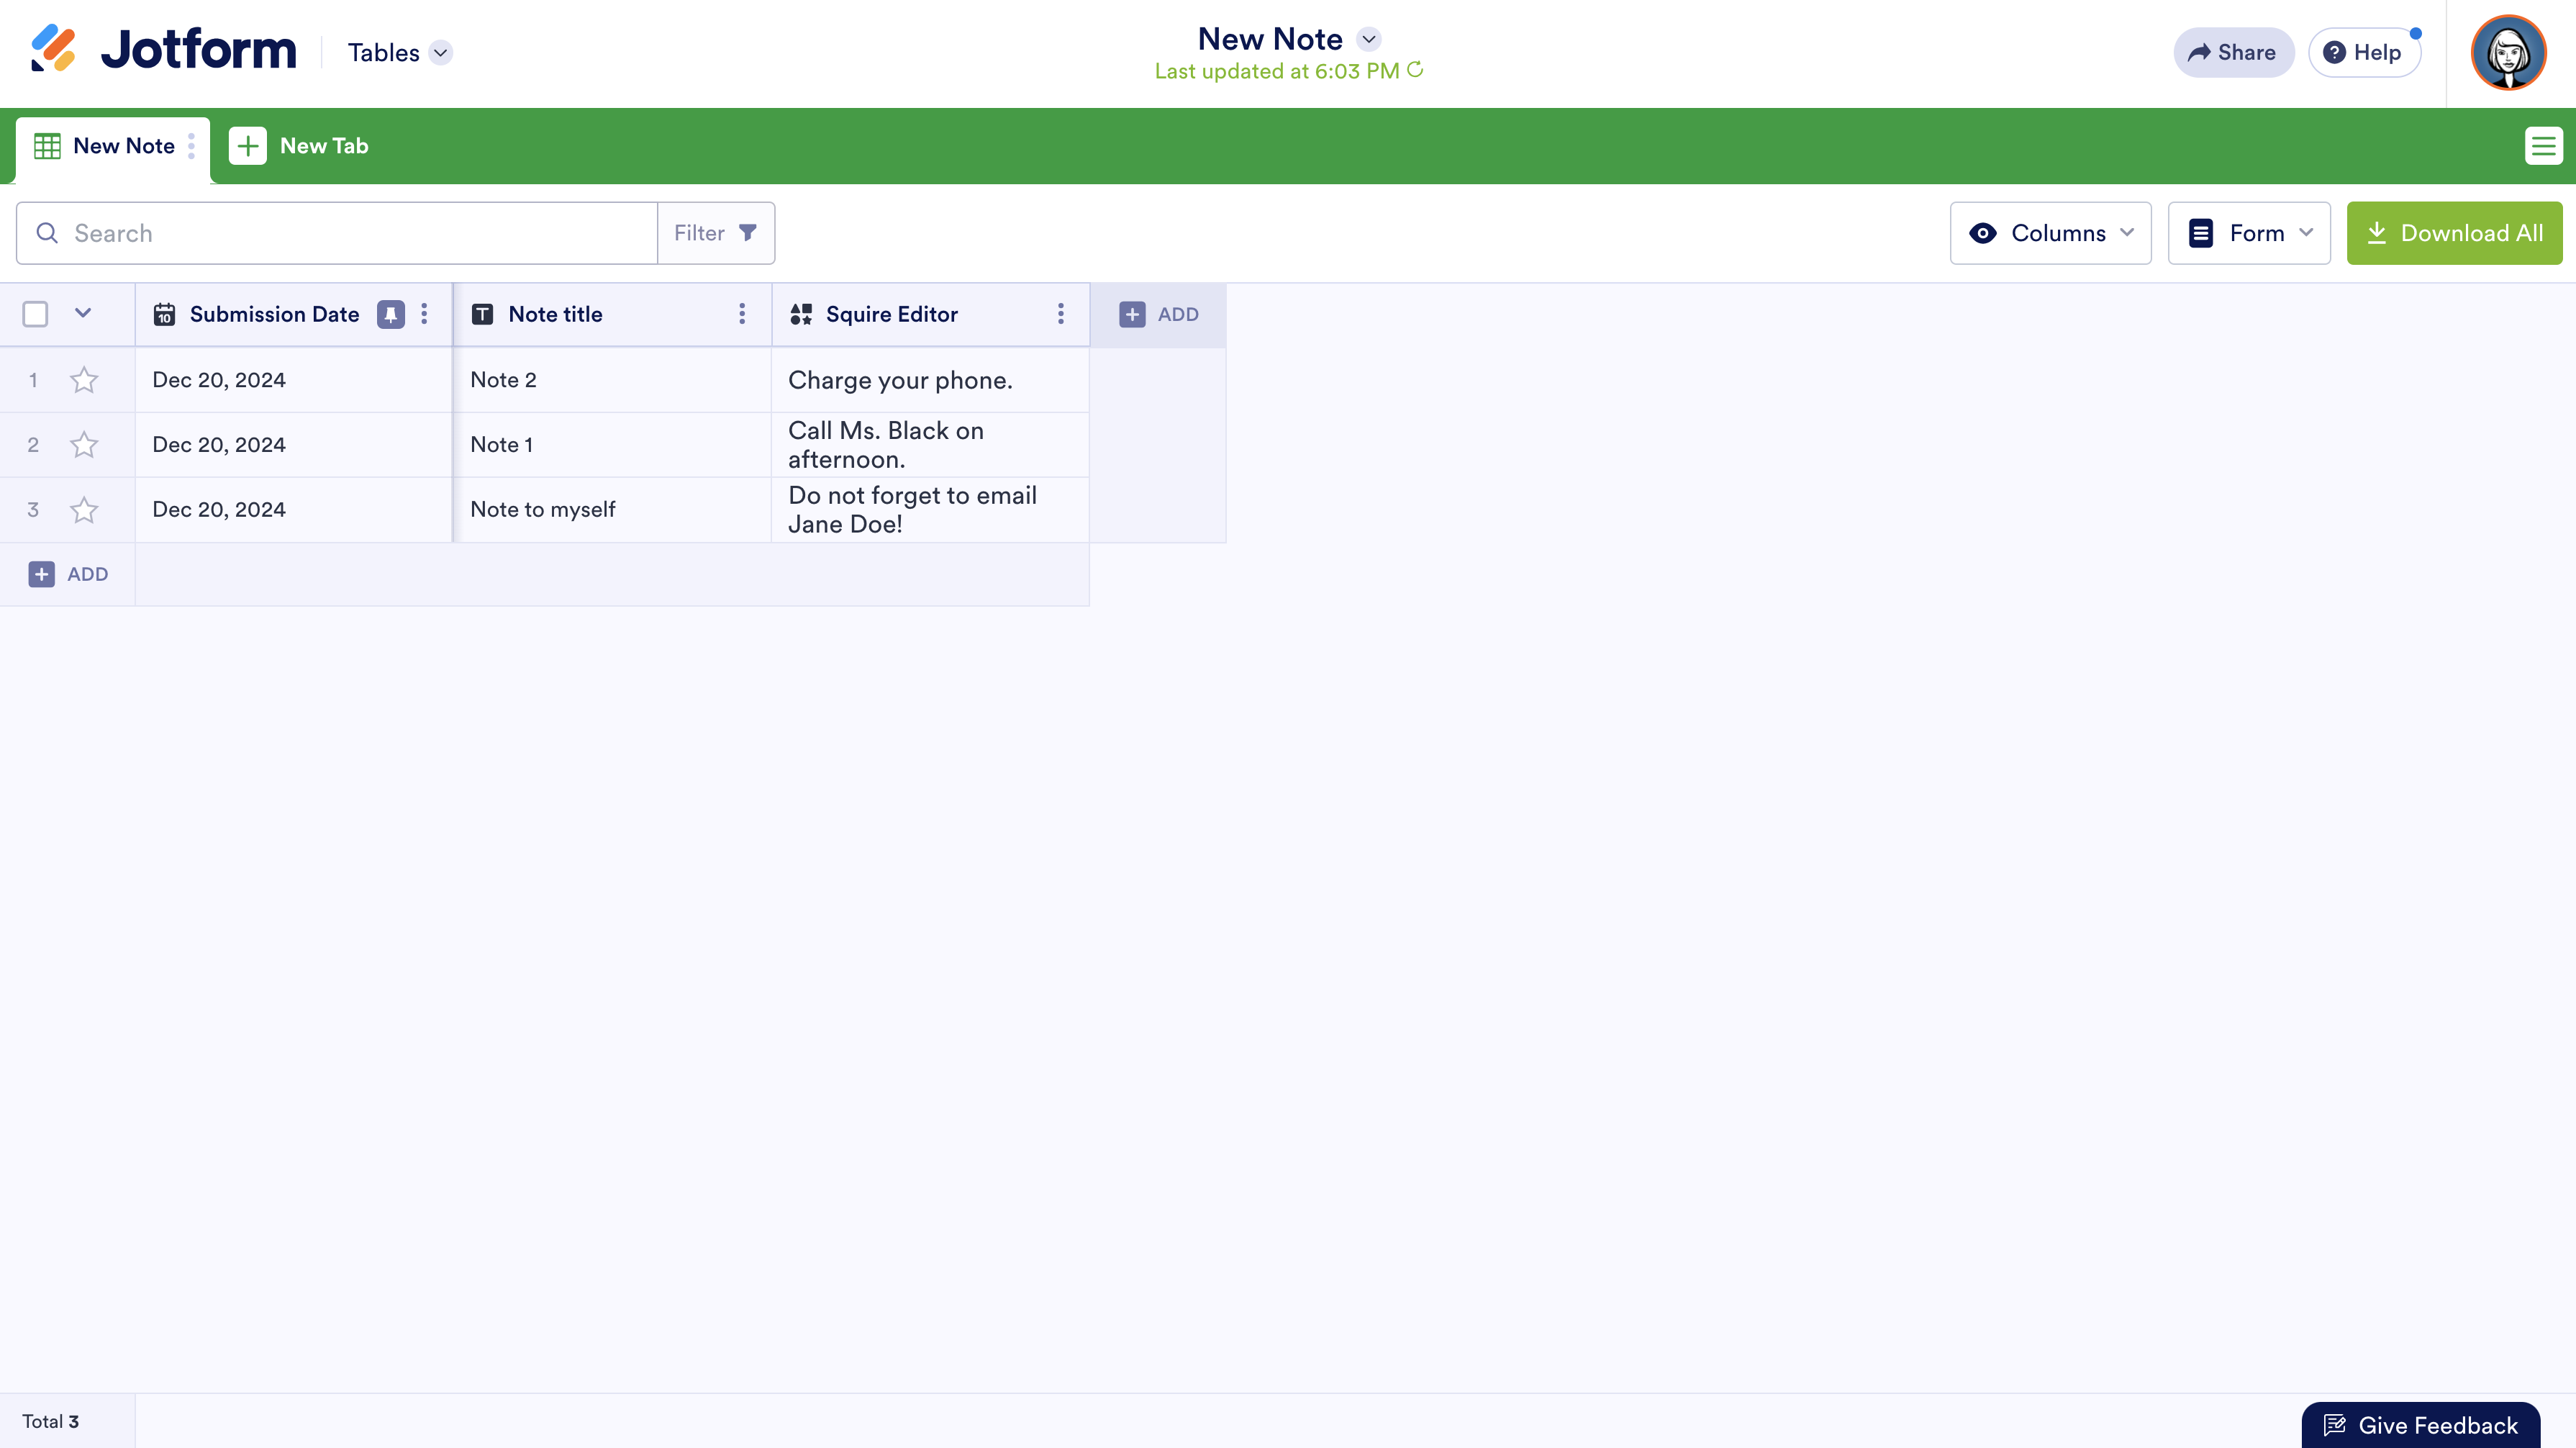
Once you’ve created a note, you obviously want to be able to easily access it later. Fortunately, Jotform has a great tool for that as well. Expand the dropdown in the upper-left corner of the Form Builder. Then select Tables.
Jotform will automatically create a table that stores all the data from your form. There are all kinds of cool things you can do with your table. For example, you can search, sort, and filter your data. And if you add a dropdown question to your form with preset answer options, you can create a tagging system to help you organize your data even more.
Make your app
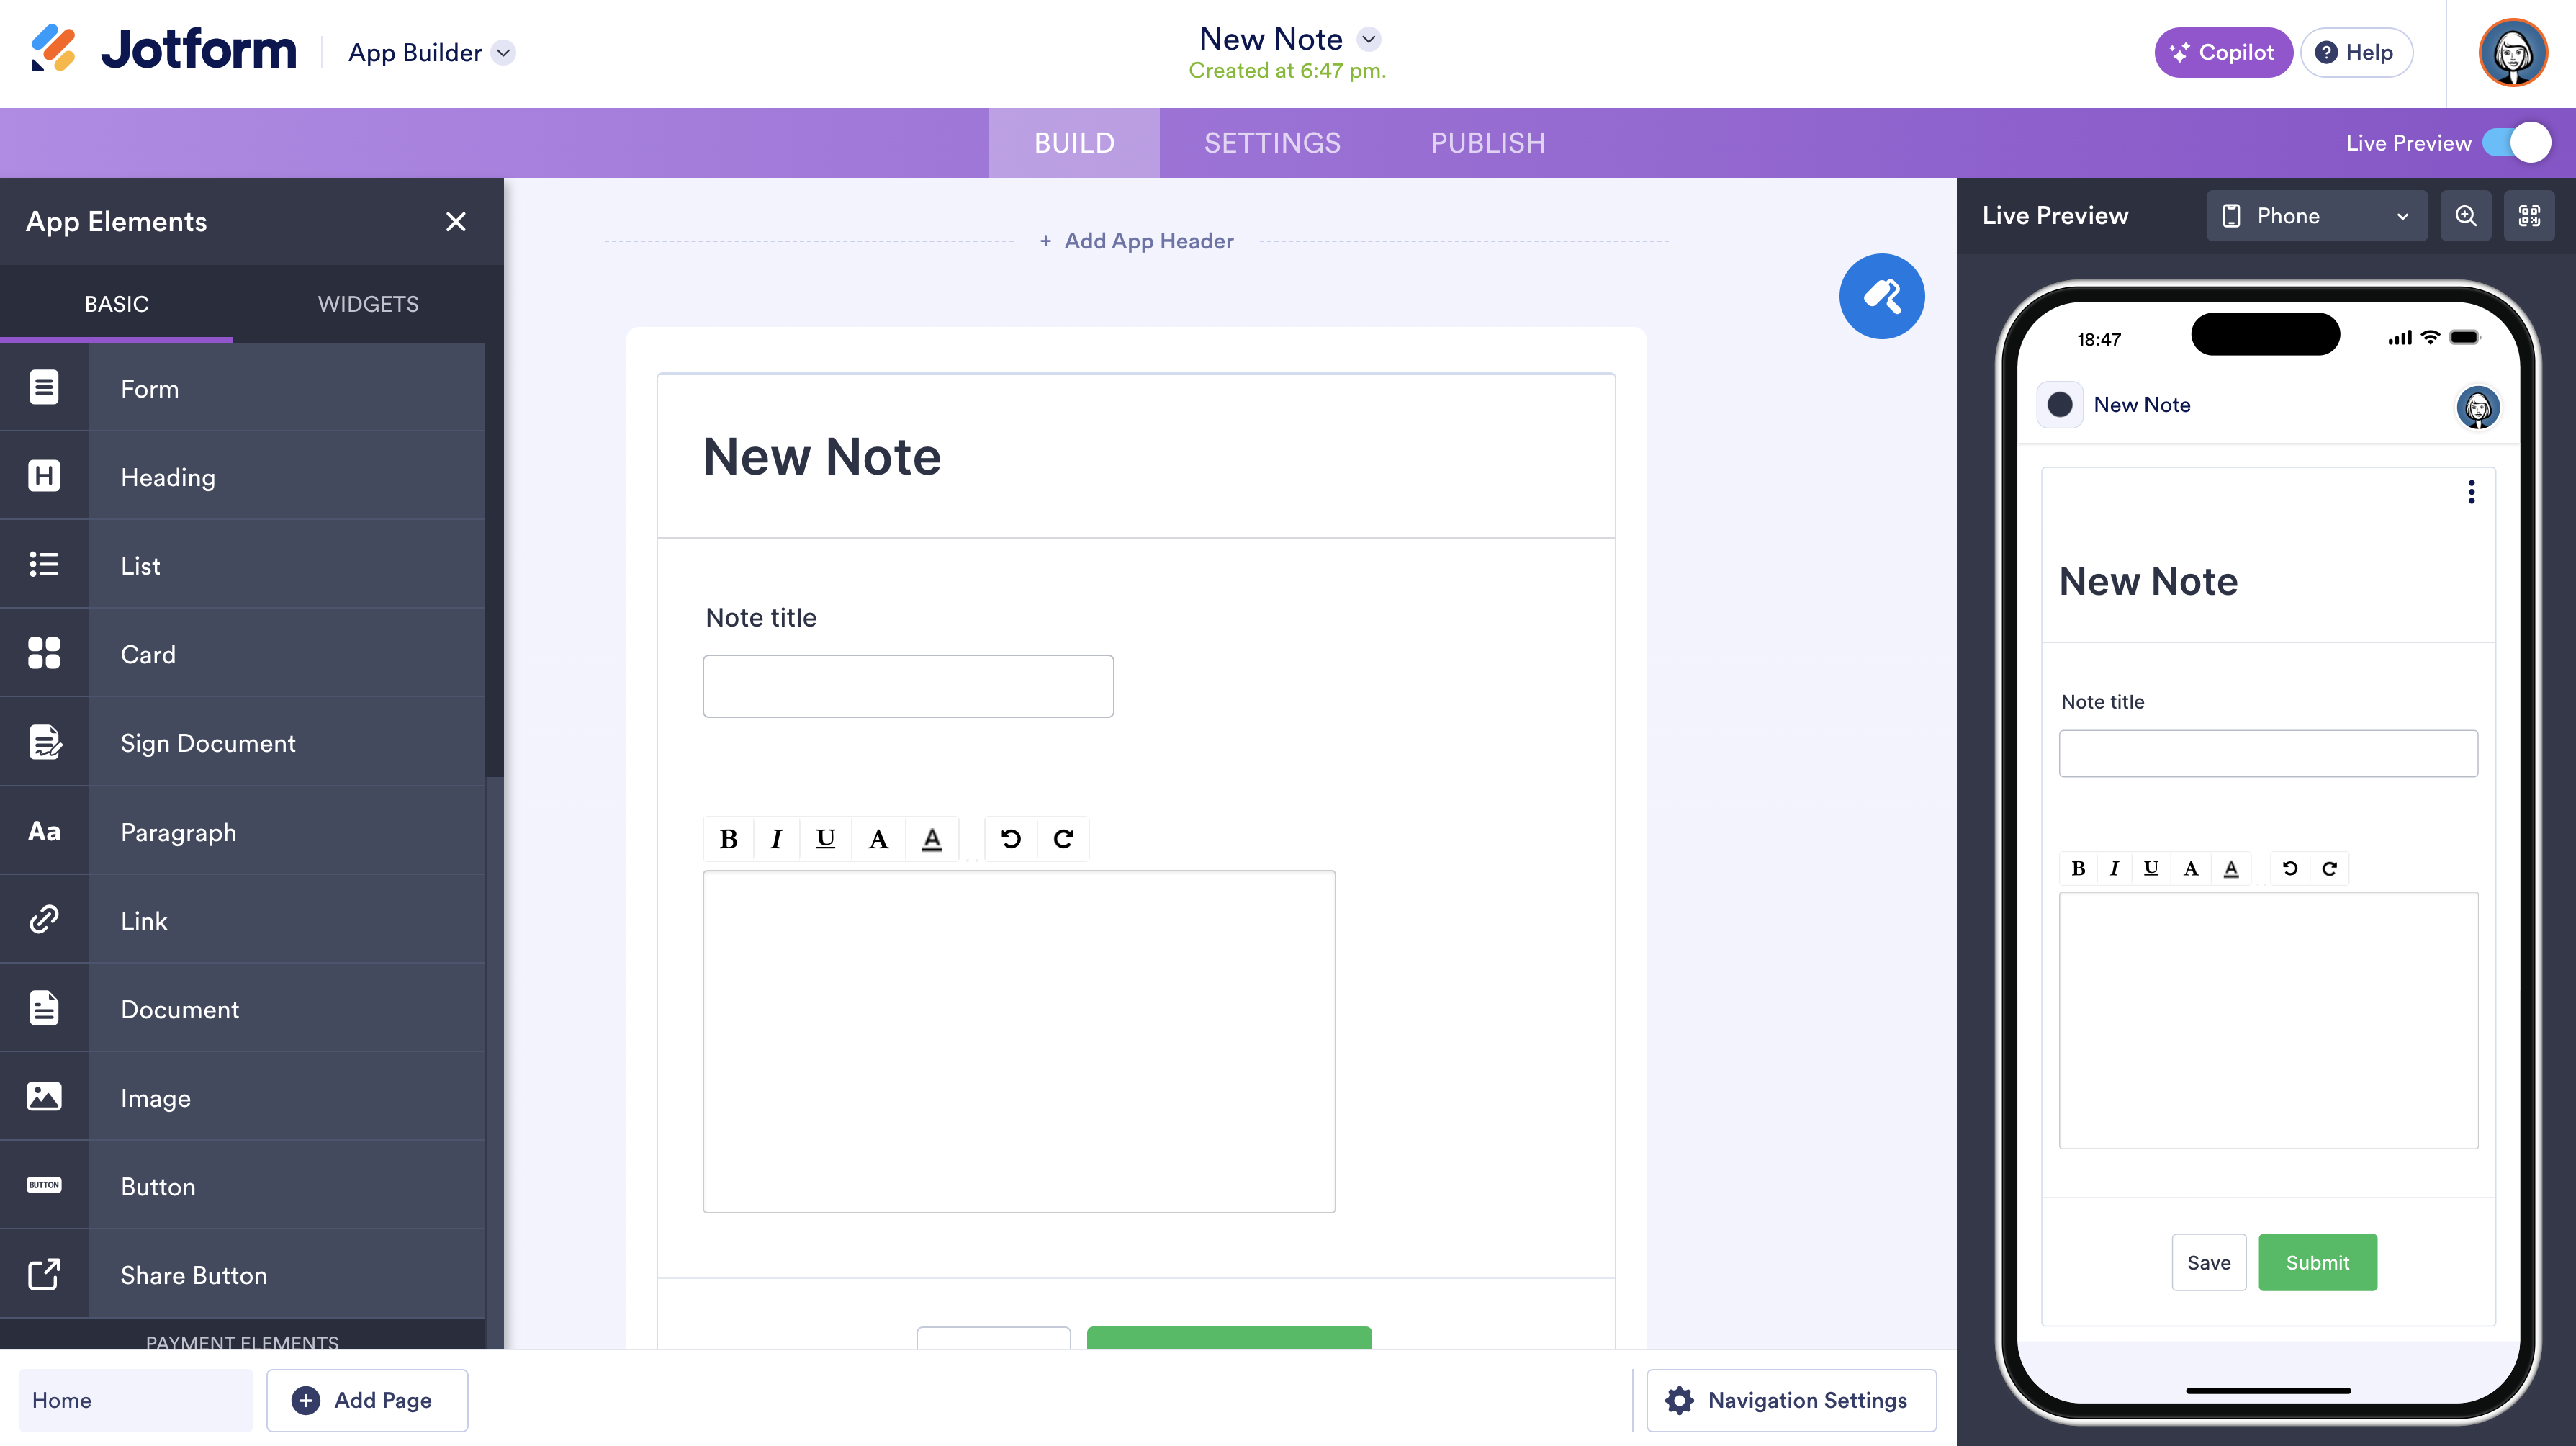
Now that you’ve set up your form, actually creating the app is a snap. Just go back to the upper-left dropdown and select App Builder. Just like with the table, Jotform creates an app automatically.
At first glance, the app may look just like your form — but there are new app-related design options available to you. In the App Elements menu on the left, you’ll see some of the many elements you can add to your app.
There are more design-centric elements like paragraphs, links, and images. You can also embed useful widgets like maps, video, and image sliders. Many of the widgets from the Form Builder are here as well.
For example, you can create multiple app pages and link them to create a custom productivity app. And you aren’t limited to just adding notes. You can also embed a link to your table. And if you change the table type to Cards, you’ll be able to see each individual entry, one at a time.
Let’s go back to those widgets that we mentioned a moment ago, though. Widgets allow you to do more in your app as well, like embed PDFs, link to your Spotify account, create QR codes, and much more.
There’s even a widget that lets you add an iFrame to your app. That means you can put other web apps inside your Jotform app.
A tool that grows with your needs
The nice thing about building your own software application is that you can keep customizing it as needed. An app is never truly done as long as you have new ideas for how to use it.
Because Jotform makes it so easy to edit and change your app, updating it regularly is simple. Every time another brilliant idea comes to mind, just add something new.
Another nice thing about building an app with Jotform is that you have access to an entire suite of other business tools through the platform. Adding tables, e-signature documents, reports, and more gives you lots of options.
Photo by Photo By: Kaboompics.com




Send Comment: