One of the biggest bottlenecks in getting requests approved — aside from the approver being absent — is missing information.
Ideally, you want to give your approvers all the resources they need to say “yea” or “nay” and keep your workflow moving.
For efficiency’s sake, that includes request forms that can, and should, contain data that has already been captured within your database from a previous form.
With Jotform Prefill, you can now assign forms, prefilled with information, within your workflow. As a result, your stakeholders will spend less time filling in redundant information and more time keeping approvals moving to get the job done.
Additionally, the more you use prefilled forms, the more consistent your form fields and resulting data will be, giving you better data hygiene and eliminating the potential for confusion.
How did the prefill functionality come about for Jotform Workflows?
Our intrepid support team fields more than 1,000 inquiries each day. Depending on their importance or impact, common inquiries are then prioritized by our product team.
Since we launched Jotform Workflows, one of those priorities has been the ability to assign forms within an approval workflow.
This long sought-after solution will help your team collect all of the related data and approvals (plus signatures if needed) efficiently over the path of your workflow.
But why stop there?
To make the assigned form feature more adaptable to your needs, we added prefill. Let’s face it, everyone’s time is short, and the data you need has a better chance of being completed when the data you already know is auto-filled for everyone involved.
Here’s how prefill will better your Jotform Workflows experience
- You’ll be able to design a workflow with assigned forms that are prefilled using data from the previous form in the process
- Form submitters will fill in assigned forms faster since redundant information is already present
- You can prefill subsequent assigned forms with data based on the previous approval
- Your data will be consistent
Who should assign prefilled forms in Jotform Workflows?
Here are some of the popular use cases for the prefill feature in Jotform Workflows, though there are definitely more.
| Your profession | Your approval need | How prefill helps you |
|---|---|---|
| Human resources | New hires, promotions, salary bumps, leave requests, business expenses | Interview new hires faster by prefilling the hiring committee’s contact details |
| Education/nonprofit | Teacher raises, board and district proposals, fund allocation, scholarships, proposals, grants, volunteer onboarding | Ensure faster decisions by including the necessary approvals in new data request forms |
| Small businesses/entrepreneurs | New orders, inventory, vendor management, leases | Save your vendors and customers time while keeping the approval workflow moving |
| Local government | Permits, budget reconciliation, purchases | Improve wait times and efficiency |
| IT and procurement | System upgrades, vendor management, purchases | Shorten long decision windows by seeding multiple forms proactively |
How to use prefill in Jotform Workflows
Prefill eliminates the need to toggle between sending a form and building difficult workarounds into your approval workflow. You’ll get the approvals you need for submitted requests more easily, and save your approvers and collaborators time.
Here’s how to prefill your forms within your workflow.
From your chosen approval workflow, insert the Form element after the approval step.
Click on the Settings of the Form element to choose your form (from the General tab) and enter your assignee’s email address.
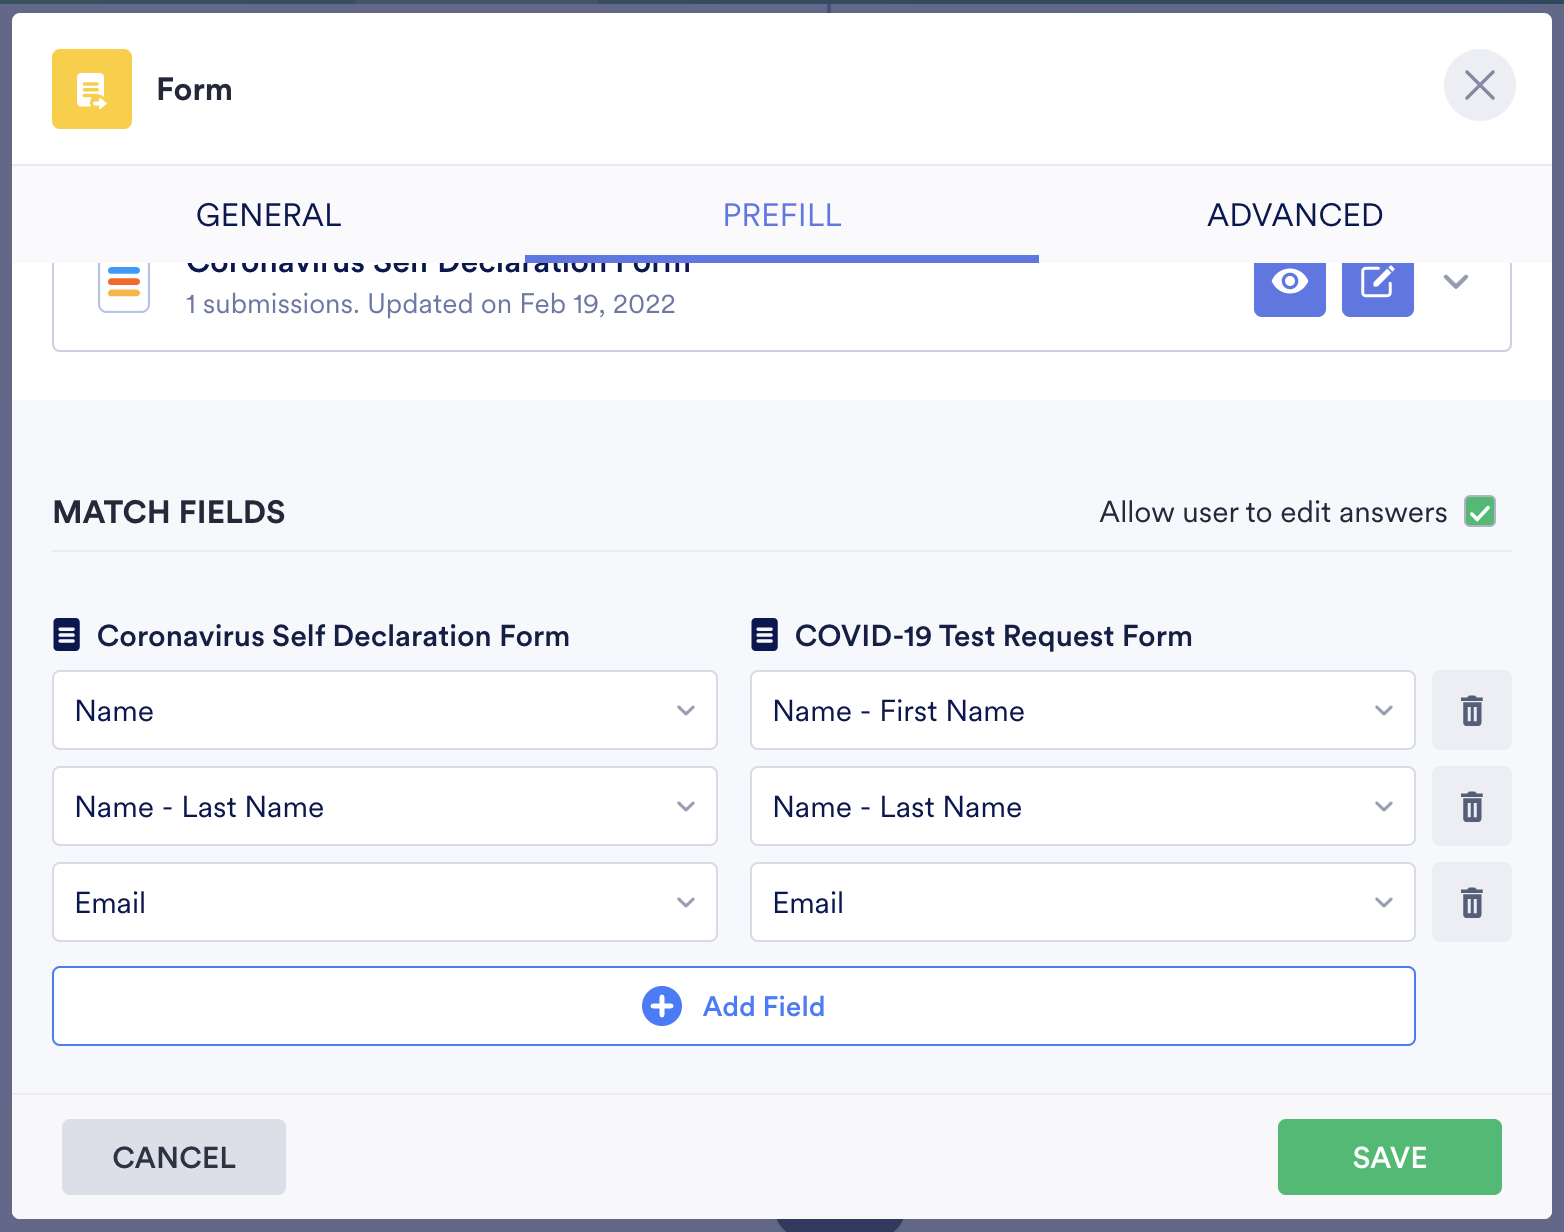
In the Assign form element, click the Prefill tab. There you can enable the prefill settings to pre-populate your newly assigned form.
Select the form from which you’d like to source your prefilled information.
Once you’ve selected a source form, you can then choose the fields that you’d like to prefill from the source form to your newly assigned form.
You can also choose whether to allow your recipient to edit the info in prefilled form fields.
When you’re finished, click Save, and your prefilled form will be added to your approval workflow.
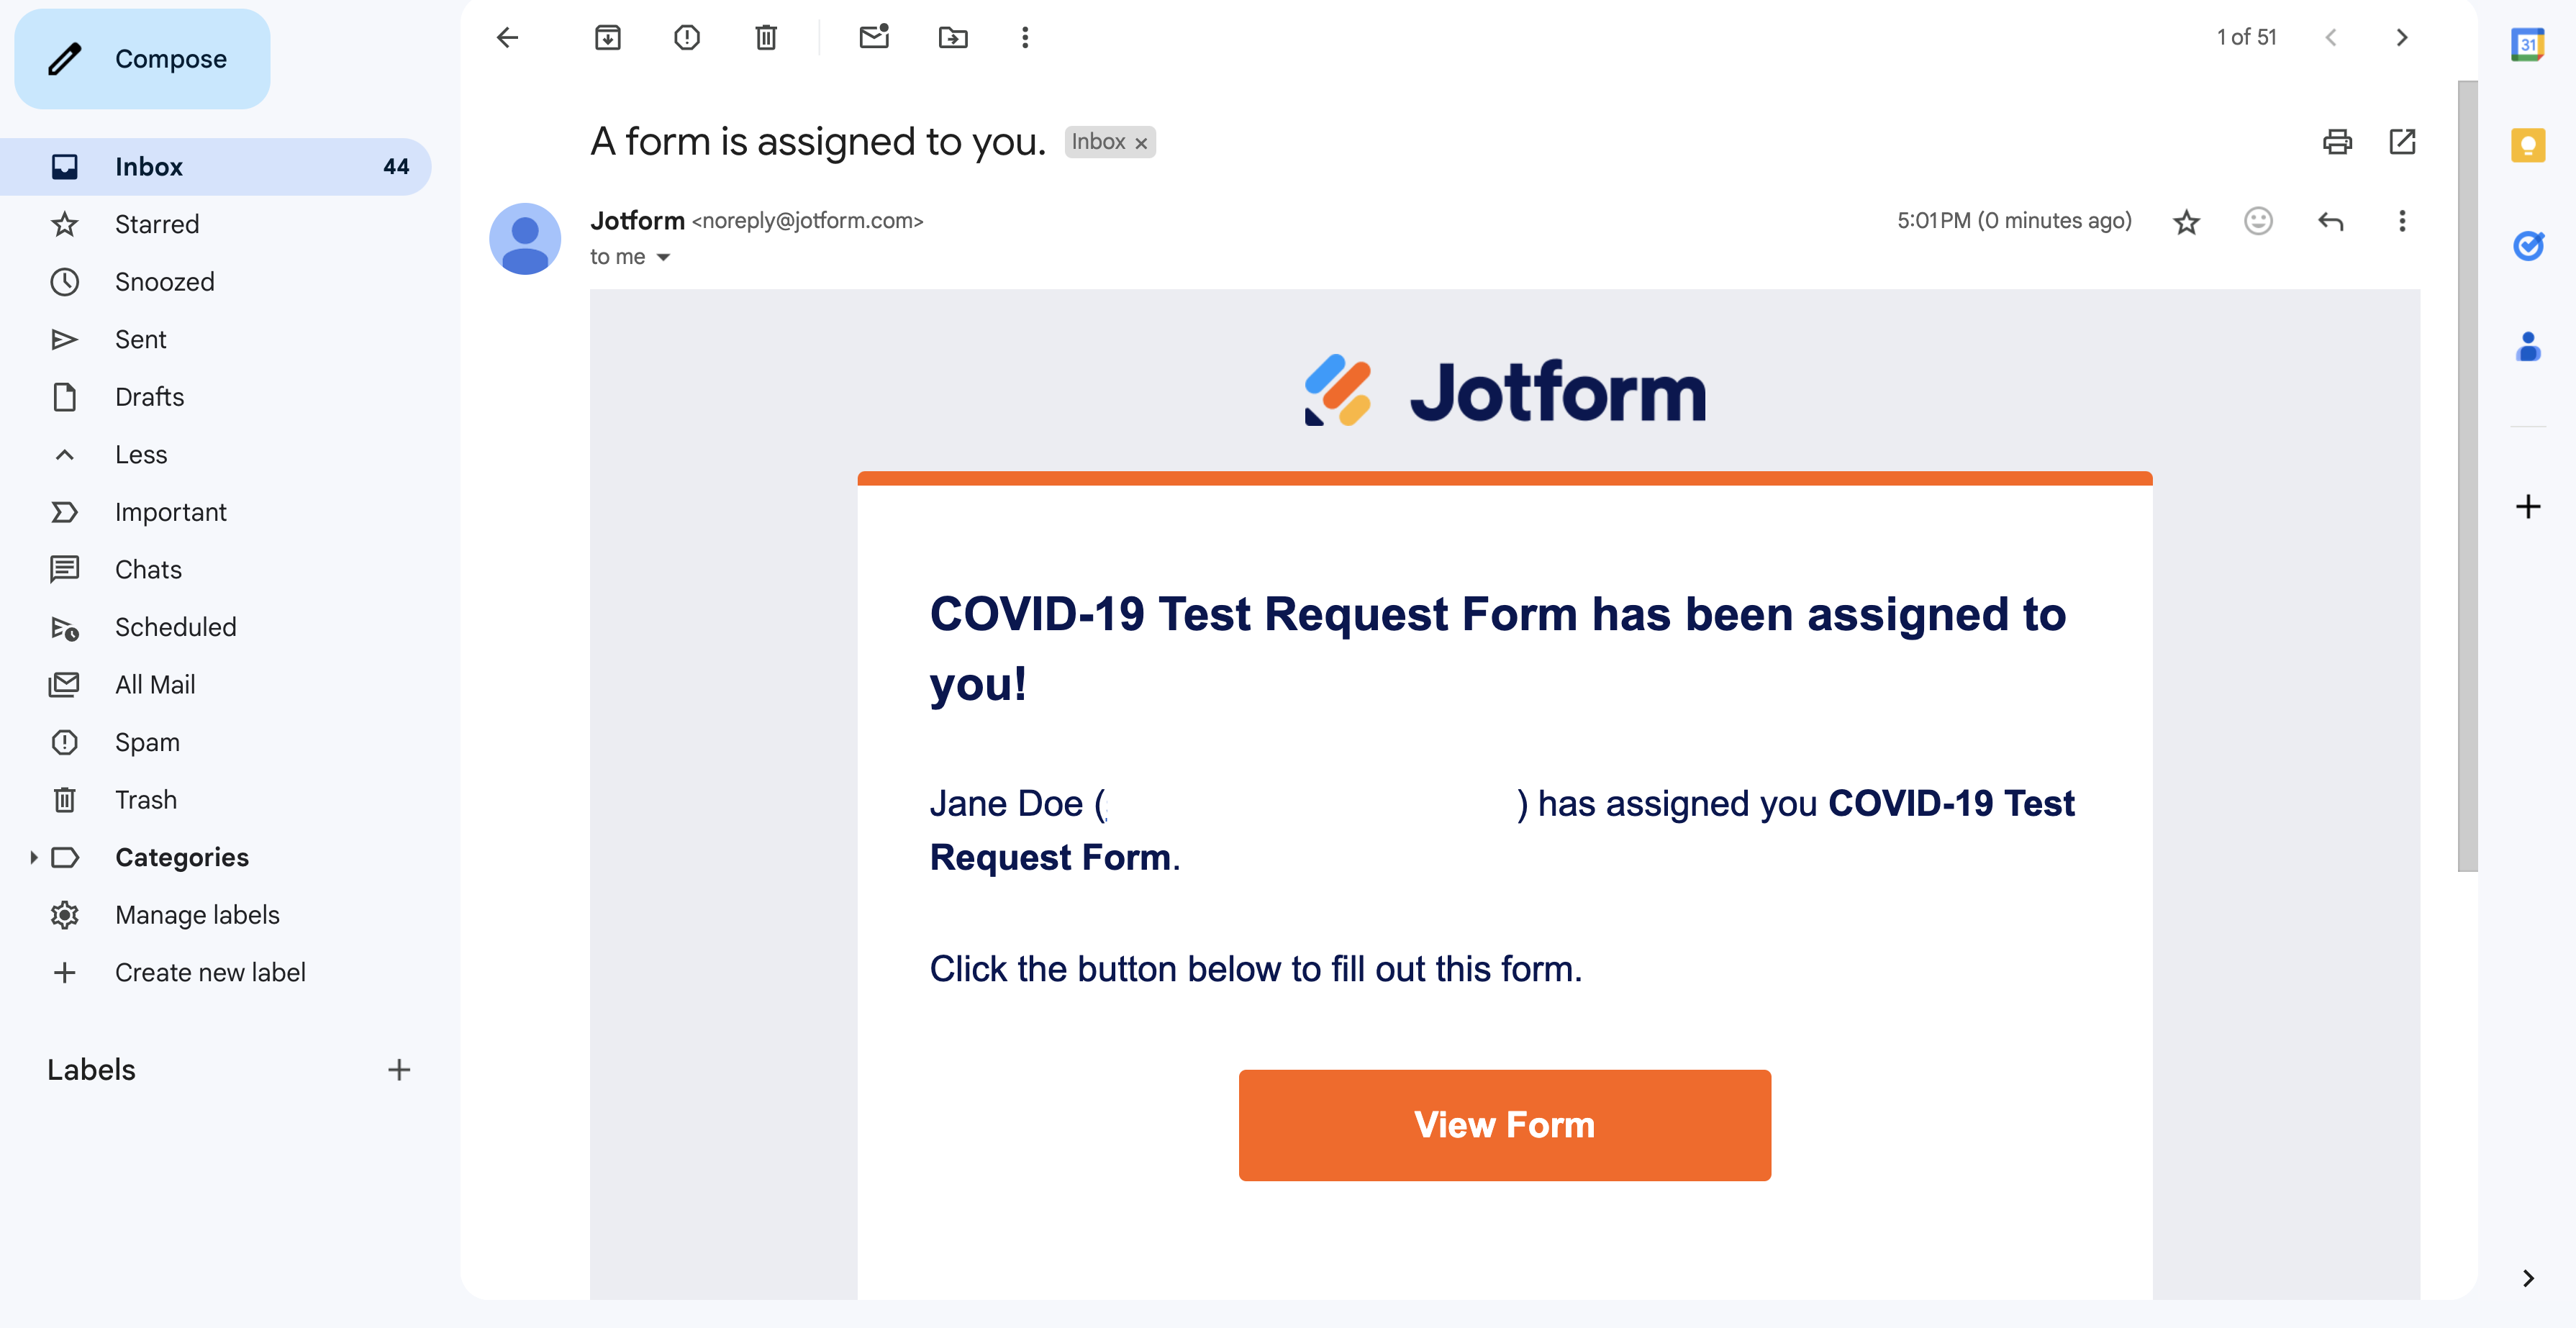
Your recipient will receive an email asking them to complete the new form.
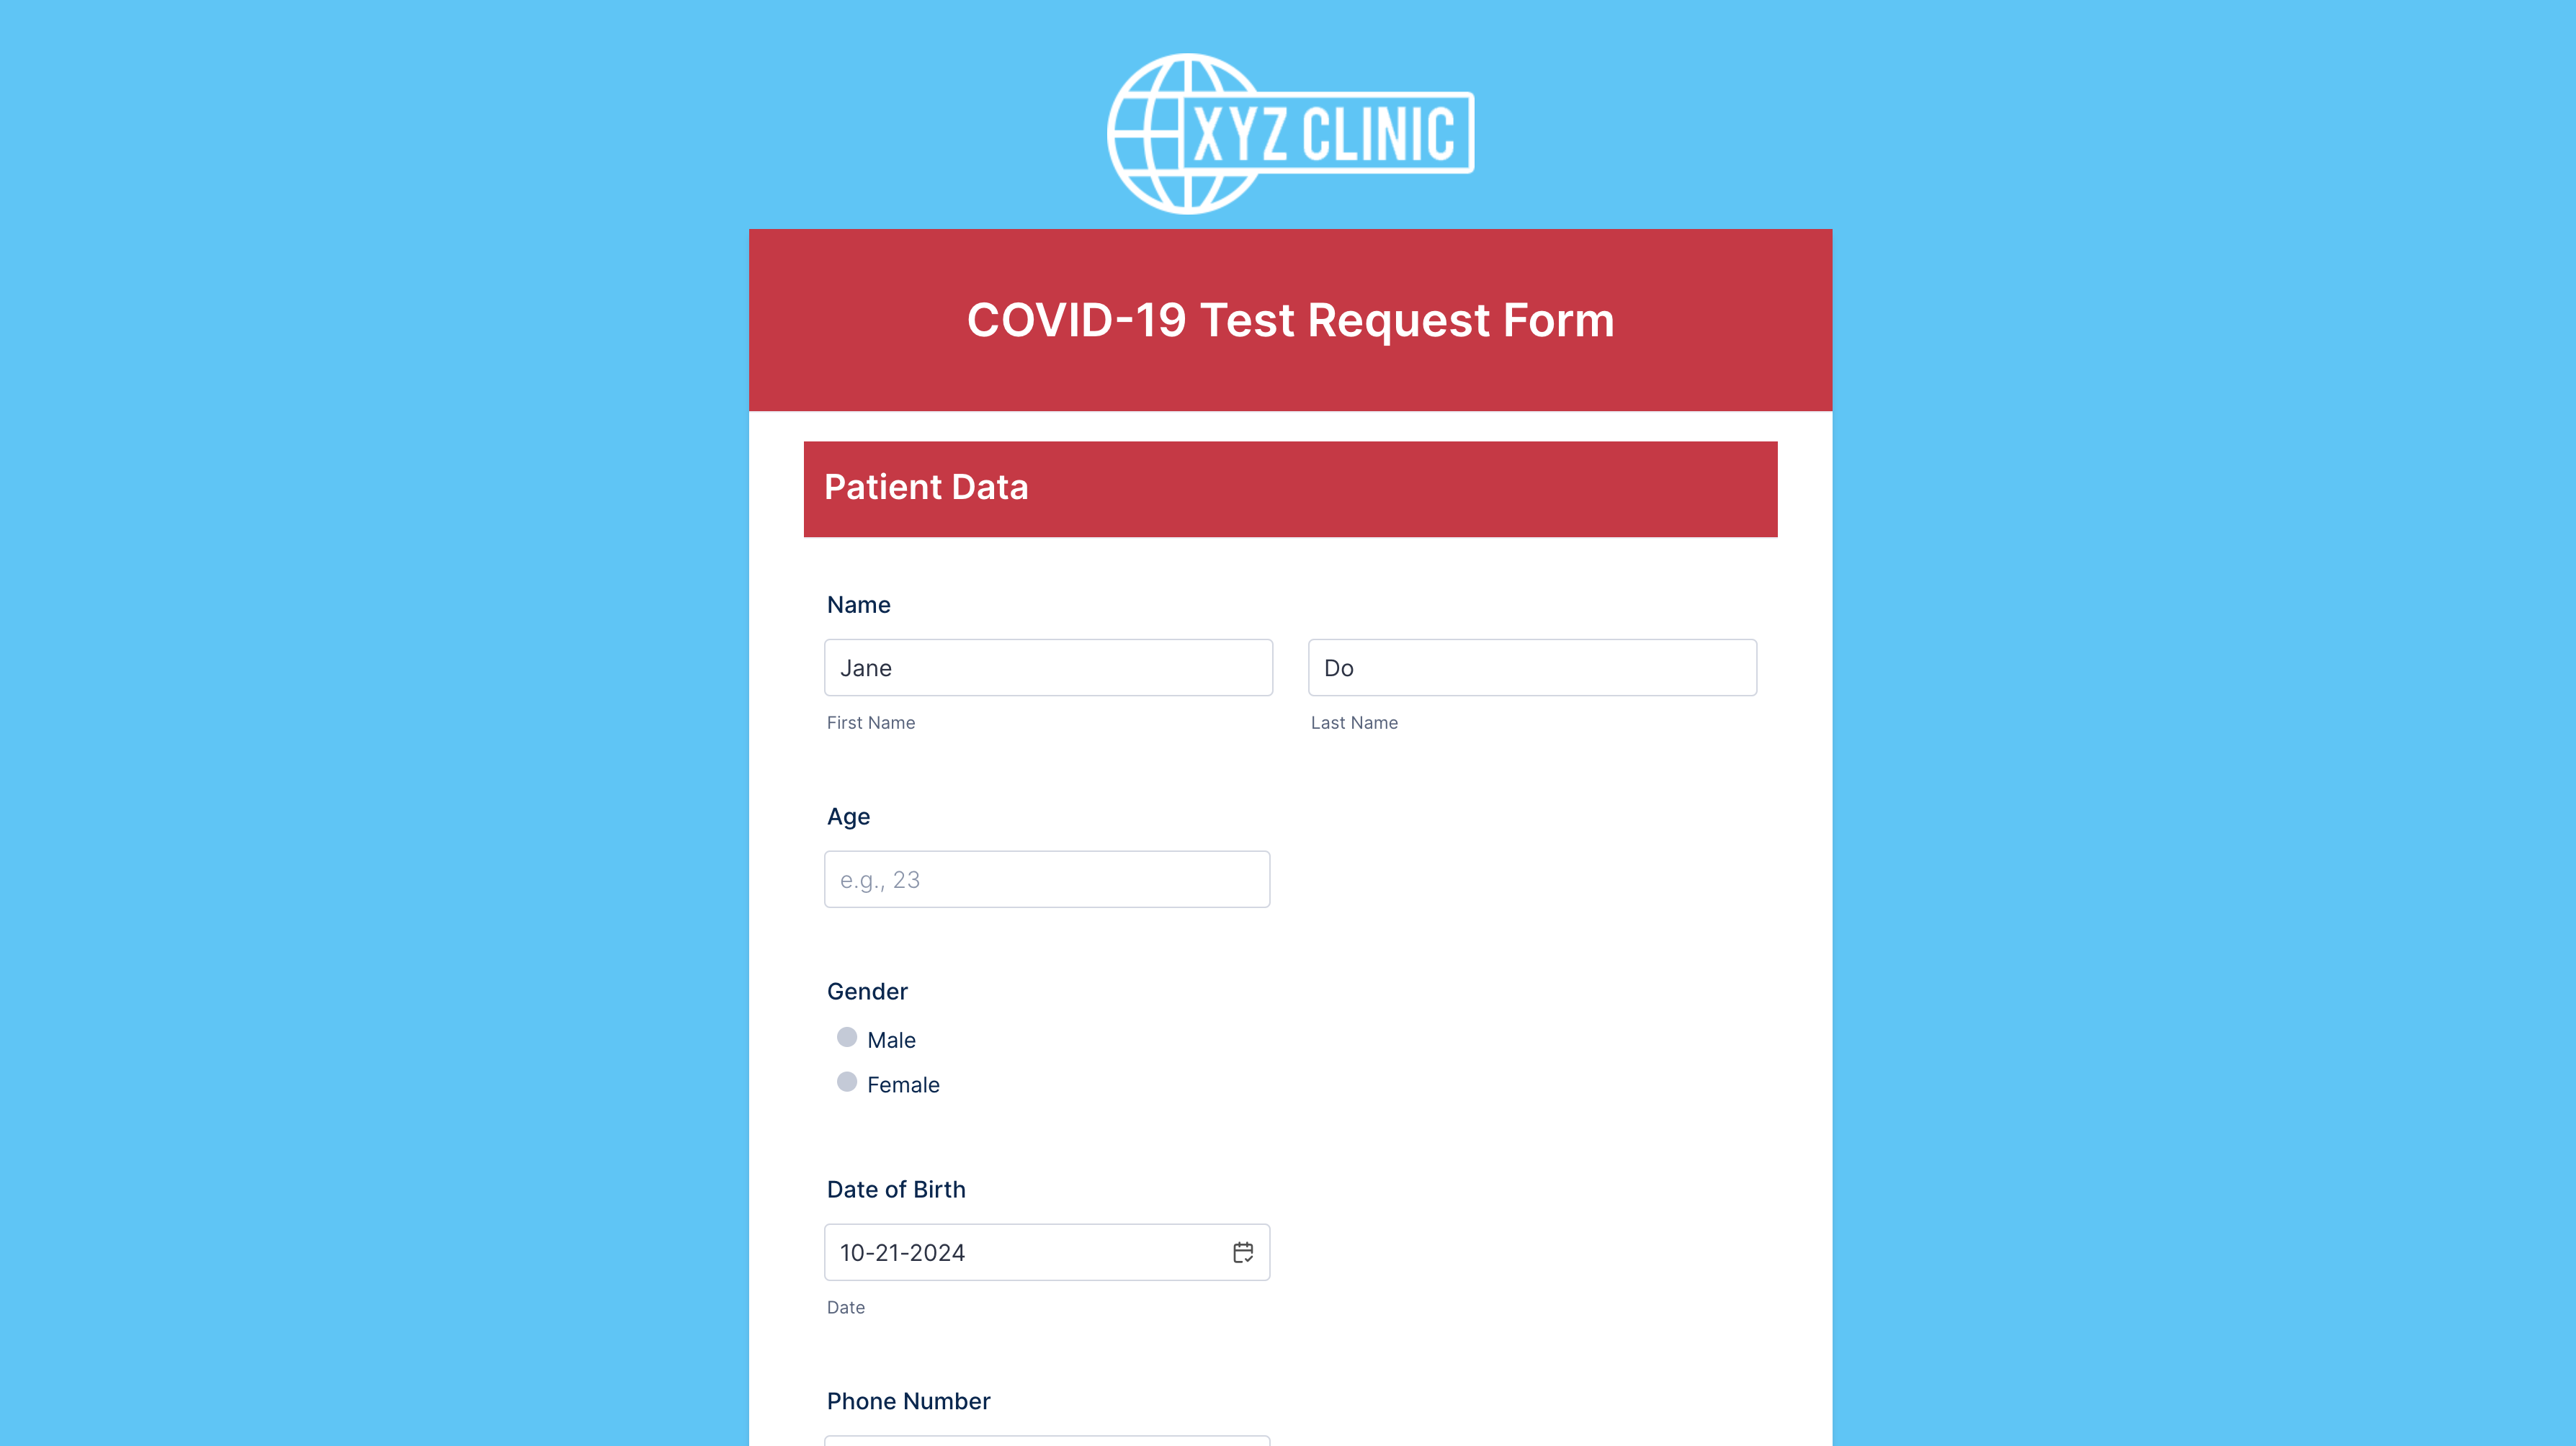
Upon clicking the View Form button in the email, the form will open with the recipient’s prefilled information already present.
Pro tip
You also have the option to assign a form that includes the approval fields of your approval workflow. In this scenario, the assignee can view the previous approval decisions made in the workflow; however, they won’t be able to edit these fields.
This feature offers great flexibility in cases where you have multiple stakeholders who need to see sign-off before they can provide or pass along the required information in a given process.
Conclusion
You may need to assign forms within your approval workflow to collect info from external third parties. Or you could have a need to give internal approvers the sign-offs necessary to supply key information.
Perhaps your needs overlap, and you need a combination of both. In either scenario, prefill will help you neatly finalize your approval workflow.
Additionally, there are endless approval flow customizations and conditional logic combinations that you can pair with prefilled form assignments to meet almost any data, approval, and sign-off need.
To learn more about Prefill 2.0 and its capabilities, join us on March 3, 2022 for a webinar discussing all things prefill.


Send Comment:
2 Comments:
More than a year ago
I don't see my file upload fields as an option to prefill. I also can't add upload images {IMG:FileUpload} in the email sent to the Assignee. I'm I missing something or is not possible?
More than a year ago
Hi there, this article was amazing. But myself I prefer video tutorial insert inside the post to make me understand clearly.