Integrating your form with Google Calendar is a powerful way to streamline scheduling and keep everything organized in one place. With just a few clicks, you can automatically create Google Calendar appointments from your form submissions, saving time and helping to prevent double-booking or missed events.
You can integrate your form with Google Calendar in a few simple steps, so you can stay on top of your schedule and never miss a beat. Here’s how to do it:
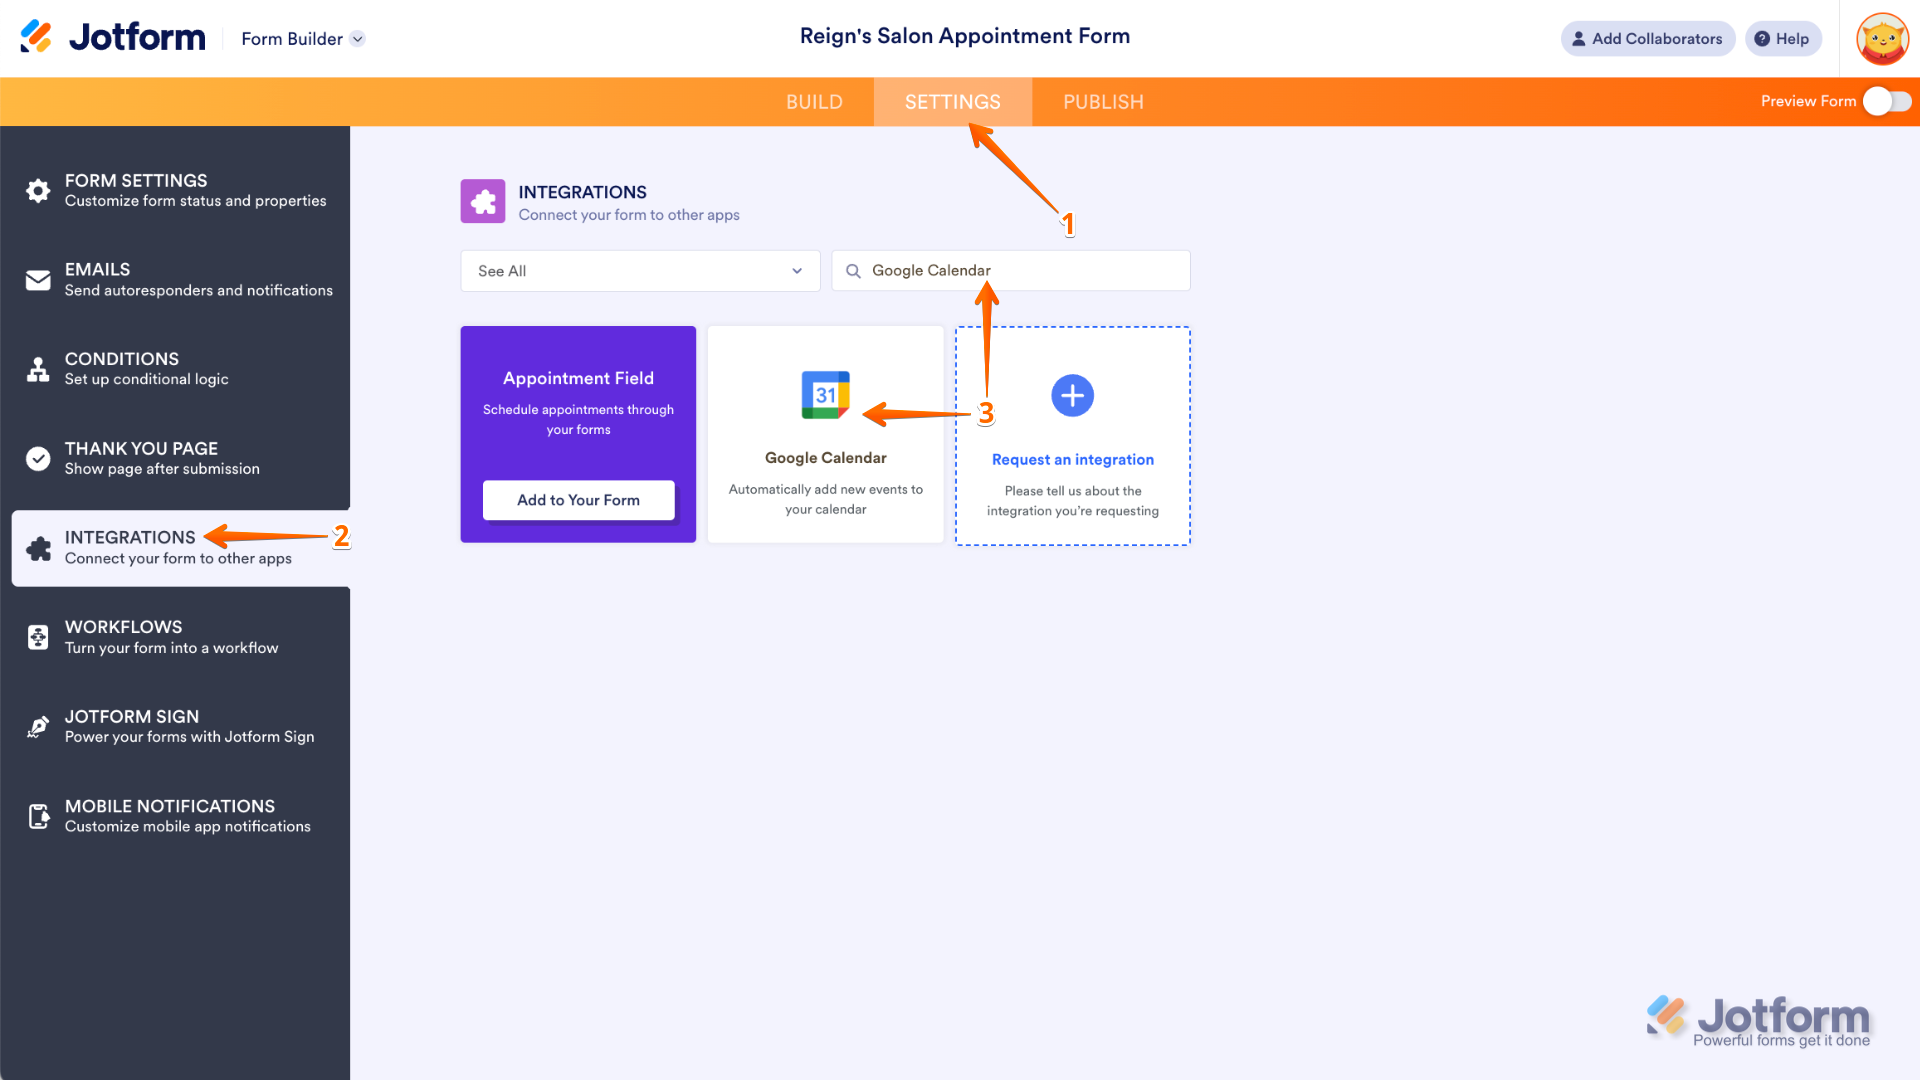
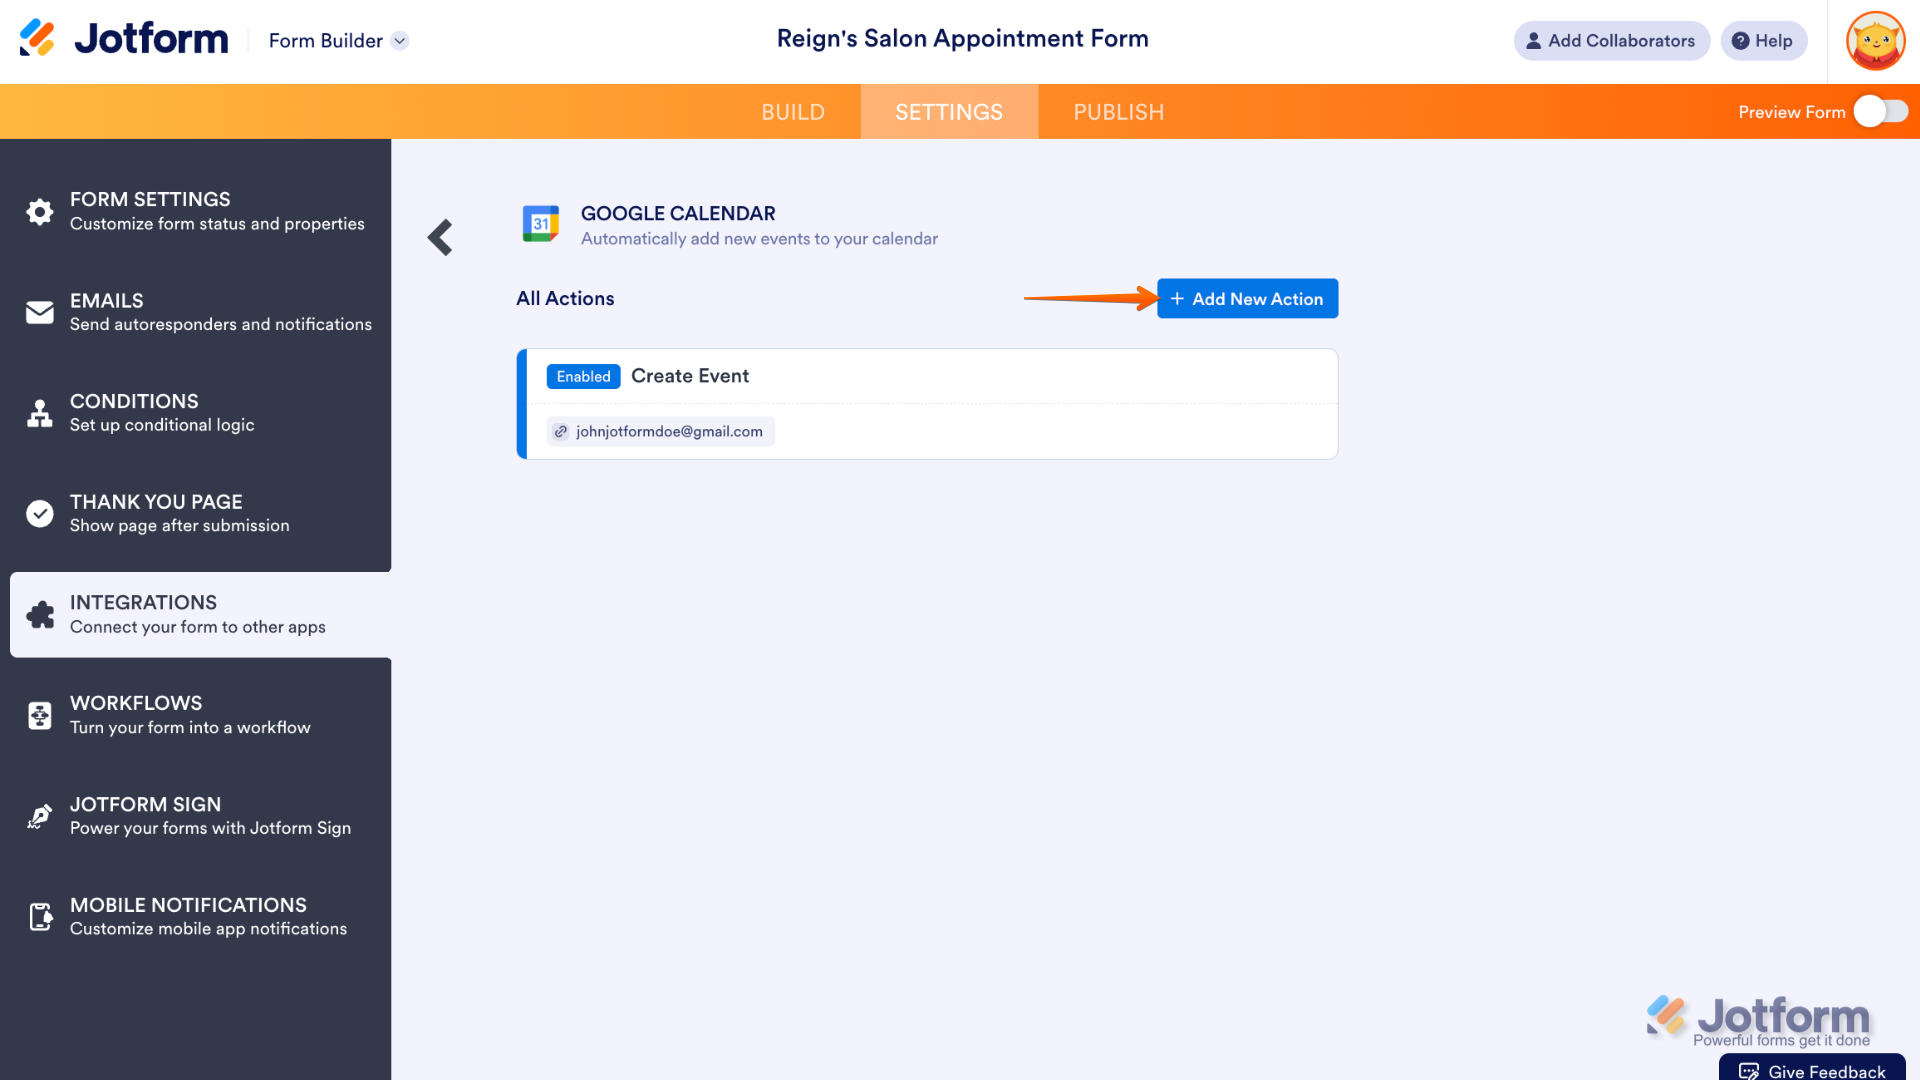
- In Form Builder, in the orange navigation bar at the top of the page, click on Settings.
- Click on Integrations in the menu on the left side of the page.
- In the search bar, enter Google Calendar, and then click on the Google Calendar icon.
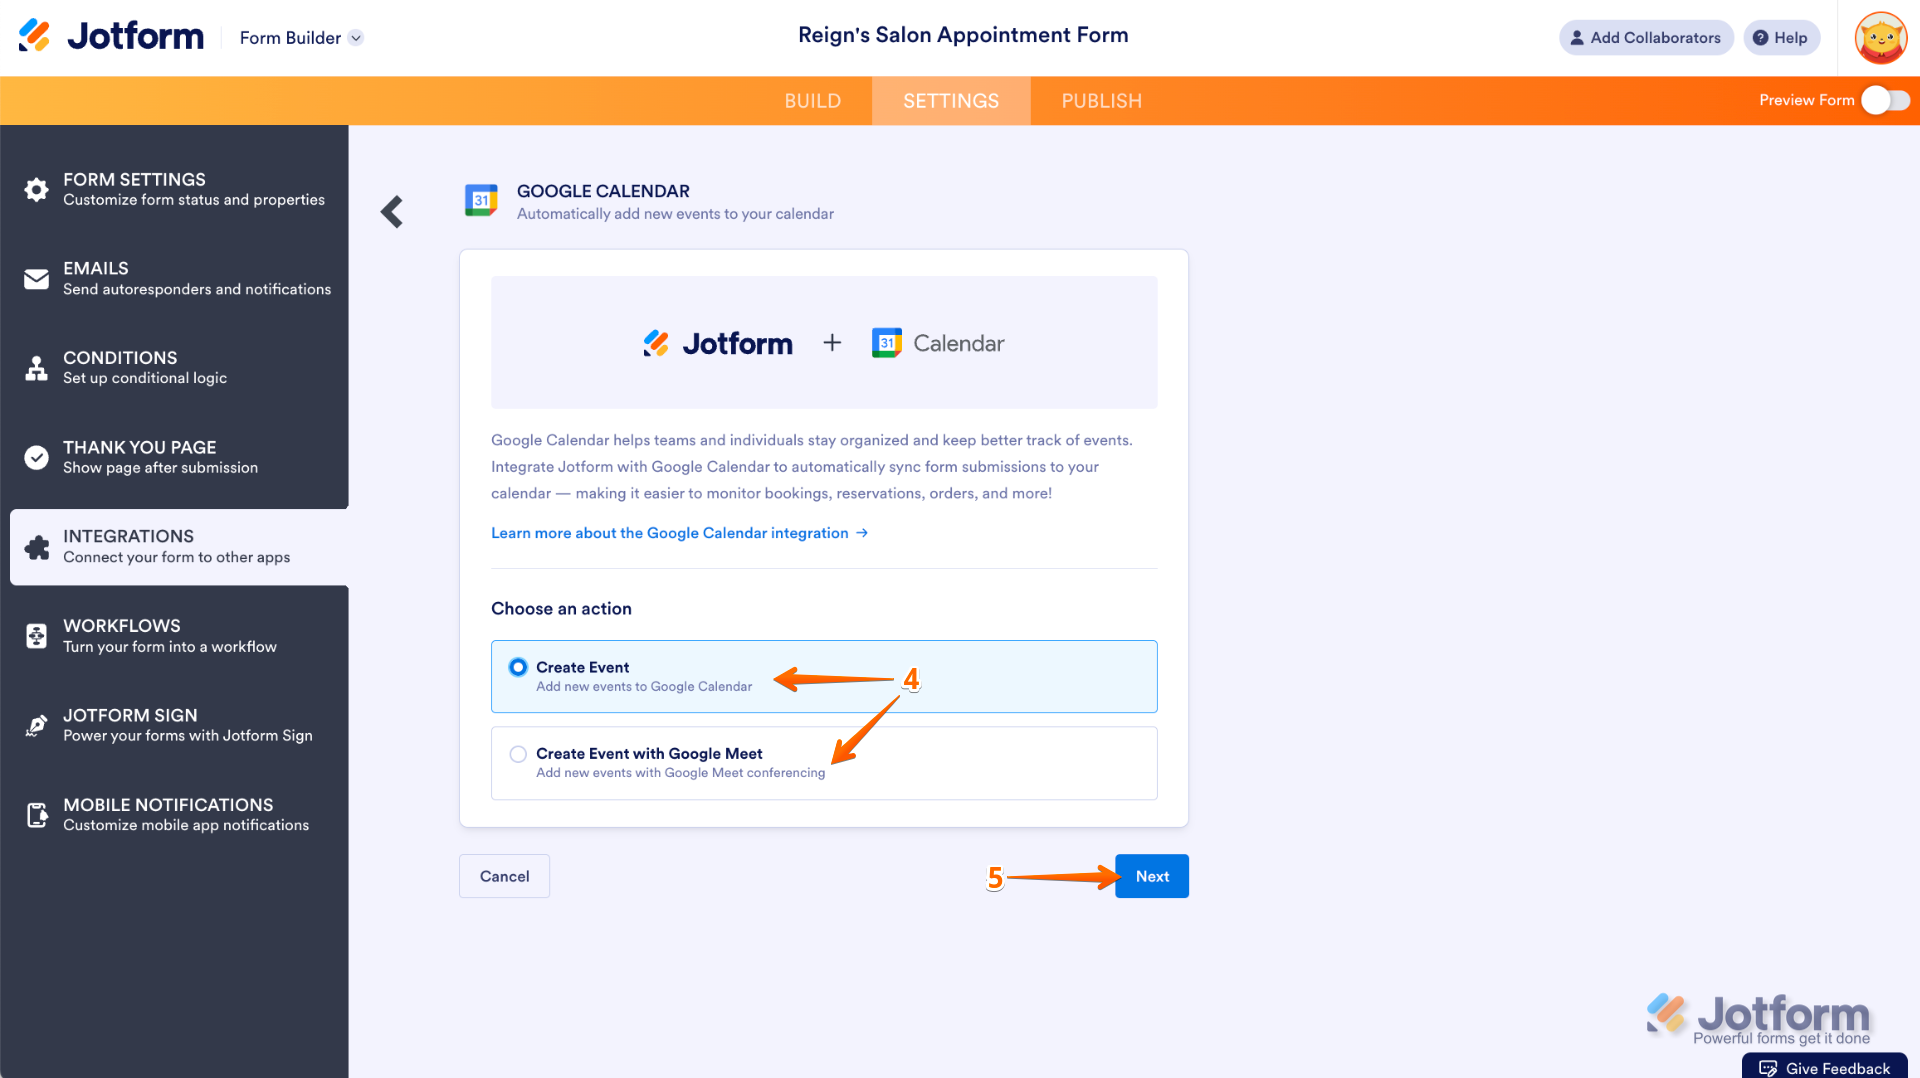
- Now, select Create Event or Create an Event with Google Meet:
- Create Event — This adds new events to your Google Calendar.
- Create an Event with Google Meet — This adds new events with Google Meet Conferencing.
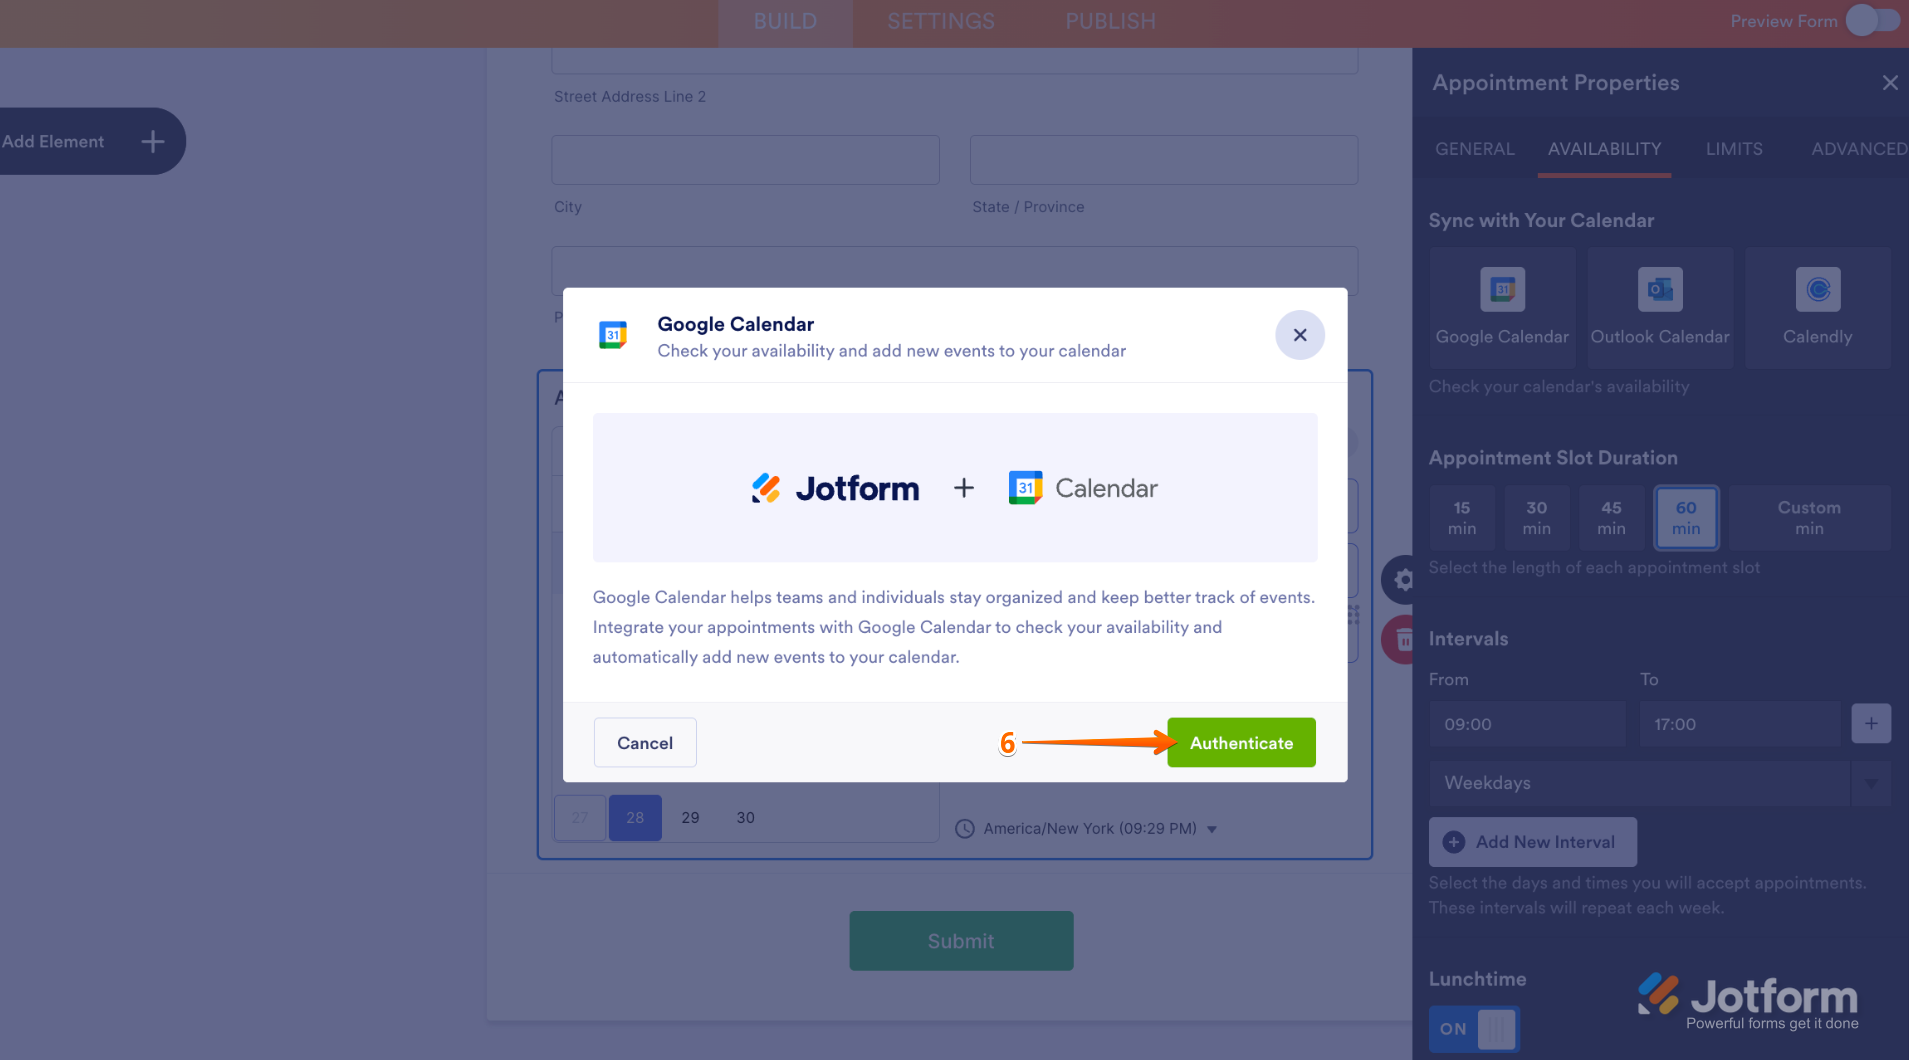
- Then, click on Next to continue.
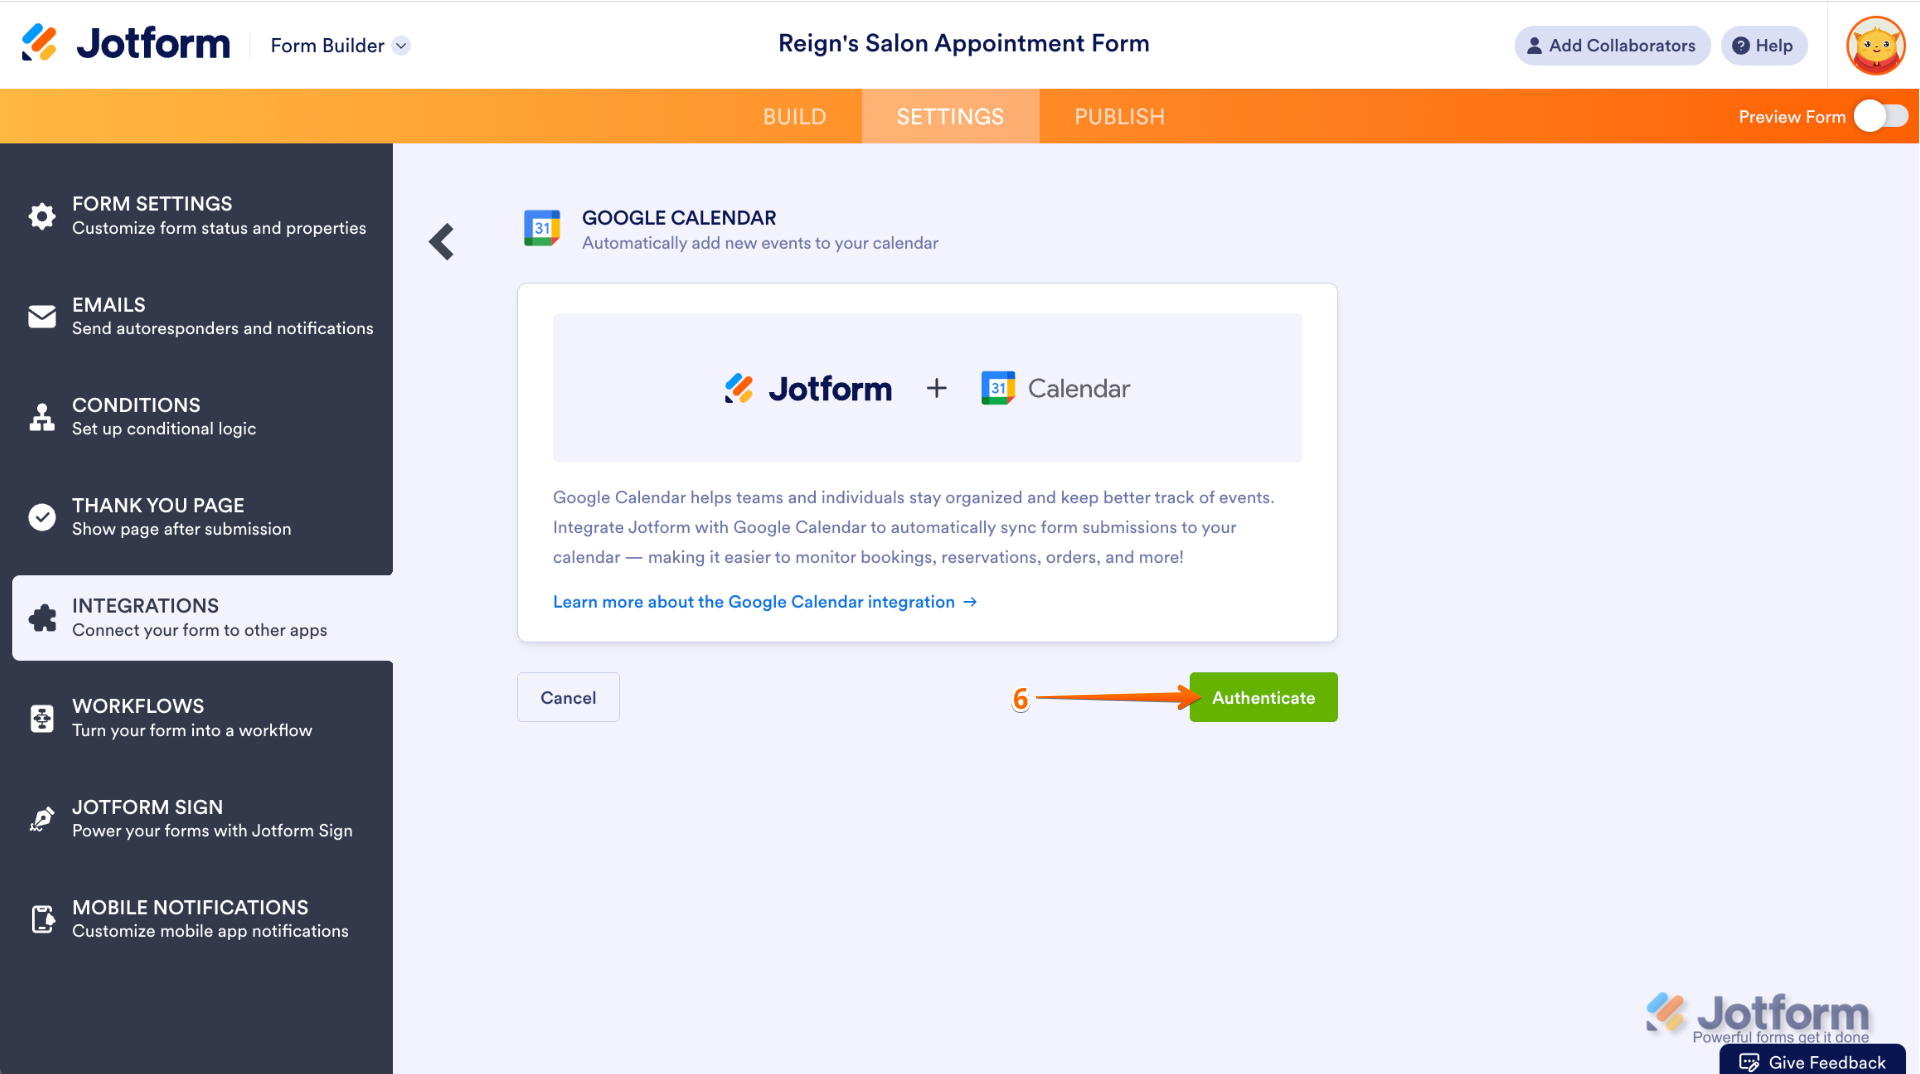
- After that, click on Authenticate.
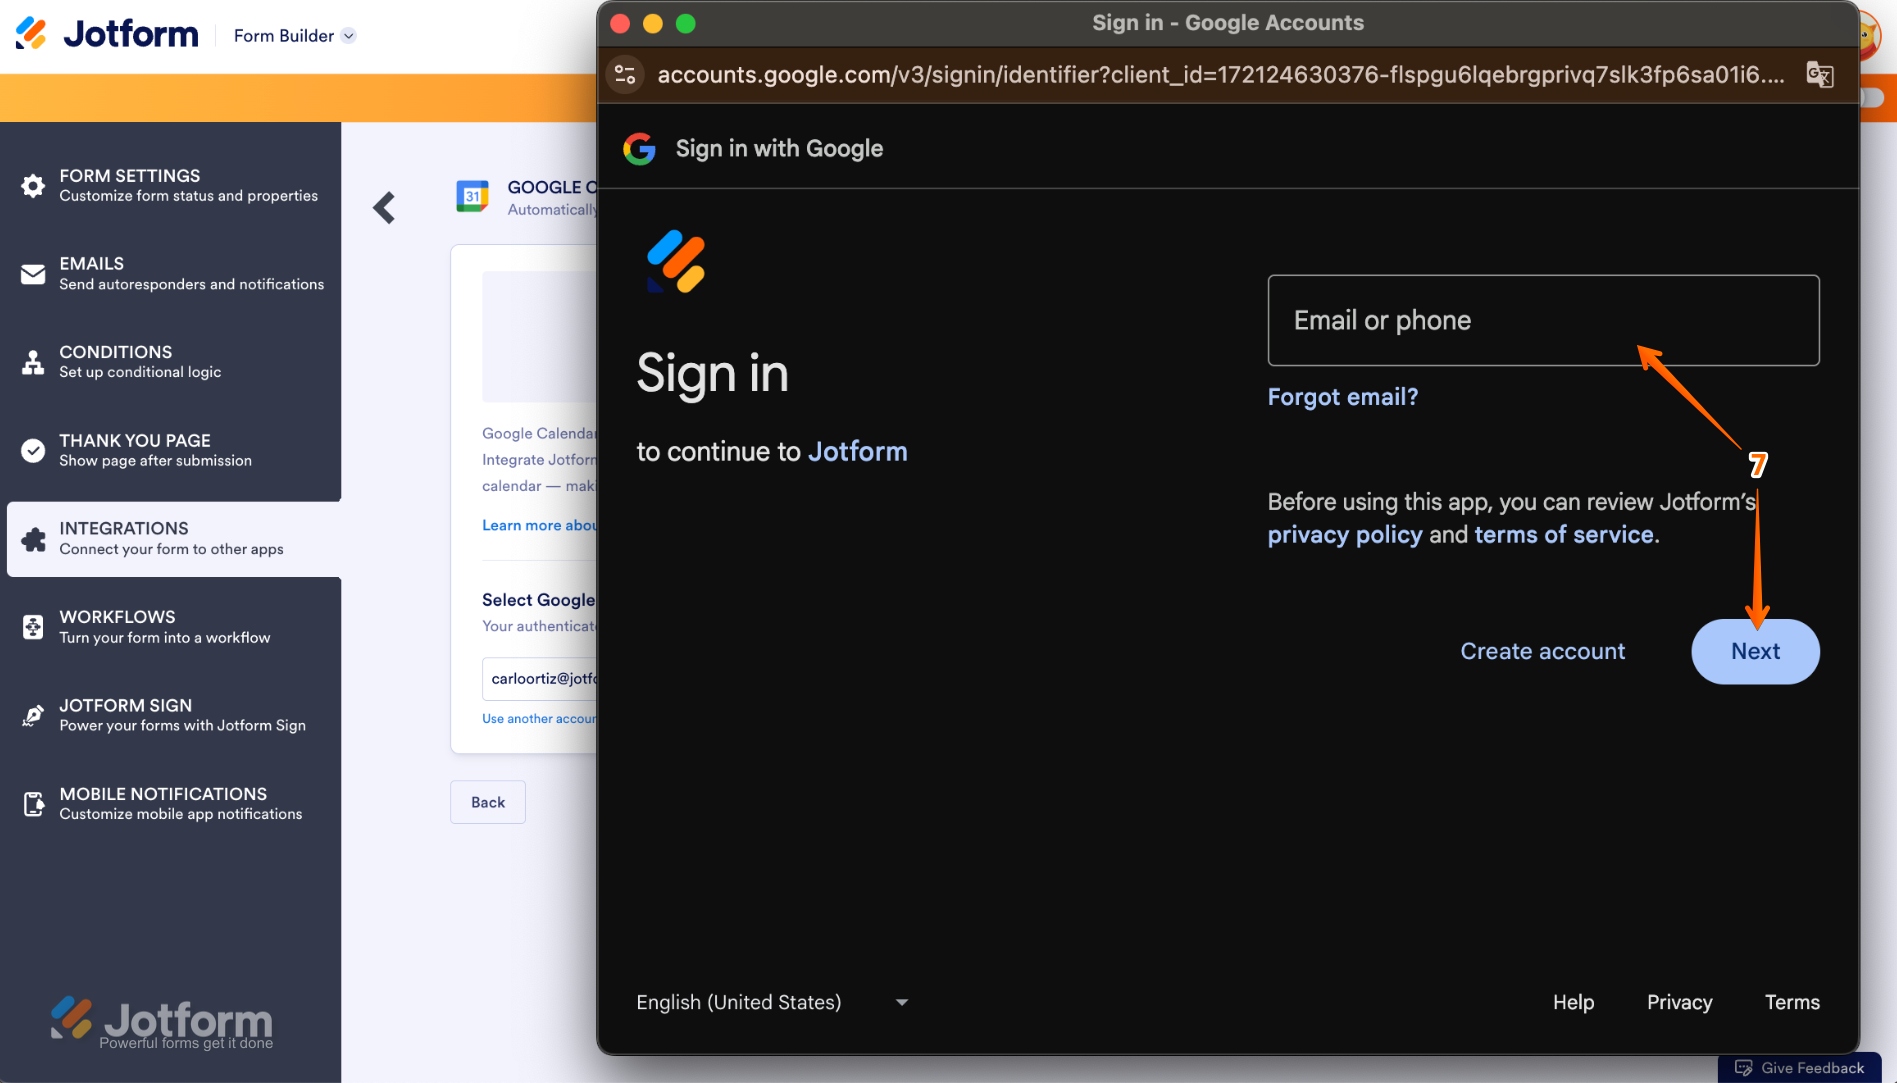
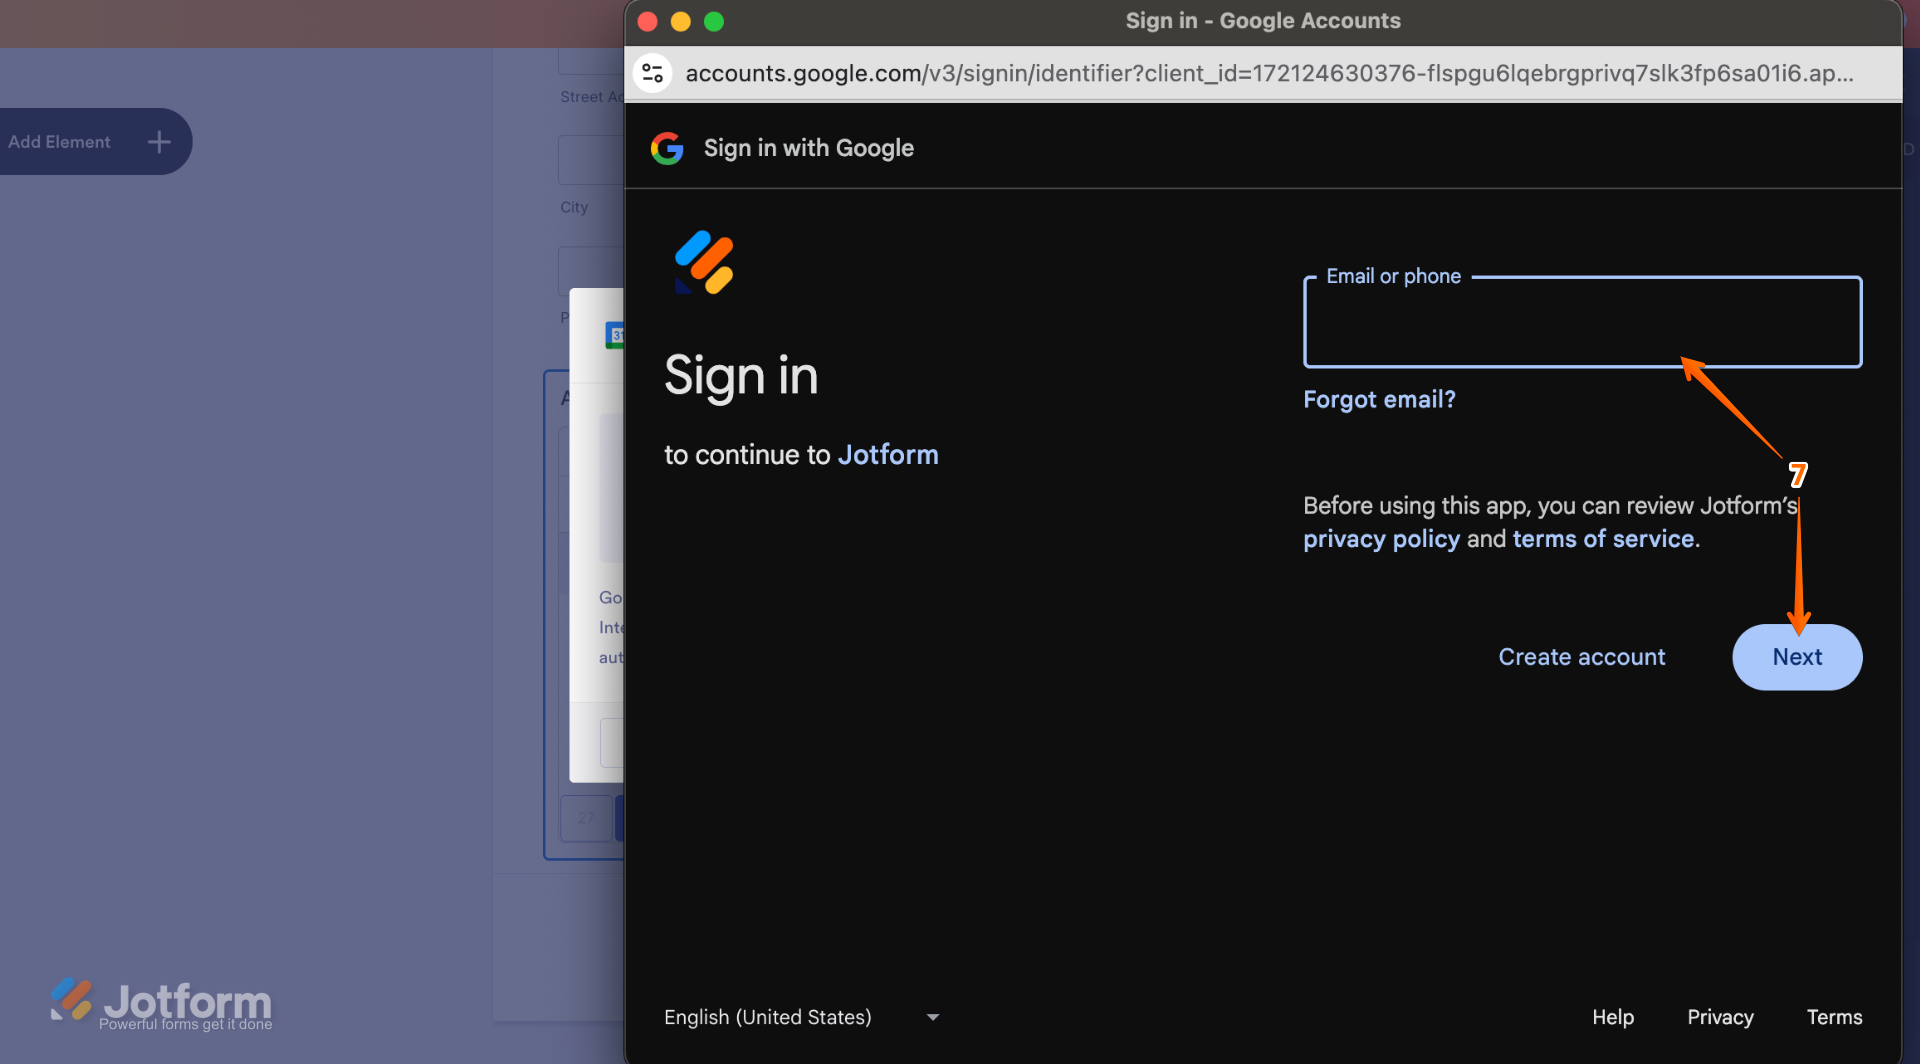
- In the window that pops up, enter the email address for your Google account, and then click on Next.
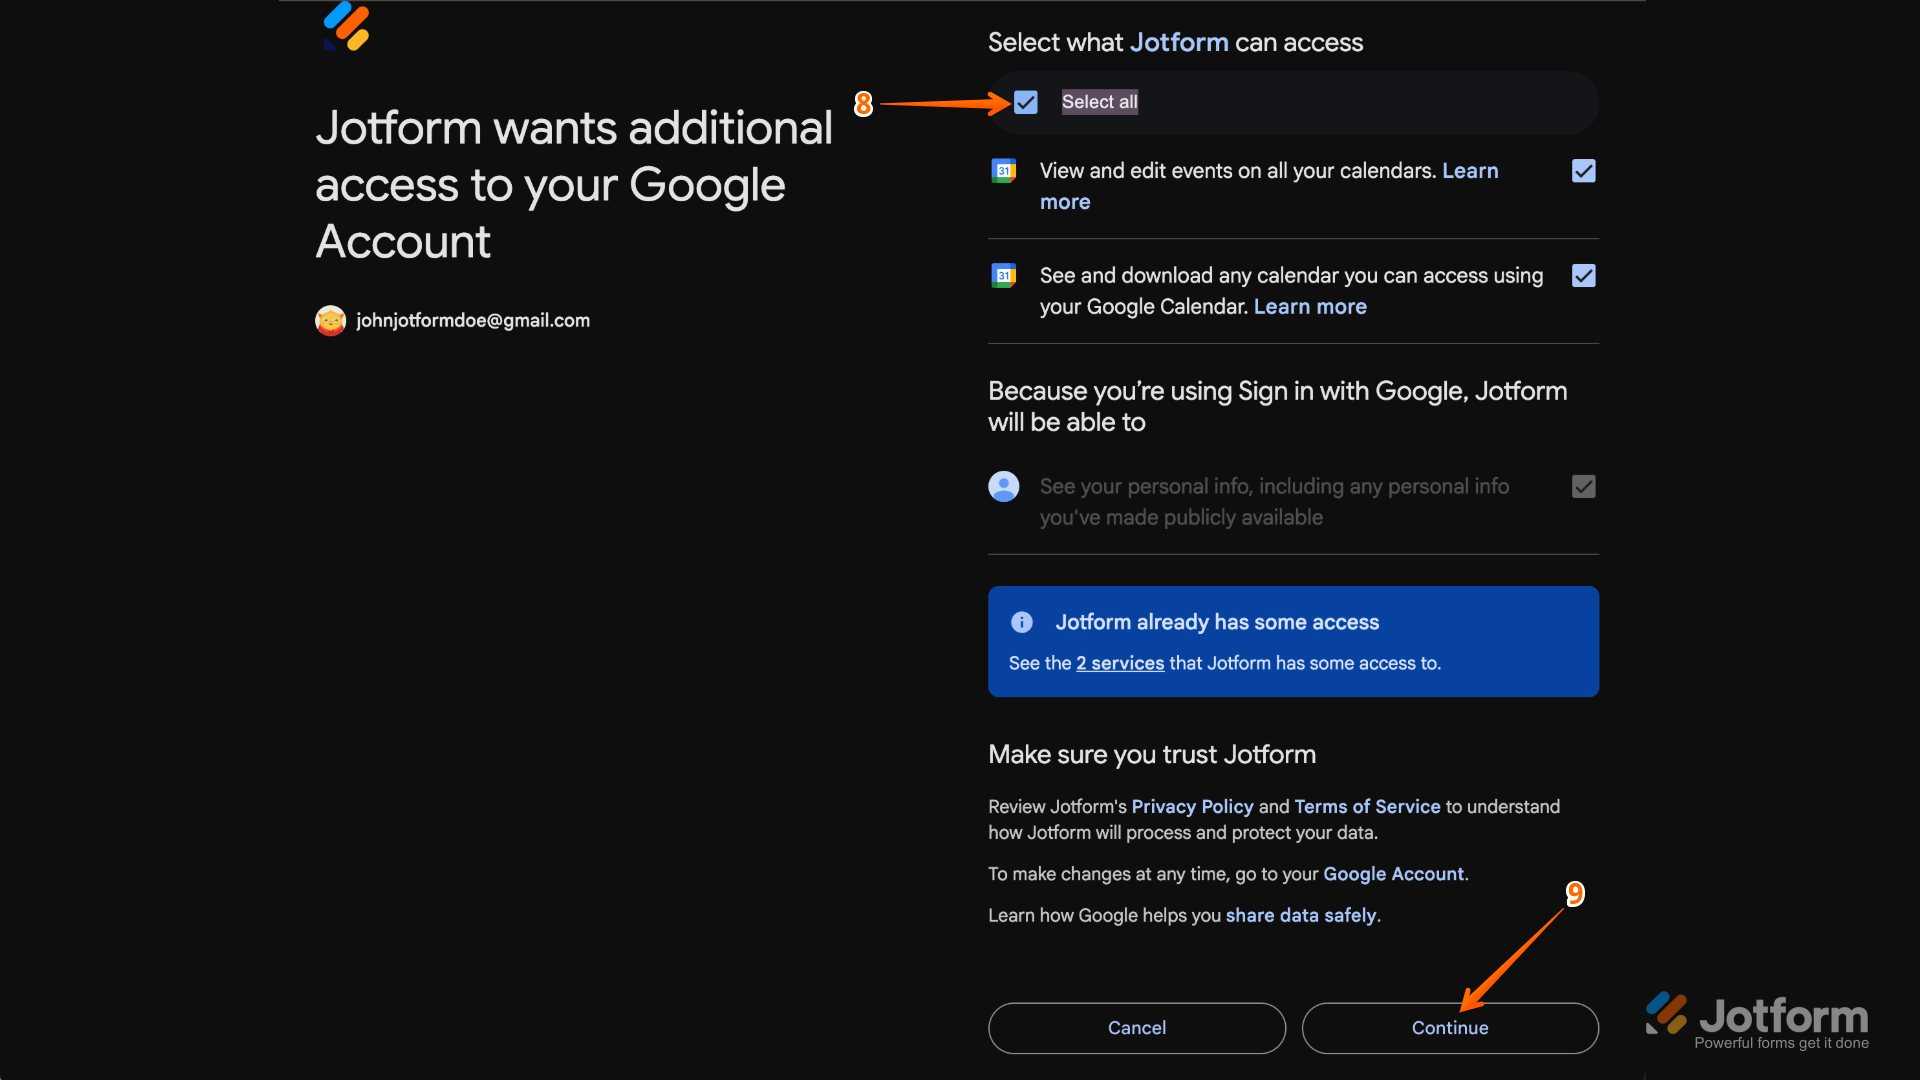
- Once logged in, tick the Checkbox next to Select All.
- Then, click on Continue.
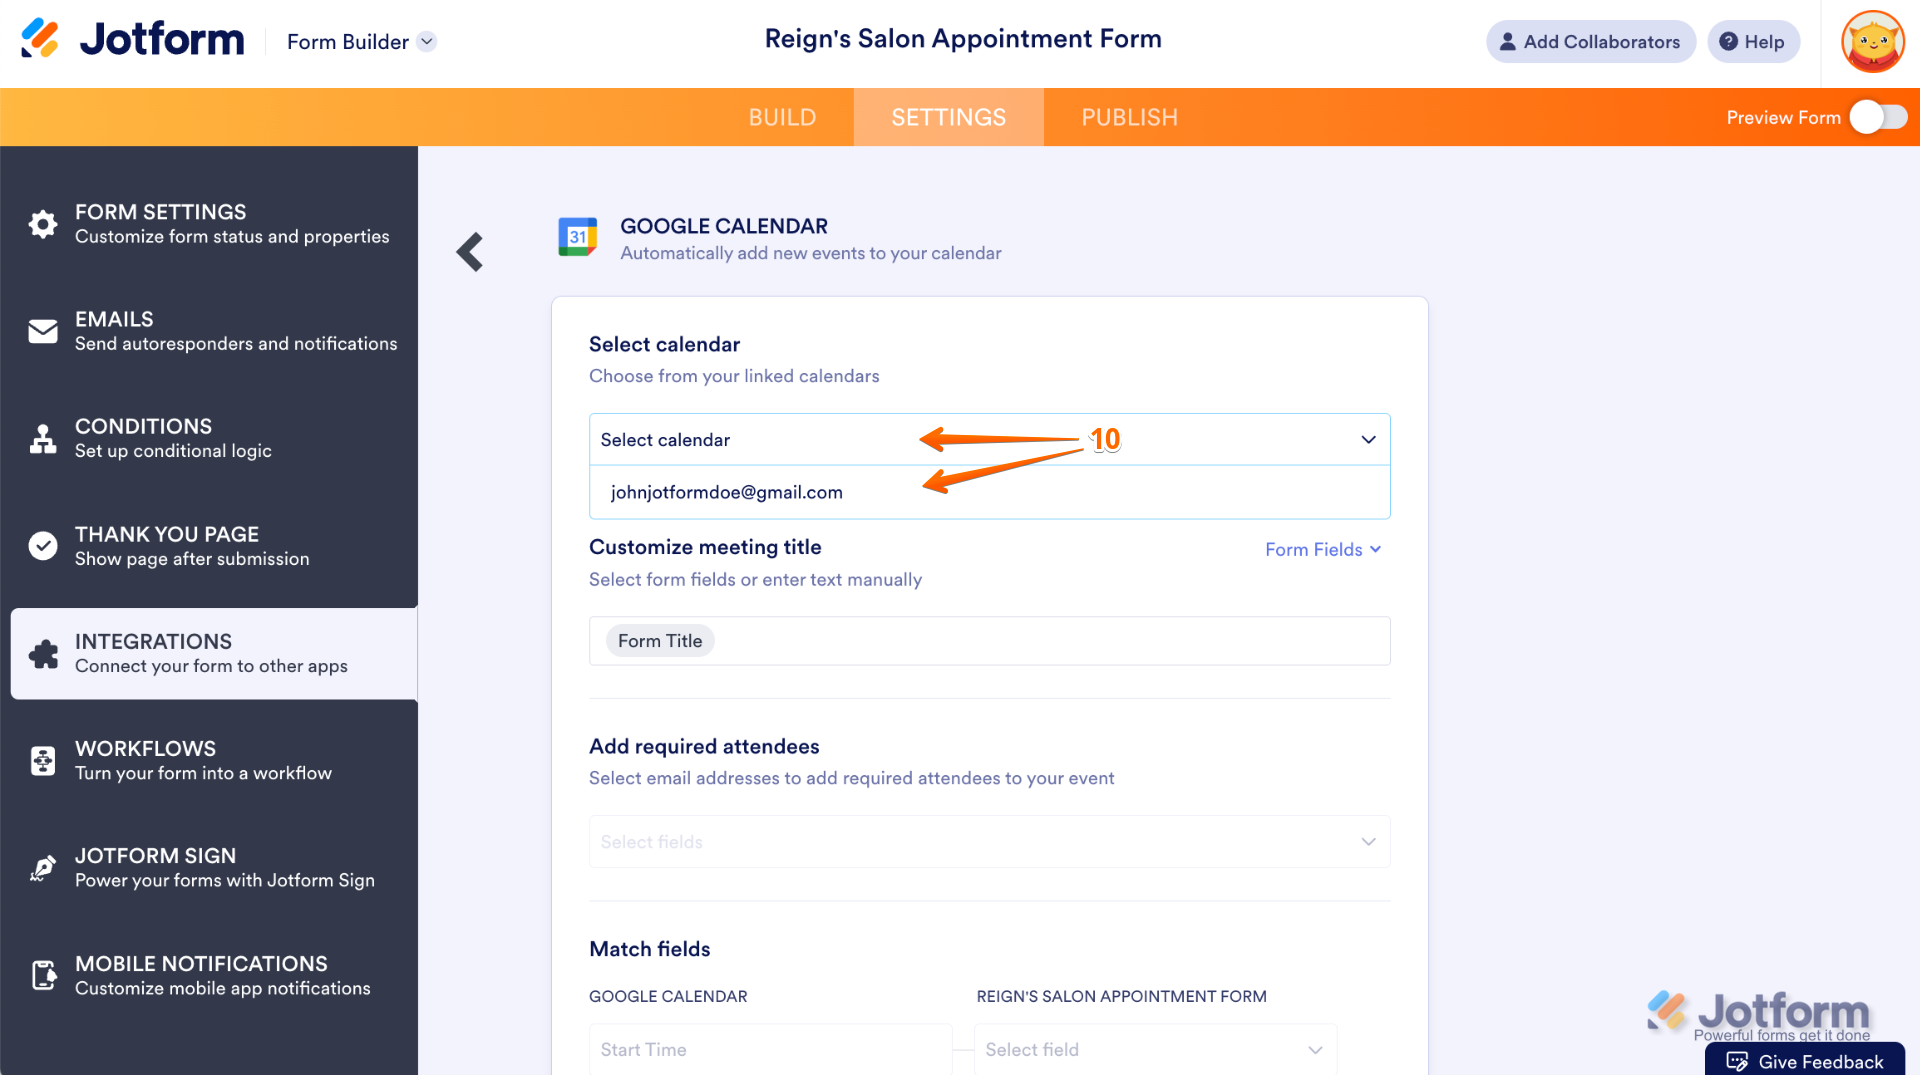
- Then, in the Select Calendar Dropdown menu, choose the calendar you want to integrate
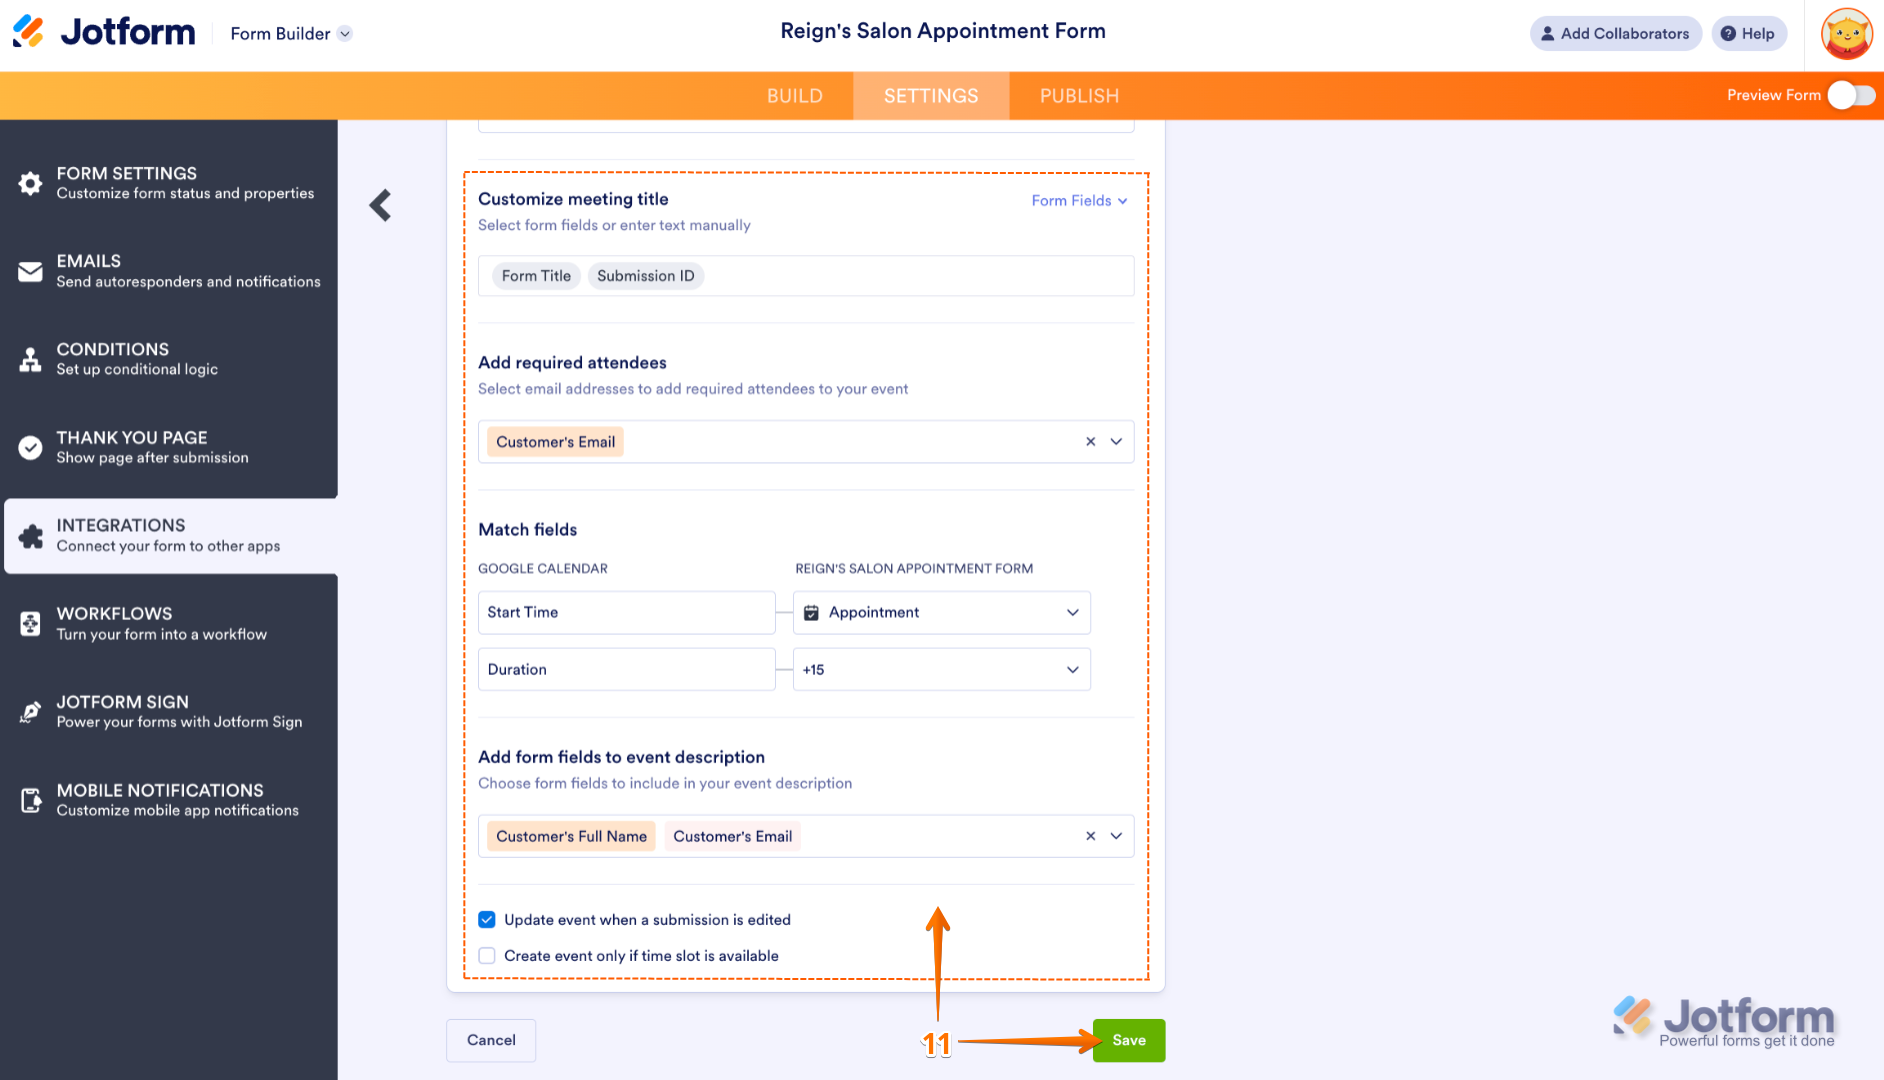
- Then, edit the Customize Meeting Title, Add Required Attendees, Match Fields, and Add Form Fields to Event Description sections, and check the Update Event When a Submission is Edited option. Once you’re done, click on Save.
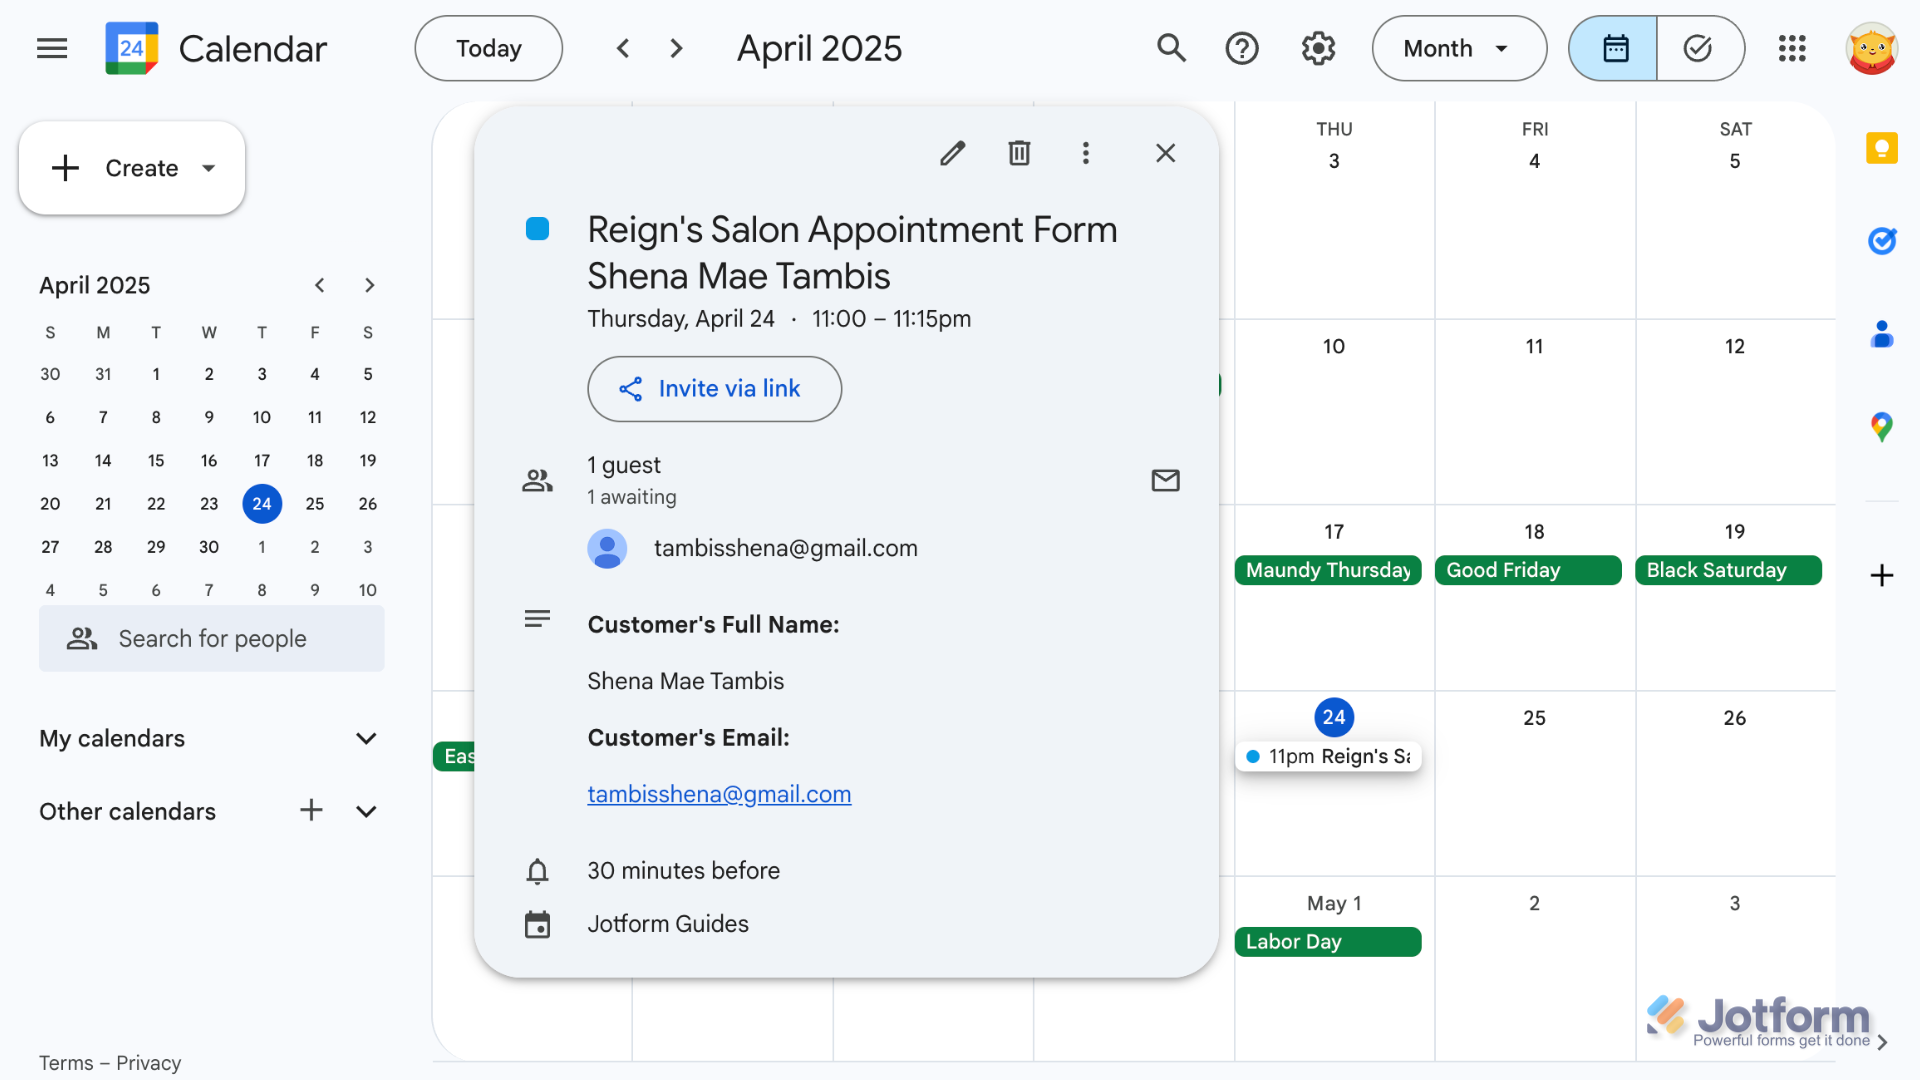
That’s it. Your form’s now connected to Google Calendar, and an event will be created when someone submits it. Take a look at the screenshot below to see an example:
Note
You can connect other calendars in your account using the same integration. You’ll just have to click on Add New Action in the Google Calendar Integration window. This allows you to design multiple workflows while keeping everything synced.
How to Sync Your Google Calendar with Jotform’s Appointment Field
With Jotform’s Appointment field, you can sync submissions directly with your Google Calendar, automatically adding events as users book time with you. It’s a simple and powerful way to stay organized and keep your calendar up to date without any manual input. Connecting your Appointment field to Google Calendar allows every submission to become a scheduled event in real time. Here’s how to do it:
- In Form Builder, click on the Add Element menu on the left side of the page.
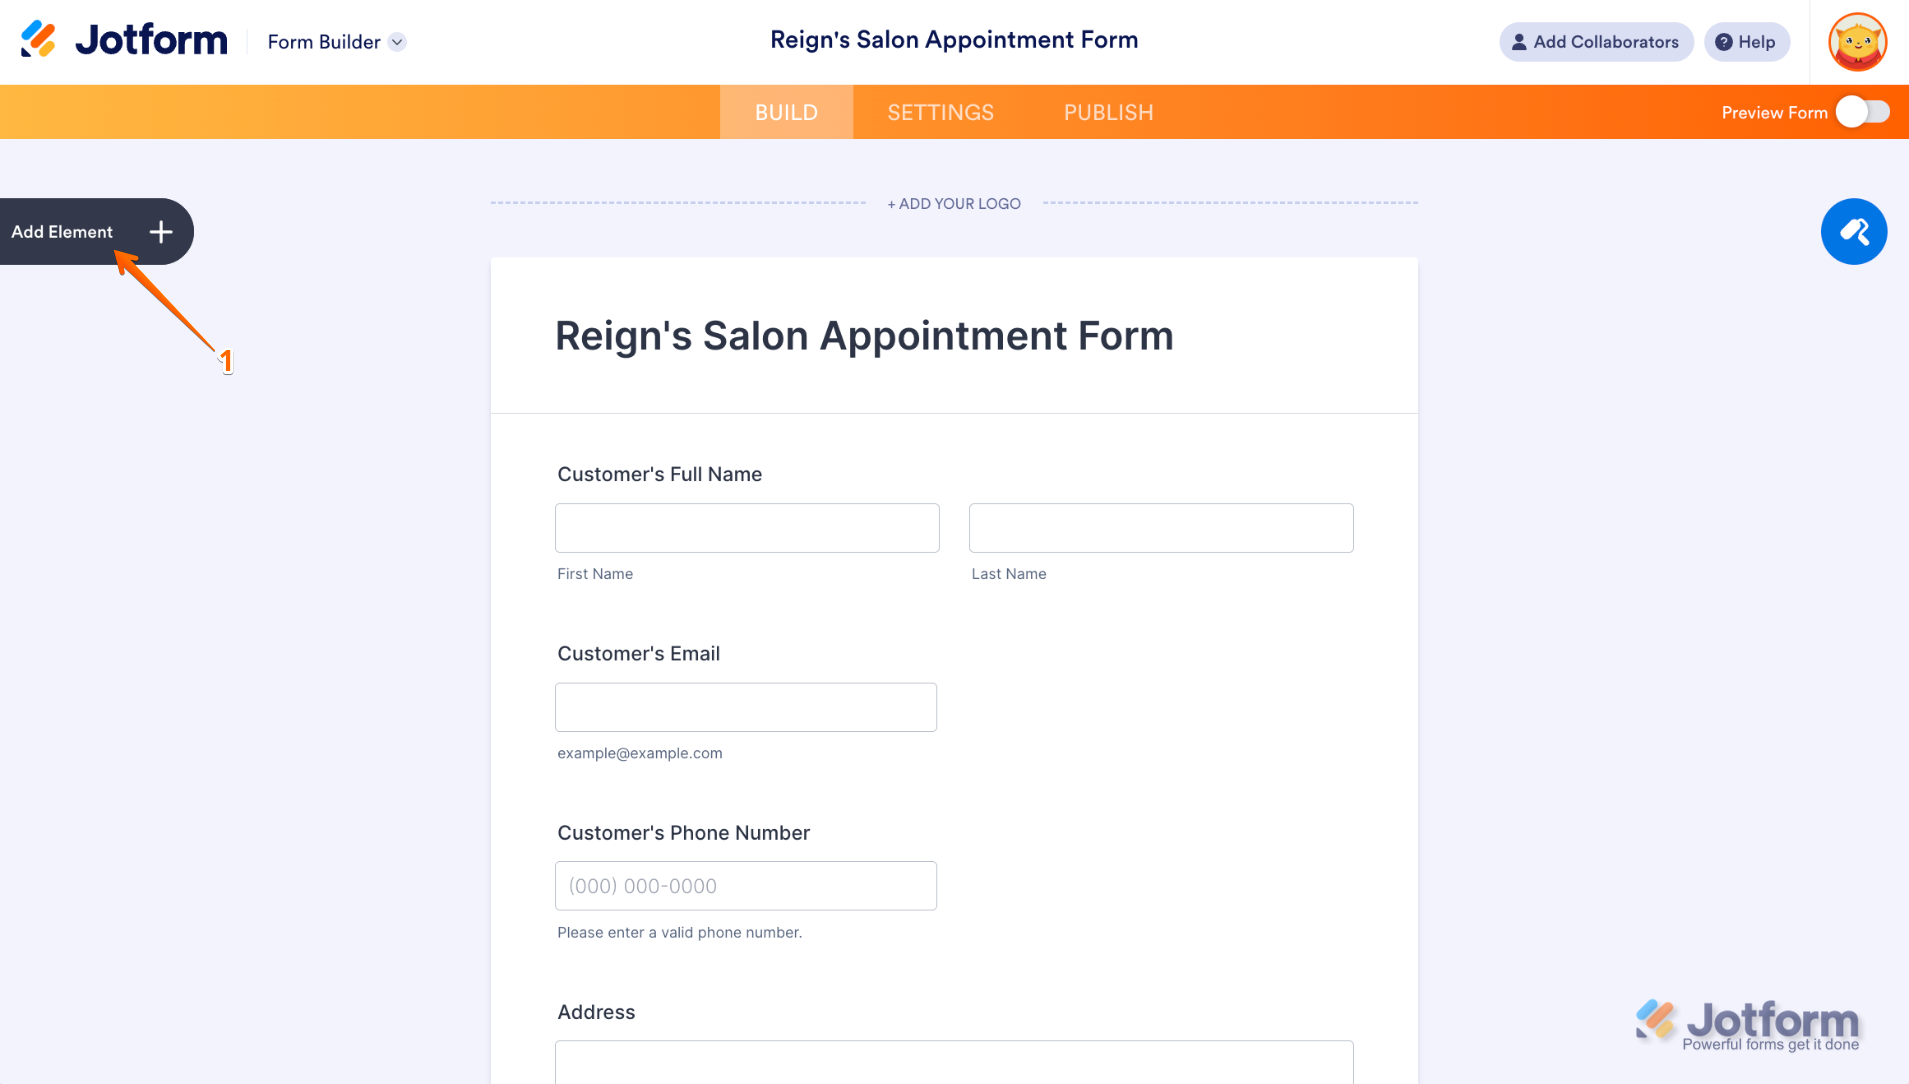
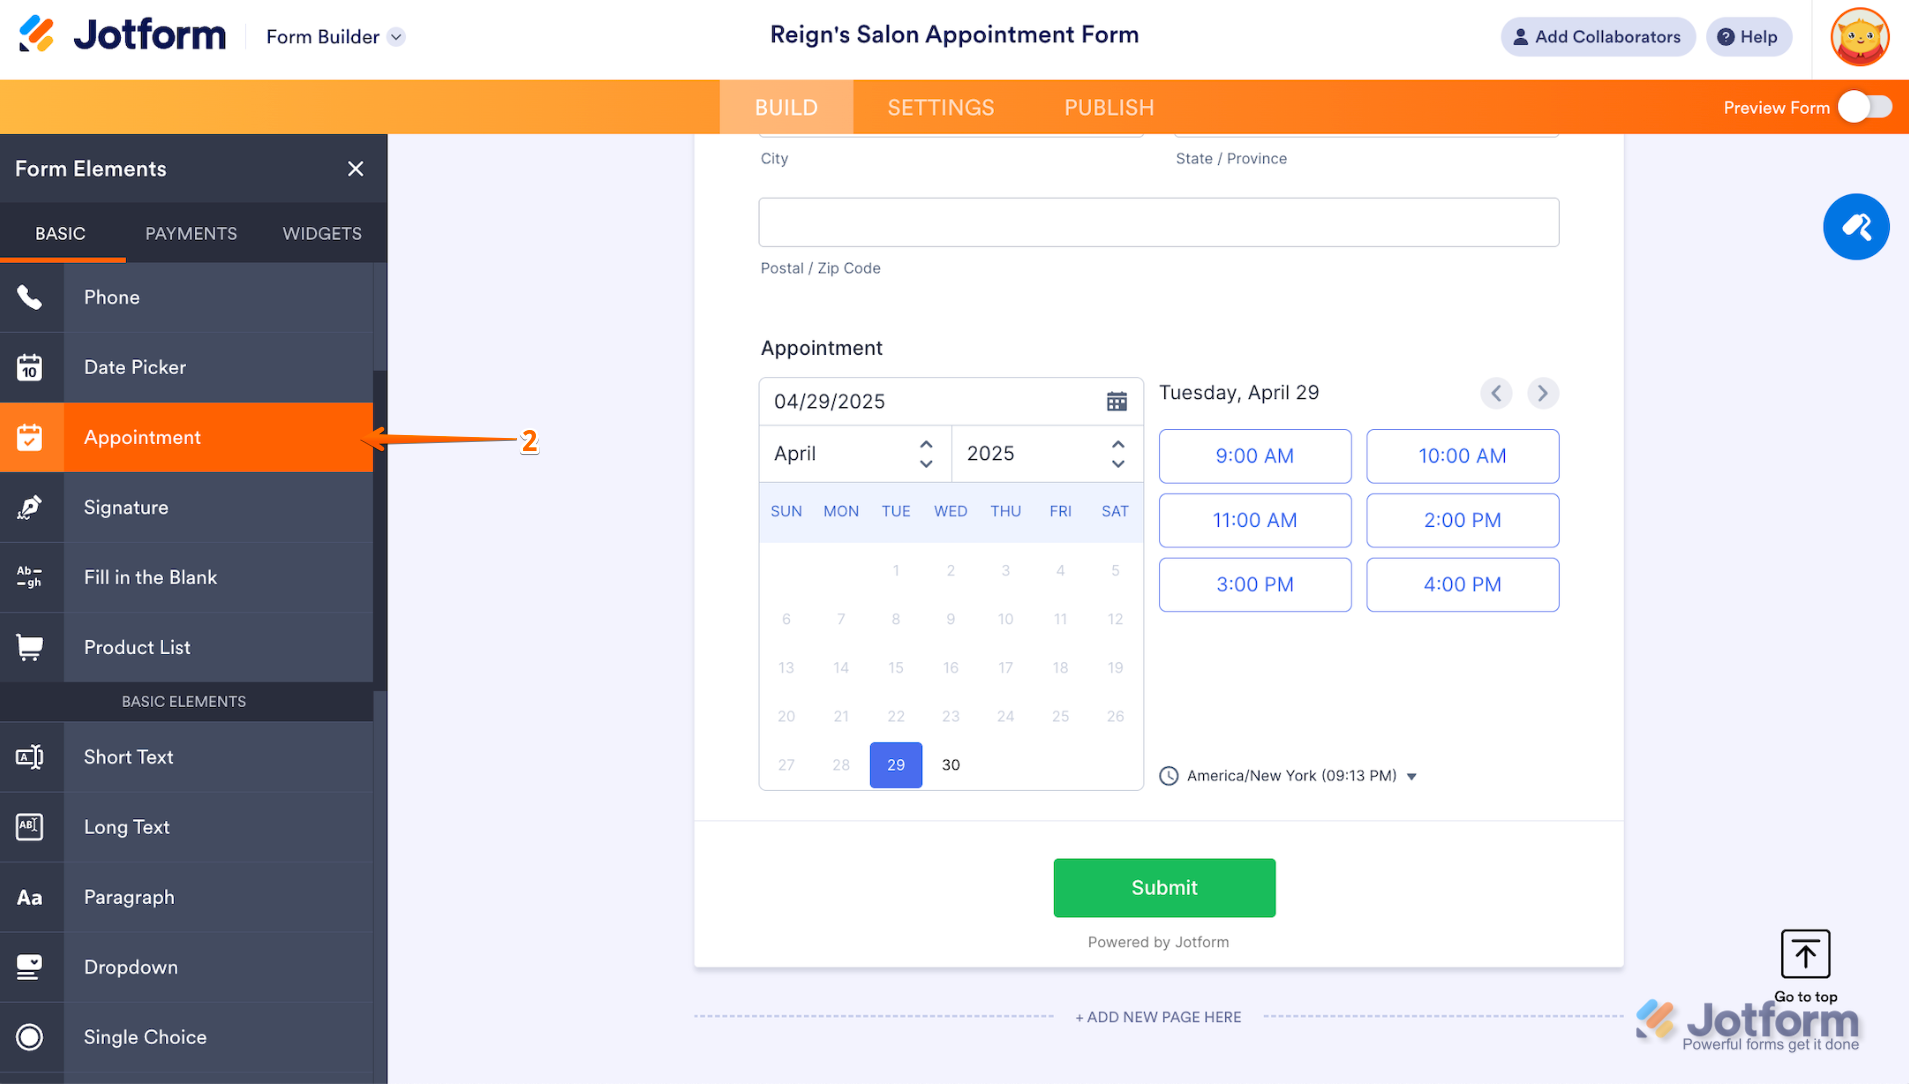
- Under the Basic tab, scroll down the list and click on Appointment.
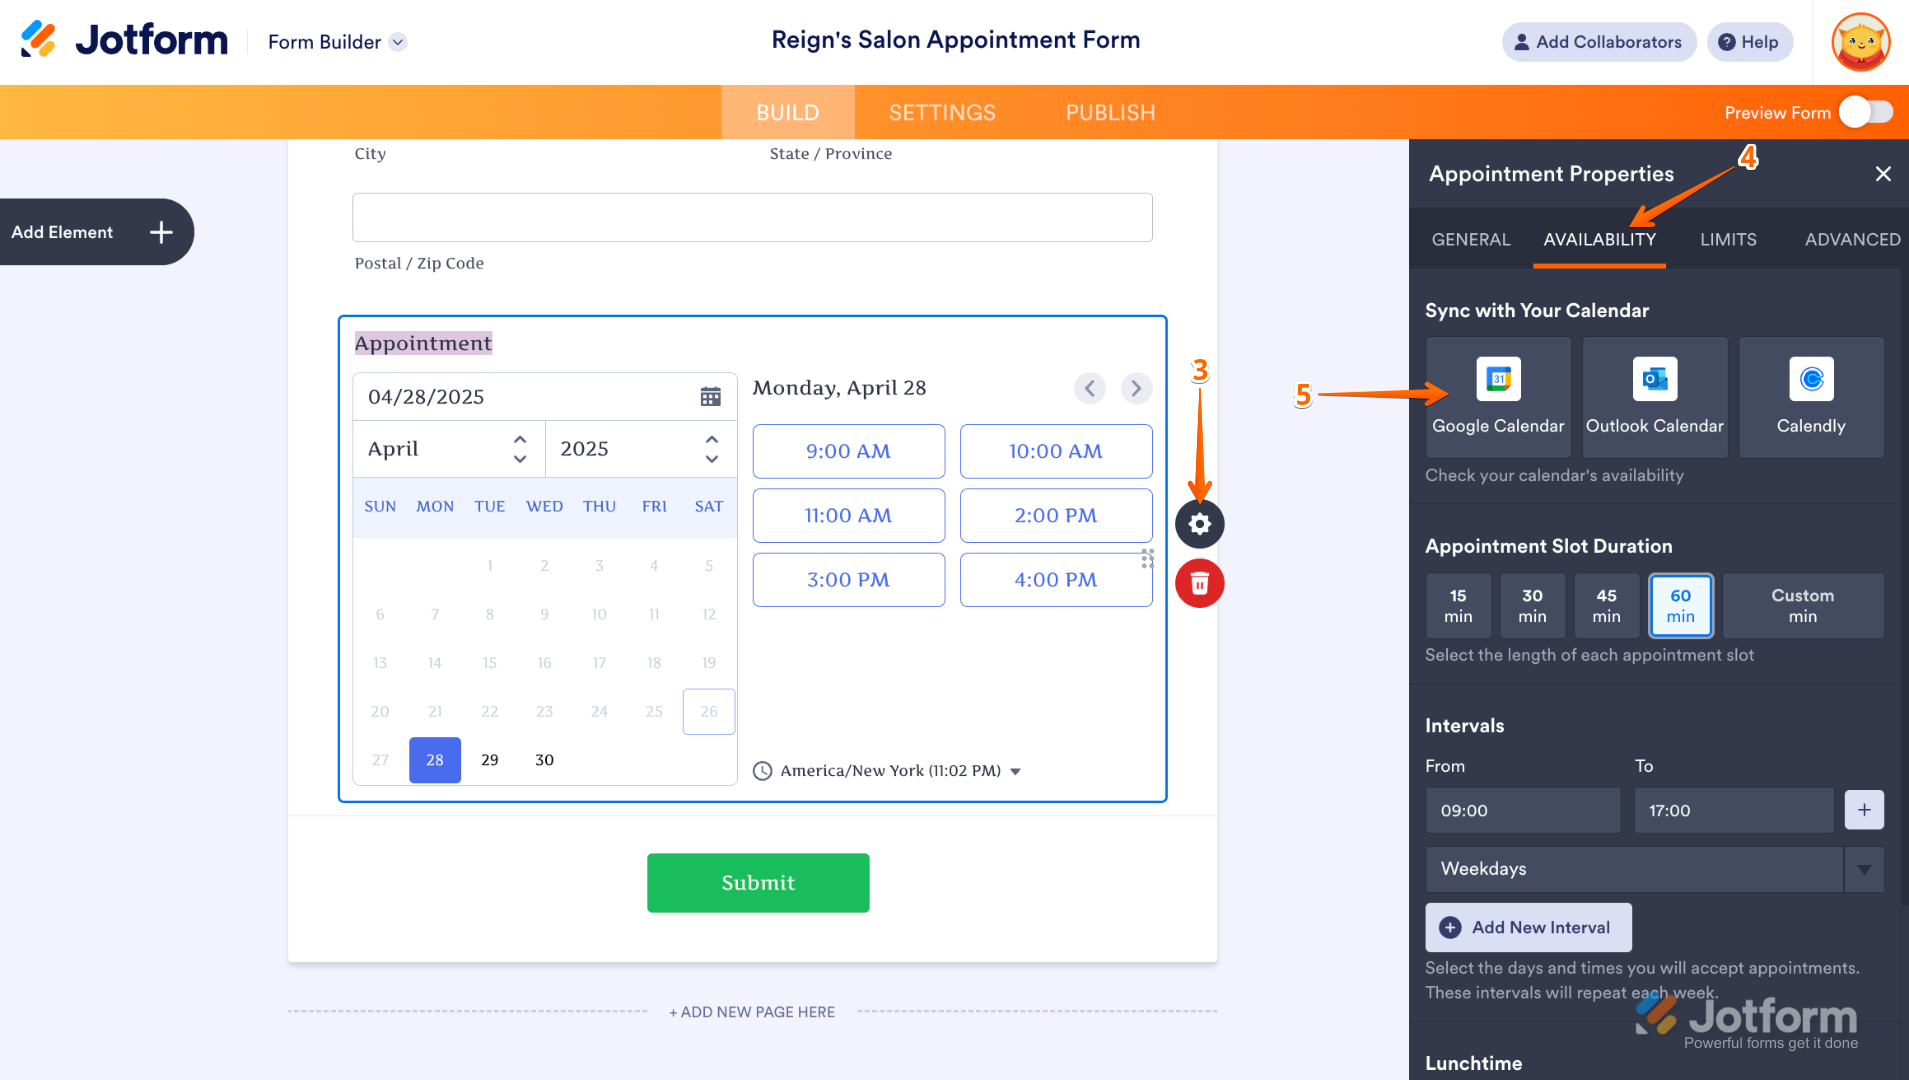
- Then, click on the Gear icon next to the Appointment field.
- In the menu on the right side of the page, click on the Availability tab.
- Now, in the Sync with Your Calendar section, select Google Calendar.
- In the Google Calendar window that comes up, click on Authenticate.
- In the window that pops up, enter the email address for your Google account, and then click on Next.
- Once logged in, tick the Checkbox next to Select All.
- Then, click on Continue.

- Then, in the Select Calendar Dropdown menu, choose the calendar you want to integrate.
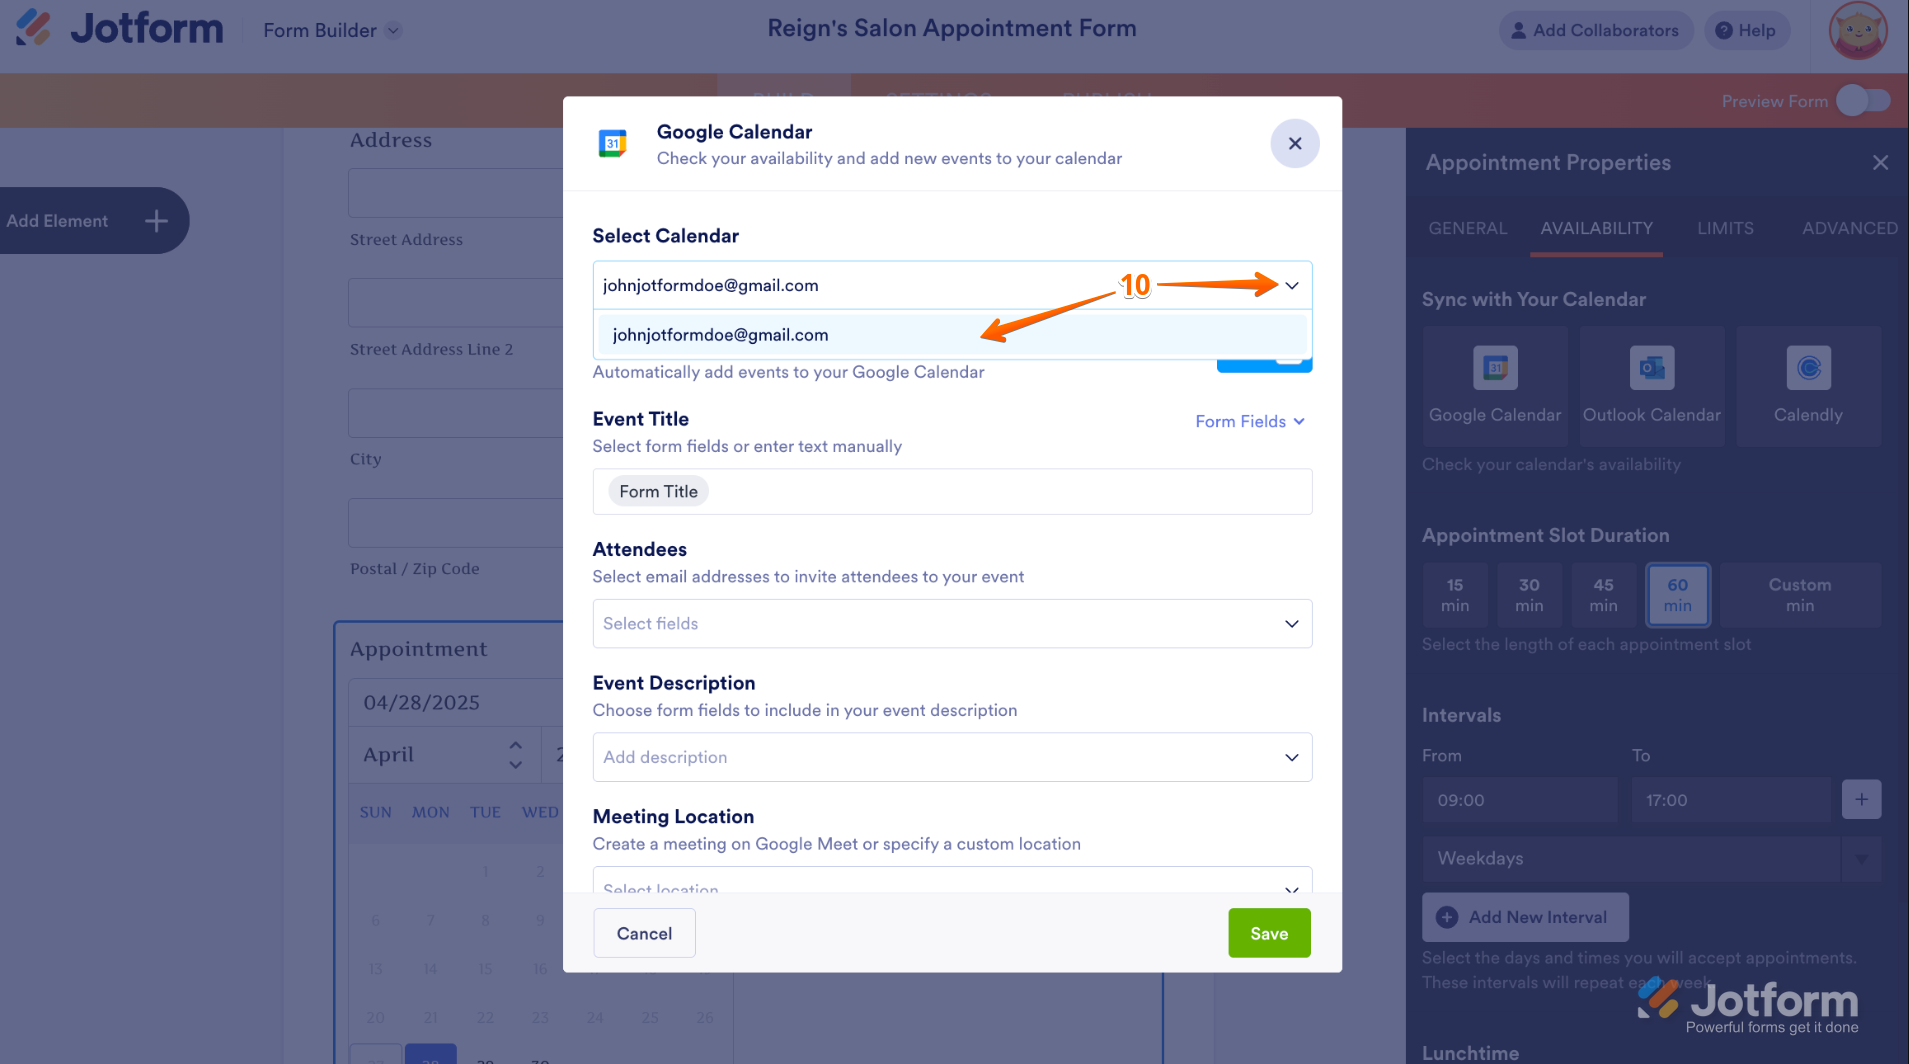
- Then set the Event Title, add the Attendees, write the Event Description, and enter the Meeting Location. Once you’re done, click on Save.

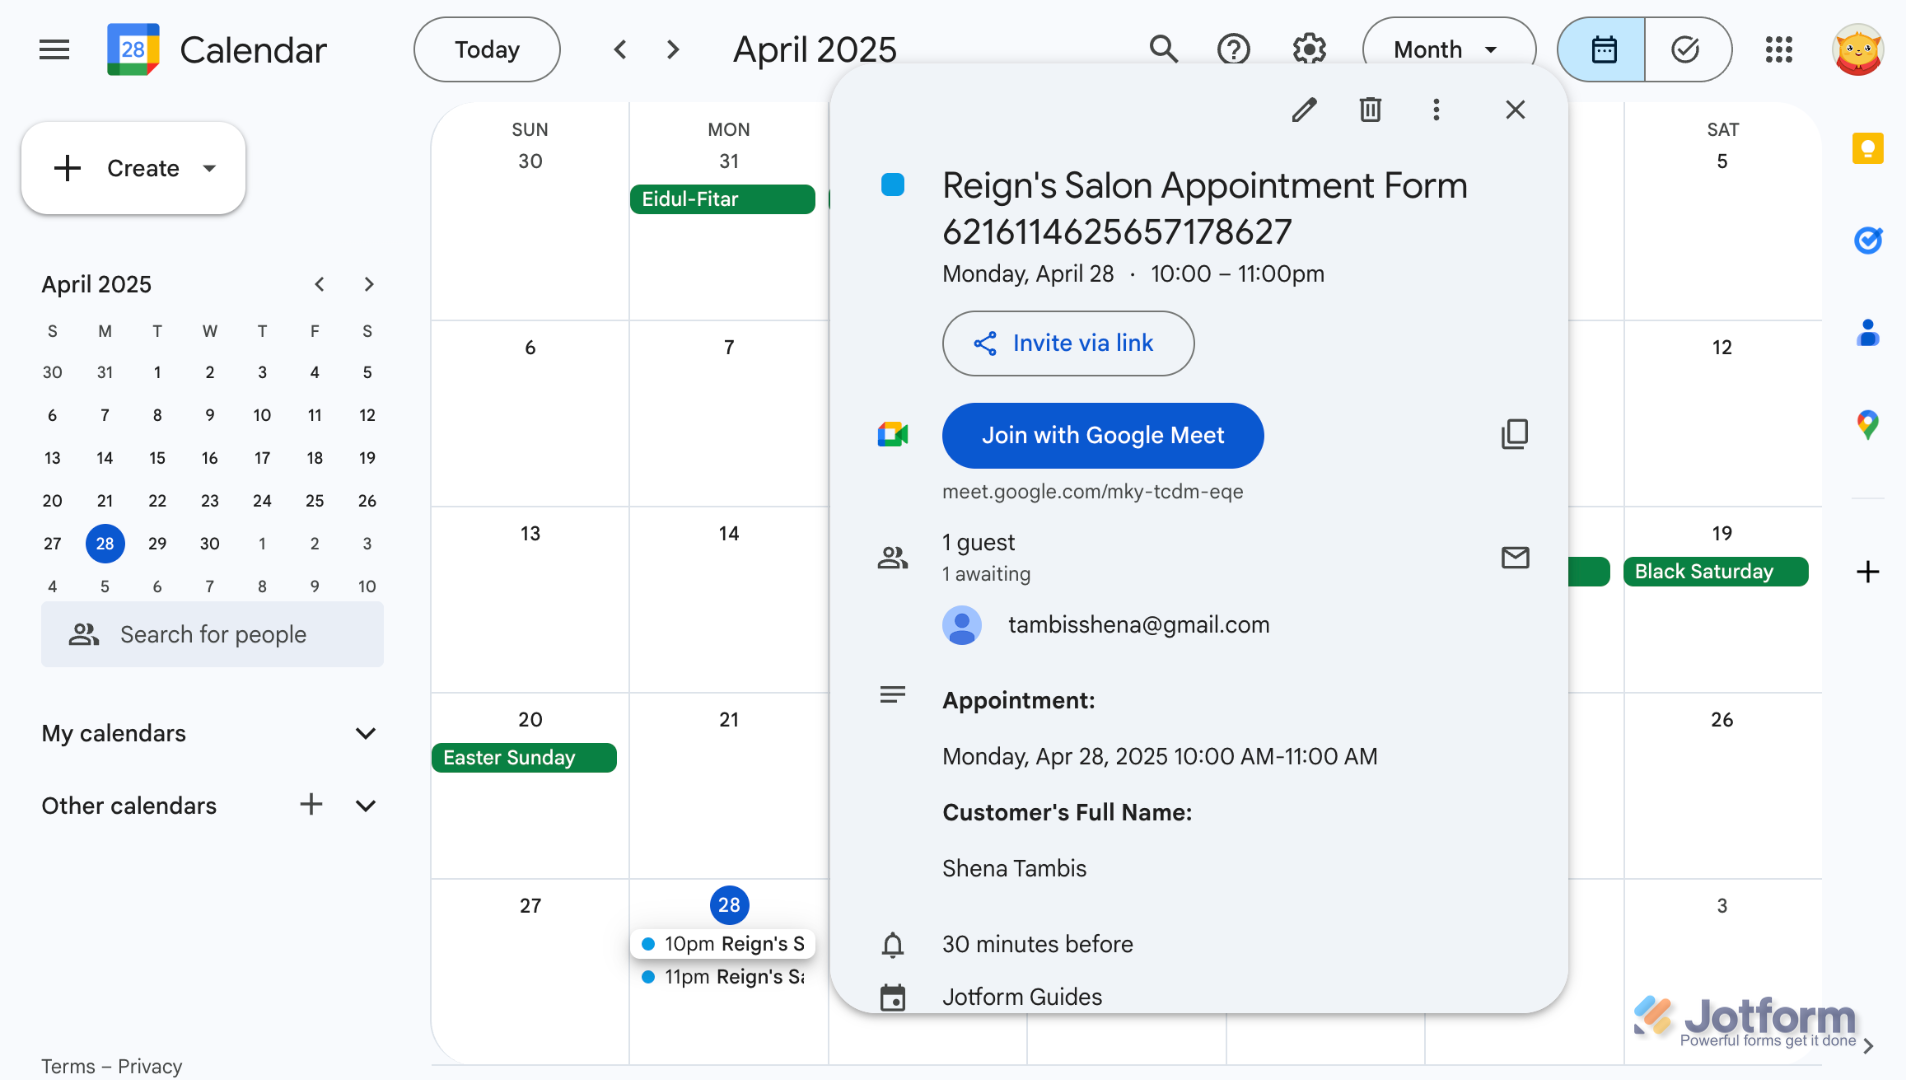
That’s it. Your form is now connected to Google Calendar, and an event will be created when someone submits it. Take a look at the screenshot below to see an example:


Send Comment:
40 Comments:
11 days ago
How come there is no longer a location match field? The only options I see on the integration is start time and duration.
21 days ago
Intento integrar el calendario de Google para utilizarlo en un formulario y no lo lora autenticar, figura cargando "autenticando" y nunca termina, por favor solicito asistencia
43 days ago
Hello and good day,
I am trying to integrate my Google Calendar with the Jotform virtual registration form I'm creating. However, your instructions on https://www.jotform.com/help/558-how-to-use-google-calendar-create-events-with-your-form/ do not map to the current Jotform UI.
Can you please help?
Thank you,
Bob Thomas
141 days ago
Hey,
I'm using jotform, as a waitlist for a virtual webinar, and would like when a people submits their participation, to automatically receive an invite to the already created google meet event/webinar.
154 days ago
Hey, my google calendar integration no longer looks like this. I prefer the old way (as demonstrated in this guide) .
More than a year ago
Can you give us any more details about the reason why Jotforms can't sync both ways? Is it political, financial?
I'm pretty sure it's not technical as there are many other apps that integrate to allow two-way communication between them and Google Calendar (Calendly, SimplyBook.me, etc.).
I love everything else about Jotforms, but I would love to bring my booking system into it, but the workarounds that are being suggested are just not practical.
Many thanks in advance.
More than a year ago
Hi
While testing the form, Jotform offered me Timeslots where already bookings have been made; not available slots…
I integrated Jotform with google calendar. What else can I do to be sure it offers only free slots?
How can I install jotform with direct bookings so I don’t have to confirm ?
More than a year ago
Good morning
I have a small problem to solve with jotform and the google calendar.
- i create tours with different date and time each time
- the duration of the tour is also variable
to import the tour itself in the google calendar the fields must be DataPicker or Appointement.
- it would be interesting to be able to choose the departure time with a datapicker, indicate the duration and get the result in a second datapicker already complicated with (departure time + tour duration)
- alternatively use an appointement and enter the desired time and duration
at the moment I am using two datapicker fields to be filled in manually and a duration field also to be filled in manually, as each tour has at least 1 outward and 1 return I have to enter the tour date 4 times which I personally find impractical.
Are there any solutions or widgets that can make life easier?
More than a year ago
Bye,
I have two google calendars, the first with requests the second with confirmed services.
I would like to be able to keep track of the two calendars and thus recognise what is actually confirmed.
for the first part I have no problems and everything works fine... when I make the link to the confirmed calendar in the menu I don't see the choice
More than a year ago
How can I add a widget to a form response so a meeting can be added to a meeting attendee's calendar for Google or Apple?
More than a year ago
It would be nice if the Jotform calendar could avoid double bookings, and if we could connect several appointments on a single google calendar.
More than a year ago
Realice los pasos para integrar los eventos del formulario al Google calendar y no me aparecen los cumpleaños al consultar el calendario..
More than a year ago
How do I change the Google calendar that I already authenticated? Or how can I add a new one?
More than a year ago
Unfortunately it allows double booking and cannot see the events that are already scheduled in google calendar.
More than a year ago
Can I make text bold in the description of the meeting?
For example,
Bold {meetingdate}
More than a year ago
How can I do if I want to add a google meet link automatically in the google calendar? And can I send an autoresponder email with the google meet link to the person who fills my form?
More than a year ago
There does not seem to be anything in jotform that will help with booking appointments that won't overlap the appointments you have on a daily basis as well as options to display locations you will be at, is this right?
More than a year ago
Hi, I am trying to add events to the google calendar using a jotform but when prompted to choose the calendar I would like to add it to it will not allow me to choose the filler's email from form fields. Can anyone advise on this?
More than a year ago
How do I configure the Google calendar integration to accept the date I select using the "Date Reservation Widget" as the "Start time *". It seems that this field can only be mapped to a basic date picker or an appointment slot. Is that correct? Ideally I would like to use Jotform to book 3 day long events but eliminate days that are already booked based on my Google calendar. Is this possible?
More than a year ago
hi, when using the integration to google calendar-after sending the form and creating a Google Calendar event. the person who filled out the form gets an email from google about the new event. is it possible to block this email from gettig sent/change the content?
More than a year ago
Jotform Events / Appointments show up in google calendar before I approve the appointment - is there a way to have it show after approval flow?
More than a year ago
I created a form using my account and wanted to update a client's google calendar, is that possible?
I attempted to link it but only allows me to access my email and not the clients.
More than a year ago
Hi - just a few questions about the calendar sync with Jot Form.
- Can we set a period ourself (for example our bookings take 3-5 days)
- Can we make sure it doesn't overlap other appointments
- Can Users amend their
More than a year ago
Is it possible to build in a downloadable calendar element when people sign up for an event via jotform?
More than a year ago
Hi,
I wonder if the appointment is set by customer, can customer receive an event on their own calendar ?
It means I don't need to send a meeting invitation manually.