Steps to get a QR code for a Wix website
- Open the Wix editor
- Copy your website URL
- Use a QR code generator
- Customize your QR code (optional)
- Download the QR code
When you want to share something with a friend — like a website, address, or phone number — they’ll likely ask you just to text them. People want things to be easy. The same goes for business. If you want people to visit your website, you need to make it as easy as possible.
That’s where QR codes come in. QR codes make it super easy for people to visit your website and for you to share it. Worried that making a QR code requires you to be super tech-savvy? There’s good news: It’s actually pretty easy.
If your website is built using Wix, here’s how you can easily create and add QR codes to it.
Pro Tip
Make your Wix website more interactive with QR codes. Create custom solutions effortlessly using the QR Code Generator.
How to generate a QR code for your Wix website
In just a few simple steps, Wix users can generate a custom QR code that directs people to their site, making it easier to connect with customers. Follow these straightforward step-by-step instructions to generate a code for your Wix website:
Step 1: Open the Wix editor
- Log in to your Wix account and open the website you want to generate a QR code for.
- In the Wix dashboard, select Edit Site to open the editor.
Step 2: Copy your website URL
- Once you’re in the editor, locate your website’s URL. You can find this at the top of the site editor.
- Copy the URL.
Step 3: Use a QR code generator
Wix currently doesn’t offer a built-in QR code generator, but there are plenty of reliable, free options available online. Here’s how to do it:
- Open a QR code generator of your choice. You can use the Wix QR code generator site or another option like QR Code Generator or QRStuff.
- Paste your Wix site’s URL into the field provided on the QR code generator’s website.
Step 4: Customize your QR code (optional)
- Most QR code generators offer customization options that allow you to change colors and frame style. You can even add a logo in the center of the code.
- Adjust these settings as desired to match your brand’s style.
Step 5: Download the QR code
- Once you’re satisfied with your QR code design, click Download to save the QR code image file.
- Save the file somewhere easily accessible so you can use it in your marketing materials.
How to integrate QR codes into your Wix site design
QR codes can do more than direct visitors to your homepage — you can embed them into your Wix site to take visitors to forms, online stores, registrations, promotions, and more. With Jotform, it’s easy to create QR codes that engage users through dynamic forms and apps. How might this enhance one of your current processes?
Imagine you’re hosting a community event and want to streamline the registration process. Let’s briefly look at how you could combine Jotform with QR codes to make registration more accessible.
- Use Jotform to create an event registration form. (See the instructions below).
- Generate a QR code and place it on the event’s promotional page, on printed materials, or in an email newsletter.
- When attendees scan the code, they’re taken directly to the registration form, making it easy for them to RSVP on the spot.
- Finally, track responses in real time with Jotform Tables and analyze the data after the event with Jotform Report Builder for insights on turnout and attendee engagement.
It’s clear how QR codes might fit into your marketing workflow. With that in mind, here’s a step-by-step guide for integrating QR codes for Jotform forms into your Wix site design.
Step 1: Sign in to Jotform or create an account
- Go to the Jotform website and sign up for free, or log in if you already have an account.
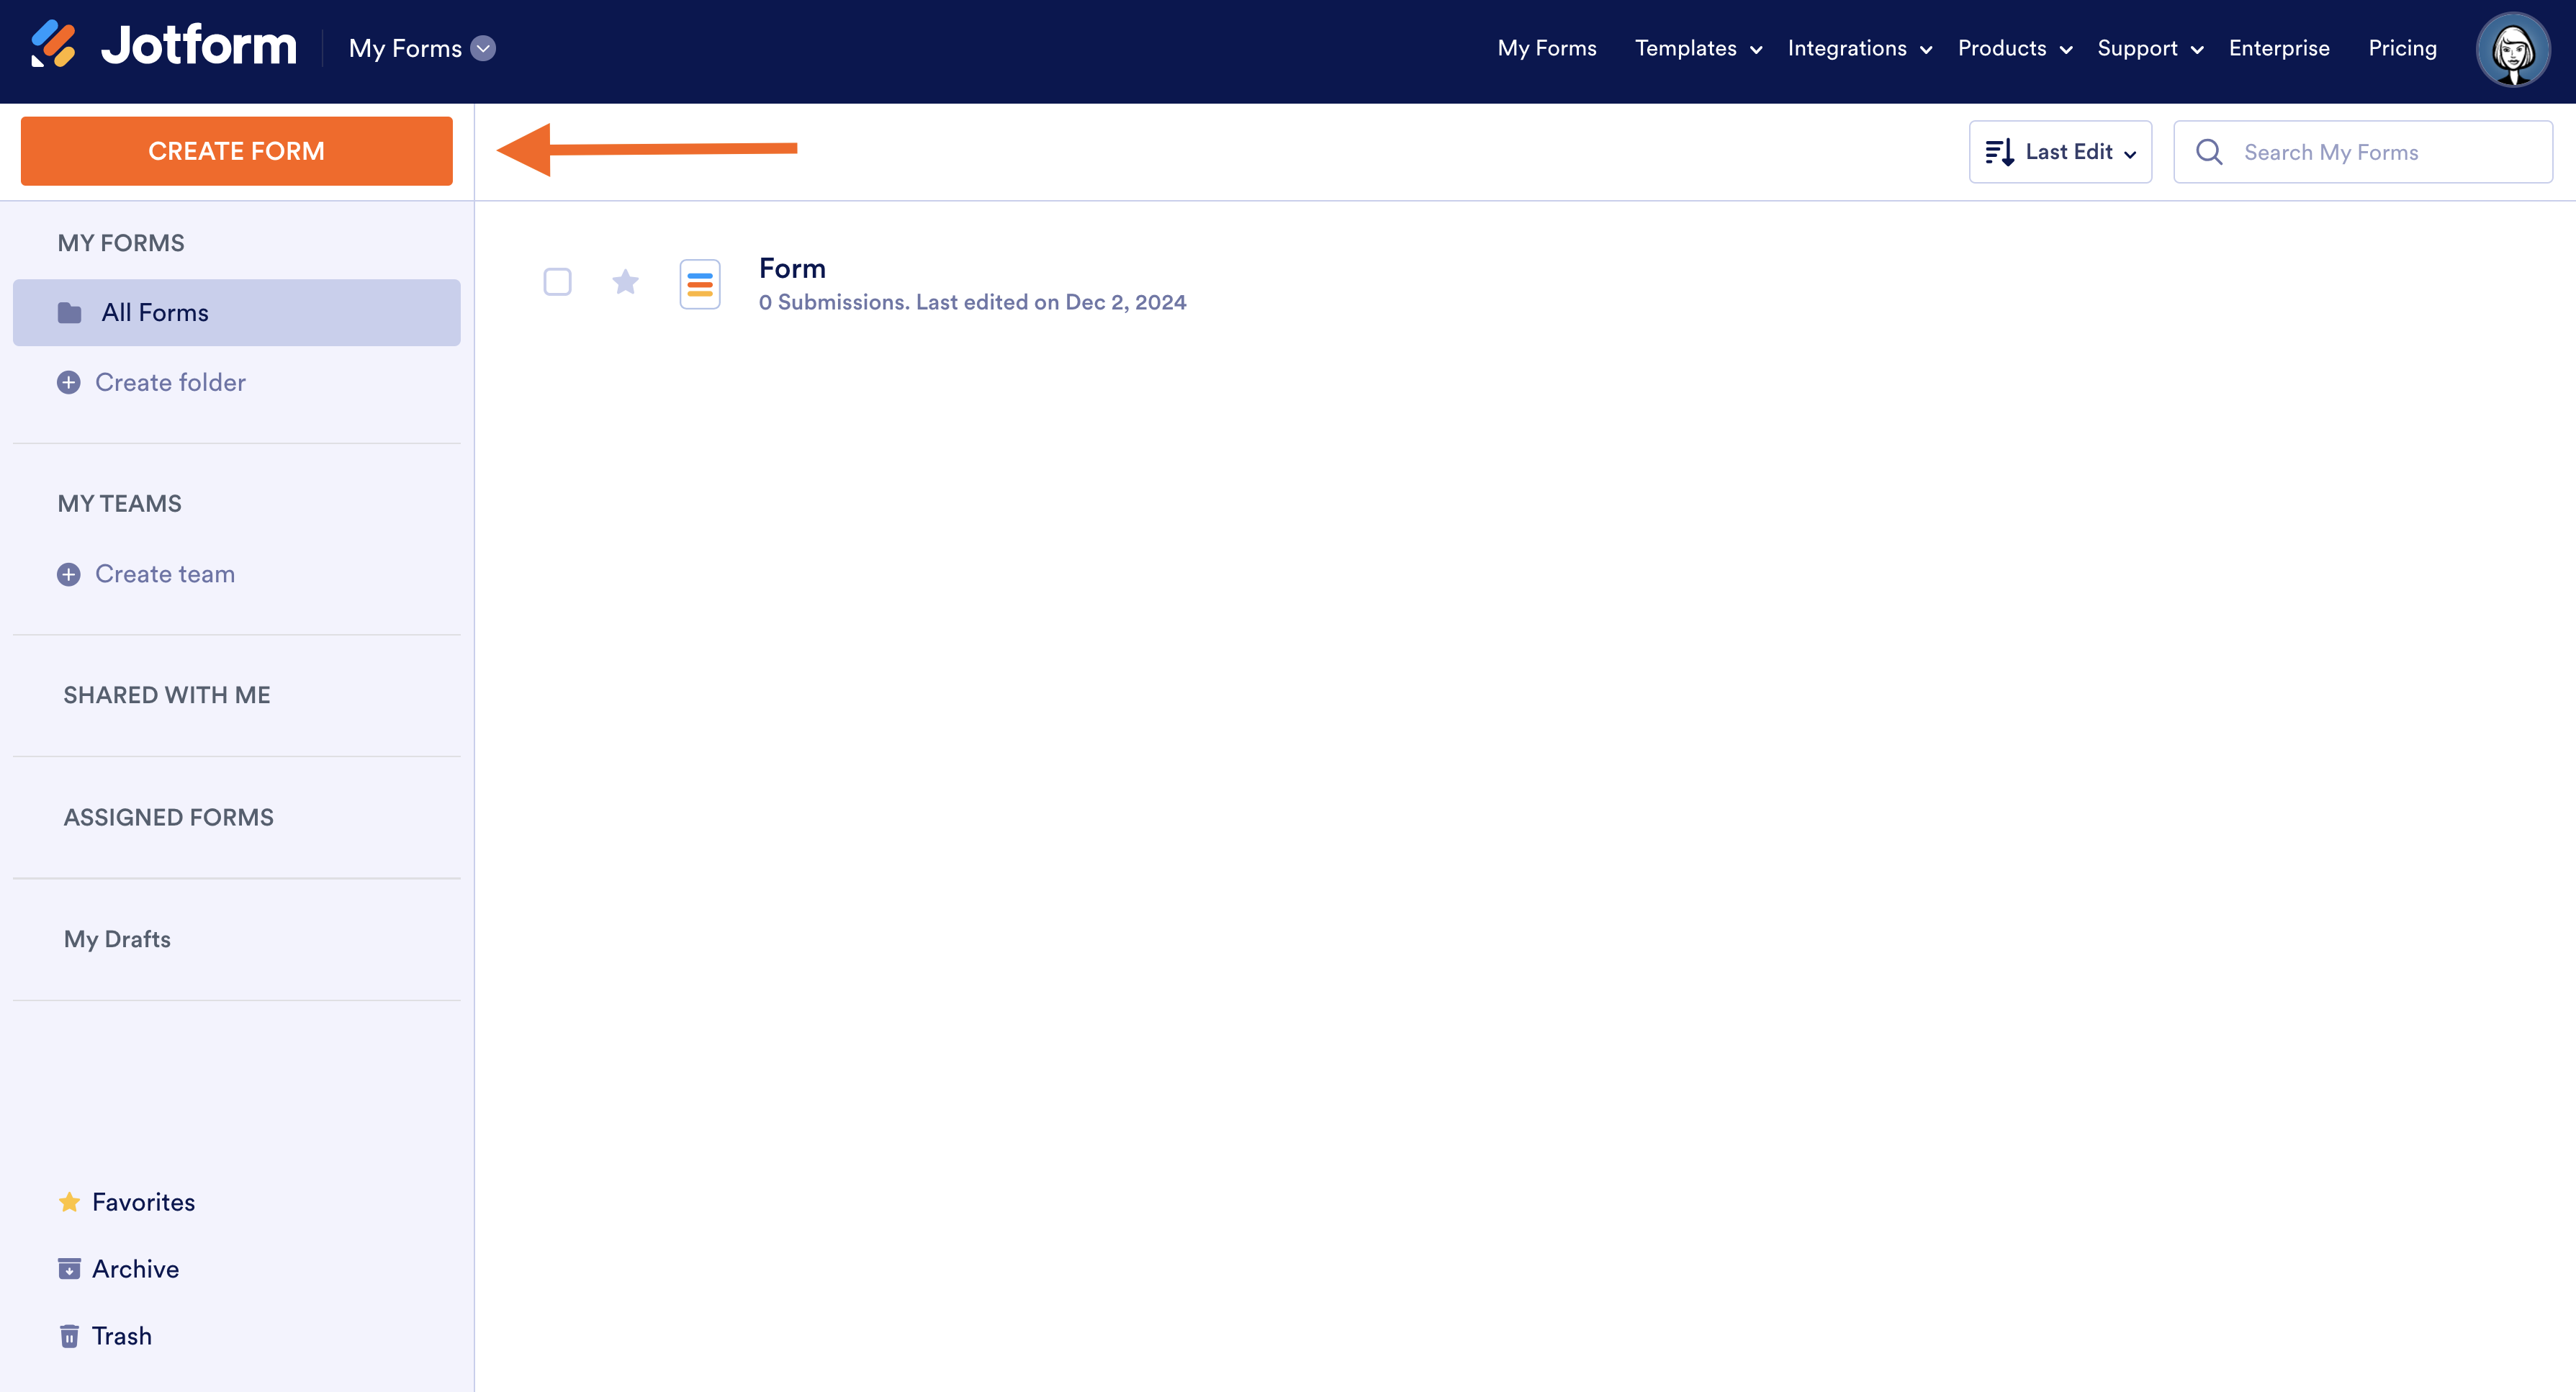
- Once you’re signed in, select Create Form to begin setting up a form that matches your purpose.
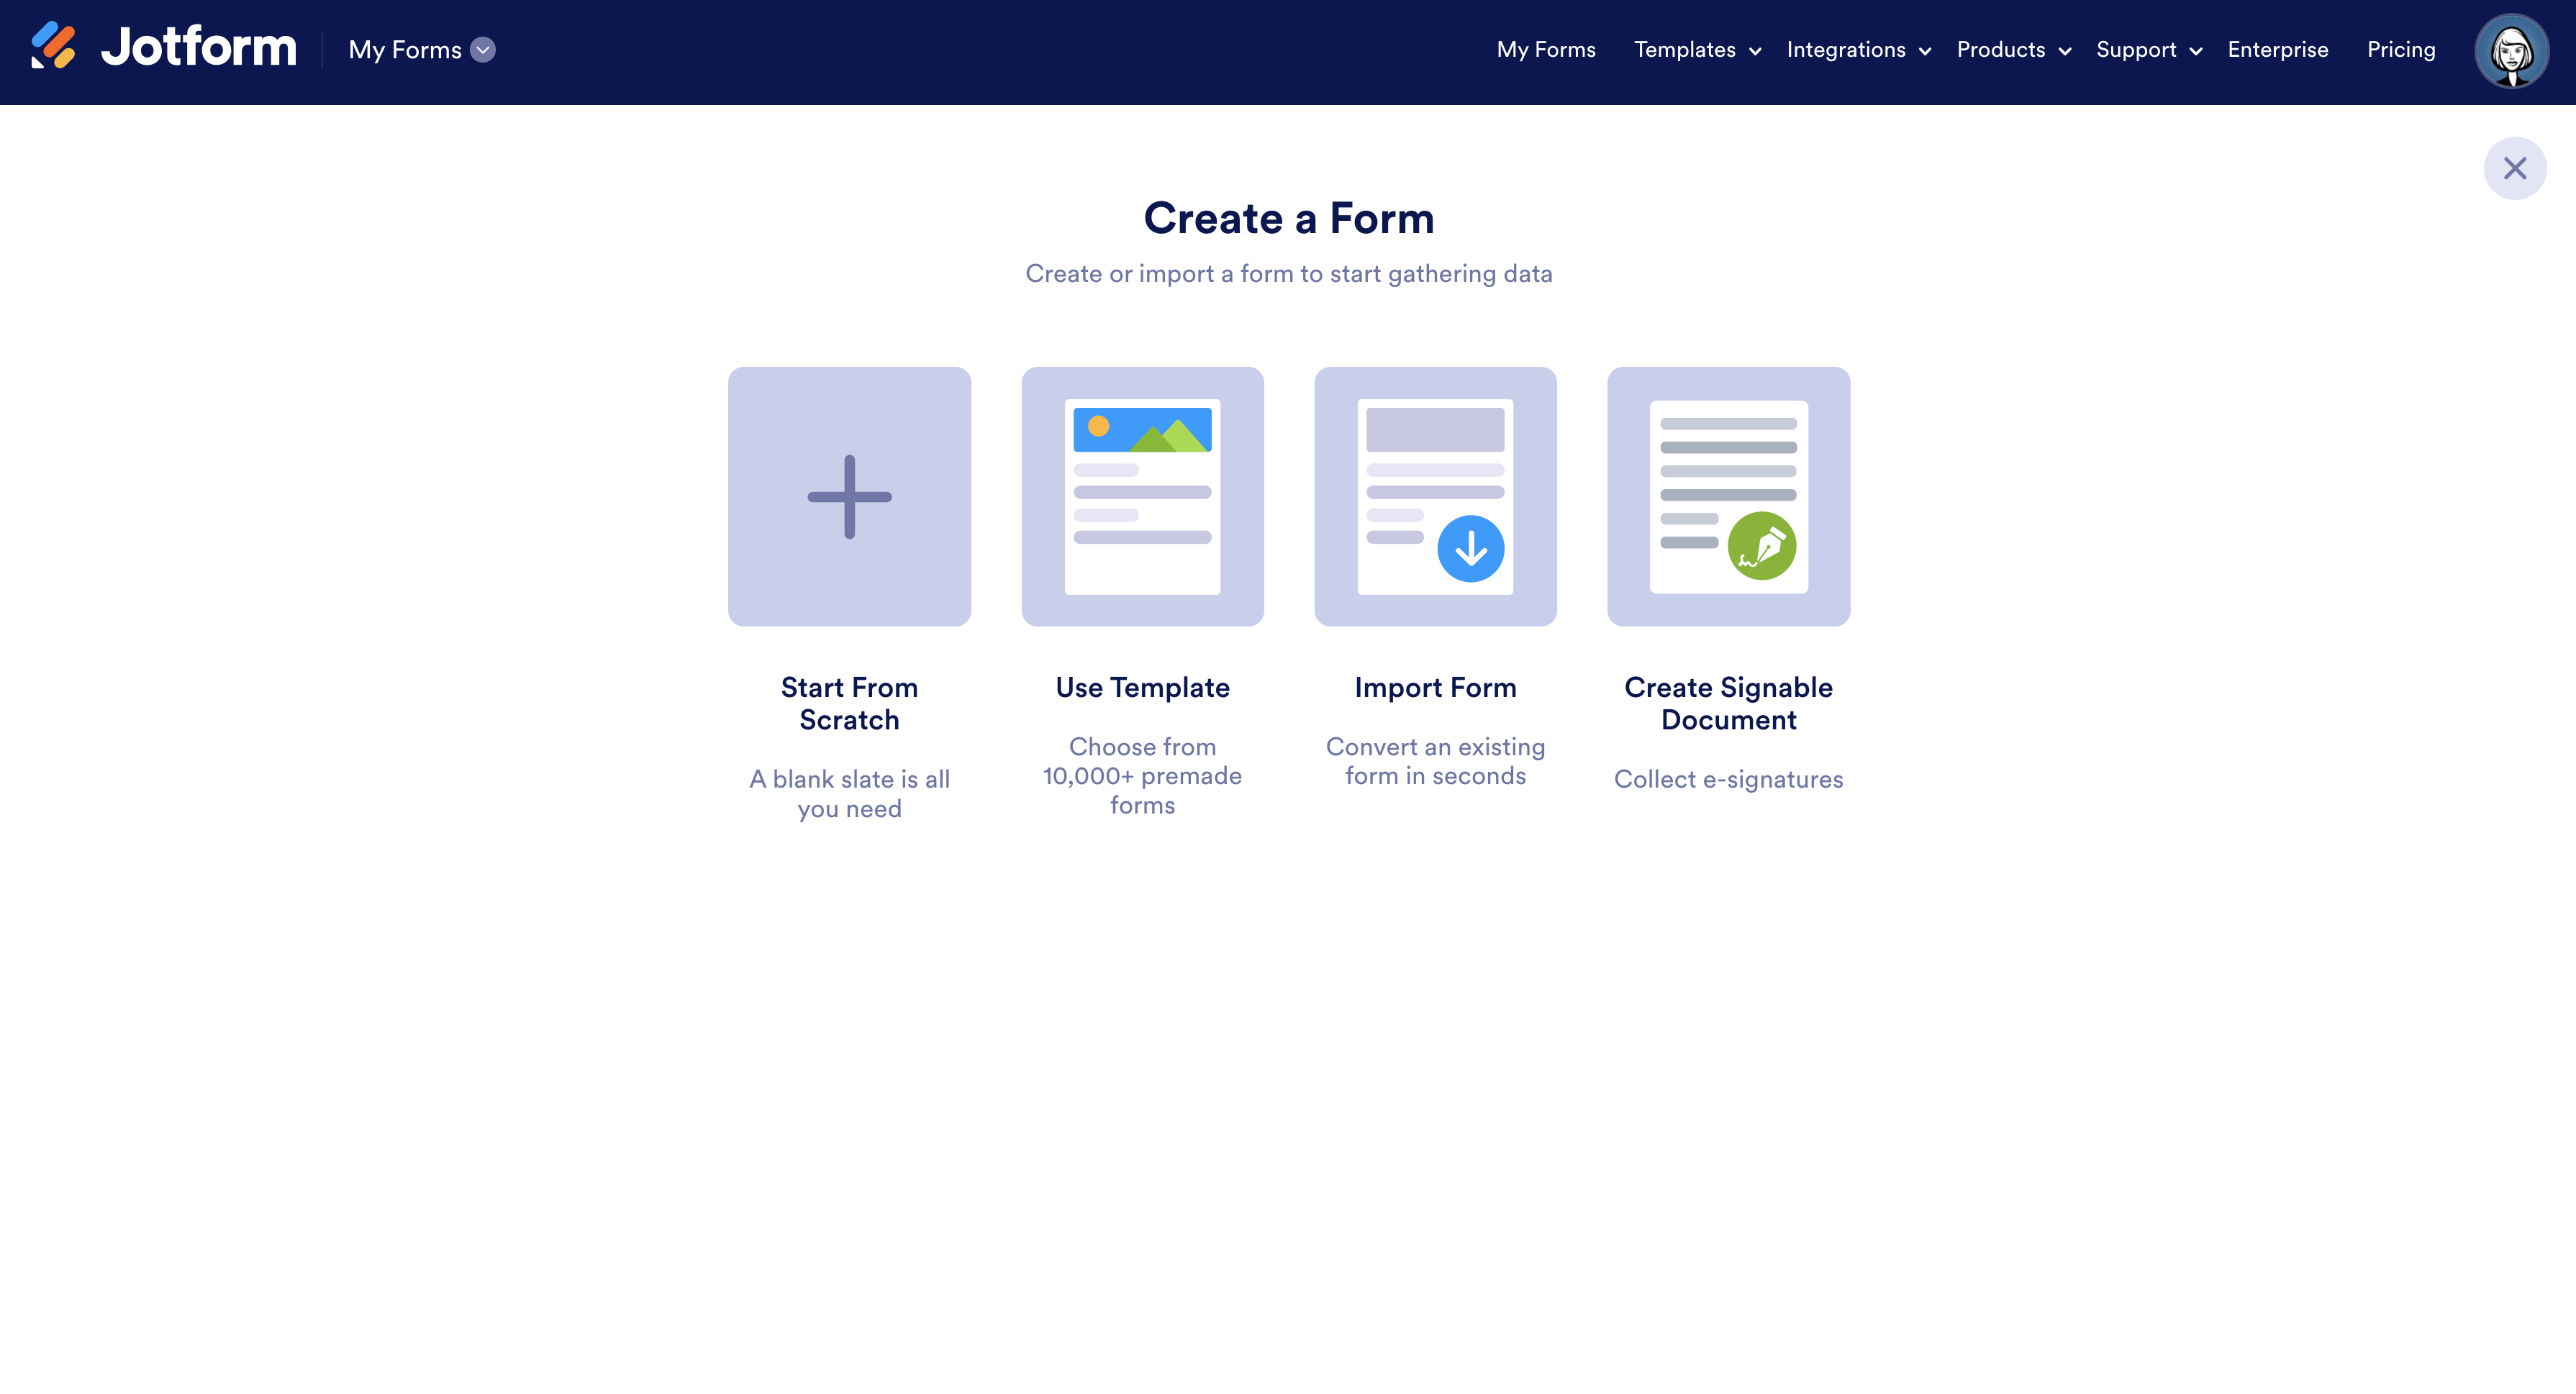
Step 2: Choose a form template or create a form from scratch
Jotform offers thousands of customizable templates for forms that can be linked to a QR code. Simply choose a template that fits your needs or create a form from scratch with Jotform’s drag-and-drop form builder.
There are a number of helpful templates, including these:
- Event registration form: Perfect for handling signups for an event right from a QR scan
- Sign in sheet form: Great for streamlining the check-in process, letting attendees scan and fill in their details at the door
- Promotional offer form: Great for limited-time deals or discounts, allowing customers to access exclusive offers with a quick scan
Step 3: Generate and download a QR code for your form
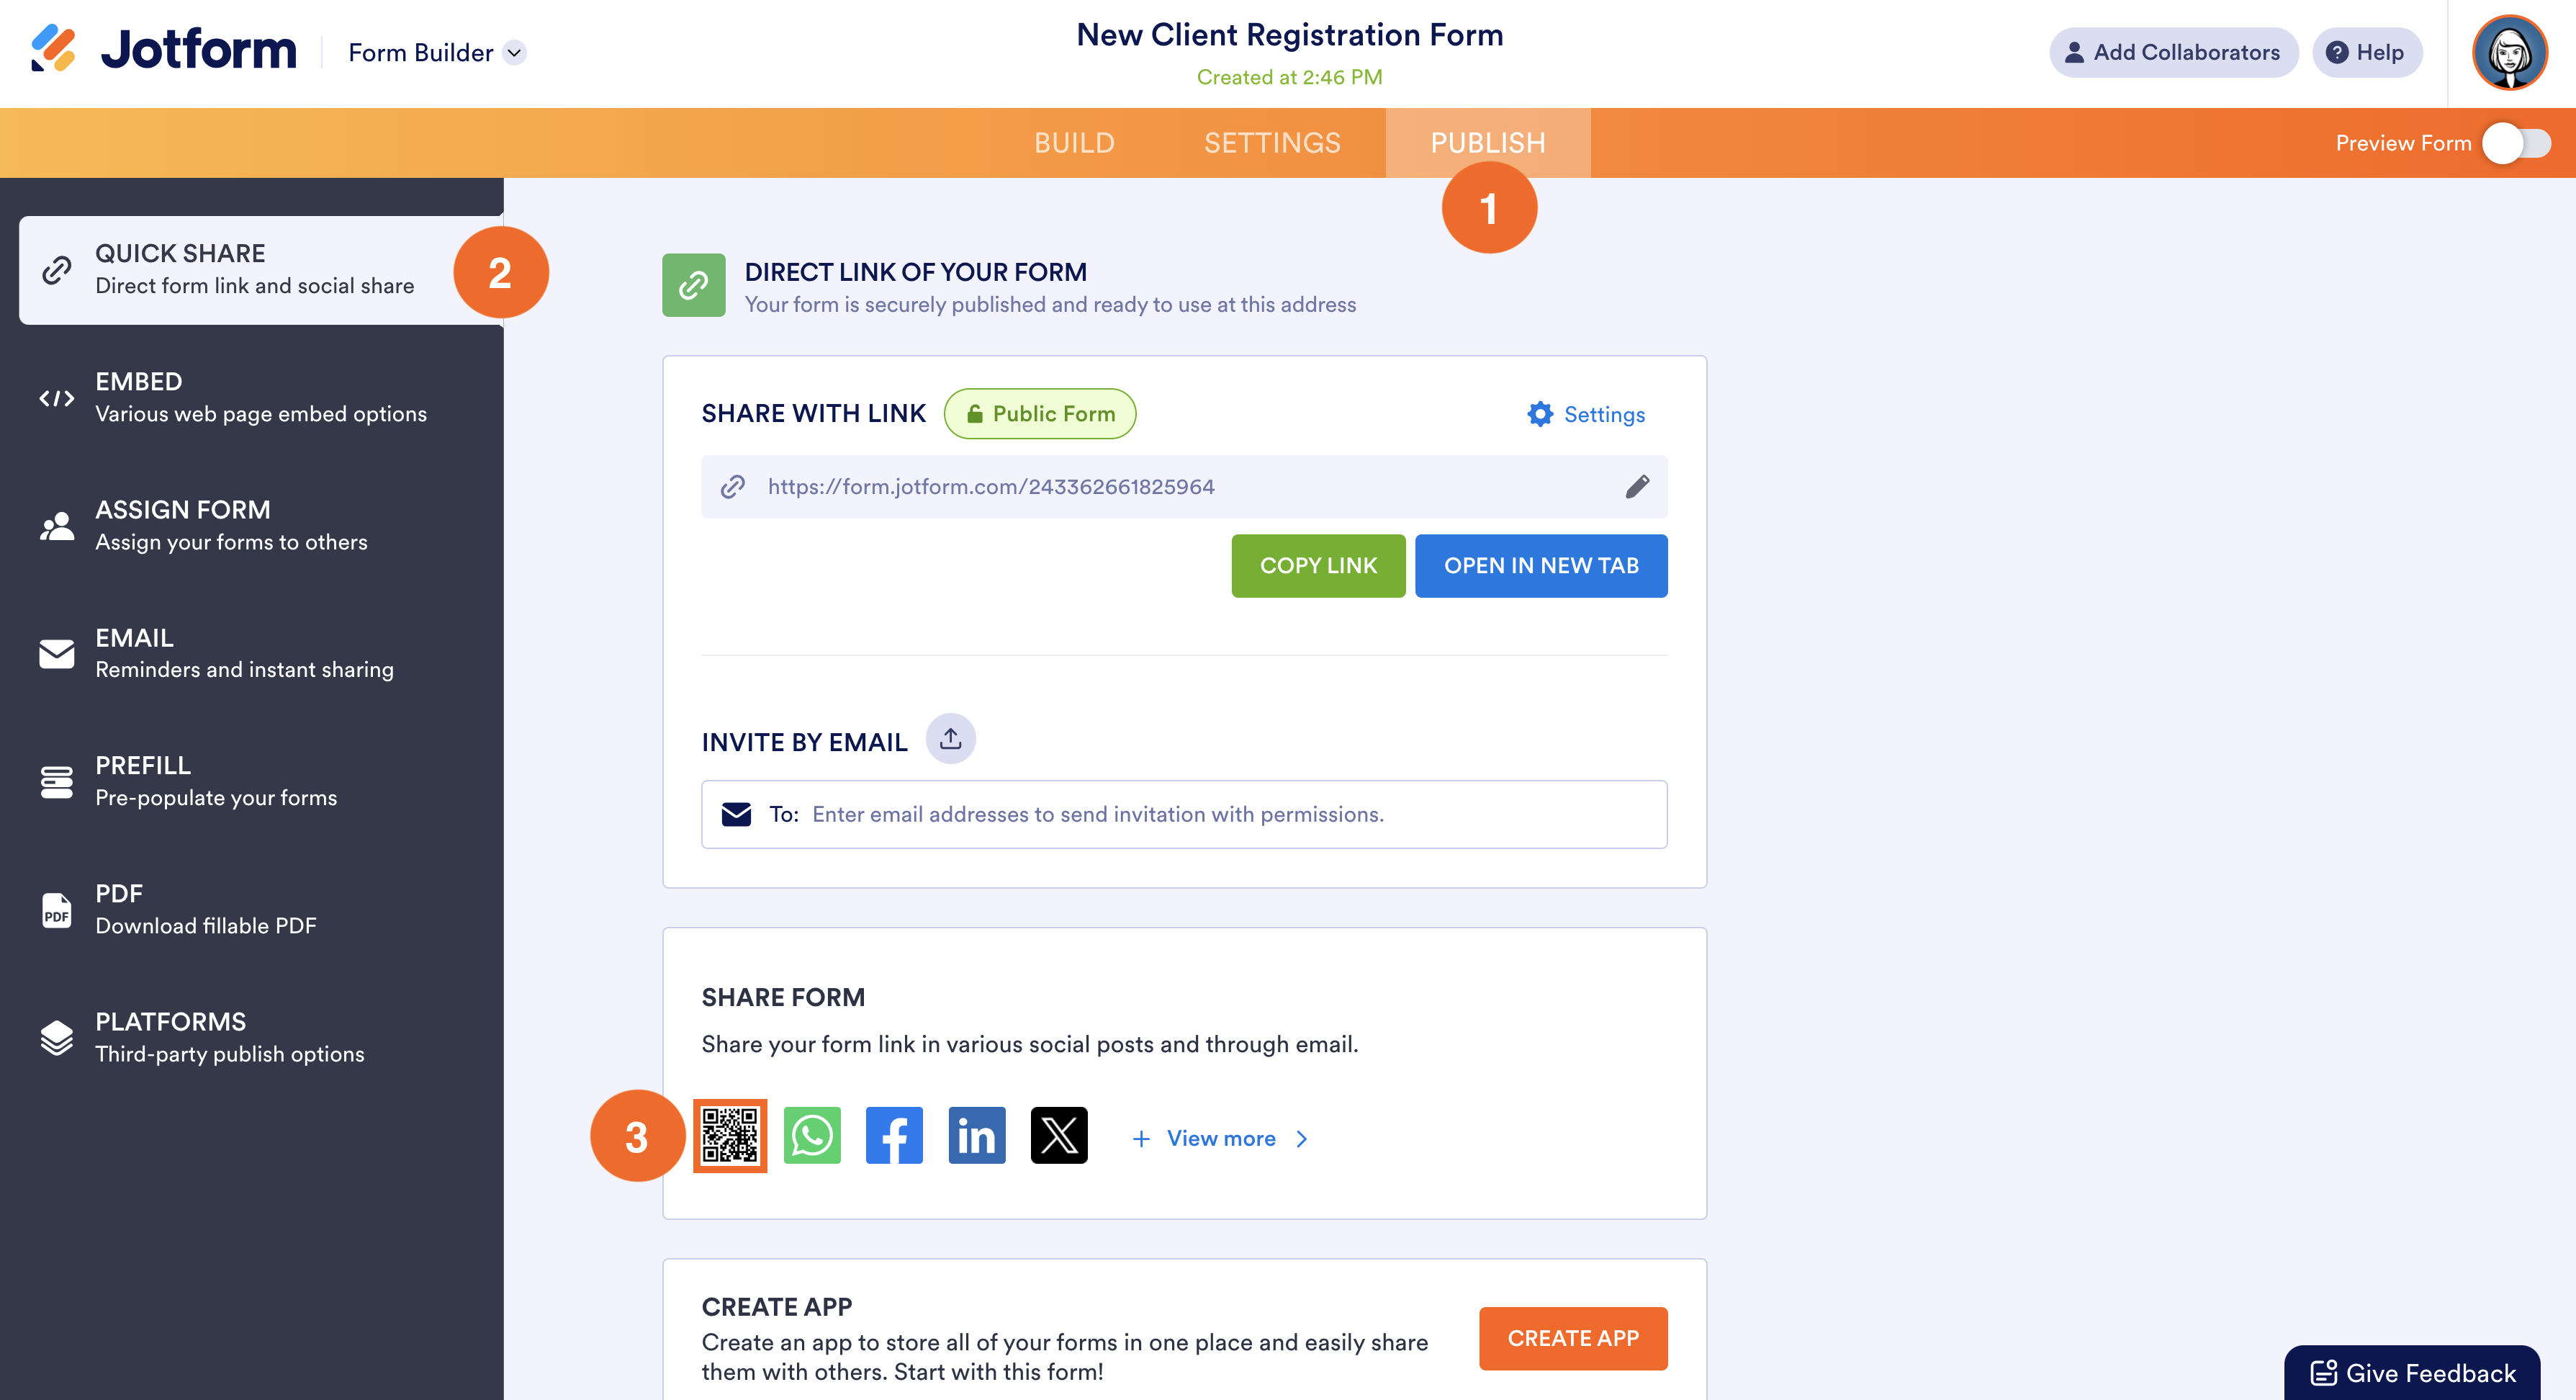
- Once you’ve built your form, go to the Publish tab in Jotform and select Quick Share.
- Under Share Form, choose the QR code icon. This will create a scannable QR code linked directly to your form.
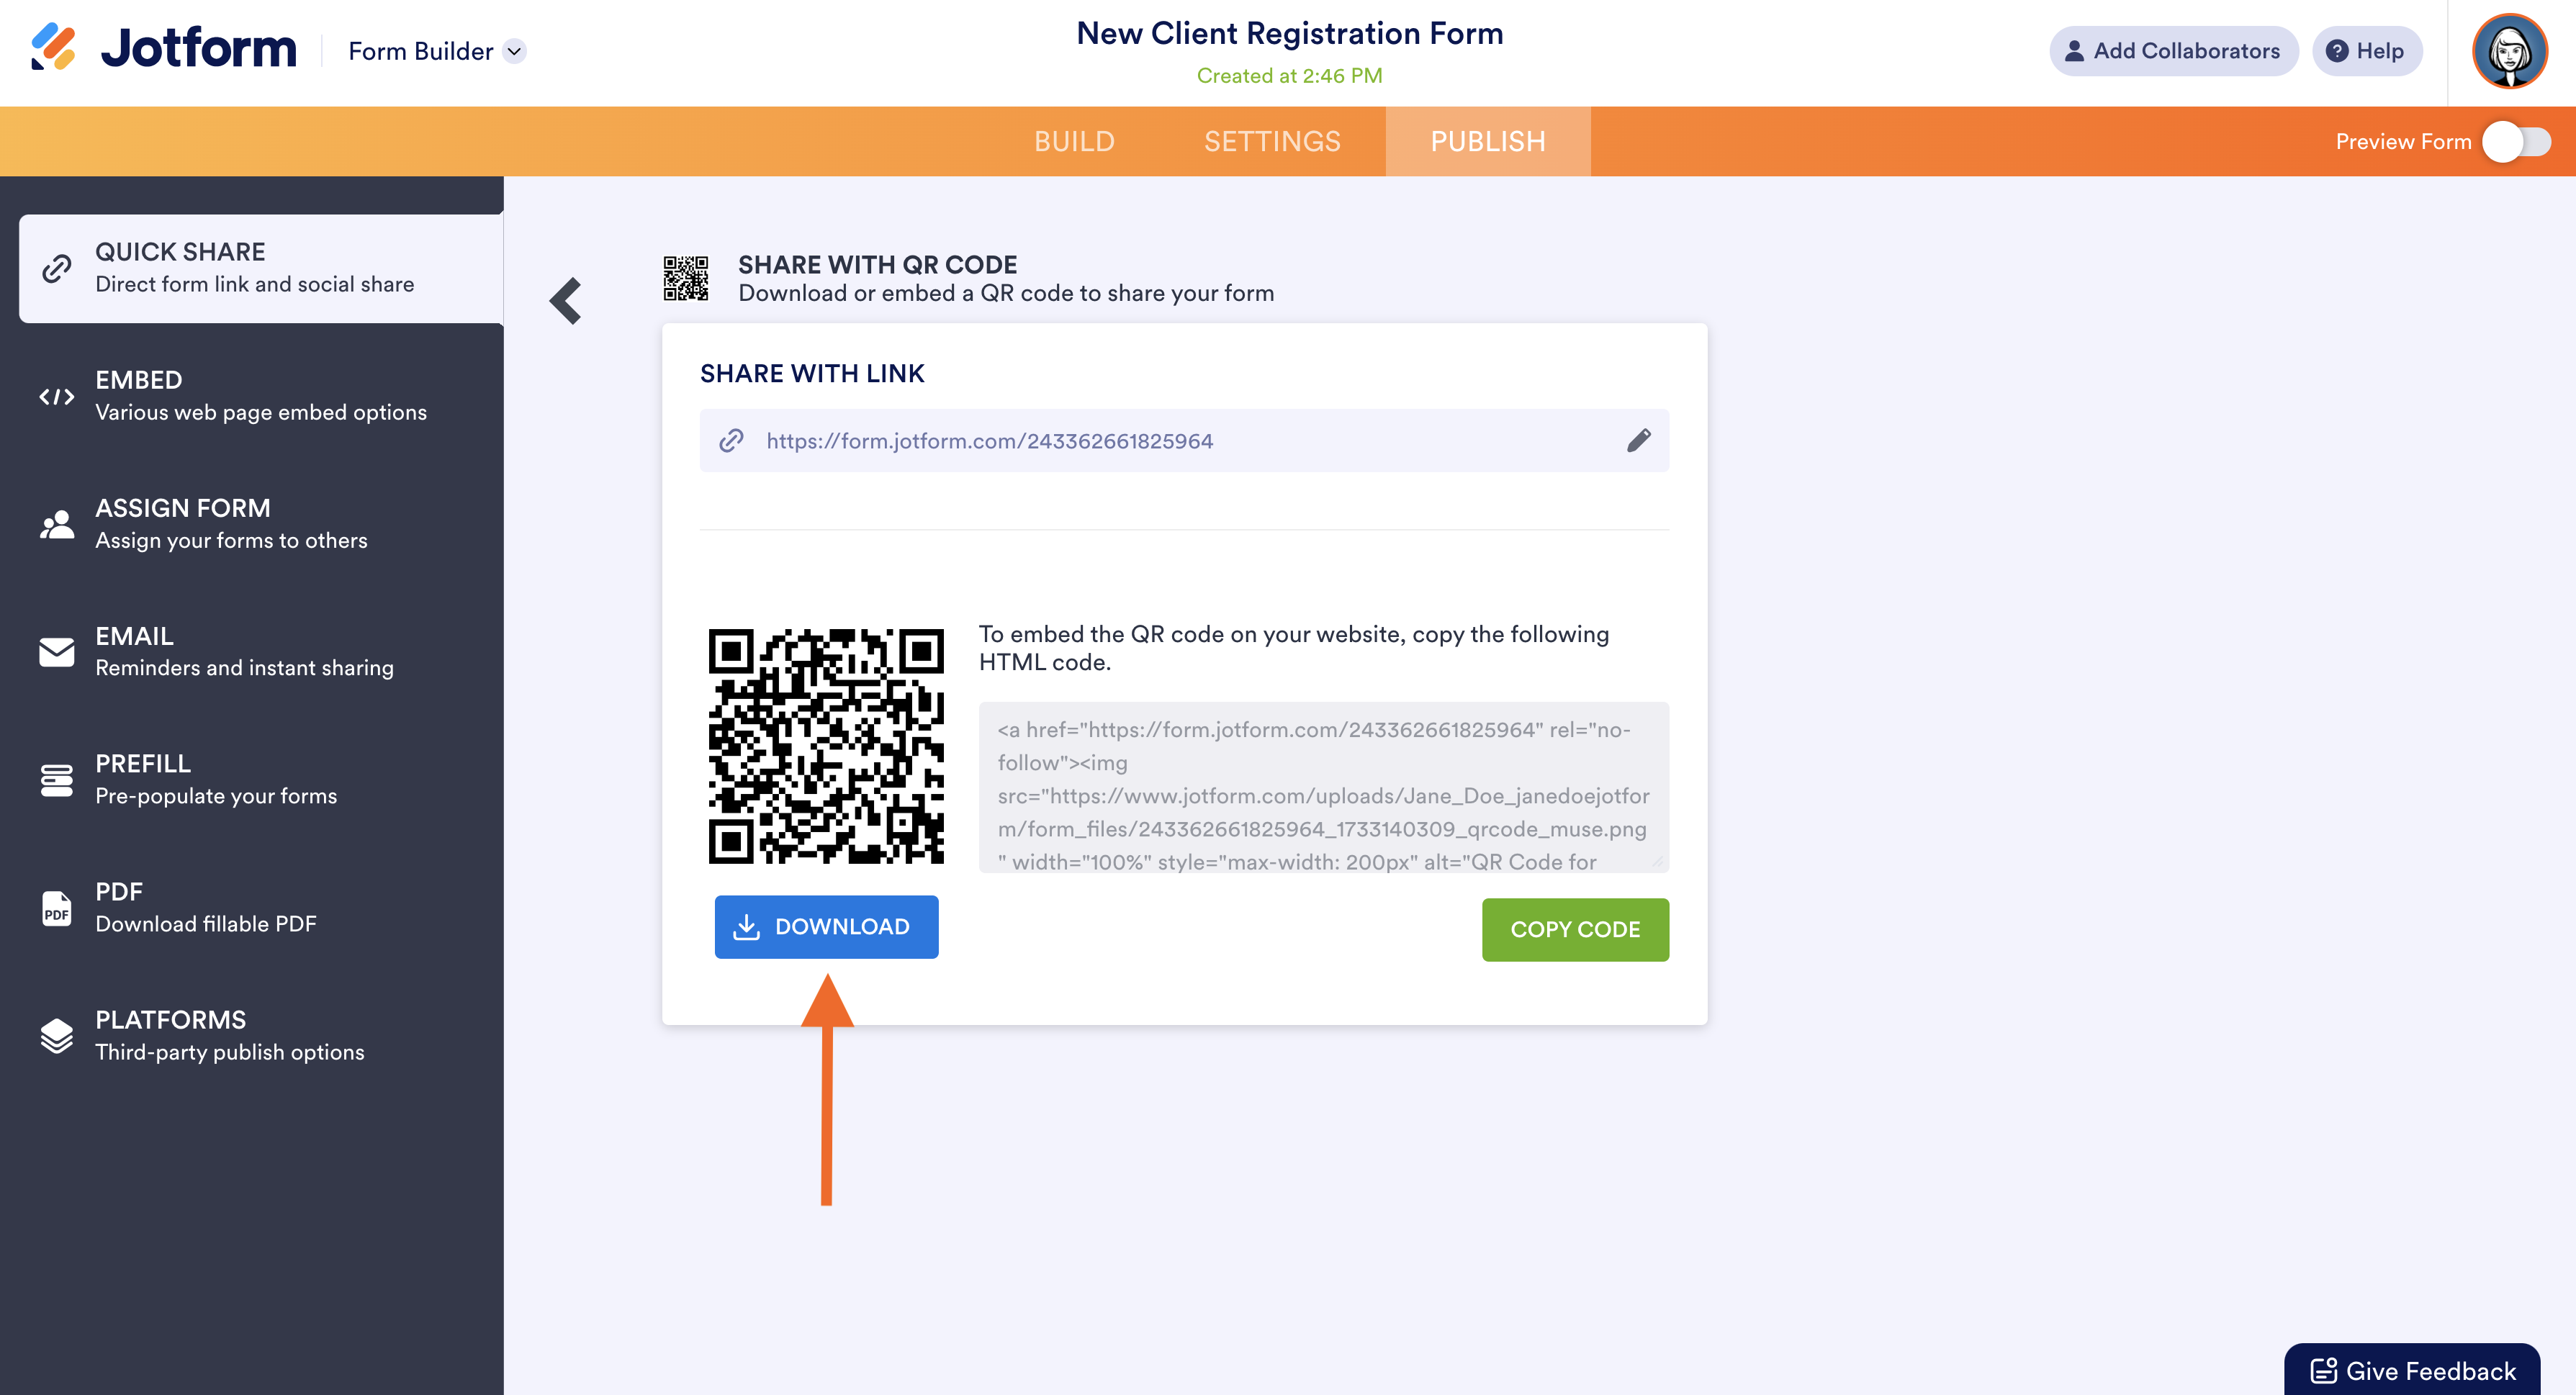
- Download the QR code image.
Step 4: Embed the QR code on your Wix website
- In your Wix editor, add the QR code image to the appropriate page by clicking Add Elements on the left, then choosing Image. Upload the QR code image.
- Place the QR code in a prominent spot so visitors can easily access it. Consider adding a short description explaining its purpose (e.g., “Scan to register”).
Step 5: Track responses with Jotform Tables
- Back in Jotform, head to the My Forms page. Click on your form to select it.
- Click the Submissions button to open Jotform Tables and see a spreadsheet view of all submissions to your form. Here, you can track responses, organize data, and manage attendee or customer information.
- Use built-in filtering, sorting, and search options to organize responses based on specific criteria, like registration dates or participant names.
- You can also export the table data or download reports for an offline overview of collected information.
Step 6: Share results with Jotform Report Builder (optional)
- For a visual overview of your form data, open Report Builder in Jotform.
- Generate a report based on form submissions to analyze engagement, trends, and responses gathered from the QR code scans.
- Share the report with your team or stakeholders by generating a shareable link or embedding it in a presentation.
FAQs on Wix website QR codes
1. Can I create a QR code directly in Wix?
Currently, Wix doesn’t offer a built-in QR code generator. However, you can easily create a QR code for your website using free QR code generators or by sharing forms with Jotform using the QR code function.
2. How do I make sure my QR code works correctly on all devices?
Test your QR code by scanning it on different devices (iOS, Android, etc.), and check that it loads the correct page. Additionally, make sure the code image itself is clear, with a high enough contrast between the code and background for easy scanning.
3. Where should I place QR codes on my Wix site?
QR codes are best placed in sections where they’ll add value. Here are a few good spots:
- Landing pages to let users access promotional offers
- Your contact page to link to a digital business card or contact form
- Product pages if you want customers to access detailed product information, reviews, or instructions via QR code
4. What types of forms work well with QR codes?
QR codes are versatile, working effectively with many types of forms, including
- Event registration and check-in forms for seamless attendee management
- Surveys and feedback forms to gather customer insights directly from printed materials or in-store posters
- Promotional offer forms to deliver discounts or access to special deals through a quick scan
5. Can I customize the appearance of my QR code?
Yes. Many QR code generators allow you to change colors, add a logo, or adjust the frame design. Make sure any customization doesn’t affect the code’s scanability; avoid colors that are too light or low in contrast.
6. How can I track the effectiveness of QR code scans?
For simple tracking, use QR codes linked to specific URLs with tracking parameters (e.g., Google Analytics UTM codes). For QR codes linked to online forms, Jotform Tables allows you to track and manage each form response.
7. Can I update the content of my QR code without reprinting it?
Some advanced QR code generators offer dynamic QR codes, which allow you to update the URL or content without changing the printed code. For example, if you need to update the destination page after a campaign ends, dynamic QR codes are a flexible option.
Why not give Jotform a try for your Wix QR code needs?
Adding QR codes to your Wix website opens up exciting ways to engage with your audience, gather insights, and streamline interactions. With Jotform, you can easily create QR codes that link to your dynamic forms and add them to your website. Plus, using Jotform’s integration with Wix, you can also embed the forms themselves directly into your site.
Give Jotform a try and see how easy it is to elevate your user experience with shareable QR codes.
Photo by Marielle Ursua on Unsplash


Send Comment: