With Jotform’s Manual Prefill, prepopulating your form fields with data no longer requires you to go outside the form builder. You no longer need to maintain a spreadsheet for multiple URLs, as the prefilled URLs are saved within your settings and can be shared again when needed. It is also secured as prefilled URLs are saved with unique tokens to display the data.
Adding Manual Prefill
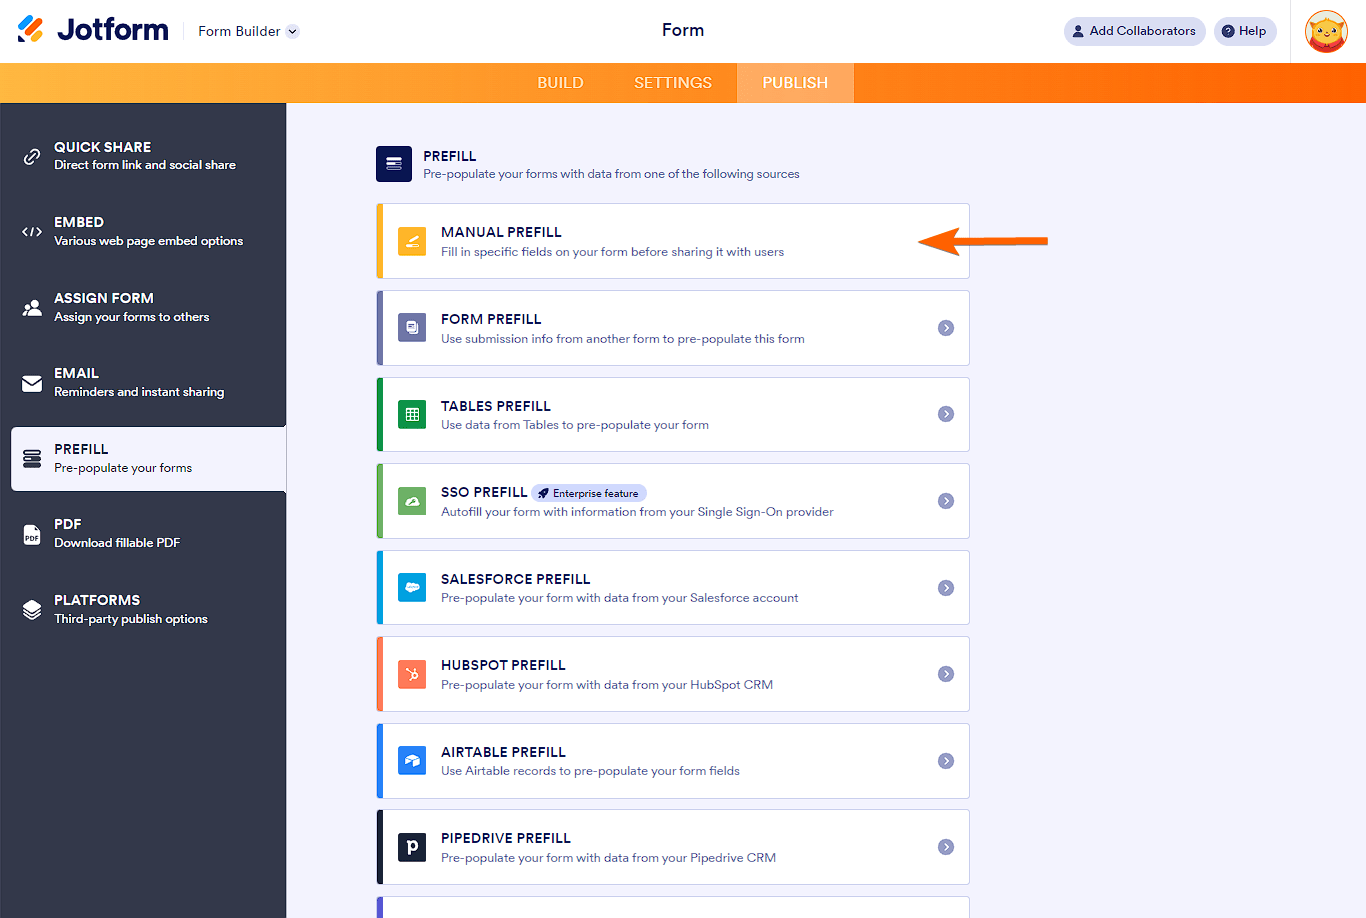
There are no prior settings for Manual Prefill, so go ahead and click the option from the list to add your Prefill items.
- In the Form Builder, go to the Publish tab.
- Select the Prefill tab from the left menu.
- Click on the Manual Prefill option.
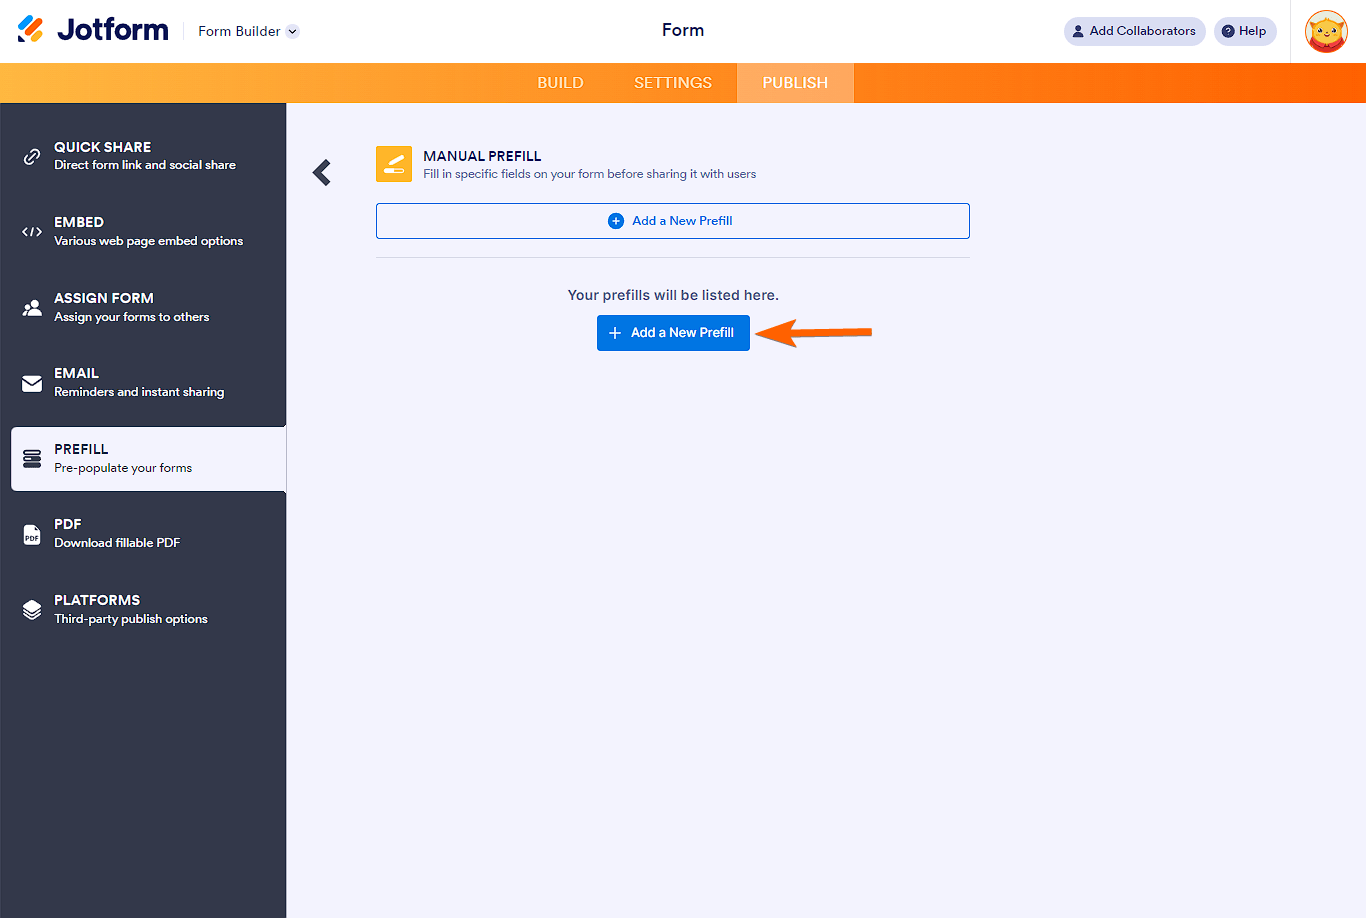
- Click on the Add a New Prefill button. This will open the form where you can enter the data for further prefilling.
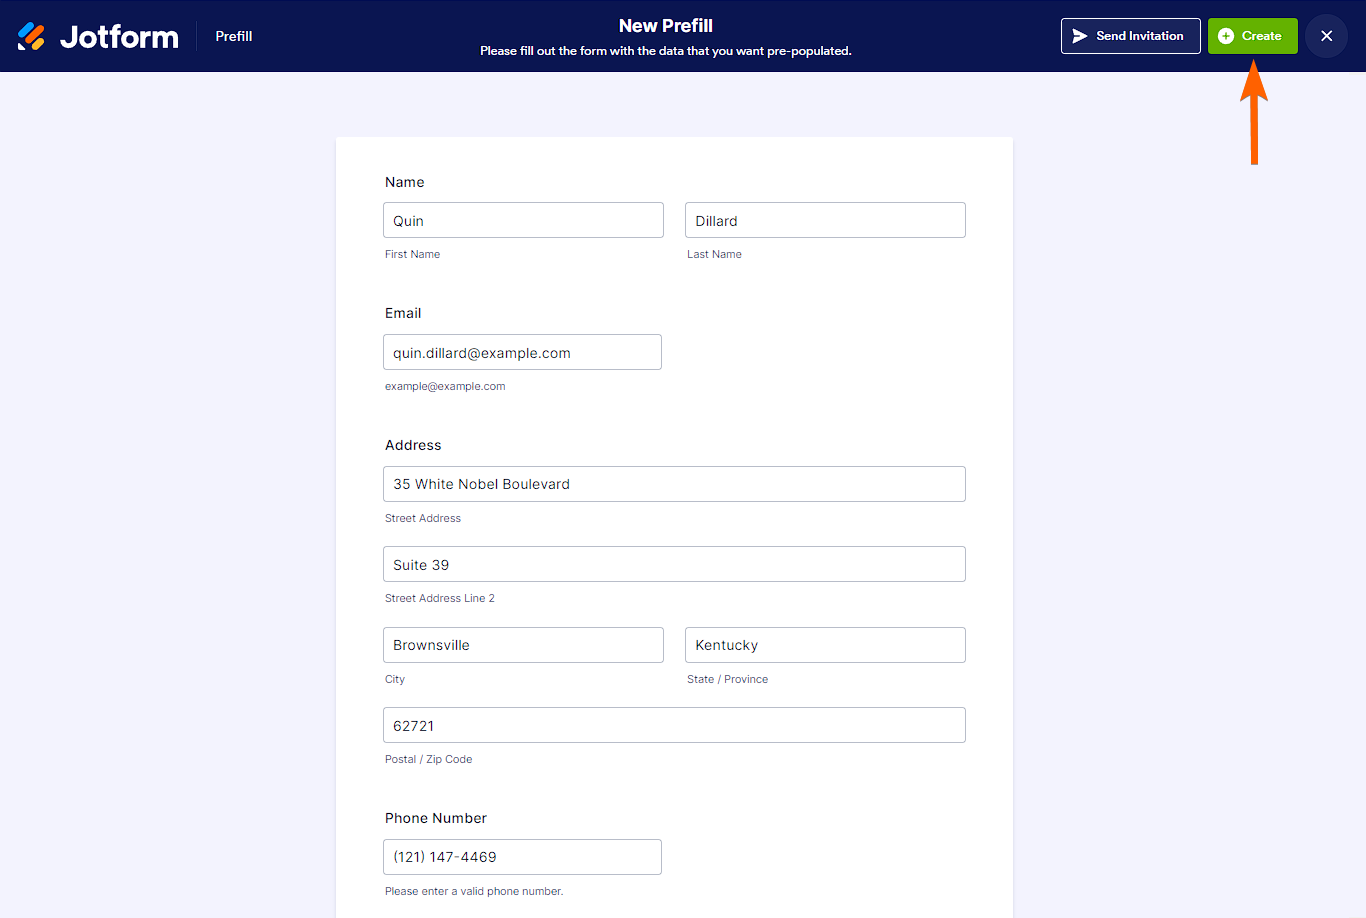
- Fill in all the fields you wish to prepopulate. Once done, click the Create button.
Pro Tip
At the top of the page, you can change the “New Prefill” name to your preferred label. We suggest to rename it with the name of the user.
Managing Multiple Manual Prefilled Items
Once the prefilled items are created, you can now go ahead and send them or copy the links.
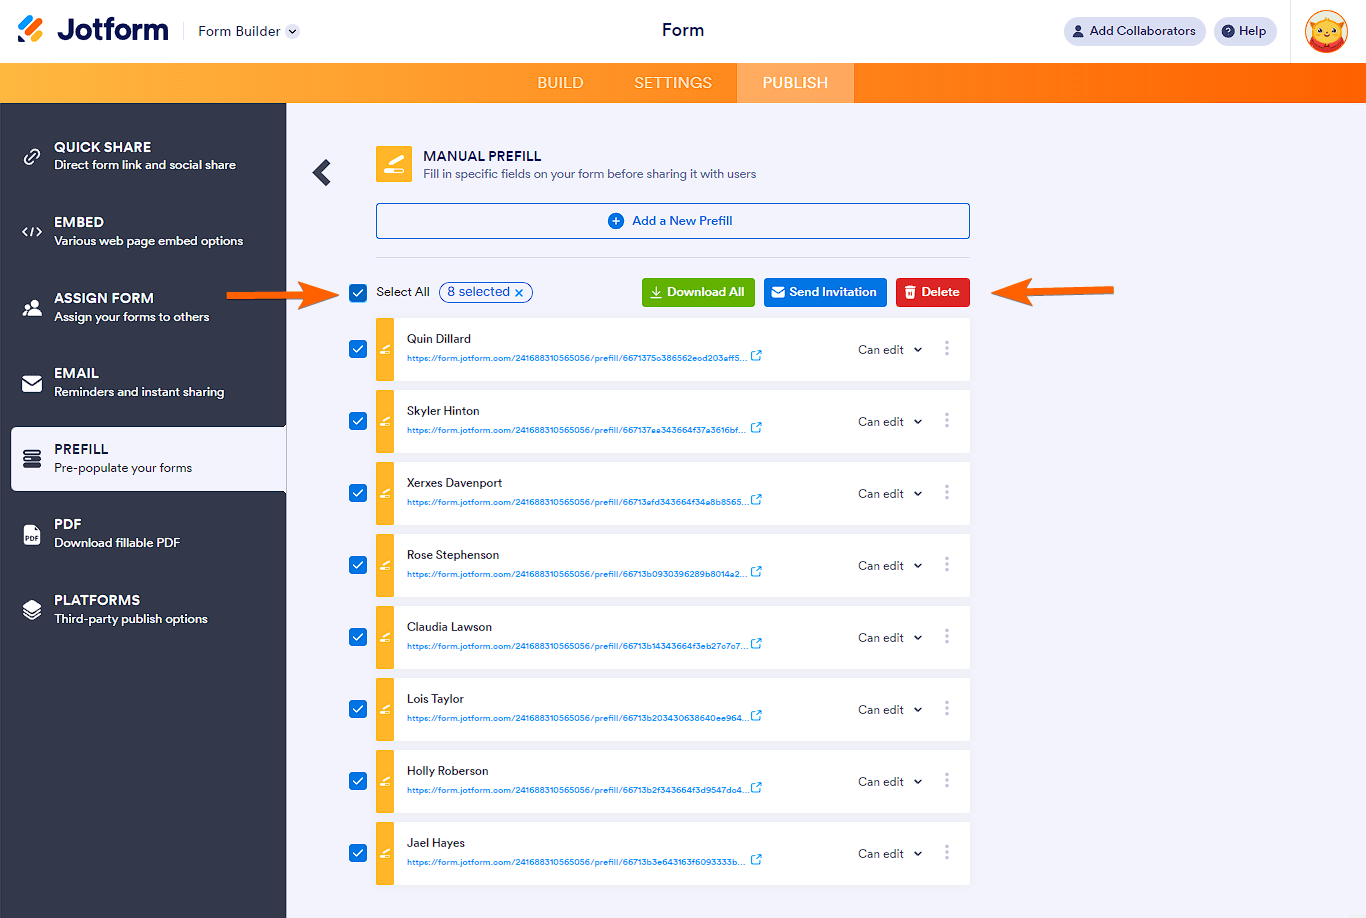
If you want to manage multiple prefill items, select them from the list, and you should see the following buttons:
- Download — You can download all prefilled items in a CSV file.
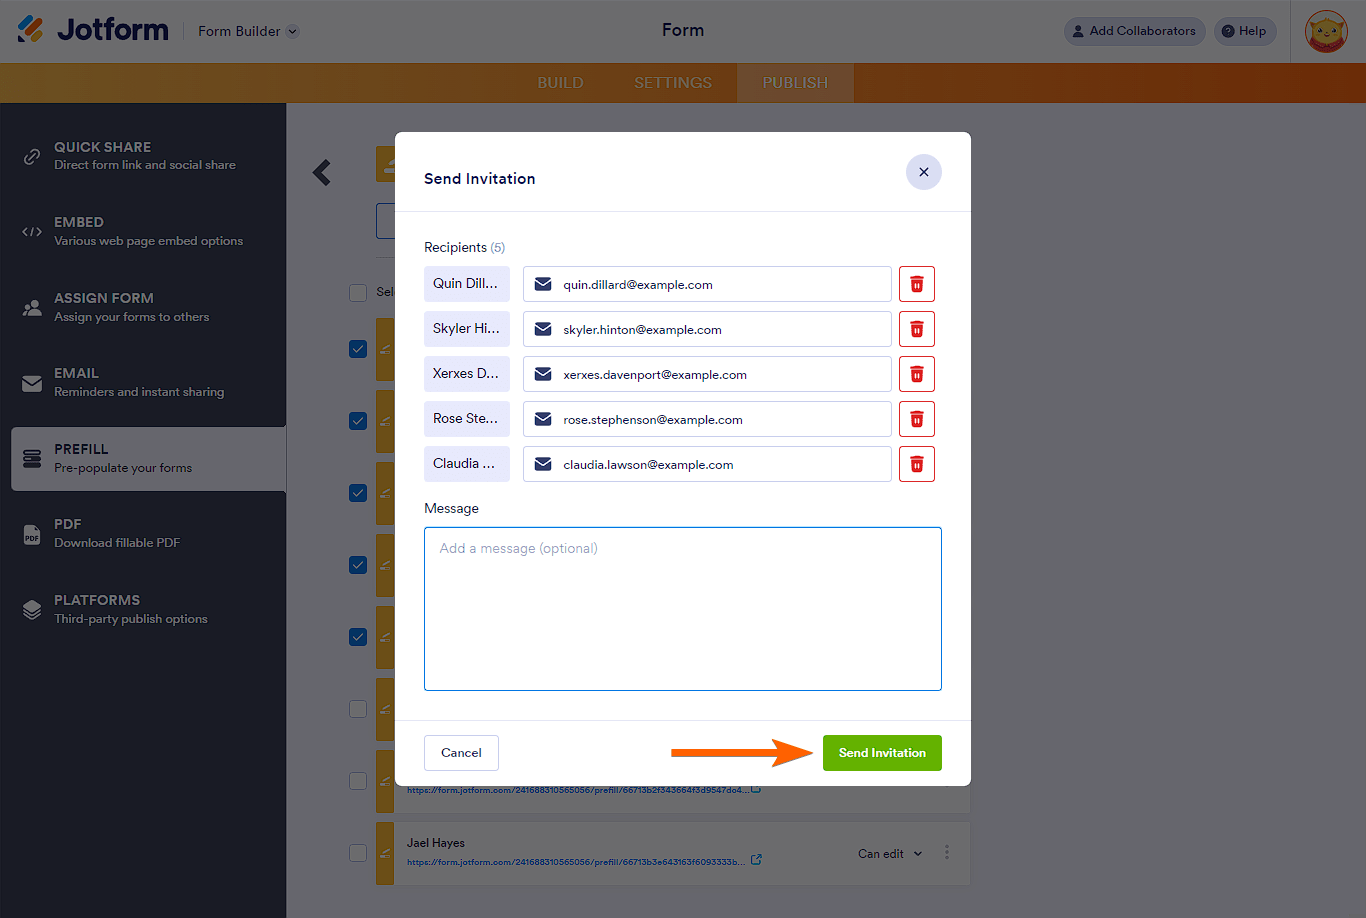
- Send Invitation — Click this button to send the prefilled items to their designated recipients. As noted below, you can only send up to 5 prefilled items at a time.
- Delete — To delete the selected prefilled items. This cannot be undone.
When you click the Send Invitation button, a popup window will appear which automatically fills the recipients with the user’s email address. You can change the recipient(s) if you want to. You can also optionally add a message. Once ready, click the Send Invitation button at the bottom of the window.
Note
You can select all Prefilled URLs, but you can only send an invitation to up to Five (5) people at a time. Selecting and sending more than this number will display an error message.
Managing Individual Manual Prefilled Item
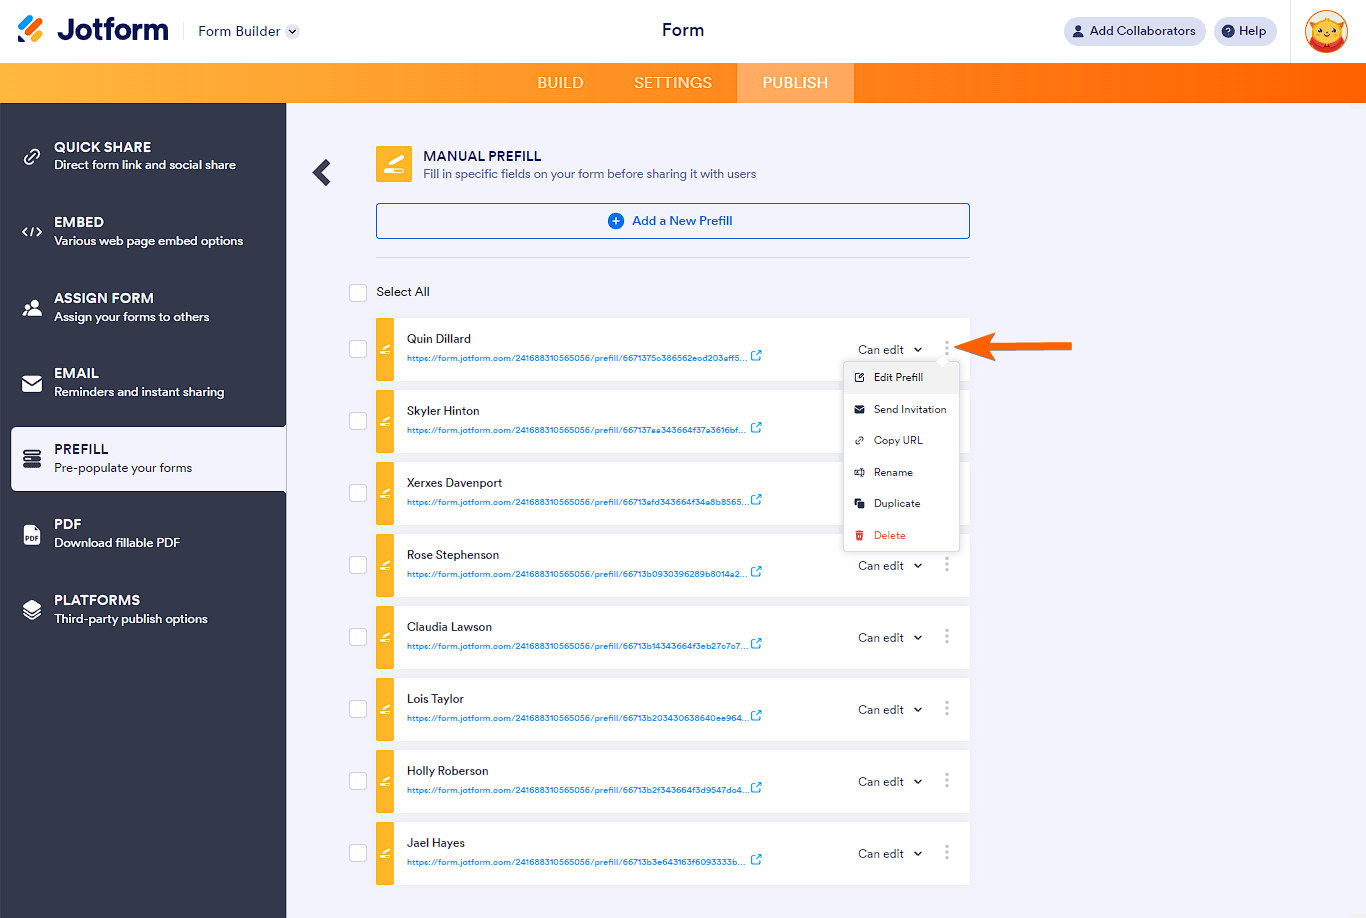
On each Prefilled URL, clicking the kebab or 3-dot menu will allow you to do the following:
- Edit Prefill — To edit the entries for the prefilled item.
- Send Invitation — If you wish to send the prefilled URL individually or resend it if the user lost the previous invitation.
- Copy URL — Copy the prefilled URL. It’s useful if you wish to send the prefilled URL manually.
- Rename — If you want to change the name of the prefilled URL.
- Duplicate — To create a copy of the prefilled item.
- Delete — To delete the prefilled URL.
Changing Permission for Invited Users in Manual Prefill
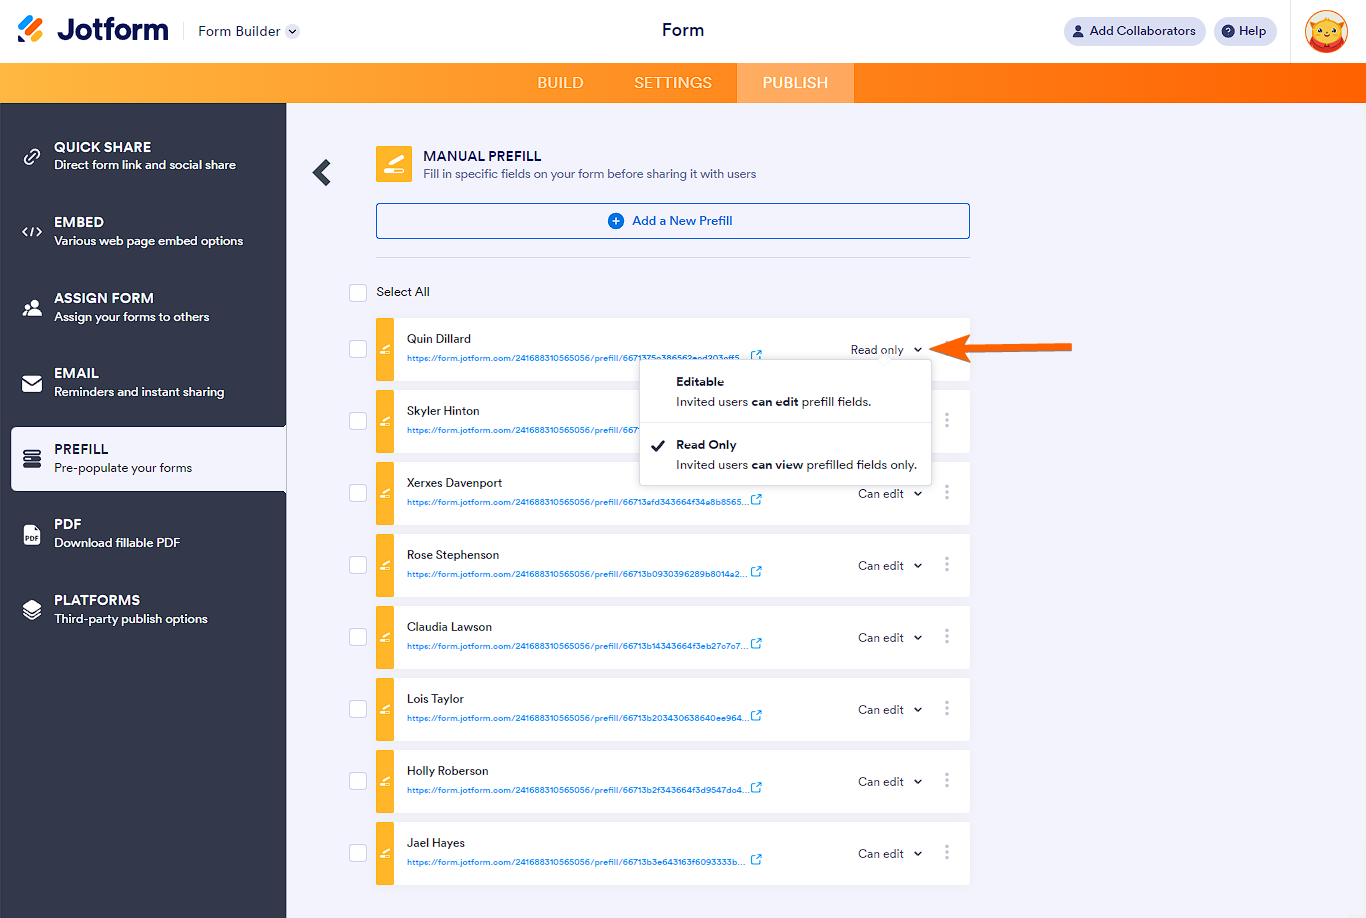
By default, users can edit the pre-filled data. If you do not want users to edit the data, you can change the permission from Can Edit to Read Only. Click Can Edit and then click on the Read Only option, as shown in the image below.
Manual Prefill supports the following fields only:
- Full Name
- Address
- Short Text
- Long Text
- Fill in the Blank
- Phone
- Number
- Date Picker
- Time
- Dropdown
- Single Choice
- Multiple Choice
- Scale Rating
- Spinner
If you are curious about what else you can do with the Prefill, we suggest you check out the following page: Pre-populate Form Fields with Jotform Prefill.

Send Comment:
12 Comments:
42 days ago
When you send the invitation using this method, does the recipient have to log in to Jotform to complete the form? If so, how do I send to recipients to complete without logging into Jotform?
More than a year ago
How do I use the pre-filled URL in an embed code? The URLs are structured differently, so I can't just add the /prefill.... suffix on the end of the embed URL.
More than a year ago
Ich will ein Mietvertrag über mein Buchungssystem Smoobu mit den Kundendaten vorausfüllen. Danach soll der Kunde alles weitere ausfüllen und unterschreiben . Wie kann ich die Zeichen einarbeiten.
Laut Smoobu so
aber ich muss bei jotform wohl irgendetwas noch einstellen, damit es geht.
Vielen Dank für Ihre Hilfe
Rolli-Thomas
More than a year ago
How do you get your unique code?
More than a year ago
Is it possible to add a manual prefill version to apps? As of now it appears to only use the parent version of the form and doesn't allow consideration of any child or manual prefilled versions to populate.
So with regard to automation, this doesn't seem viable at this juncture. Is that correct?
More than a year ago
Hi there,
I was wondering if i could manually pre-populate some of my input tables? Its for a performance review that is reviewed by different departments, so i'd like to complete some information in the tables before sending on to someone else.
More than a year ago
Very useful, but when the client receives the form and click on: save to continue later, all his answers were lost.
More than a year ago
Do pre-filled forms count toward the account form limit?
More than a year ago
From my experience, the 'Copy URL' option does not work. I have tested several times. I copied the URL pasted it into a web browser and the form opened unpopulated.
More than a year ago
Is there a way to get the URL of a pre-filled form out via the API. I wish to send them out using a manual mail.
More than a year ago
I tried to follow the instructions above and sent out several emails to members that I had prefilled their data for.
However, it required the members to sign-up for a jotform account to continue? Is that the intended step?
More than a year ago
Thank you, this is really helpful
So I can use the same form, the link I had sent earlier, and have it prefilled for each of our unique members so they won't have to enter their name, email address, phone number, company name, position and other fields every time they use it?
Will they each get a unique link for the form too?