Jotform makes it simple to create web forms without any coding. Whether you need a contact form, event registration, or survey, the intuitive drag-and-drop builder allows you to design and customize forms with ease.
From selecting the right template to adding form fields and setting up email notifications, each step ensures a smooth experience for both you and your users. With flexible publishing options, you can easily share your form and start collecting responses in no time.
Creating Your First Form
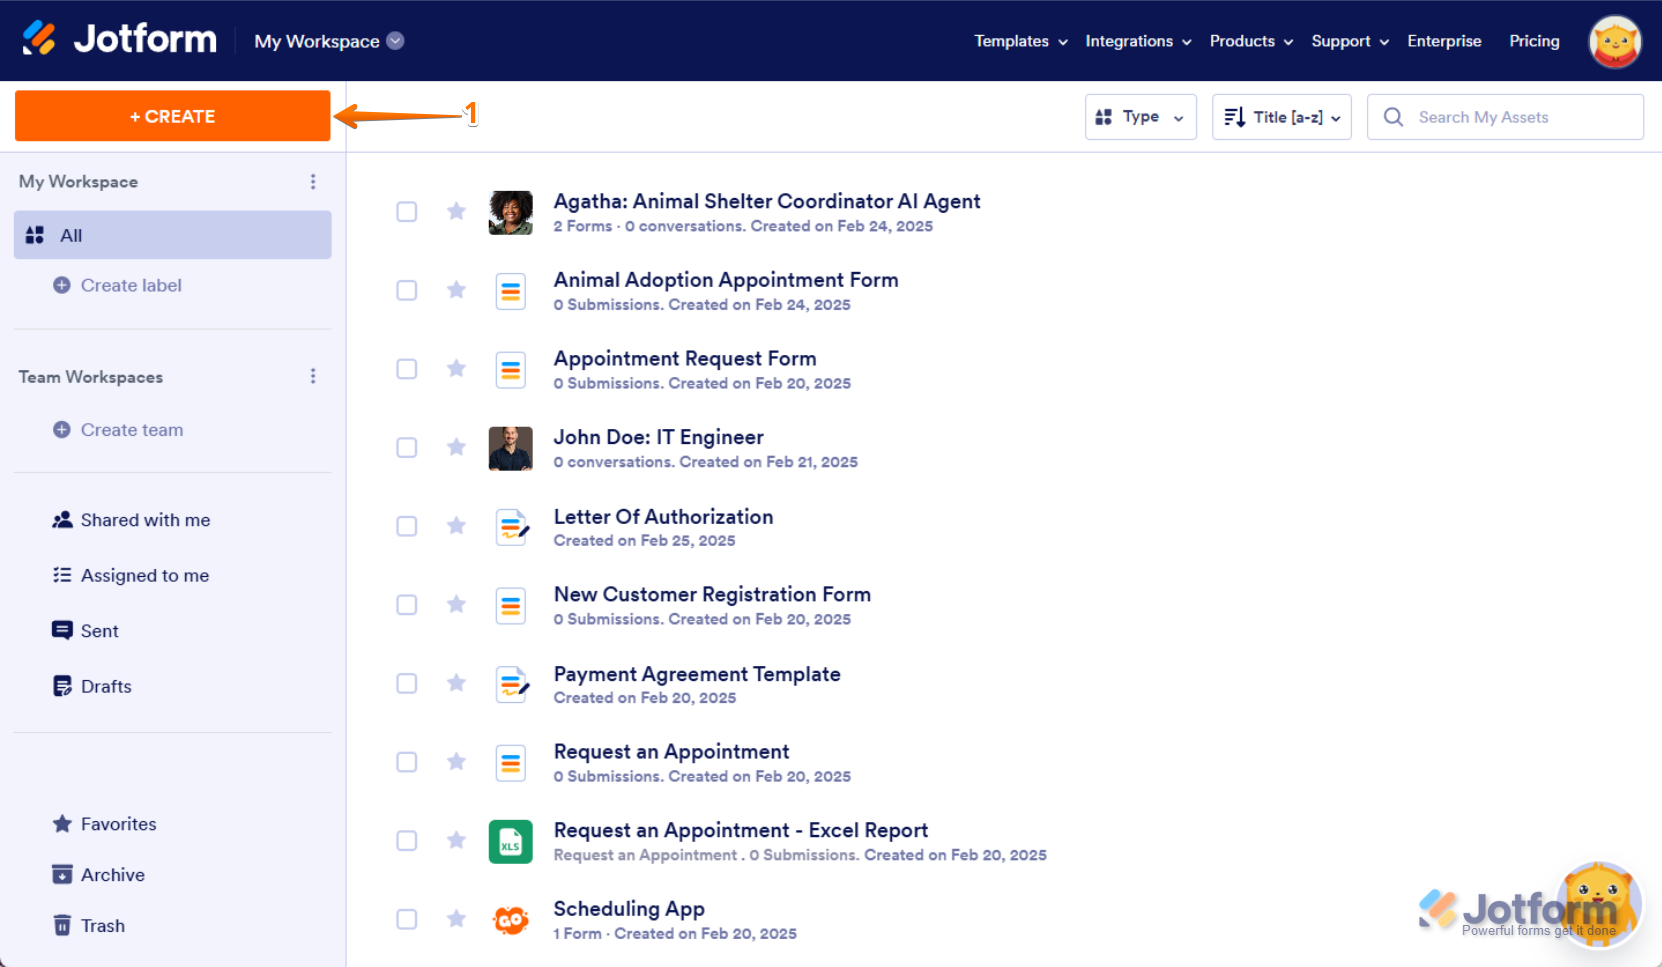
Jotform gives you multiple options to start creating a form, making it easy to choose a method that fits your needs. Let’s do it:
- On your My Workspace page, click on Create on the top-left side of the screen.
- In the window that opens up, click on Forms.
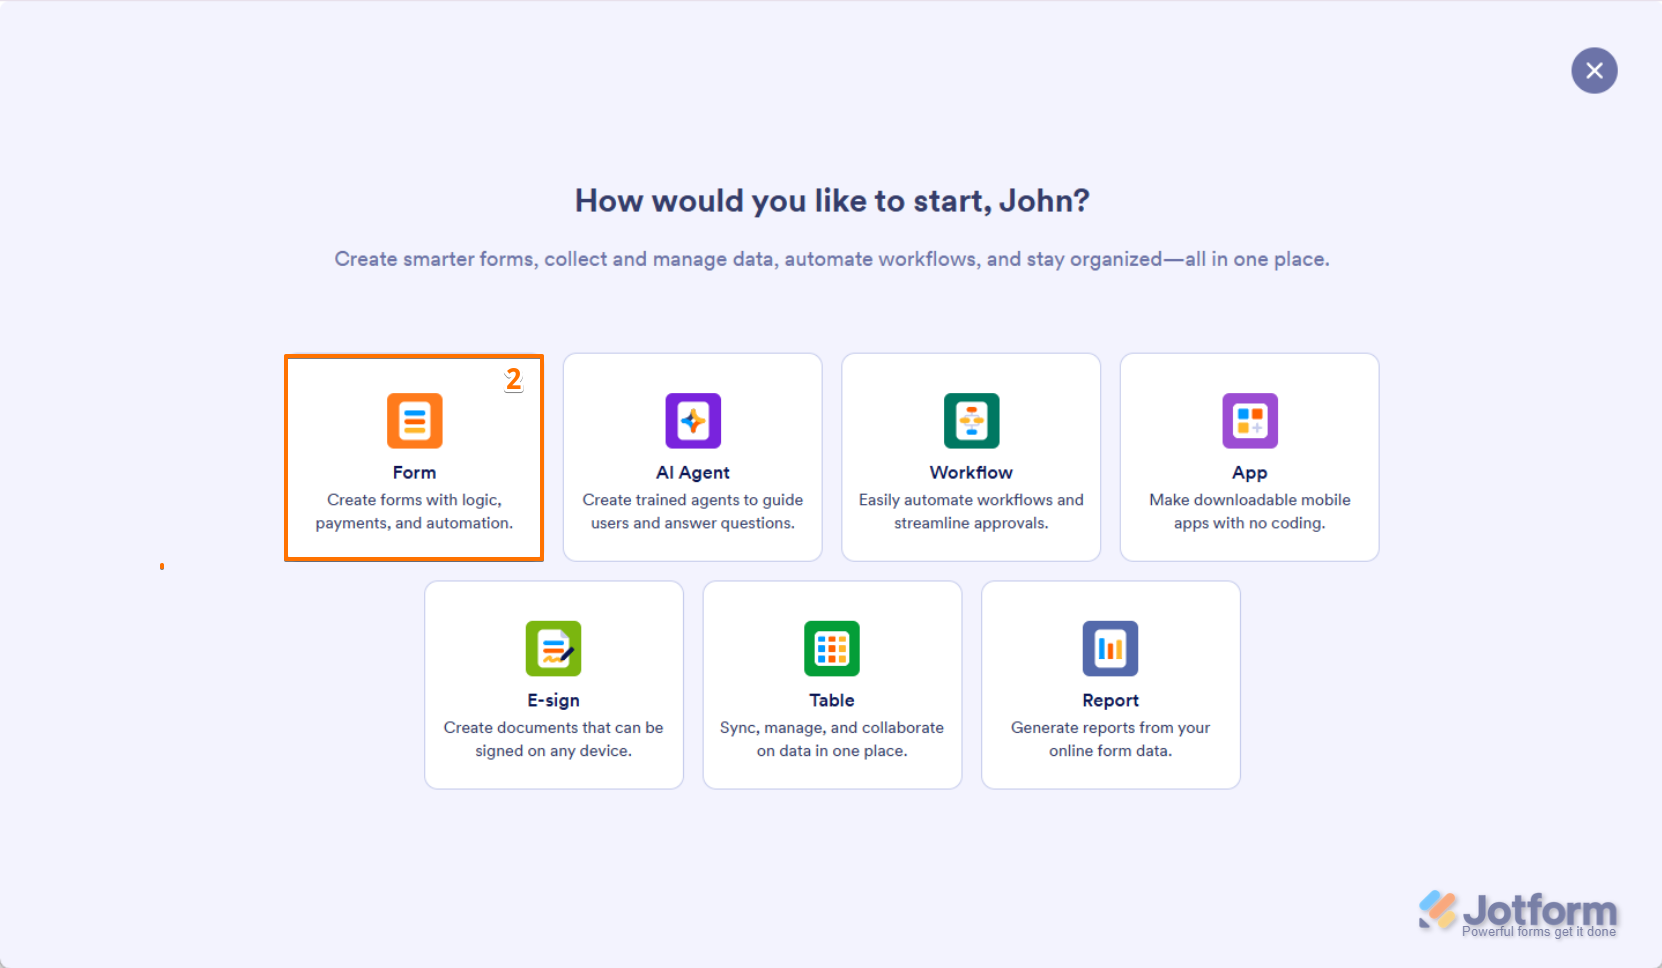
- Now, you can choose Start from Scratch or Use Template to select from over 10,000 premade forms.

- Assuming you choose to Start from Scratch, select one of the following layouts:
- Classic Form — Displays all questions on a single page.
- Card Form — Shows one question per page for a guided experience.

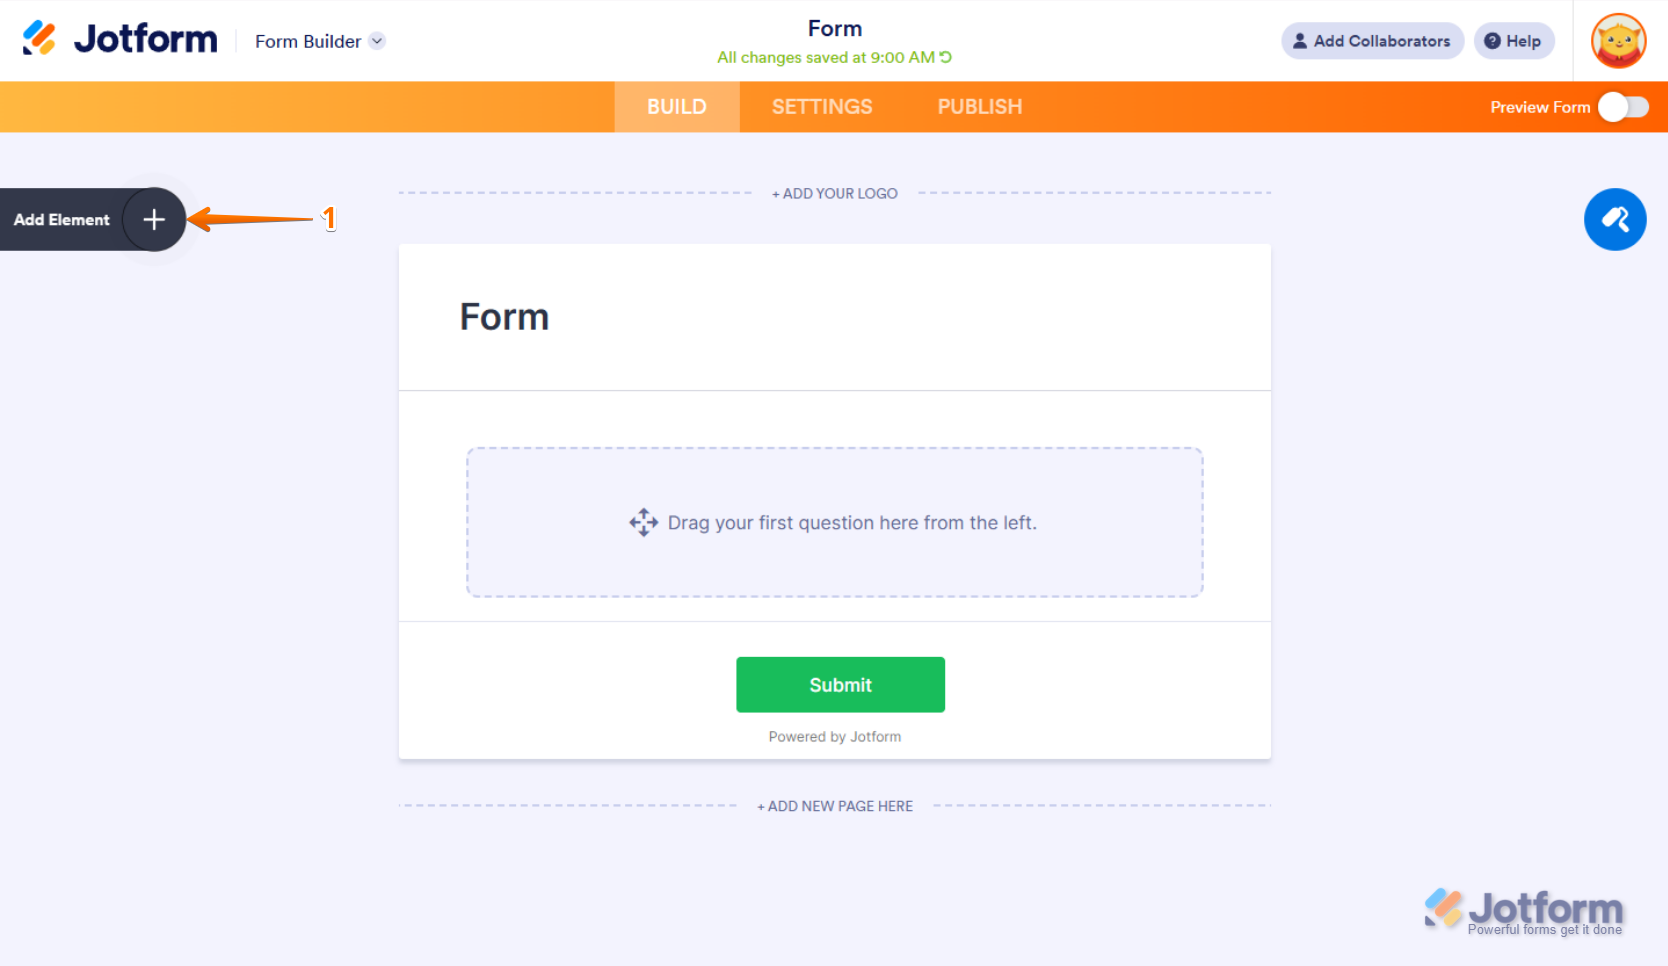
- Finally, you’ll be redirected to Form Builder, where you can start building your form using Jotform’s drag-and-drop interface.

Adding Form Elements
The foundation of your form is built using form elements. Jotform offers a variety of predefined elements, payment options, and widgets that you can drag and drop into your form. Here’s how:
- In Form Builder, click on the Add Form Element menu on the left side of the page to see the complete list of elements and widgets.
- Under the Form Elements menu on the left, make selections from the following tabs:
- Basic tab — Includes essential fields like Name, Email, Short & Long Text, Multiple Choice, Dropdown, and Date Picker.
- Payments tab — Allows you to integrate payment gateways like PayPal, Stripe, and Square to accept online payments.
- Widgets tab — Offers advanced fields such as e-signatures, file uploads, rating scales, and progress bars.
- Just scroll down the list, and then drag and drop the elements onto your form.

Pro Tip
Keep your form short and focused. Only include the fields that are essential to avoid overwhelming users.
Customizing Your Form
A well-designed form improves engagement and enhances the user experience. Jotform allows you to personalize the look and feel of your form to match your brand. Here’s how to do it:
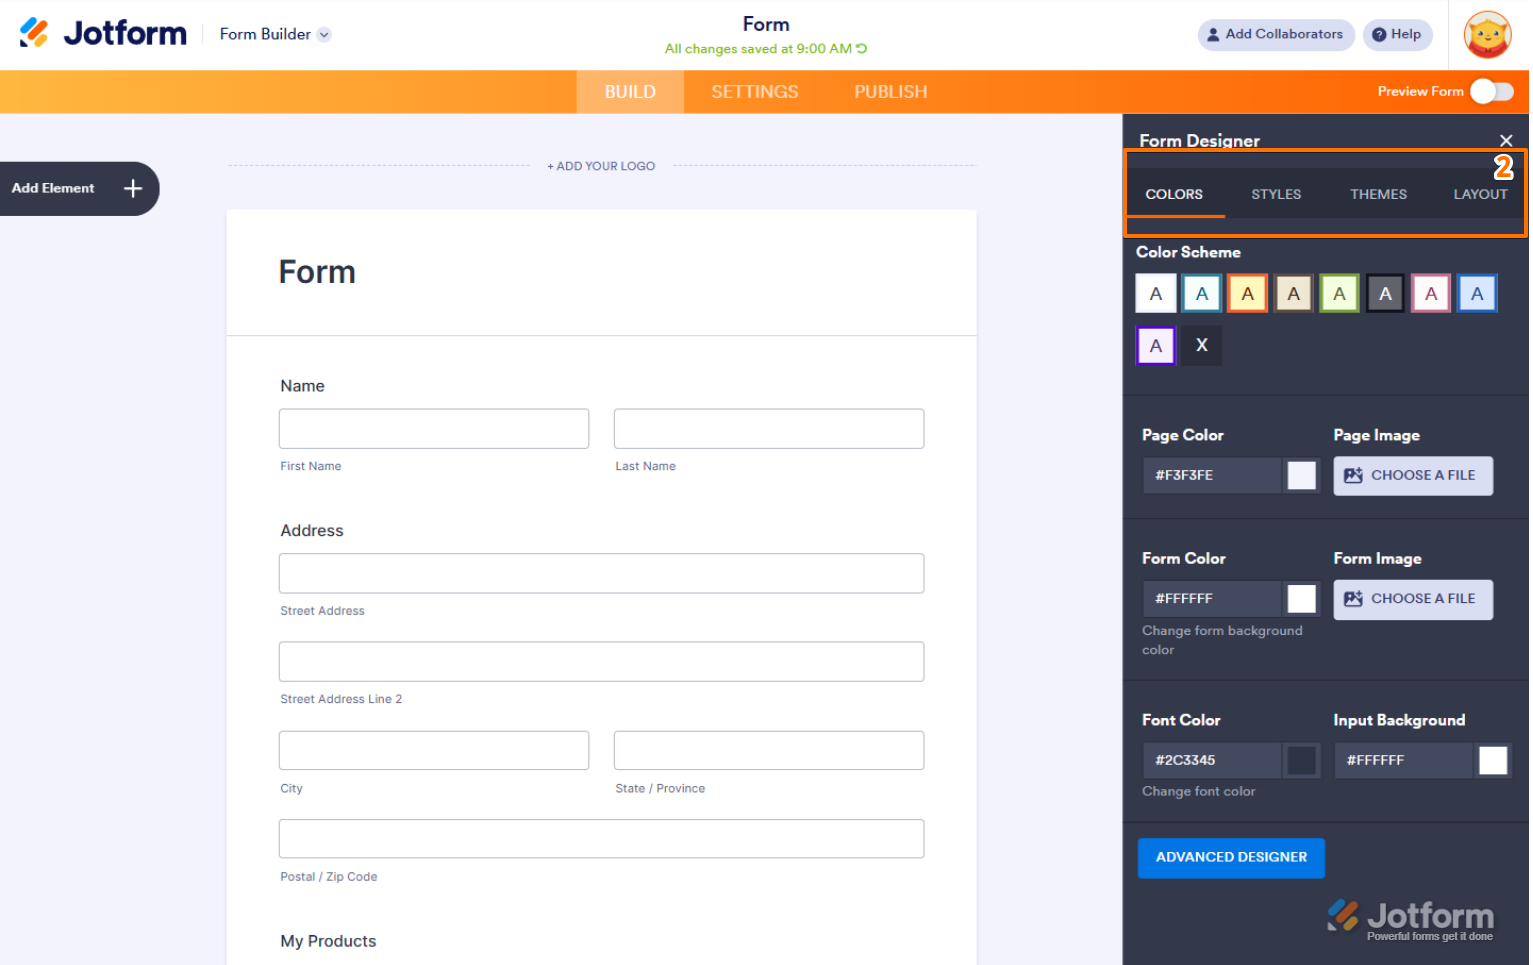
- In Form Builder, click on the Paint Roller icon on the top-right side of the screen to open Form Designer.
- Now, in the Form Designer menu, you can customize the following aspects of your form:
- Colors tab — Change the background, button, and text colors.
- Styles tab — Modify font styles, spacing, and field alignment.
- Themes tab — Apply a pre-made design theme to give your form a professional look.
- Layout tab— Choose between a single-page (Classic) or one-question-per-page (Card) format.
You might also want to check out our guides about:
Pro Tip
A visually appealing form improves engagement. Keep the design clean and easy to read by using consistent colors and spacing.
Setting Up Email Notifications
Email notifications help you stay updated on form submissions. You can receive responses instantly and also send confirmation emails to users. By default, Jotform automatically generates an email notification when you create a form. But, if you need to create a new one, here’s how to do it:
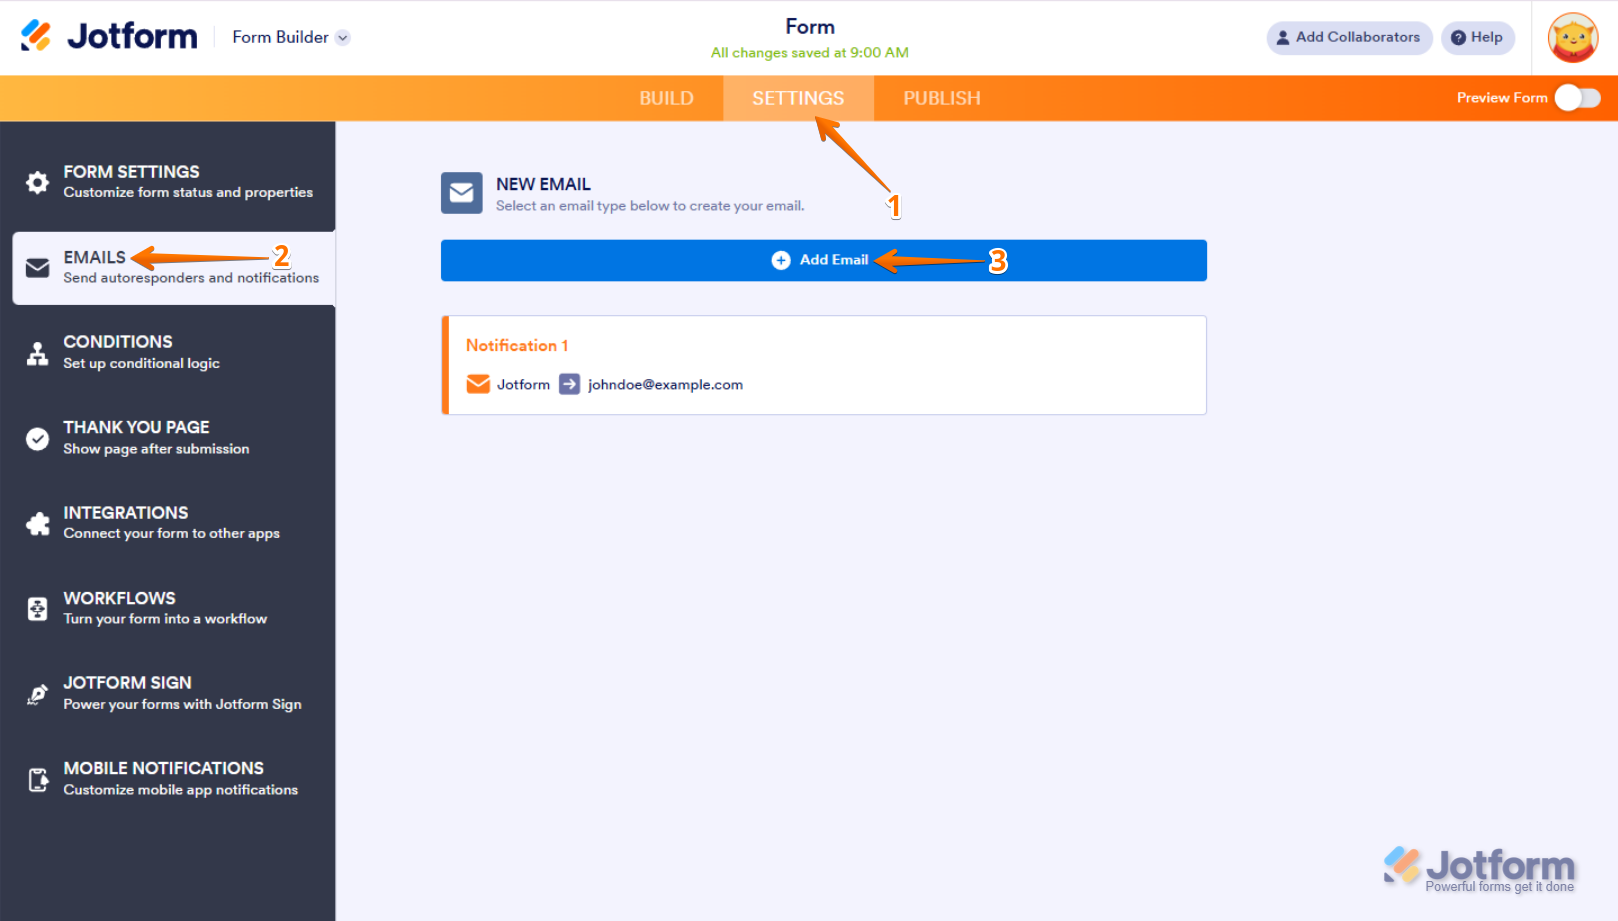
- In Form Builder, in the orange navigation bar at the top of the page, click on Settings.
- In the menu on the left side of the page, click on Emails.
- Then, click on Add Email.
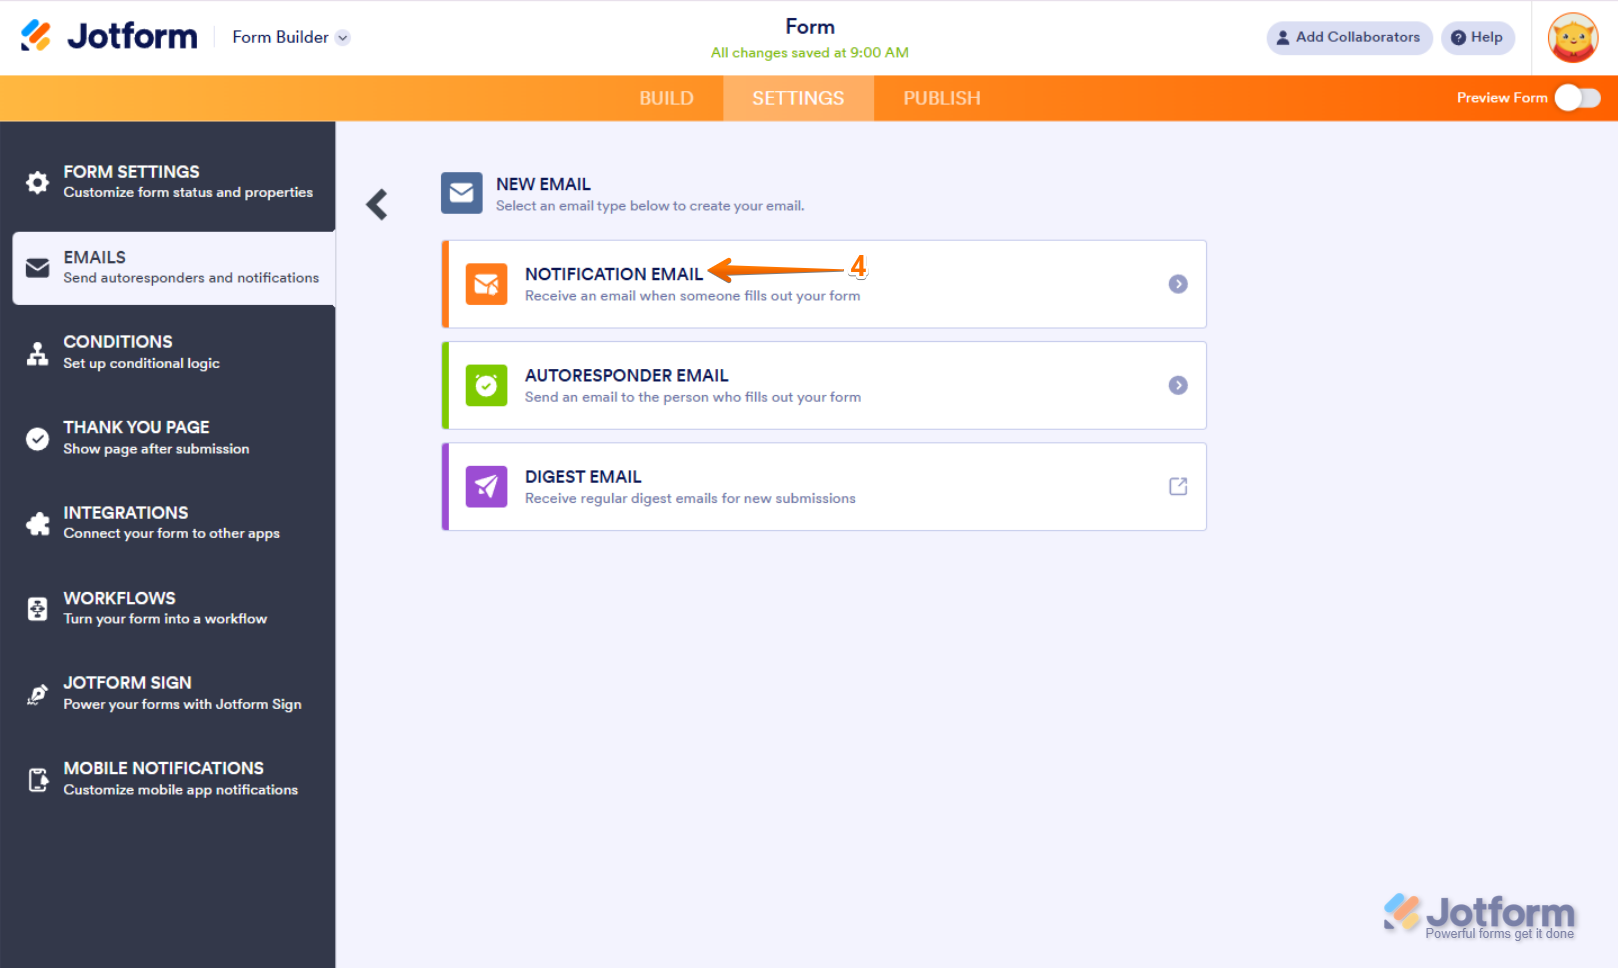
- Next, select Notification Email.
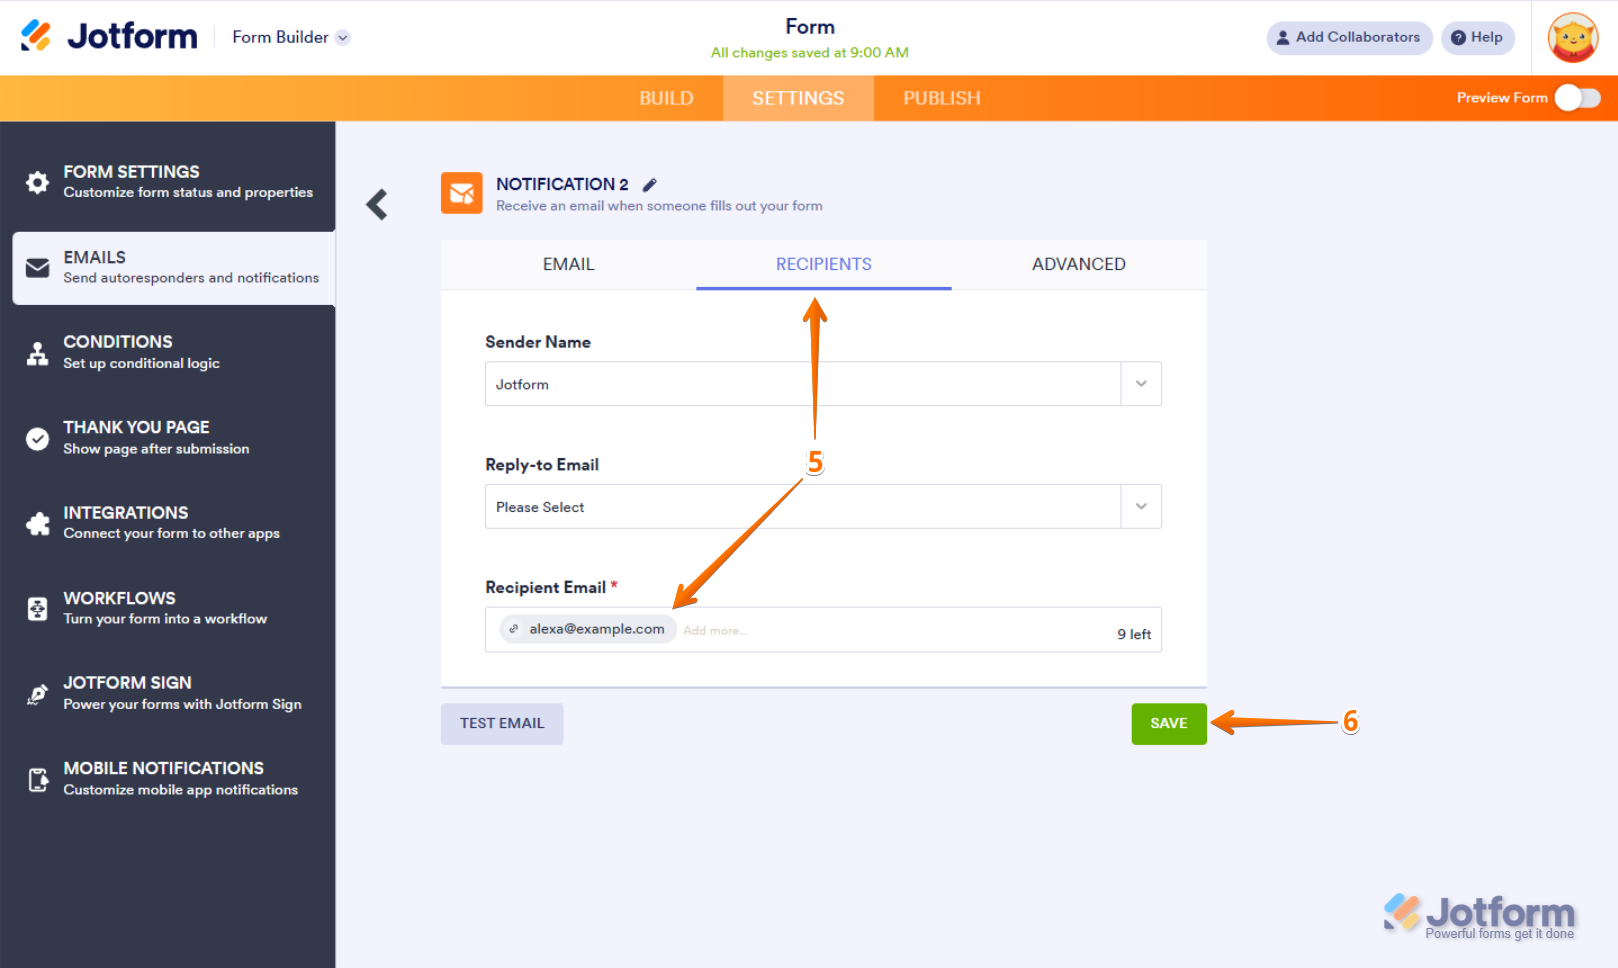
- Click on the Recipients tab and enter your email address in the Recipient Email field.
- Now, just click on Save and you’re done.
You might also want to check out our guides about:
- Setting Up Email Notifications
- Setting Up Autoresponder Emails
- Explanation of Email Notification and Autoresponder Settings
Pro Tip
Autoresponders reassure users that their submission was received. Personalize them with a thank-you message or additional instructions for a better experience.
Publishing and Sharing Your Form
Once your form is ready, you’ll need to share it with your audience. Jotform provides multiple ways to do that. Here’s how:
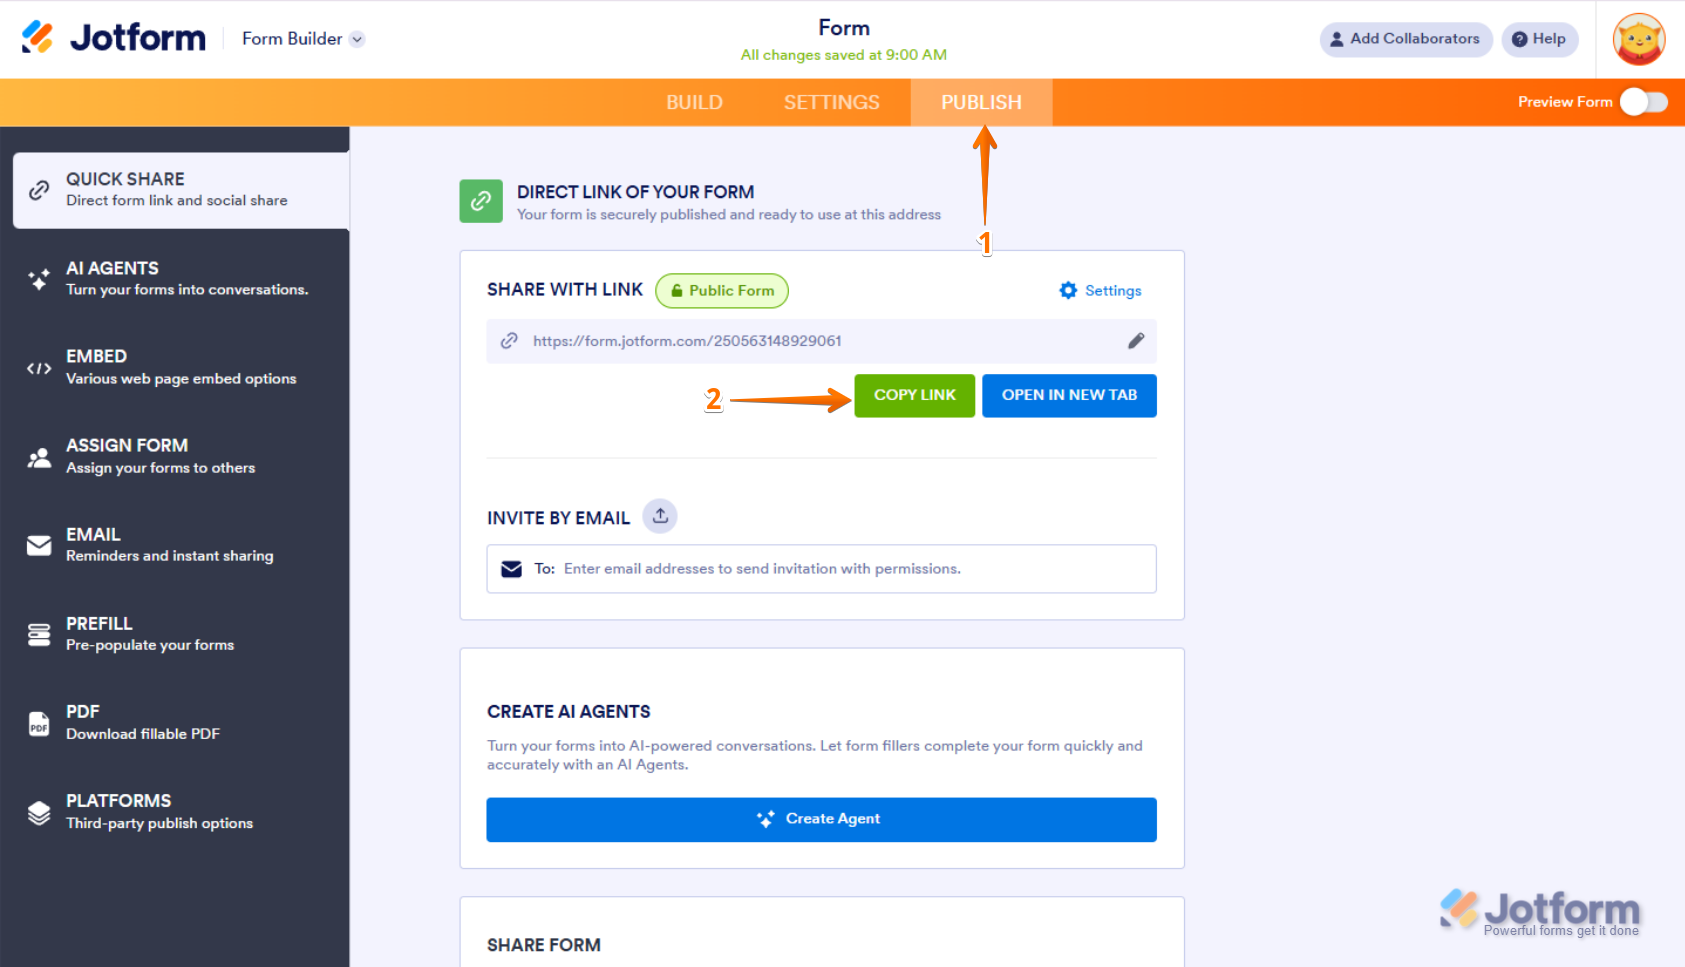
- In Form Builder, in the orange navigation bar at the top of the page, click on Publish.
- Then, click on Copy link and send it directly to your users via email or social media.
You can also check out our guide about How to Send a Form via Email.
Testing Your Form
Before going live, it’s essential to test your form to ensure it functions correctly. Checkout the steps below to see how it’s done:
- In the orange navigation bar on the top-right side of the page, toggle Preview Form to the On position.
- Then, fill it out and click on Submit to submit a test entry.
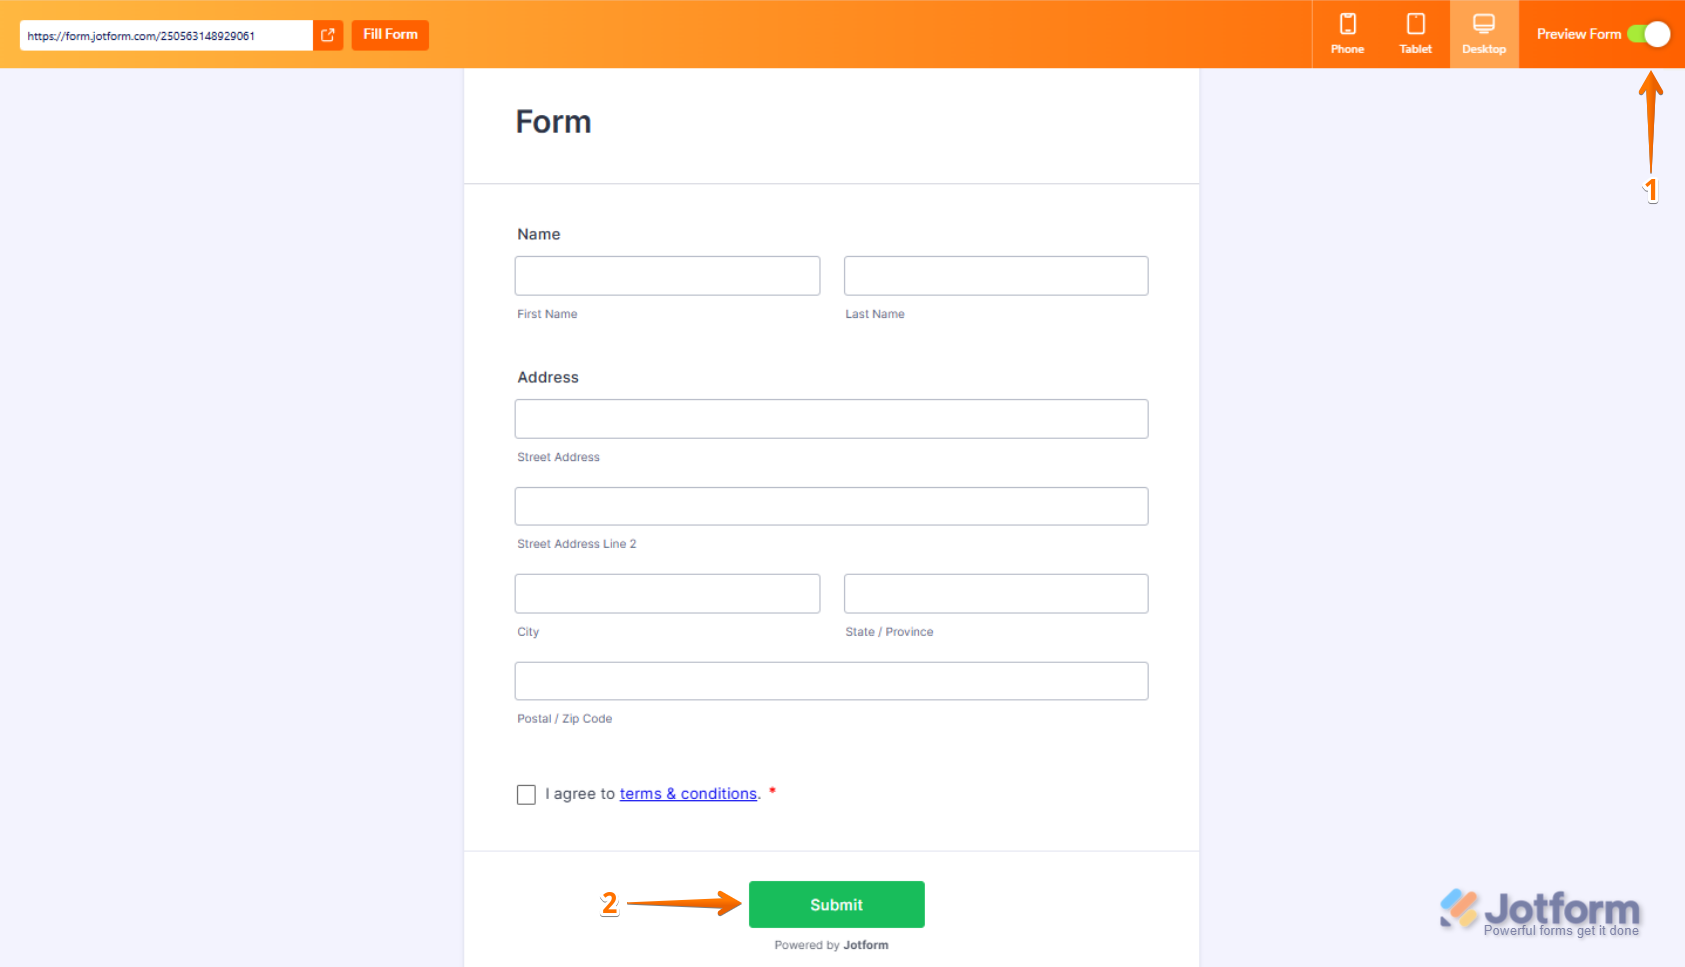
Now, check if you receive email notifications and if submissions show up in your Table Submissions.
And that’s it! You’ve just created your first Jotform web form. With easy customization, email alerts, and sharing options, collecting responses is a breeze. Give it a try and see how it works for you.


Send Comment:
211 Comments:
121 days ago
I have a pre interview evaluation questionnaire which is well crafted I am unable to upload it in the jot form
309 days ago
Thanks for helping me
353 days ago
how do I add a website entry box?
More than a year ago
I aim to produce a large form, send it to 25 email addressees to have them fill it out and then return the completed form to me. The process will be repeated 15 times for each respondent. Is this possible with Jotform (which is great to use)?
More than a year ago
Where does the donated money go? How do we access and use it?
More than a year ago
How to collect responses and export to Excel spreadsheet?
More than a year ago
Please help me create this as I need this for my training
More than a year ago
Great guide on how to create a web form! It's very helpful for beginners who are just starting out with Jotform. The step-by-step instructions are easy to follow and the screenshots make it even easier to understand.
I do have a few questions though. Can I customize the design of the form to match my website's branding? And is it possible to add conditional logic to the form, so that certain questions only appear based on the user's previous answers? Lastly, is there a limit to the number of responses I can receive through Jotform?
Overall, great job on the guide and I look forward to creating my first web form with Jotform!
More than a year ago
É possível fazer um formulário em forma de tabela?
More than a year ago
That is the thing that I was searching for, what a data present here at this site, thank you administrator.
More than a year ago
Hello there, how do I save my gift card after editing it?
More than a year ago
Hej Jotform,
Går det att ändra texten/titeln som "fliken" i webläsaren visar när formuläret öppnas. Lyckades döpa fliken när jag skapade ett formulär från "scratch" men vill gärna veta hur jag gör om jag kopierar formuläret för att använda i ett liknande sammanhang men där titeln i webläsar-fliken hade behövt ändras.
Vänlig hälsning,
More than a year ago
I like it that you've made starting easy.
More than a year ago
thanks great article.
More than a year ago
Hello, I am testing this comment field.
More than a year ago
i hava big challange on how can i make password on my web form in order to make it puplic but for complet only without editing or looking to my inbox thankyou.
More than a year ago
Thanks for the Useful Article about Create the first web form.
More than a year ago
1. Decide what to ask
2. State the purpose in the heading
3. Use predefined form fields
4. Use a Long Text Entry field for long answers
5. Setting up Email Notifications With Email Notifications
6. Embed your form on a website
More than a year ago
That's what I want
More than a year ago
Hi, I just was testing and it seems that the Jotform account must be opened to have access to the embed form on a website? When I was logged, everything worked. But I left the session of Jotform and the form asked in the website for the login and password of JotForm.
I'm doing something wrong for sure..
More than a year ago
im about to get the information
More than a year ago
I don't understand. I do not have a website. I just want to send the survey to my group. How can I do it and get their response?
More than a year ago
Thank you for this informative information about the utilization of your product. I have maybe not an uncommon question for your support team that I will submit after this comment, just wanted to say thank you to Chrisalet Vassell Inspiring Greatness for the gift and you and your team for the platform. Looking foward to the user experience. Happy new year everyone many blessings in all that we do.
More than a year ago
Thank you for your info! just made a form on techfixya.com with the help of this info. Thanx
More than a year ago
Completed my form. During my testing, it is not prompting me to "submit" the form once completed. Did I omit to do anything?
Appreciate your help!