Using HTTP POST for form submissions allows you to send data to a server, custom thank-you page, or third-party service. To connect your forms with other platforms, set up your form to redirect to an external page or endpoint that supports HTTP POST, and enable the Redirect with HTTP POST setting to include submission data. This ensures secure, efficient transmission for tasks, like automated processing, data analysis, or personalized responses.
Setting Up Classic Forms for POST Submission
To set up your form for sending submission data via HTTP POST to the redirect page, follow these steps:
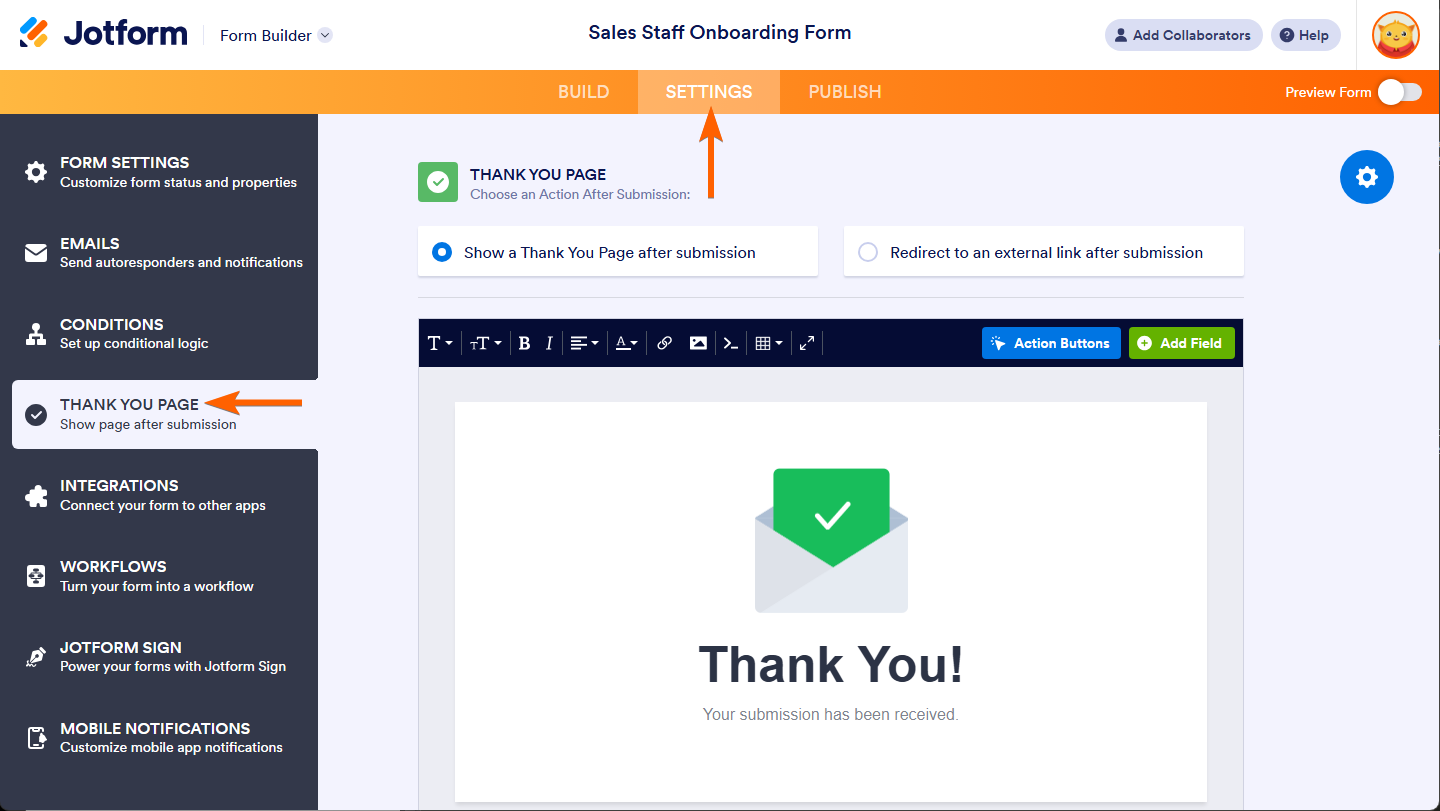
- In Form Builder, click on the Settings tab.
- Then, click on the Thank You Page tab on the left side of the page.
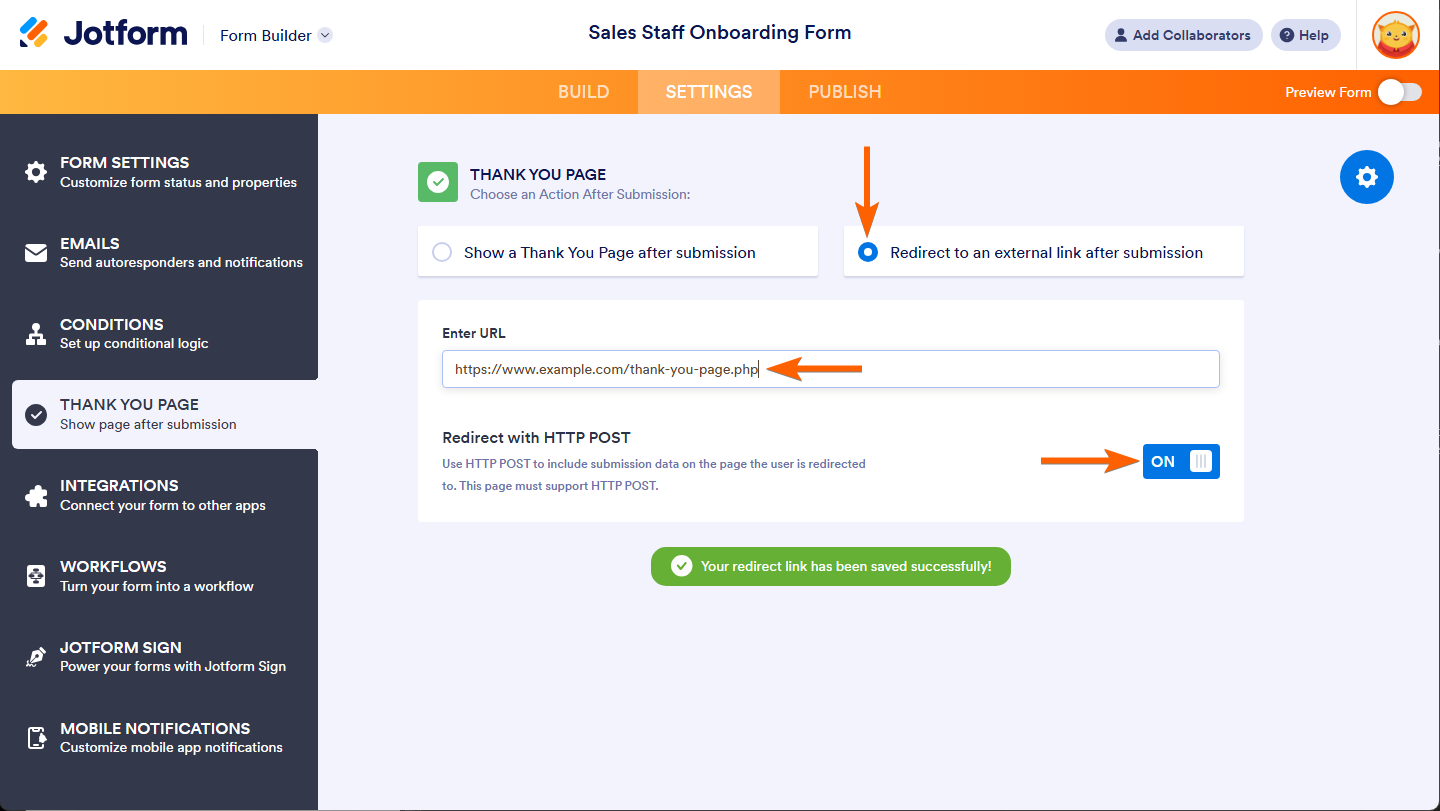
- In the Thank You Page Settings on the right, select Redirect to an external link after submission. See How to Redirect Users After Submission.
- Type or paste your endpoint URL (e.g., https://www.example.com/thank-you-page.php) into the Enter URL setting.
- Then, toggle the Redirect with HTTP POST setting to the On position.
Note
The changes you make in the Form Builder are saved automatically.
Configuring Card Forms for POST Submission
Enabling HTTP POST data for the Thank You page or an external page is set up differently for forms in the Cards layout. Follow these steps to enable it in the Form Settings:
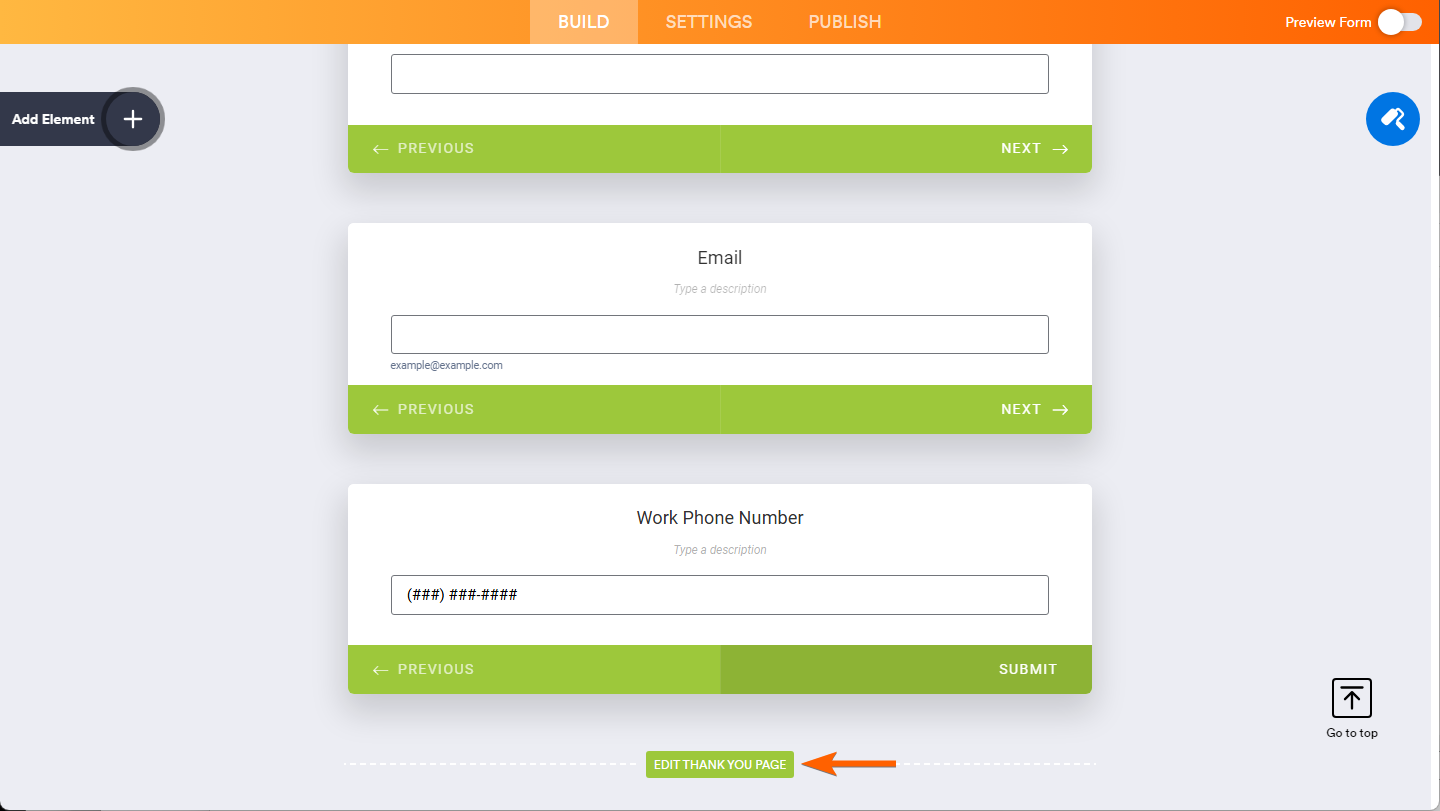
- In Form Builder, go down to the last field in your form and click on the Edit Thank You Page button at the bottom.
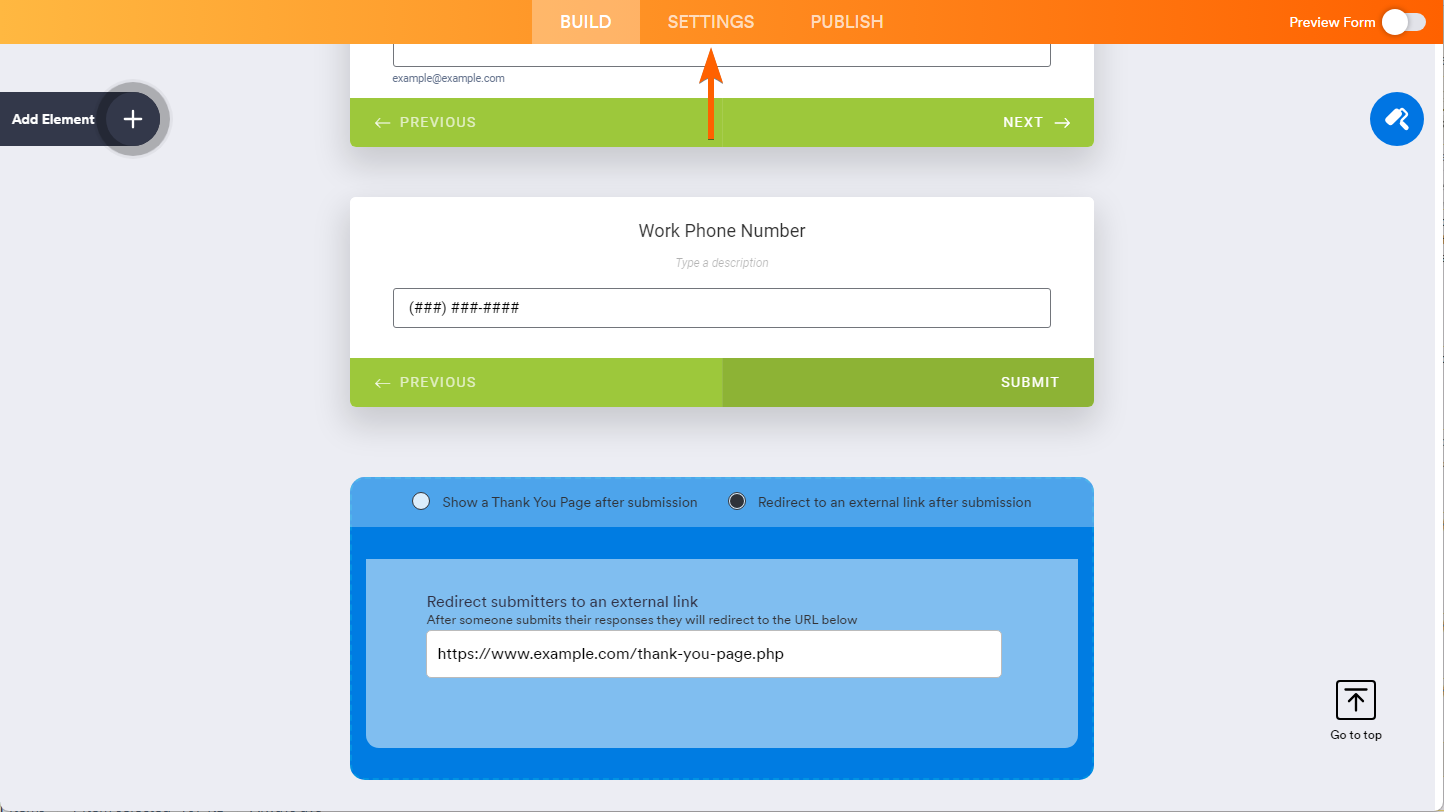
- In the Thank You Page Settings, select Redirect to an external link after submission. See How to Redirect Users After Submission in Jotform Cards.
- Then, type or paste your endpoint URL (e.g., https://www.example.com/thank-you-page.php) into the Redirect submitters to an external link setting.
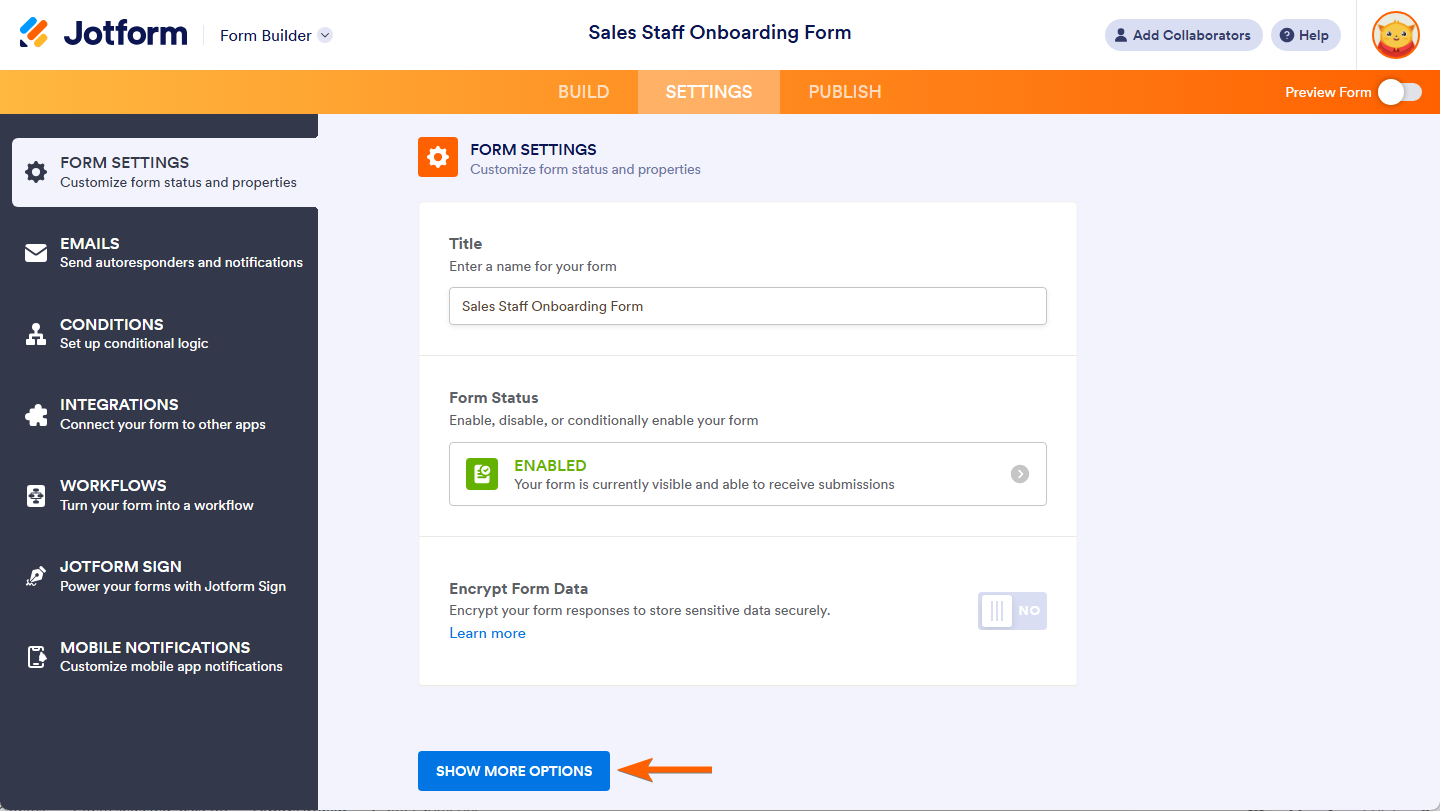
- After that, click on the Settings tab at the top.
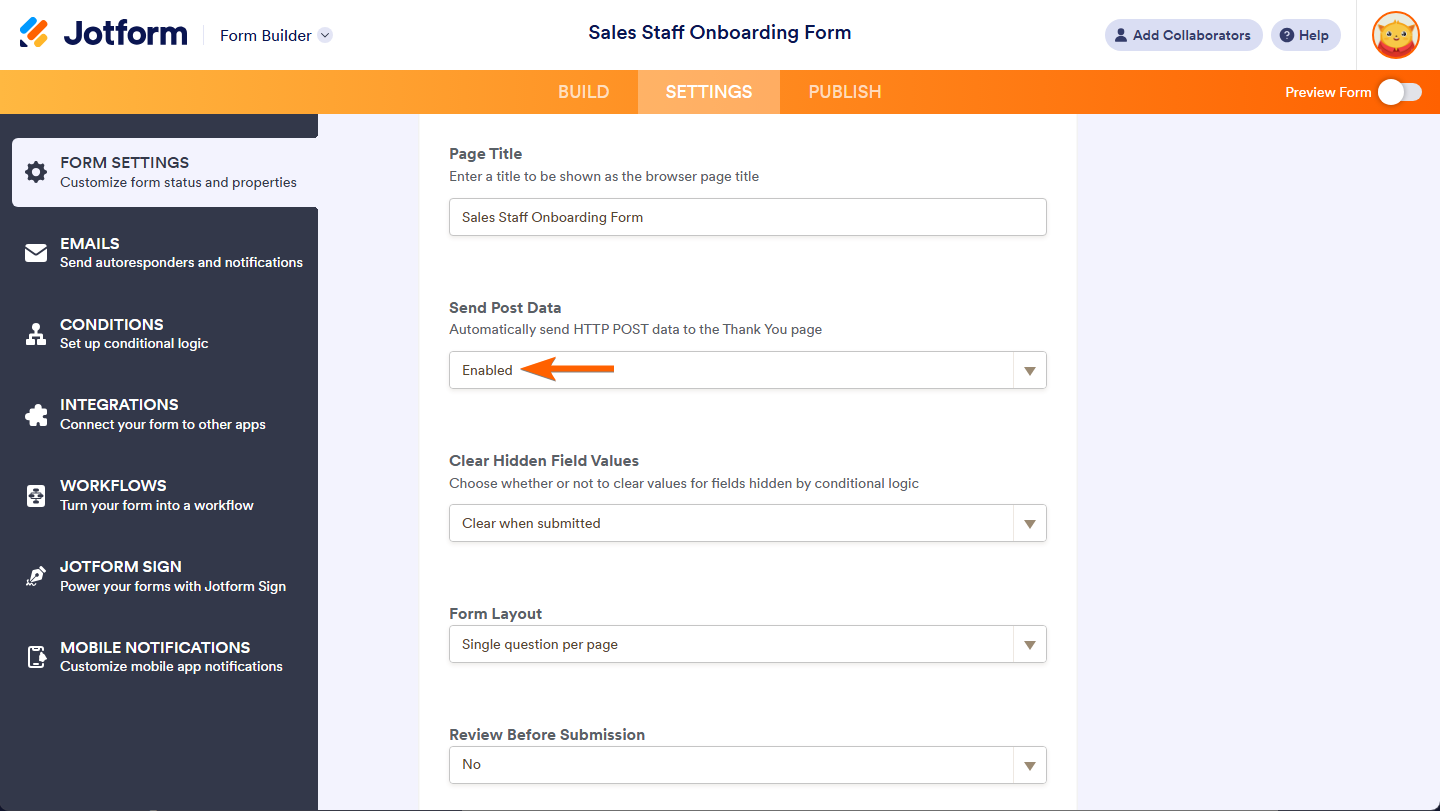
- Now, click on Show More Options.
- In the Form Settings menu, scroll down and select Enabled in the Send Post Data dropdown menu.
And that’s it. Once set up, your form will send data via HTTP POST and redirect users to the specified endpoint URL after submission. You can then process the data however you need, such as displaying a custom message or saving it to a MySQL database using PHP for further use.
See also:
If you want to check what will be sent as POST data to your external page, see How to View Submissions as POST Data.



Send Comment:
2 Comments:
73 days ago
@RAW
it is now under form settings (show more options)
86 days ago
I’ve noticed that the "thank you" feature for forwarding is no longer available in the settings. It would be great if we could look into this to understand why it's missing and explore potential solutions. Thank you!