A Lightbox form is a great way to collect information from your website visitors without taking them away from the page they’re on. When someone clicks on a button or link, the form pops up on the screen, making it easy for them to fill it out right there.
With Jotform, creating a Lightbox form is easy and quick. It’s a great tool for contact forms, surveys, and more, helping you get more responses and keep visitors engaged.
Getting the Embed Codes for Lightbox
To get the embed codes for Lightbox
- In the Form Builder, navigate to the Publish tab at the top the page.
- Select Embed on the left panel.
- Choose, and click the Lightbox option.
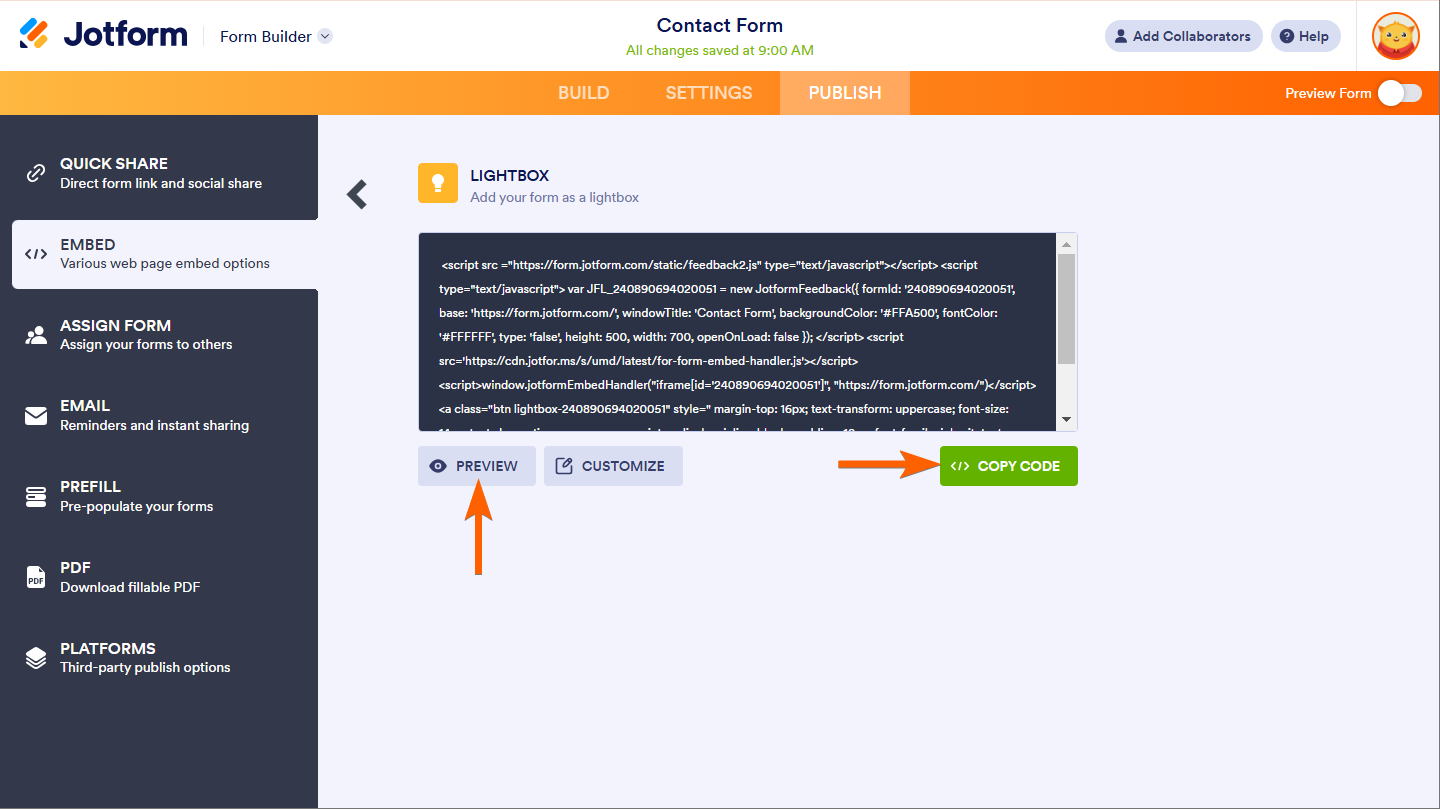
- On the next page, you may copy the code by clicking the green Copy Code button. Or, hit the Preview button to see how it looks.
When you click the Preview button, here’s how it looks like:
Customizing the Lightbox
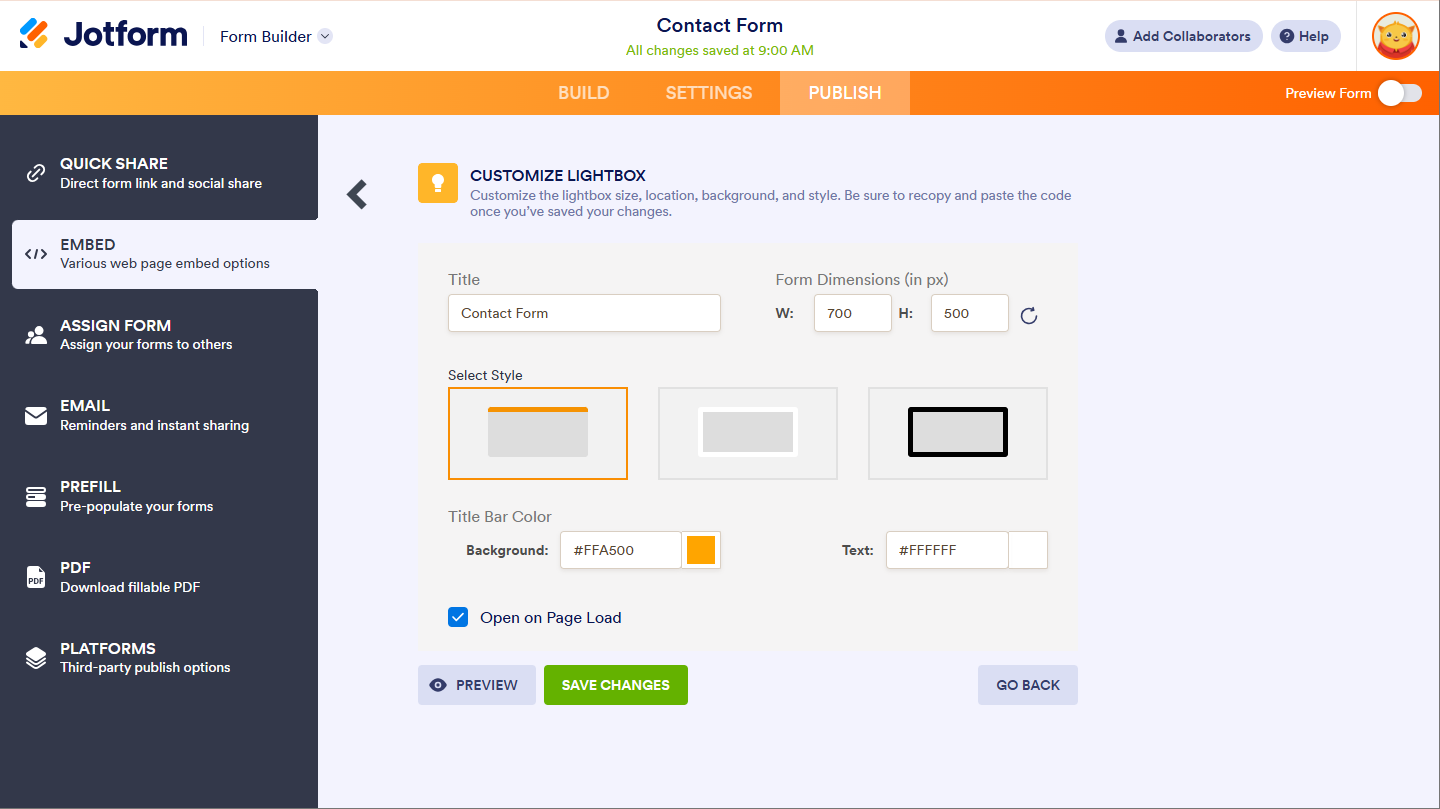
If you want to customize the look and feel of the Lightbox, click the Customize button as shown in the above screenshot. In the customization section, you can change the Lightbox title, resize the form, and update styles and colors to match your site’s design. You can also select whether you want the Lightbox to open automatically when visitors load the page, giving you full control over how it interacts with your users.
Don’t forget to click the Save Changes button, then copy the generated code.
Customizing the Call-To-Action to Use an Image
If you want to use an image instead of a button/link to trigger the lightbox to open, you have to replace the following line:
<a class="btn lightbox-{formID}" style="margin-top: 16px">
  {form_title}
</a>
…with the following:
<img src="{imageURL}" class="btn lightbox-{formID}">To make sure your Lightbox form works correctly, you’ll need to replace the placeholders in the code. For {formID}, use the actual Form ID — this is the string of numbers found at the end of your form’s URL. Similarly, for {imageURL}, replace it with the real image URL you want to display.
It’s also important to keep the class attribute’s value exactly as it is. This value ensures that the Lightbox will open properly when visitors click on the image.


Send Comment:
6 Comments:
More than a year ago
Ok thanks
More than a year ago
This was perfect for what I needed! Is there a way to add a text label beneath the image as well?
More than a year ago
Super
More than a year ago
The code that we are suppose to change
{form_title}
Is not a part of the script being generated for the lightbox script. Is there an updated version if this Help Article?
More than a year ago
It says you can customize the button color and placement, but there are no options for this in the customization window, only for the form background.
More than a year ago
I can't understand from the video 15s onward, where should i replace ?