If you expect a specific format for your form submissions and have added warnings and descriptions but still encounter some people submitting the wrong format, you could use the Input Mask feature as a solution. You can do the Input Masking with the Short Text and Phone elements.
When you enable the Input Mask, you can restrict users to match the format you specify.
Enabling the Input Mask
Assuming you’ve already added the Short Text or Phone element, you can enable the Input Masking by following these simple steps:
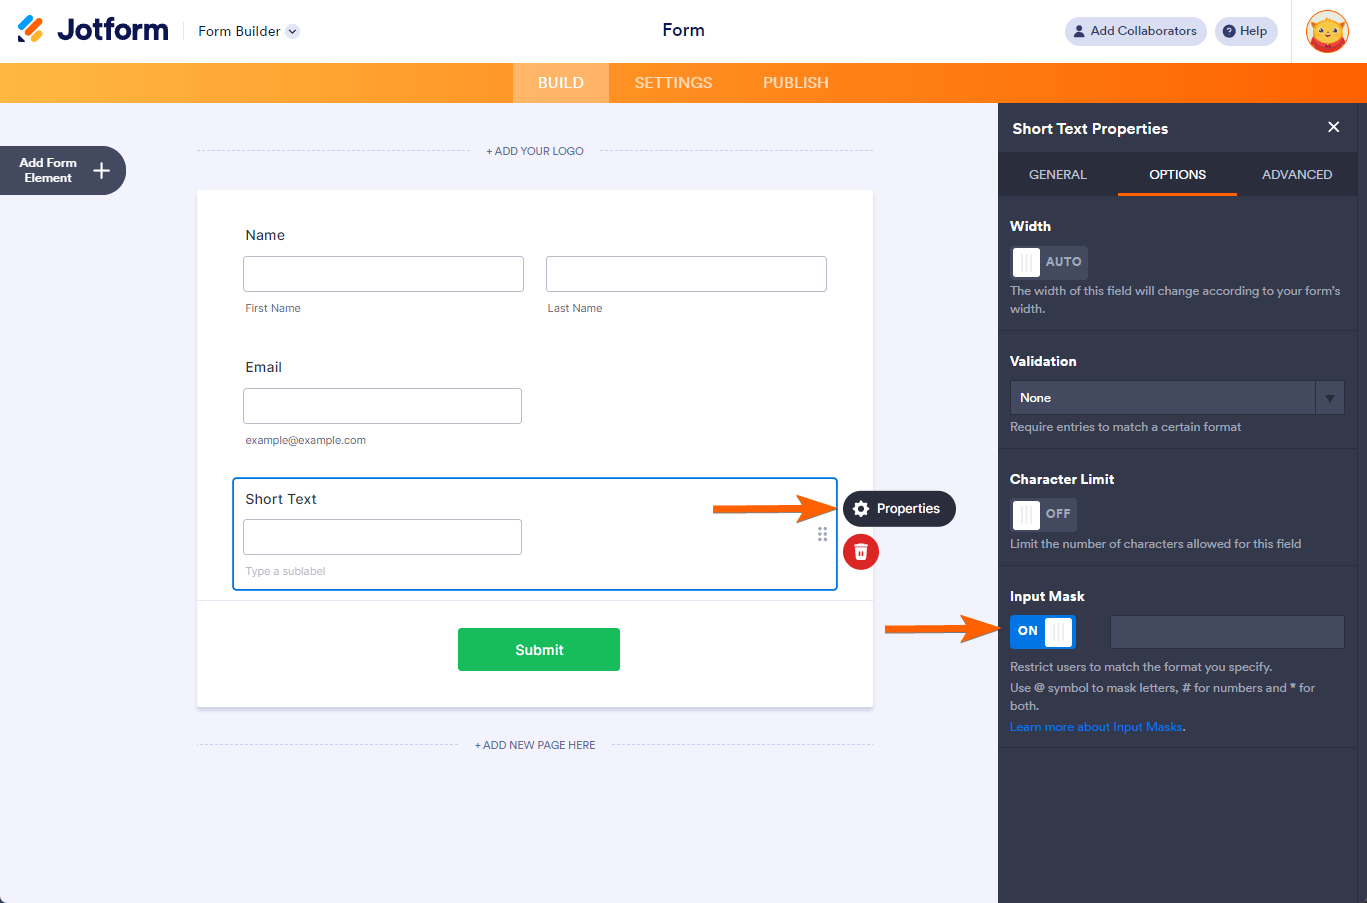
- In the Form Builder, click the Short Text or Phone element.
- Open the Properties of the given field by clicking the Gear/Cog Wheel icon.
- Under the Options tab, toggle the Input Mask.
With Input Mask, you can use the following symbols to format the values:
- # — Use the Number Sign to mask number inputs.
- @ — Use the At Sign to mask letter inputs.
- * — Use the Asterisk Sign to mask both number and letter inputs.
Add any character as a fixed value or separator between these masking signs.
Setting up Conditional Input Mask
Limiting the input format through the toolbar is easy to grasp, but what if the format changes across the form due to user preference on one of the other fields? In this case, conditions are always useful. Let’s assume we’re in the US and want to include international phone numbers but want to keep domestic numbers as well as local ones.
There are two different ways to achieve that:
1. Create Multiple Fields with Show/Hide Conditions
To achieve that, you will need to create two or more fields for same type of information, one always filled out and other fields are empty.
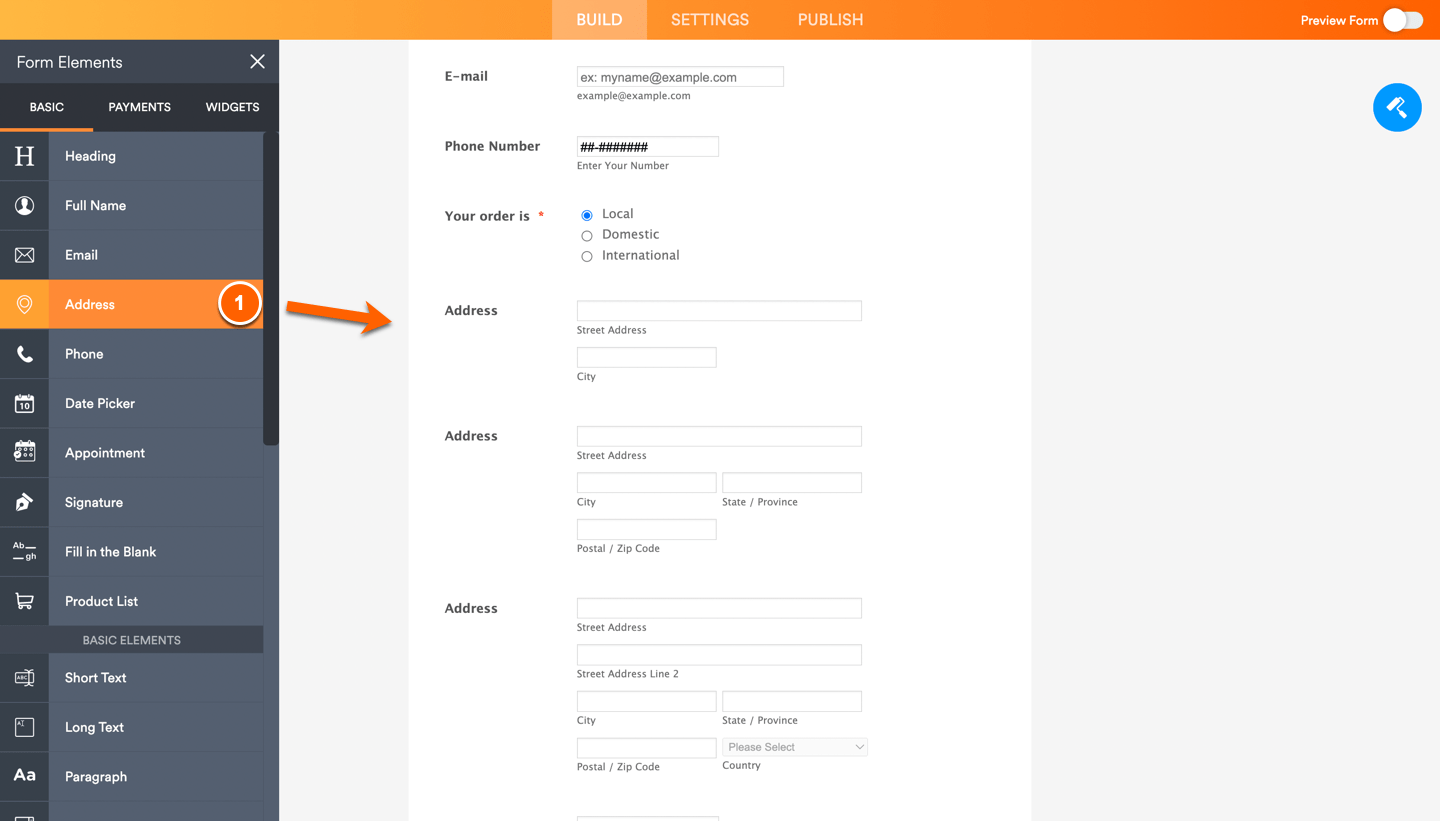
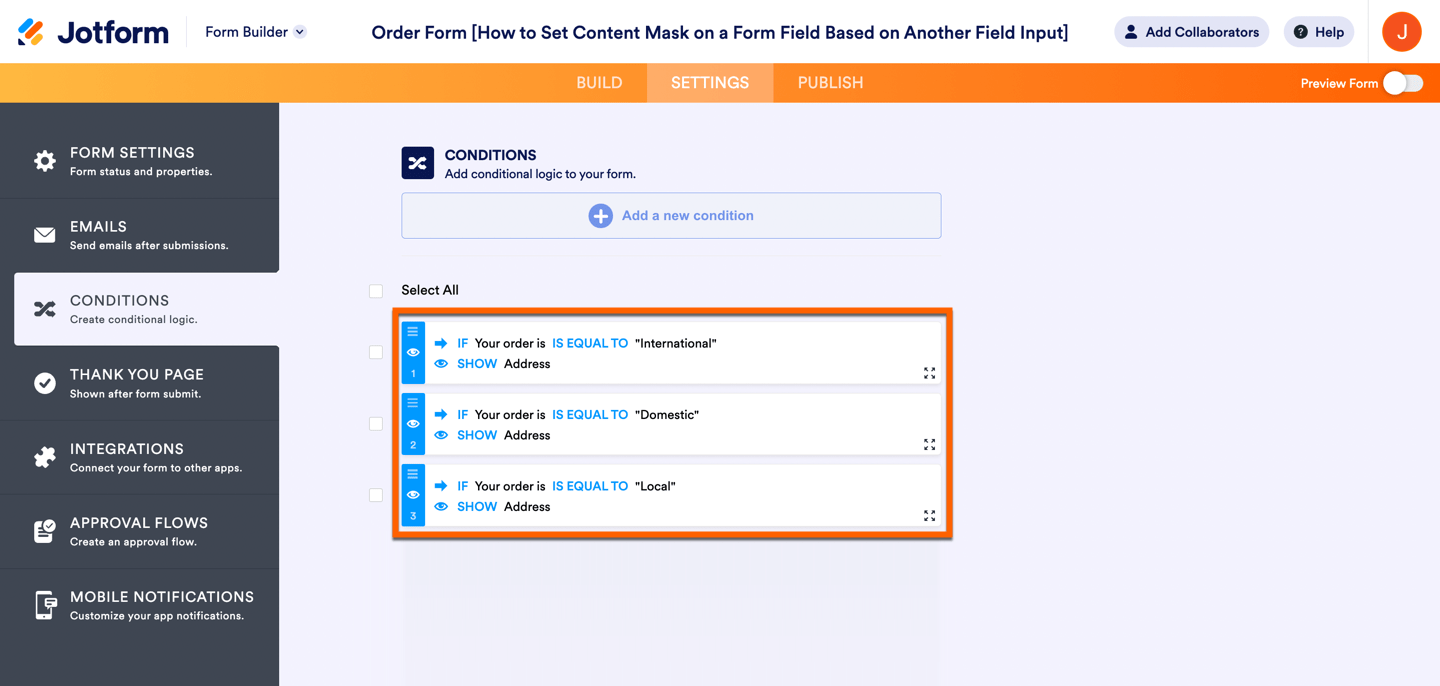
In our demo this method has been applied for the Address field to show the difference that this setup makes. Here’s the setup:
- Add a Single Choice element as an address selector and 3 Address elements into your form for each type of address.
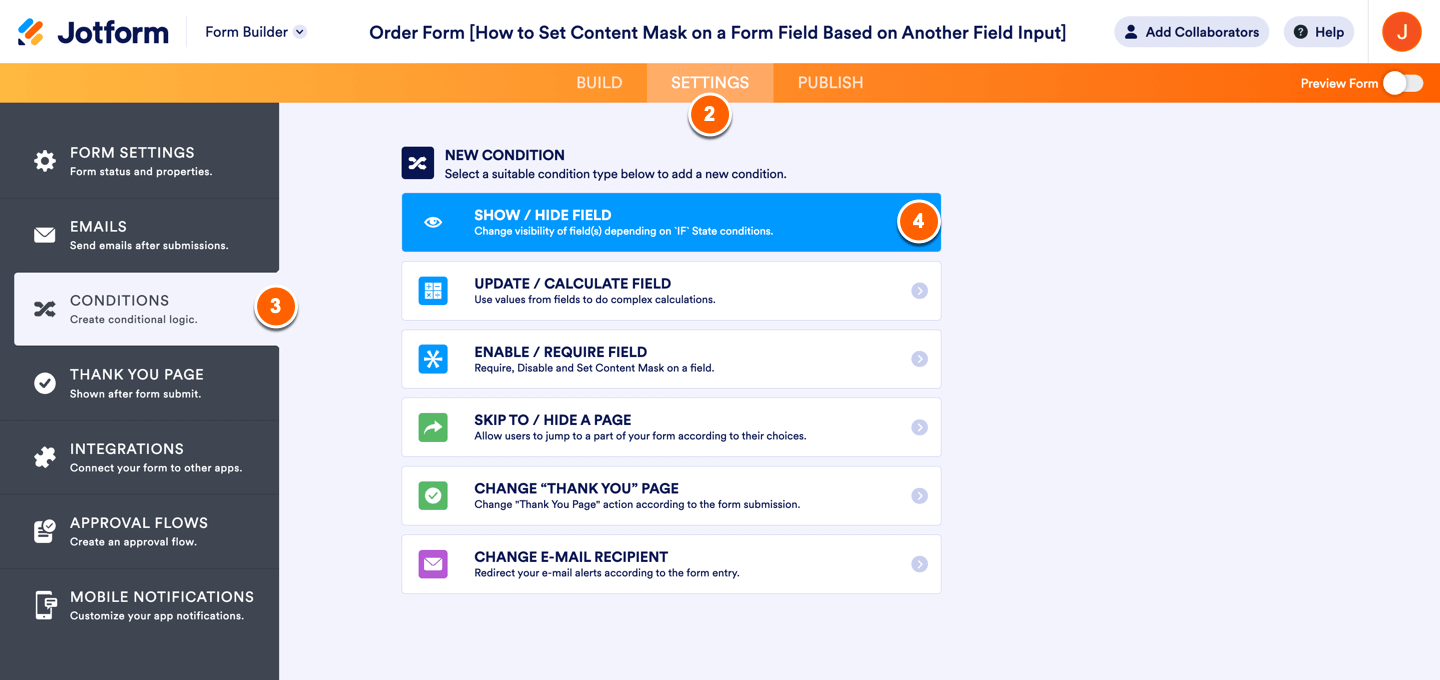
- Go to the Settings page.
- Select the Conditions tab.
- Click on the Show / Hide Field option.
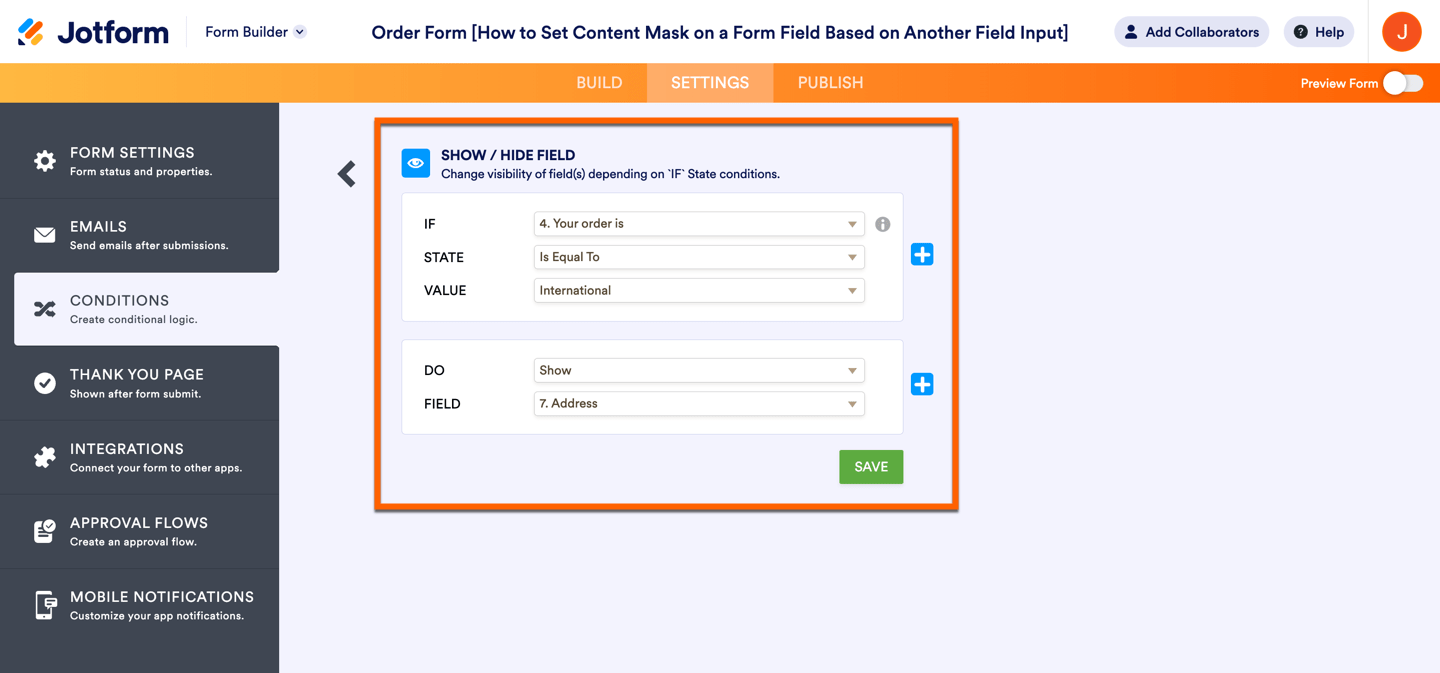
- After that, create a condition to show the field depending on a selected address type:
Finally, you should setup Show / Hide Condition for each Address field.
2. Create a Conditional Mask on a Single Field
In this way – one field shows us the value all the time, but the format can be changed conditionally.
In our demo this method has been applied for the Phone field to show the difference that this setup makes. If the business is mostly local, it makes sense that the input mask will be set for local phone numbers: 123-1234. However, if someone is not local, but is still domestic, the format would be: (123) 123-1234. And international numbers start with a plus and its own code: +123-123-123-1234.
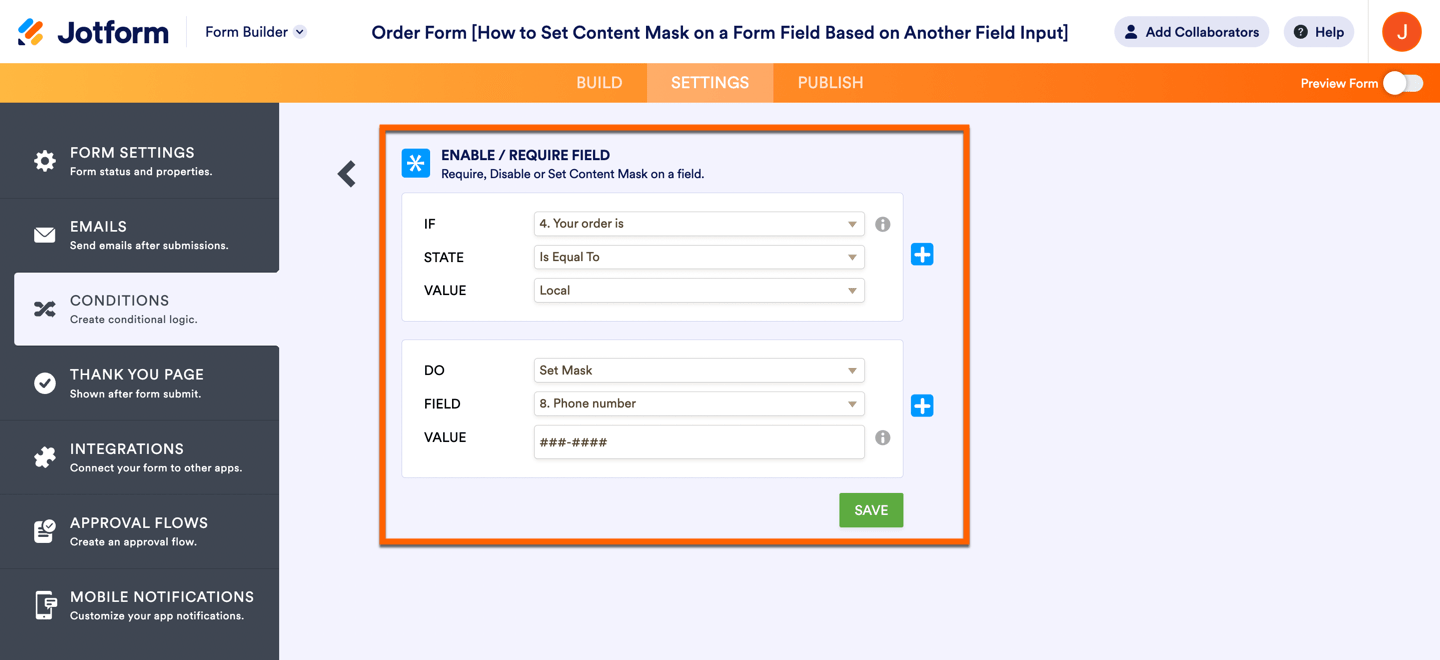
All other characters that we add are there to help us with the format, meaning that they will always stay there. So for US local number mask, we would enter ###-####, meaning that after the third number there is a minus/dash added for us automatically and 4 more numbers can be accepted.
Other formats:
US Domestic phone numbers: (###) ###-####
International phone numbers: +###-###-###-####
To create the same:
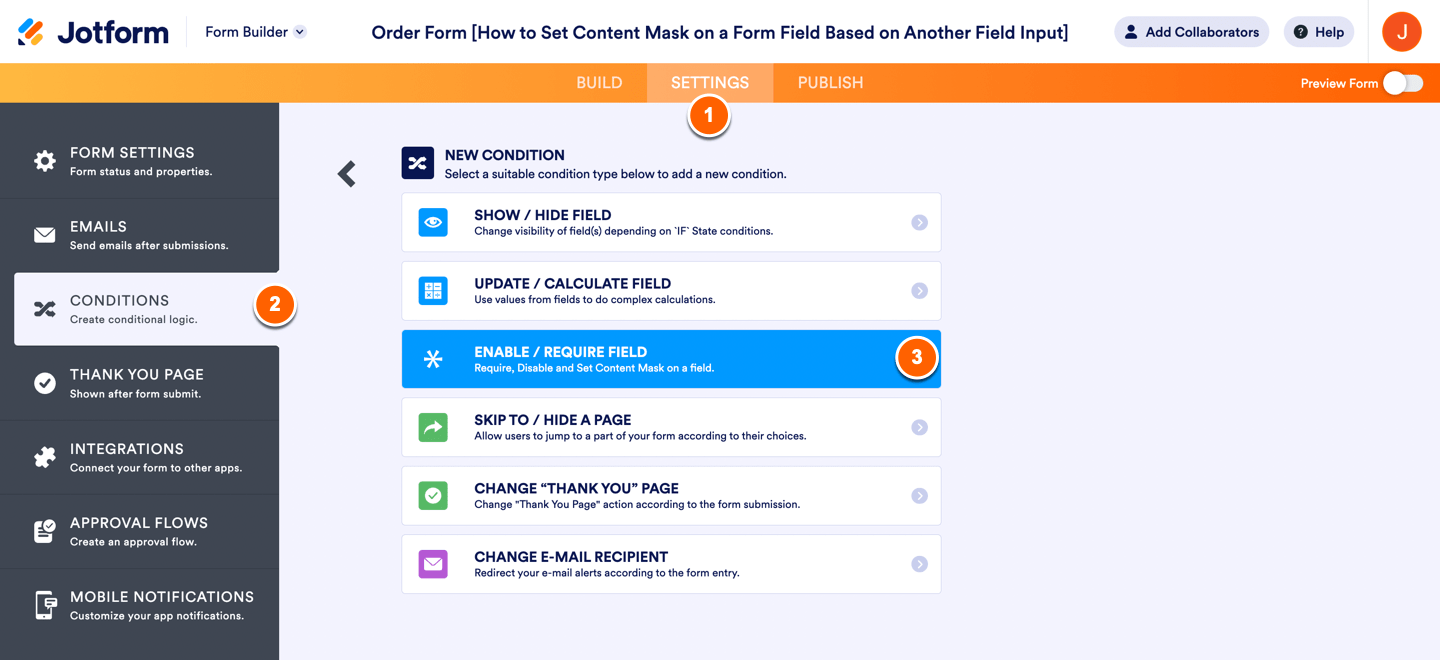
- Go to the Settings page at the top.
- Select the Conditions tab.
- Select Enable / Require Field.
- Set the condition up as per your requirements. Based on our demo, the condition for local numbers would look like on the screenshot below:
- Recreate the steps to add the same conditions for each masking in your form.
There are many different types of information that can be used with content masking on your form, address and telephone number being just one example.
You can see how it all looks like on this form. If you wish, you can also clone the form to your account and check it all.
Of course if you have any questions or need any assistance we would be happy to assist you with the same. All that you would need to do is to let us know about it by creating a new thread or posting a comment here.


Send Comment:
6 Comments:
92 days ago
HOW CAN WE SET UP A REQUIREMENT FOR SOMEONE TO ENTER ONLY CAPITAL LETTERS ON A WORD OR TO HAVE DOCUMENTS REBAELED IN CAPITAL LETTERS AUTOMATICALLY
More than a year ago
Would love to see the possibility of conditionally setting up answers of questions, based on answers of previous questions. For the forms I use I can't have people give the same answer to question 2 until 10 as they have given to question number 1. So If a person would answer "A" on question 1, that should result as answer A being eliminated from the future questions.
More than a year ago
I'd love to see these full models, but... Erm... The links are not working here, it opens to a blank page.
More than a year ago
I have been using JotForms for a while for my business contacts. I converted my contact form to Jotform cards when it debuted and it seemed to work OK for a while. Then some customers said they were not hearing back from me. When I tried sending myself a form, I received a message that basically said: "pay up or else". I'm not impressed - I'm still trying to find out how many customers I lost!!! And this form is all double characters - it's giving me a headache. No longer a fan!
More than a year ago
useful! tkx
More than a year ago
Depending on which company is chosen from the dropdown list in question #1, I need that company's corresponding address automatically entered in the forms address box, along with company's corresponding phone #'s.
Please help!