Box Metadata allows you to define and store custom data and associate it with files uploaded through your form.
Note:
Metadata is a feature reserved for Business Plus, Enterprise, and Elite Box accounts. For more information, visit: Using Metadata.
Creating a Metadata Template
First, you must create a Metadata template on your Box account. The templates define the structure of the data attached to your files. If you’ve already done this, skip to mapping the fields.
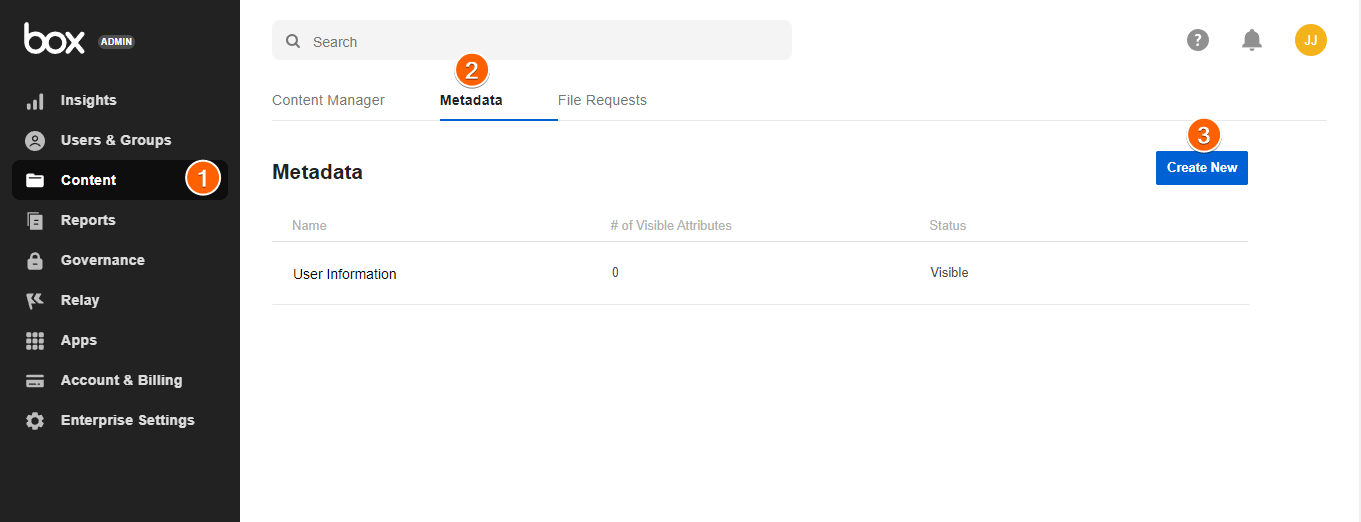
- In your Box’s Admin Console, go to the Content section.
- Click Metadata from the options.
- Click the Create New button to start creating the template.
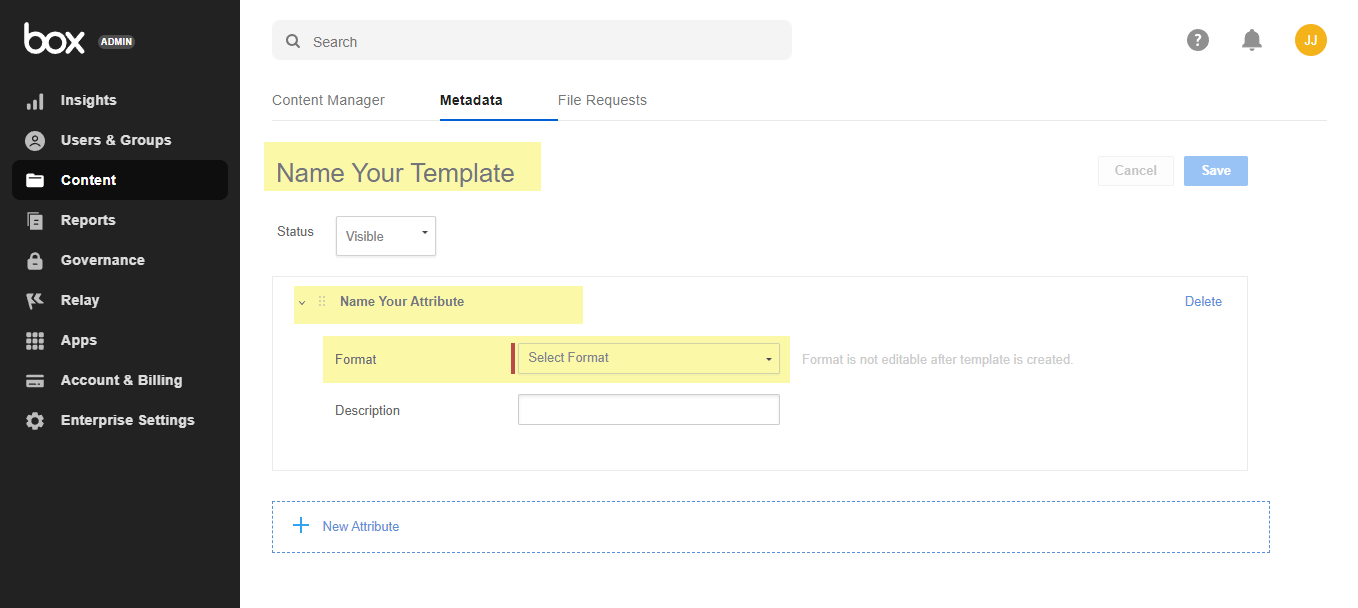
- Provide and set the following required settings, as shown in the image below:
- Template Name — This will be the label of the specific template you can select in the Box integration.
- Attribute Name — This will be the label of the metadata fields through the integration.
- Format — The specific type of field. You can find more details of this below.
- Click the + New Attribute button to add more fields.
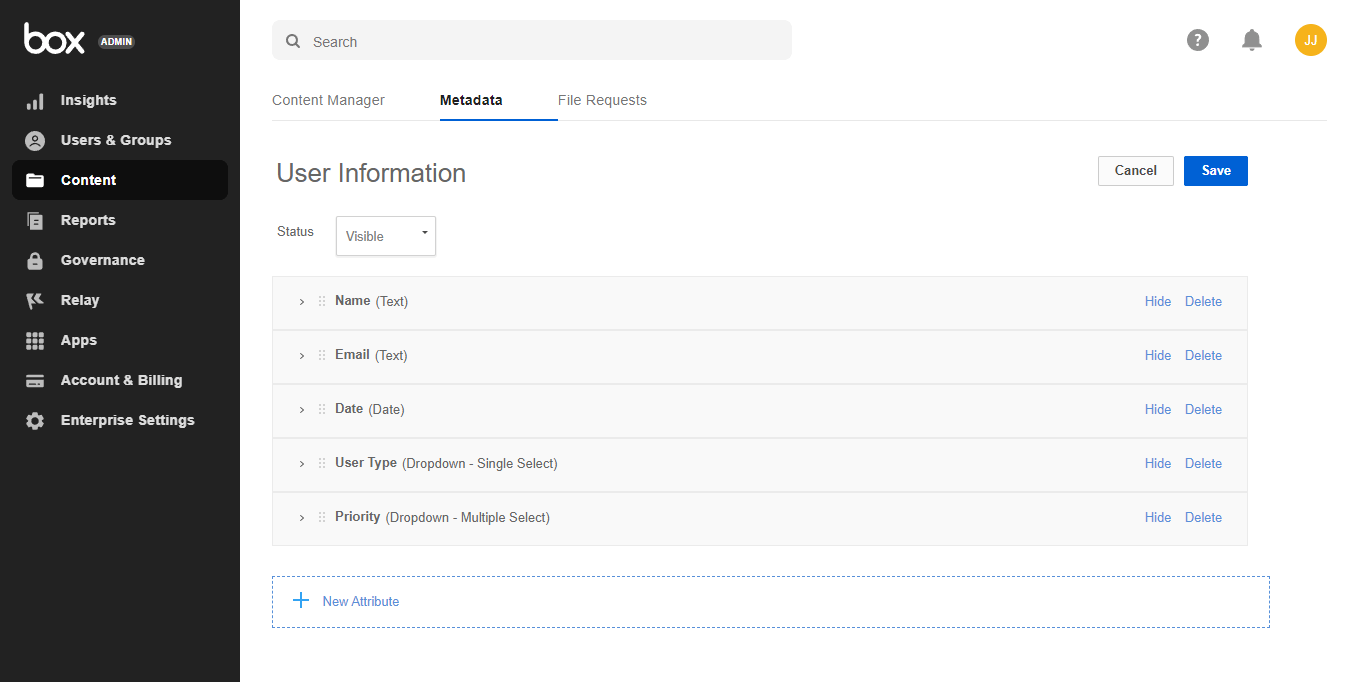
- Finally, click the Save button to save everything. Your final template should look like the following:
Now, let’s go with mapping the fields through your integration settings.
Mapping Jotform Fields to Your Metadata Template
Assuming you’ve already integrated Box into your form, you only need to edit it now. If not integrated yet, you can do it per this guide: How to Integrate Jotform with Box.
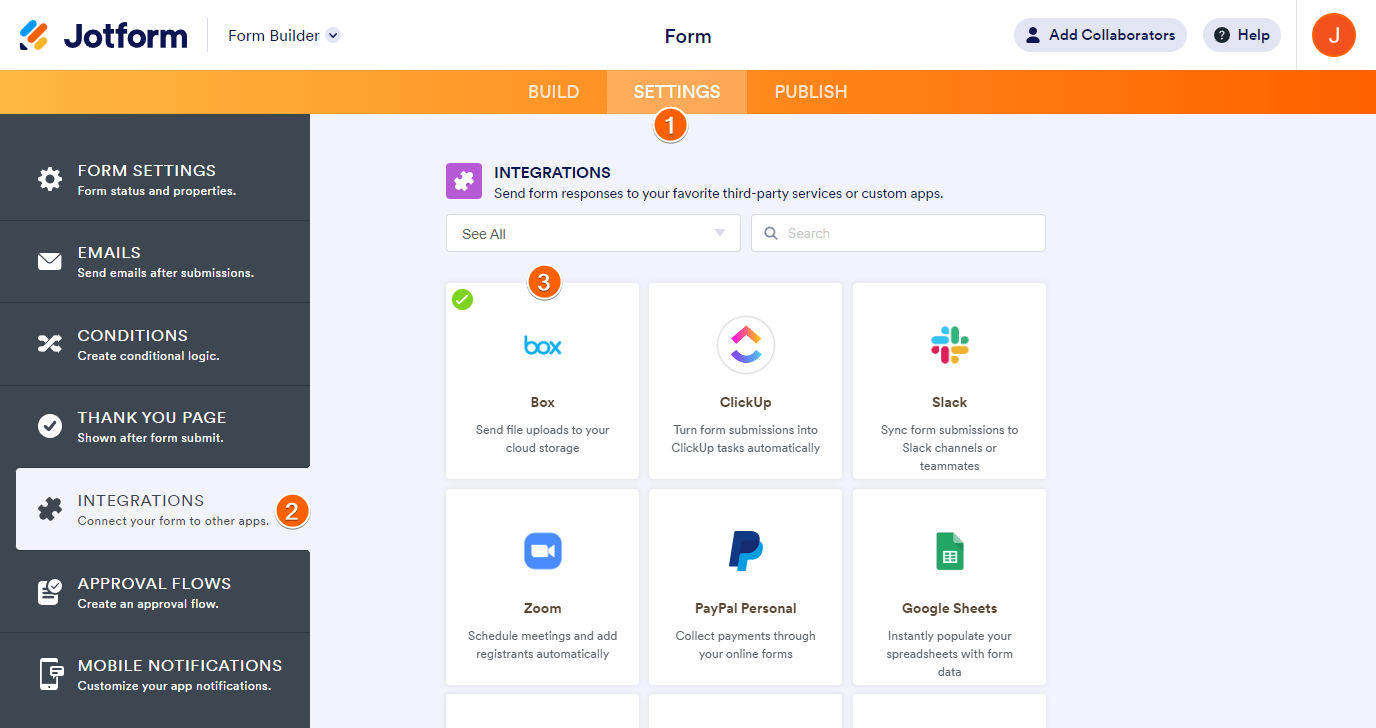
- In the Form Builder, go to the Settings tab.
- Click Integrations on the left.
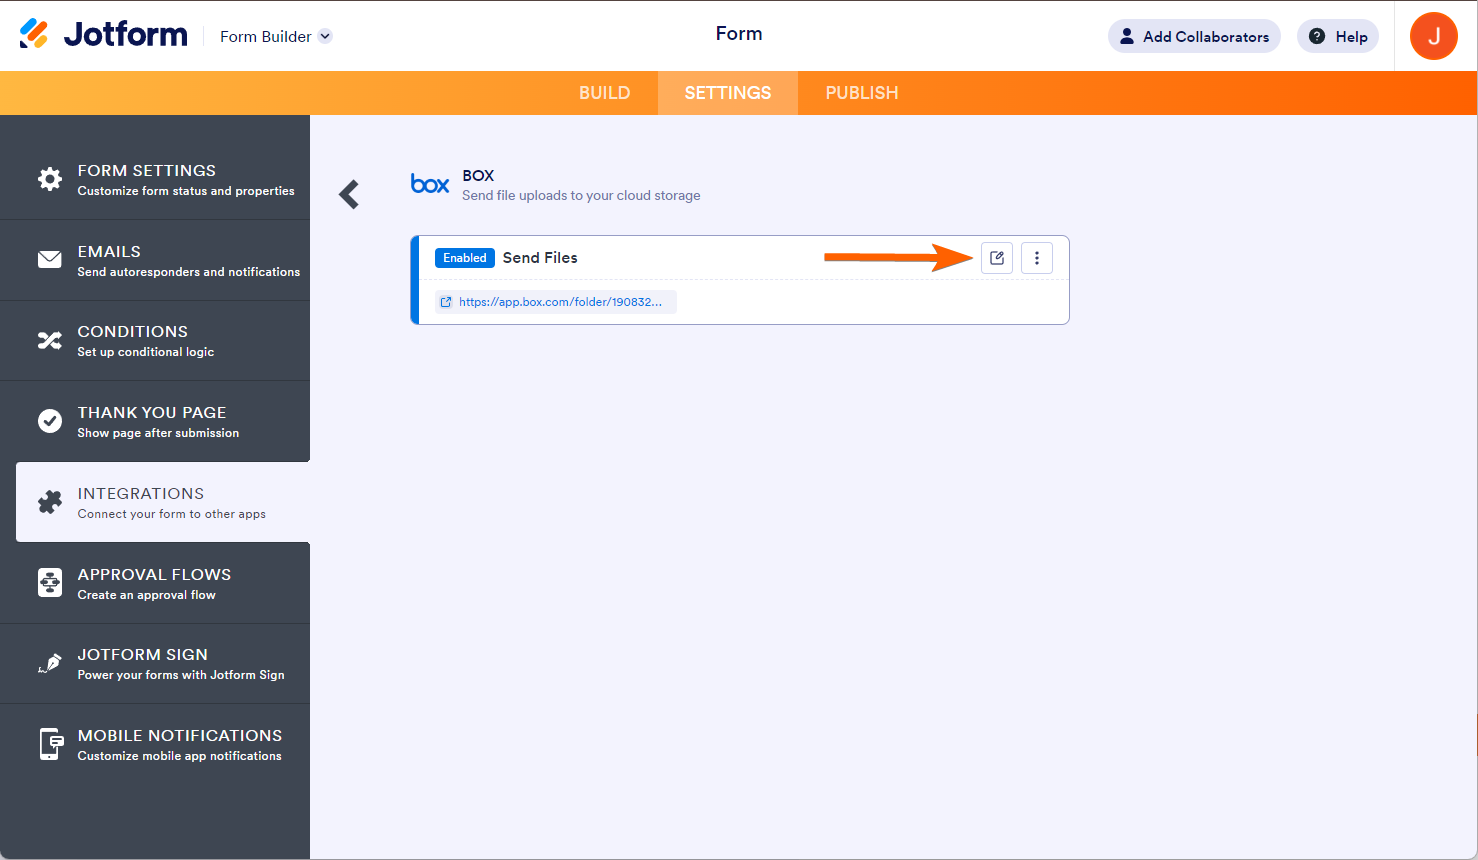
- You should see Box at the top. Click it to start editing.
- Hover your mouse over the active integration and click the Edit Integration icon to load your Box integration settings.
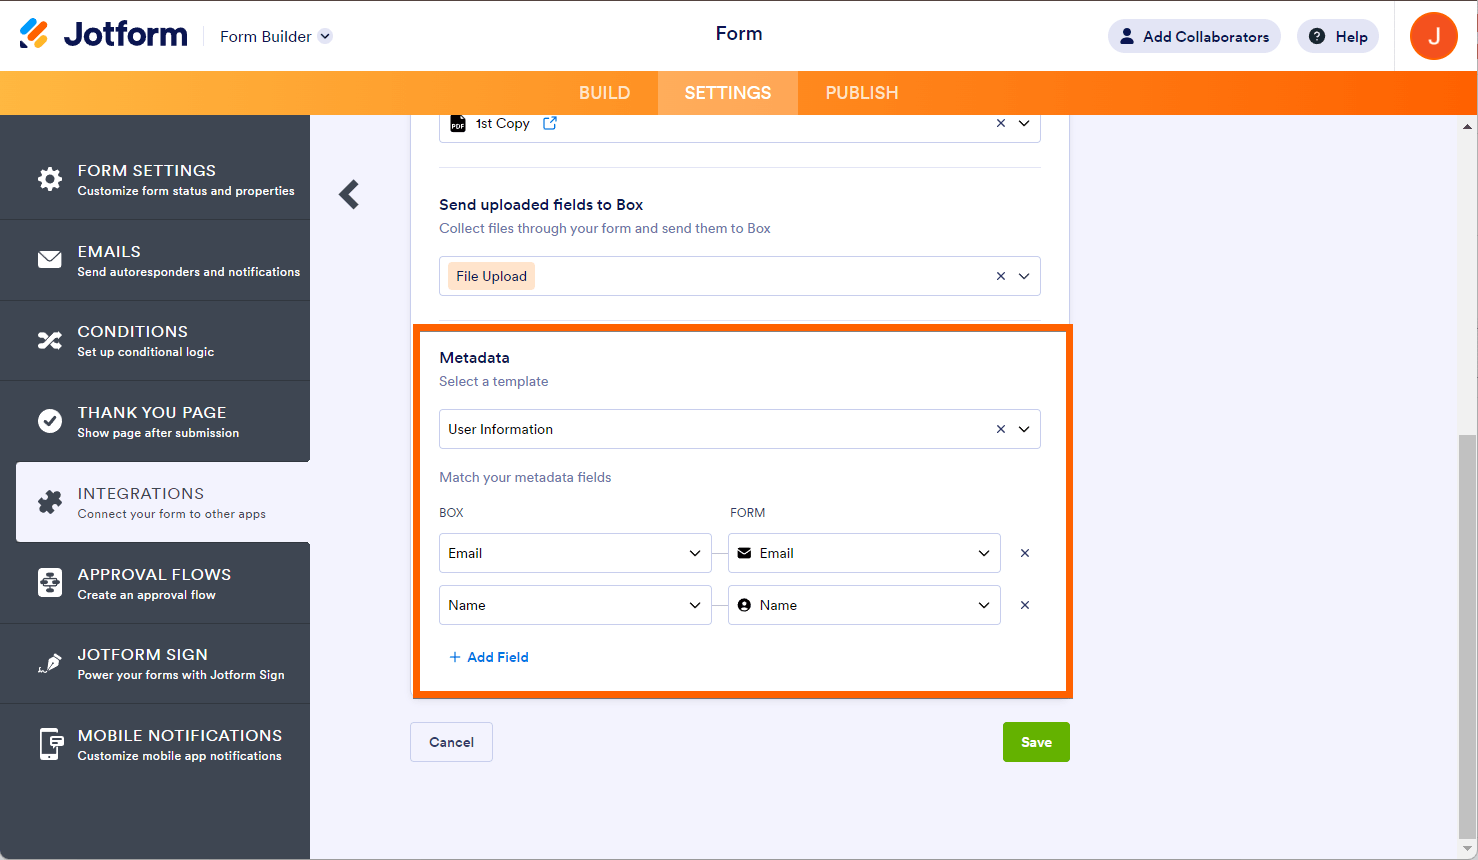
- Scroll down in the settings to see the Metadata section. Click Add Field to map the fields accordingly. Here’s an example based on the above Metadata template:
- Click the Save button to save your changes. You can now exit the Form Builder. We also suggest doing a test to see if it works.
Field Types and Metadata Attribute Format
Box requires that values passed to the Metadata API match the format of the mapped attribute. If a mismatch is detected, the Metadata will be discarded and not attached to the uploaded file.
Text
You can map the Text attribute to Jotform fields, such as Short Text Entry (textbox) and Long Text Entry (text area). You can also map the compound fields, such as the Full Name and Address, but the form will concatenate the values with a blank space. For example, “John Smith“ for the name or “9999 W Magnolia Blvd Burbank California 91505 United States” for the address.
Number
Number-formatted attributes can accept only integers. As such, you will have to use the Number field. You can also use the Short and Long Text Entry fields, but provided that the input is restricted to numbers, using the Input Masking option. You can use the Dropdown, Single Choice, and Multiple Choice fields for this attribute, but only when you have numbers as the options.
Dropdown
The dropdown restricts the input to the options you listed in the metadata template setup. Therefore, you must use Dropdown, Single Choice, or Multiple Choice in your Jotform form.
Date
For Date-formatted metadata attributes, only the Date Picker field works for now.


Send Comment: