Klarna (previously known as Sofort) provides a convenient and secure way to complete transactions without needing credit cards or e-wallets. With Klarna, your customers can pay for goods and services directly from their online banking accounts, eliminating the hassle of entering credit card details or creating additional accounts.
With Jotform’s Klarna integration, you can do the following:
- Sell products
- Collect donations
- Accept custom payments
Note
Klarna has consolidated Sofort to its platform, but this integration still supports the Sofort API, so you must obtain the Configuration Key from your legacy Sofort account to use this integration. Visit Sofort – Integration Steps for more details.
Creating Project at Klarna
You must first create a project at Klarna to get the configuration key required for the integration. If you already have it, skip to the main integration steps below.
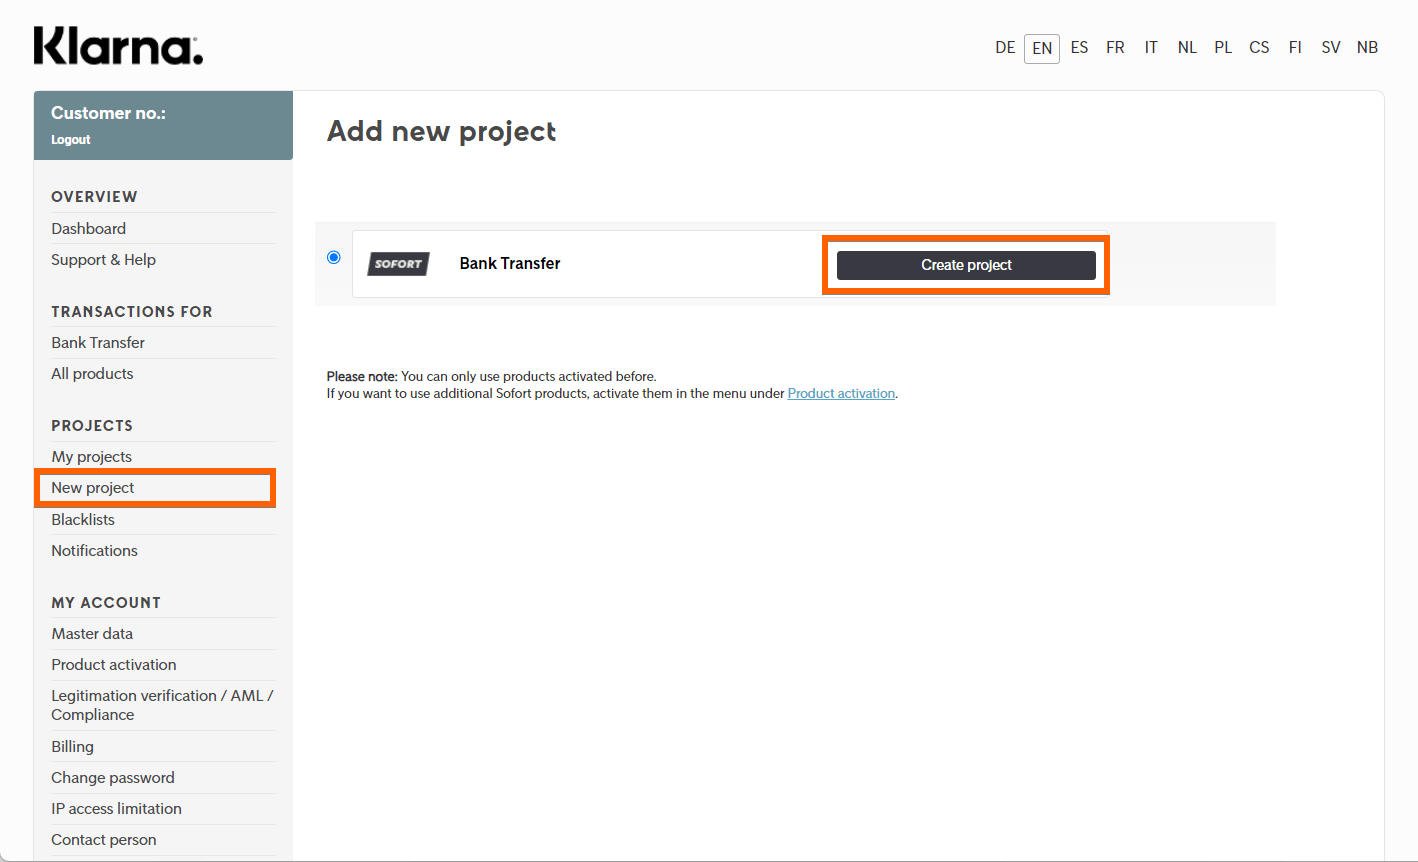
- Click the New Project link under the Projects section of your Klarna dashboard.
- Click the Create Project button on the next window.
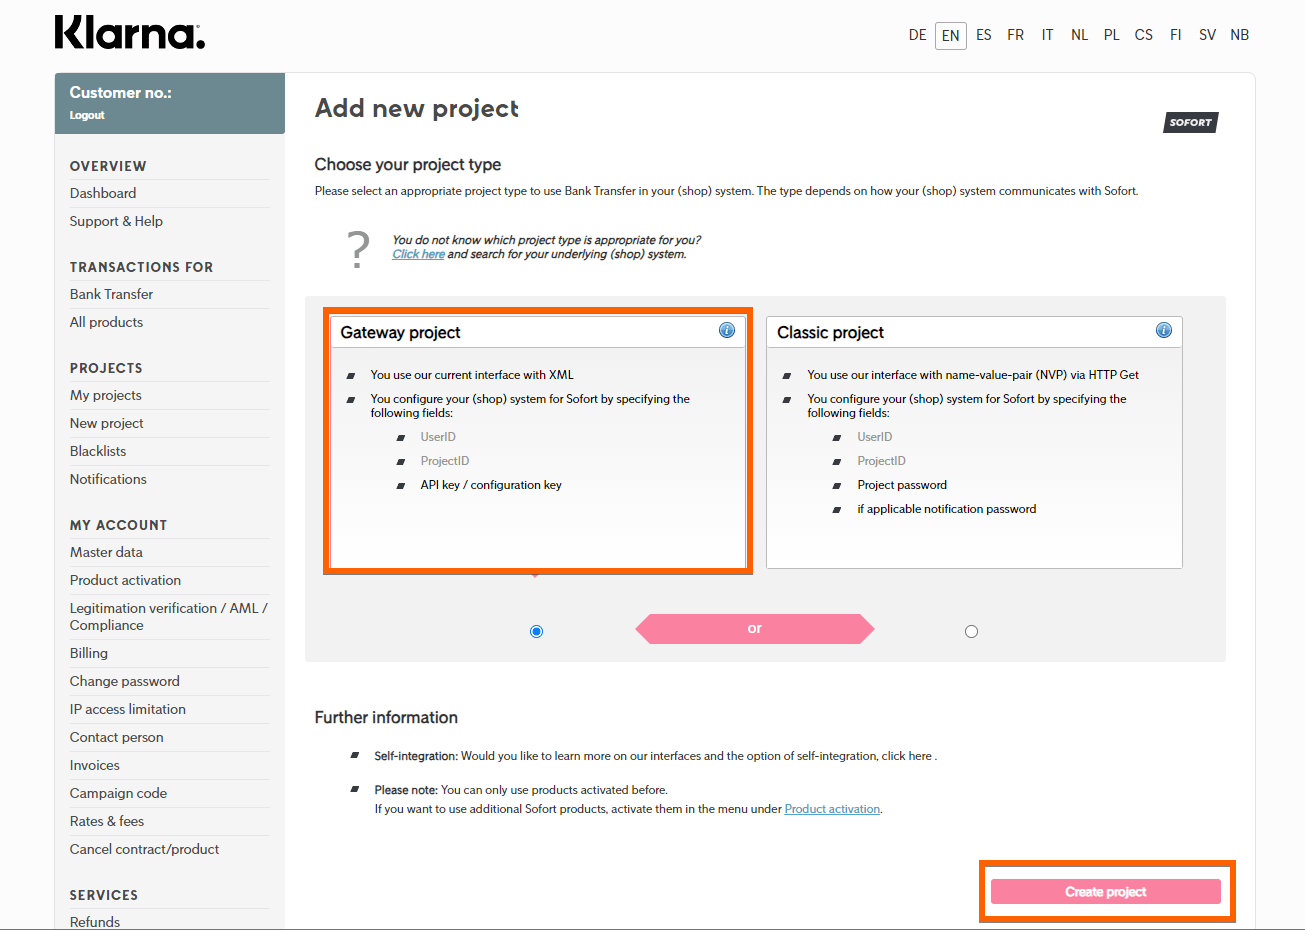
- Choose Gateway Project from the Project Types.
- Click the Create Project button at the bottom part.
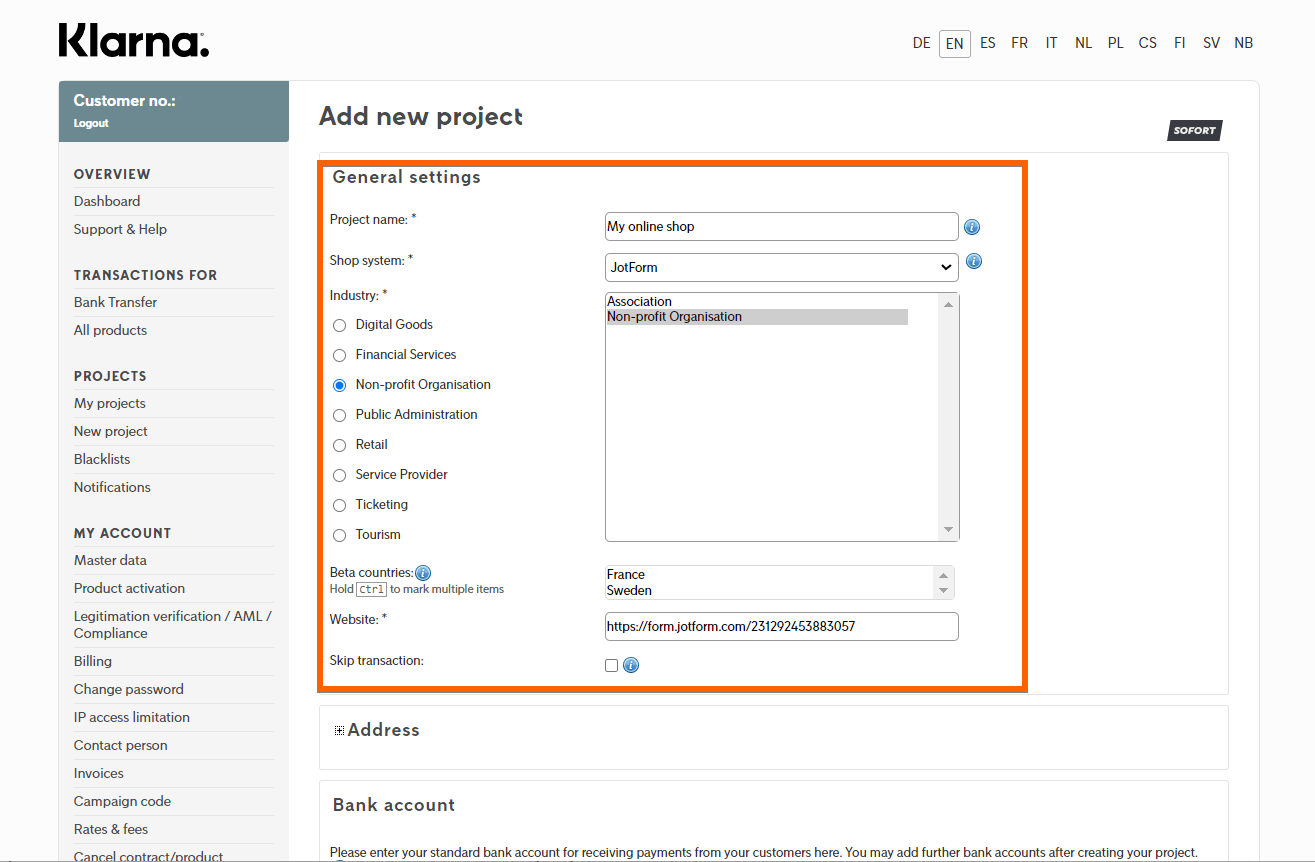
- Fill up and select an option from the General Settings section:
- Project Name — Provide a name for the project. You can type any name here.
- Shop System — Find and select Jotform from the list.
- Industry — Choose the industry that describes your business.
- Beta Countries — You can skip this part or choose the country on Klarna’s beta list.
- Website — You will need to enter your Form URL in this box.
- Skip Transaction — Leave this unchecked.
- Under the Payment Methods, check the Bank Transfer option.
- Toggle the Options, and there, you’ll find two checkboxes under the General product settings:
- Sender country locked — Keep this unchecked.
- Test mode — Check this option if you want to test the integration using test bank accounts provided by Klarna on the checkout page.
- At the bottom of the project details, click the Save button to create the project.
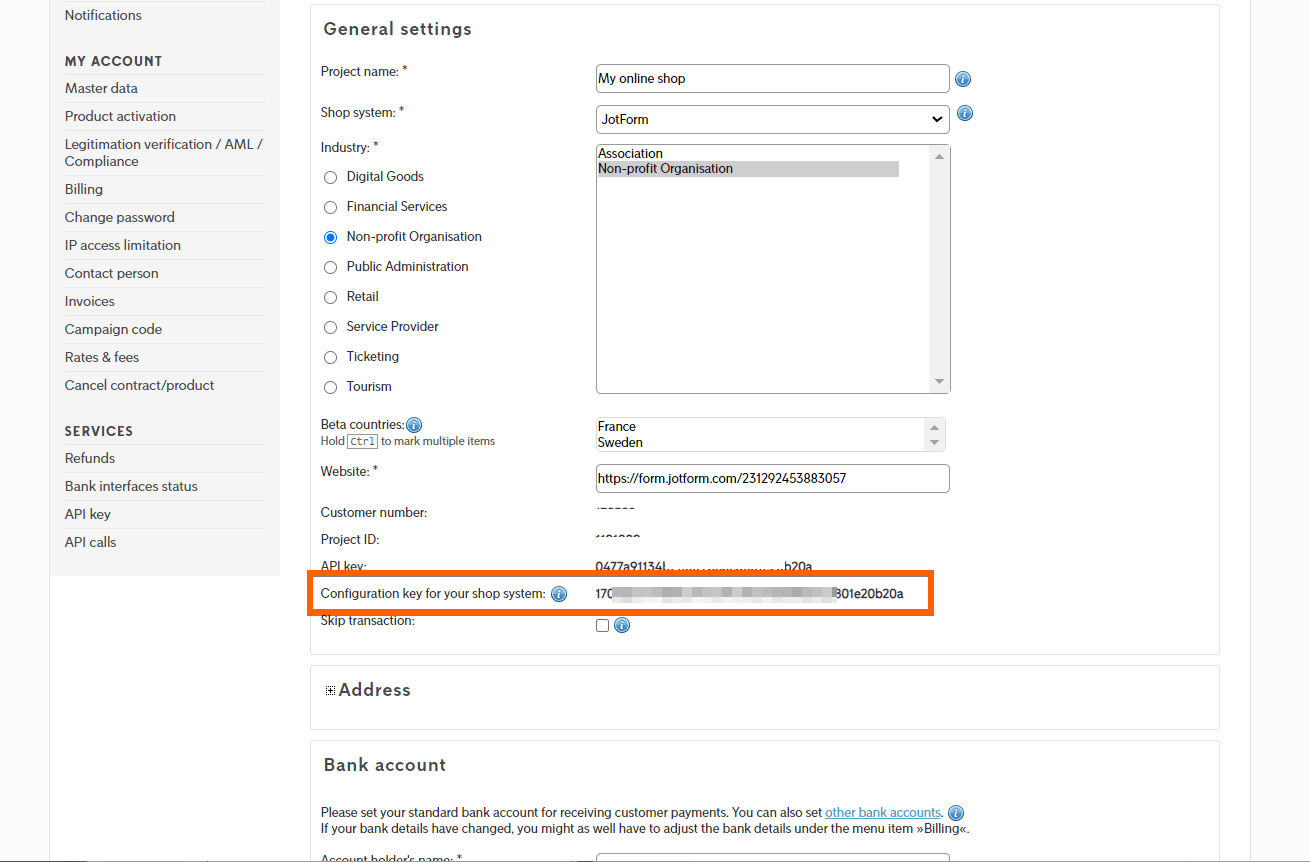
- After successfully saving the project, you will see the API credentials under the General Settings section. Copy the configuration key from here.
Now, let’s go to the main integration steps.
Adding and Setting up Klarna Integration
You can add and set up Klarna integration in your form by following the below steps.
- In the Form Builder, click the Add Element button on the left side of the screen.
- Under the Payments tab, search for Klarna and click or drag/drop it to add.
- In the Payment Settings, provide and select the following:
- Configuration Key — Paste the key you’ve copied from your Klarna project.
- Currency — Klarna supports the following currencies only:
- EUR – European Union Currency
- CHF – Swiss Franc
- GBP – British Pound
- PLN – Polish Złoty
- SEK – Swedish Krona
- CZK – Czech Koruna
- HUF – Hungarian Forint
- Payment Type — With Klarna, you can sell products, accept user-defined amounts, or collect donations.
Did you know?
You can open the Payment Settings by clicking the Wand icon on the right side of Klarna payment.
- Finally, click Continue to add your product items. If you’ve chosen User Defined Amount or Collect Donation, click the Save button to complete the integration.
See also:
- Setting Up Your First Order Form
- How to Add Options to Payment Forms
- How to Add Coupon Code to Payment Forms
- How to Add Tax to Your Payment Form
- How to Add Shipping Cost to Payment Forms
- How to Generate an Invoice for Your Payment Form
Klarna Payment Process
When users submit your form, they will be redirected to Klarna’s payment page to complete the payment process. Here’s a demo:
Notes
- The payment completion might take up to 10 minutes. In this case, you will find the payment from the Incomplete Payment section of the Jotform Tables.
- If you complete a payment from the Incomplete Payment section, you won’t see the Transaction ID in form emails, Jotform Tables, and Inbox even after you receive the payment. In this case, we recommend waiting for the payment to complete.
- Manually completed submissions in forms integrated with Klarna will always increase your payment submission count, even if they are in test mode.
Viewing Payments with Klarna
At Klarna, you can view the transactions under the Bank Transfer section. Here’s how you can do that:
- Go to the Bank Transfer section of your Klarna dashboard.
- Scroll down and look for the payment made through your form.
- Click the Transaction ID to view the full payment details, including the Form ID and Submission ID.
For test transactions, you have the option to simulate the results as shown in the below image:
If you have any questions or suggestions about Jotform’s Klarna integration, please post them in the comments below.


Send Comment:
1 Comments:
More than a year ago
ho creato il nuovo progetto con Sofort. Adesso vorrei inserirlo nel modulo ma non si evidenzia nei metodi di pagamento. Sofort dice che: " Si prega di notare che con il numero ID di progetto di 6 cifre, gli ID delle transazioni aumenteranno di una cifra. Saranno eventualmente necessarie anche modifiche ala tua piattaforma. A tale riguardo, si prega di contattare il produttore della piattaforma".
Resto in attesa di un vostro cortese riscontro.
Cordiali saluti