Egnyte empowers businesses with a secure, flexible platform for file storage, sharing, and collaboration. By combining cloud and on-premises solutions, Egnyte streamlines workflows, safeguards data, and ensures compliance while adapting to the unique needs of growing organizations.
With Jotform’s integration with Egnyte through Jotform Workflows, you can send data to your Egnyte folder based on your workflow automation. For example, send only the files for approved submission. Let’s get started!
Setting up the Egnyte Integration
To set up the Egnyte integration
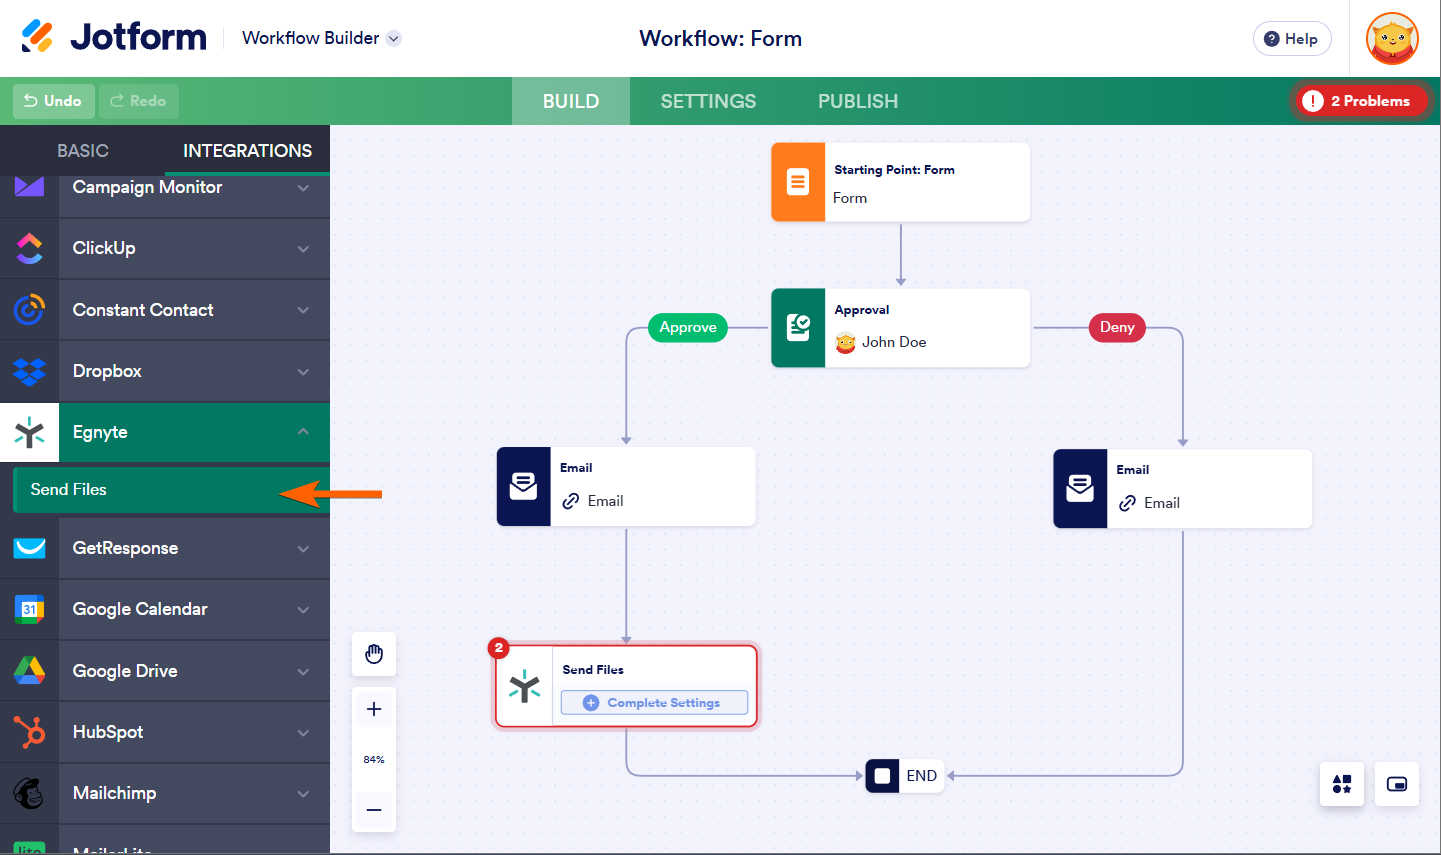
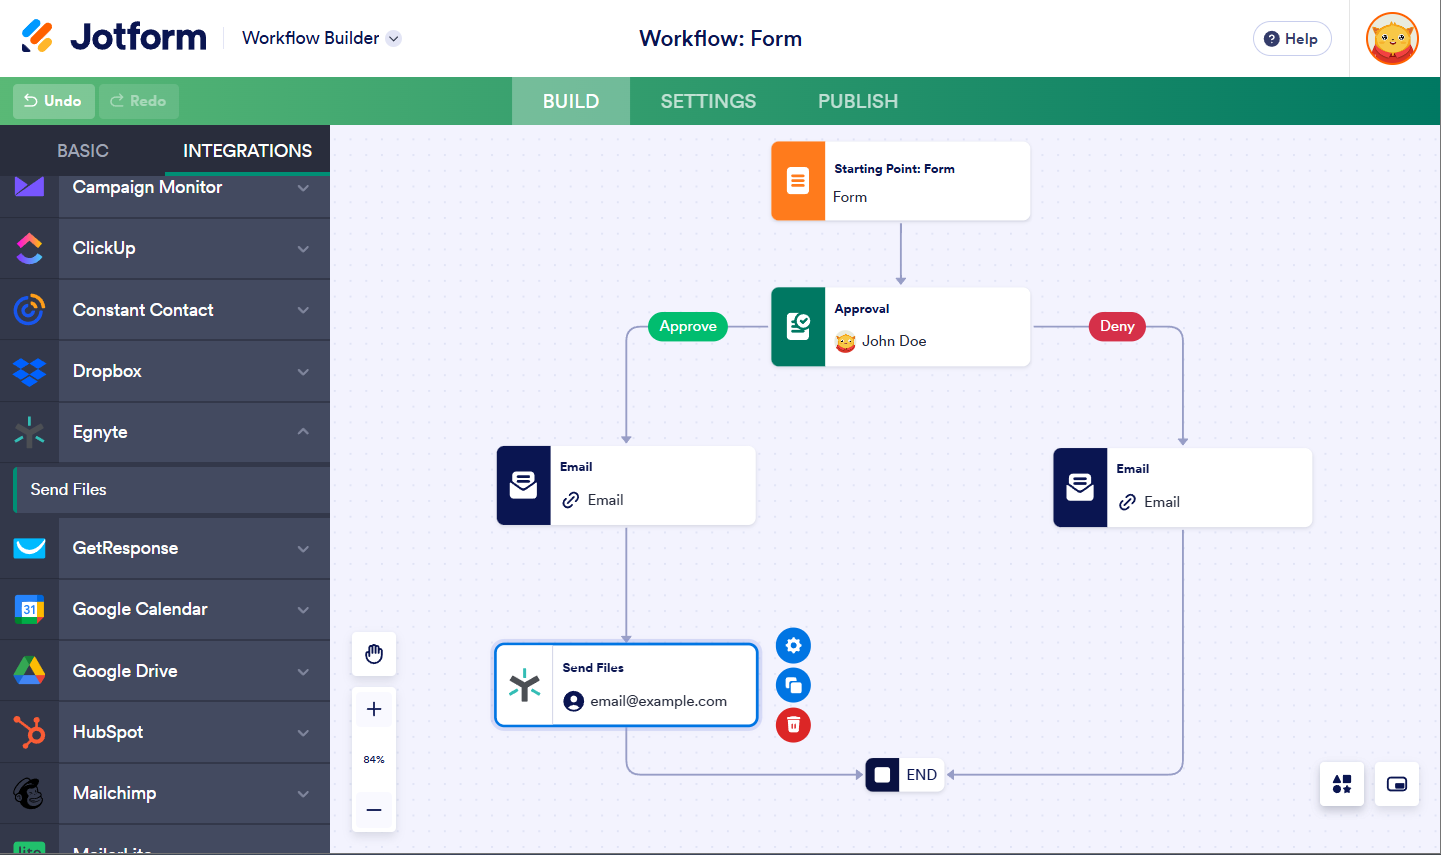
- In the Jotform Workflow Builder, add/insert Egnyte from the Integrations tab to your workflow. Here’s an example:
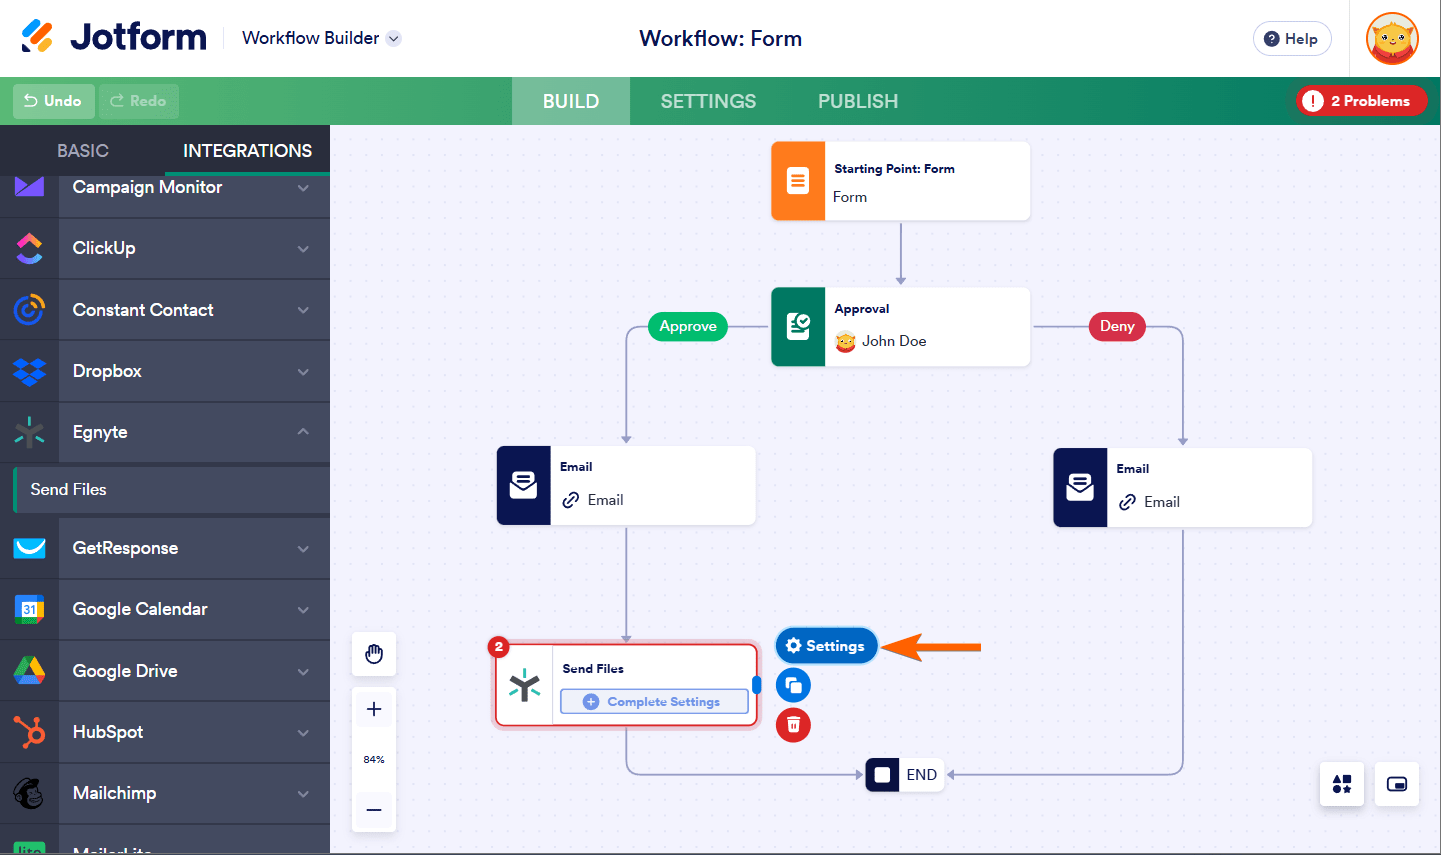
- In the Egnyte element, click the Complete Settings button or the Settings icon to begin setting up the integration.
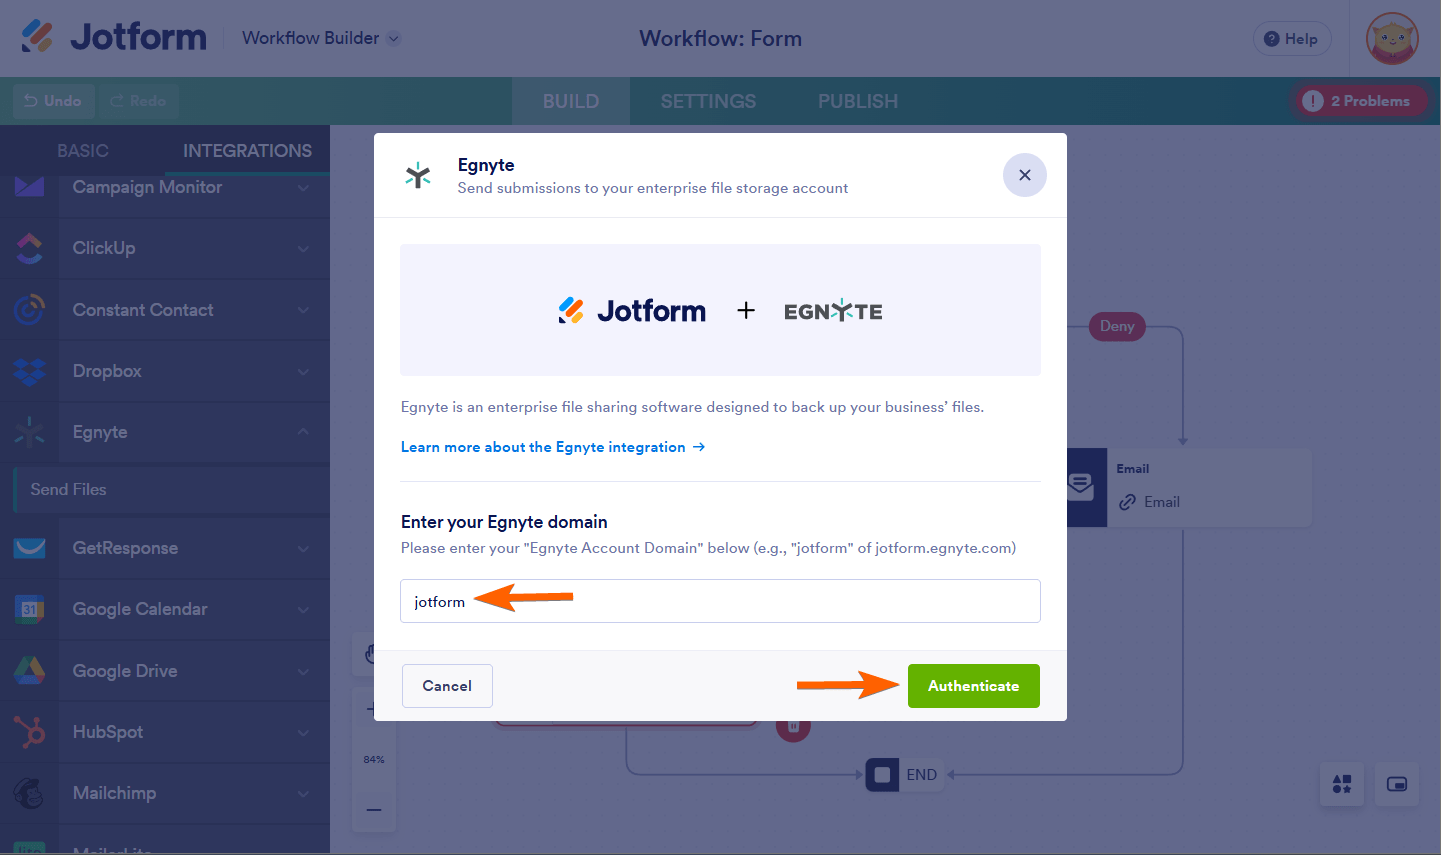
- To authenticate, you would need to provide your registered Egnyte domain. If your Egnyte URL is jotform.egnyte.com, the domain is jotform.
- Click the Authenticate button, and ensure you grant access to Jotform.
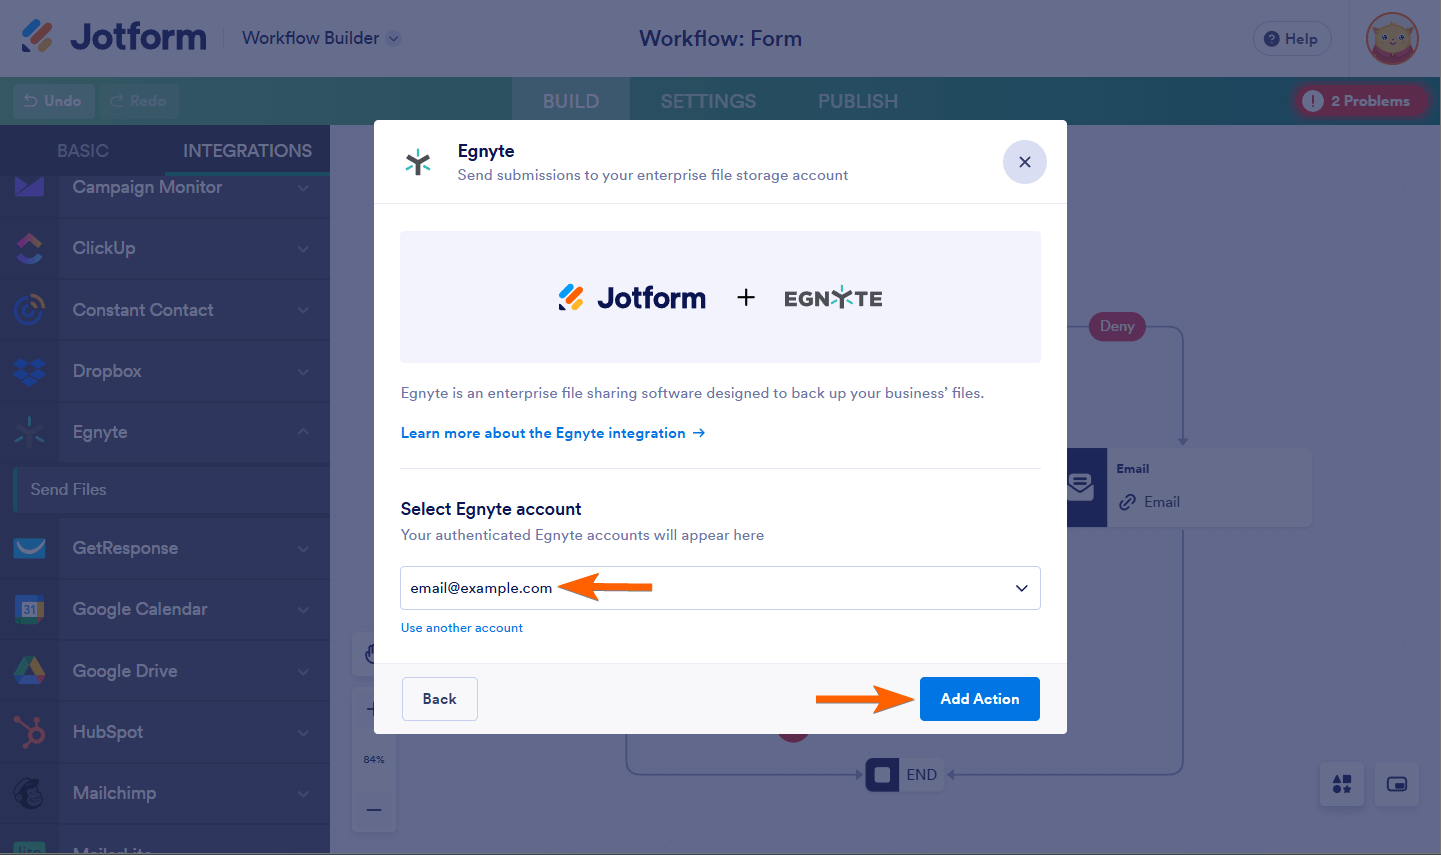
If you have connected your Egnyte account previously, choose it from the dropdown and click the Add Action button.
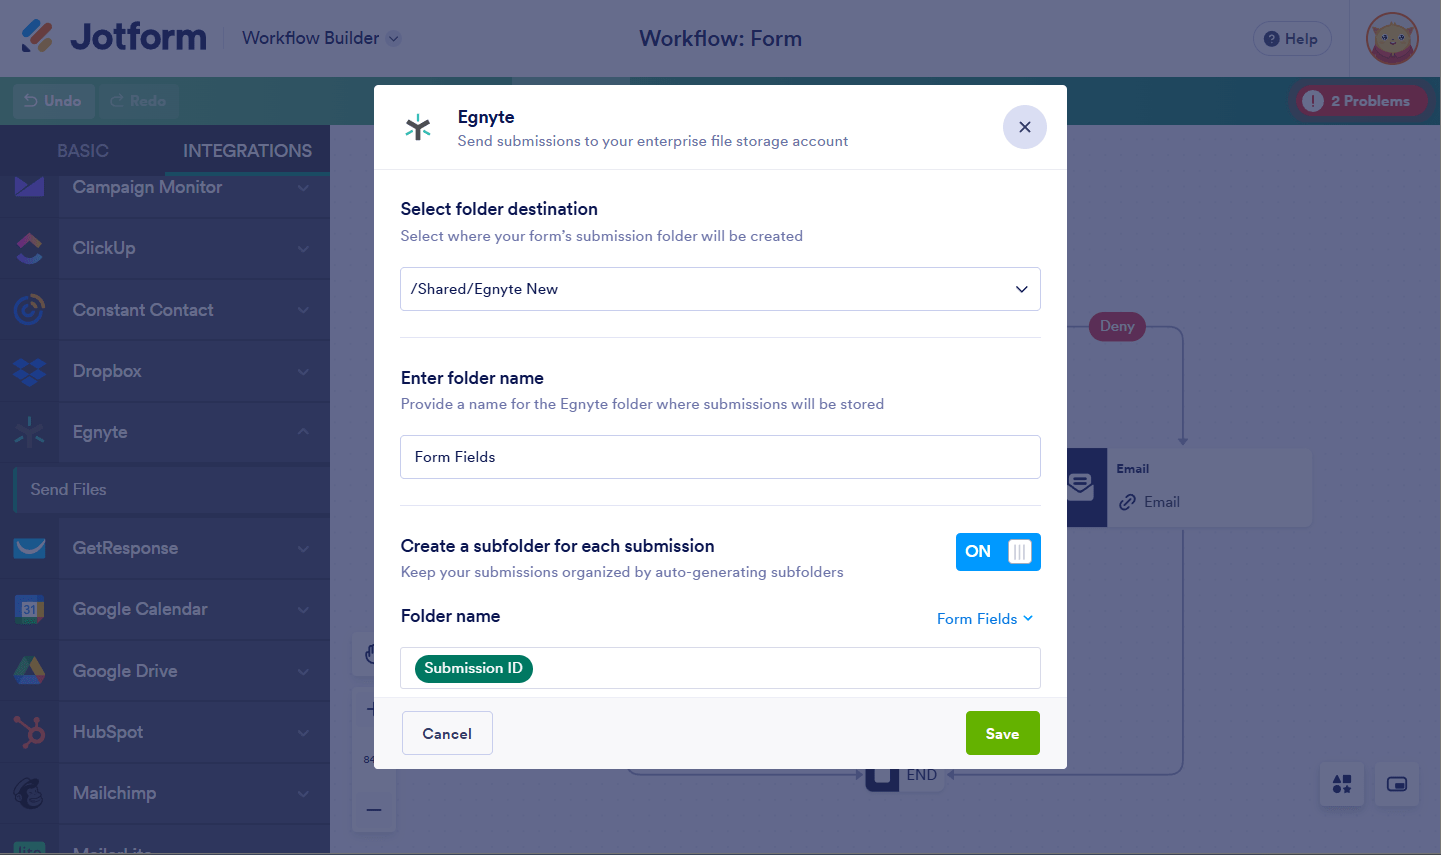
- Set up your folders, PDF, and file upload accordingly:
- Select folder destination — Select where your form’s submission folder will be created. You can choose the main Shared folder from Egnyte or a custom folder you created.
- Enter folder name — This is where your form submissions are stored.
- Create a subfolder for each submission — If you wish to organize your submissions, create a subfolder based on unique data from the form. Click the Form Fields to select the fields.
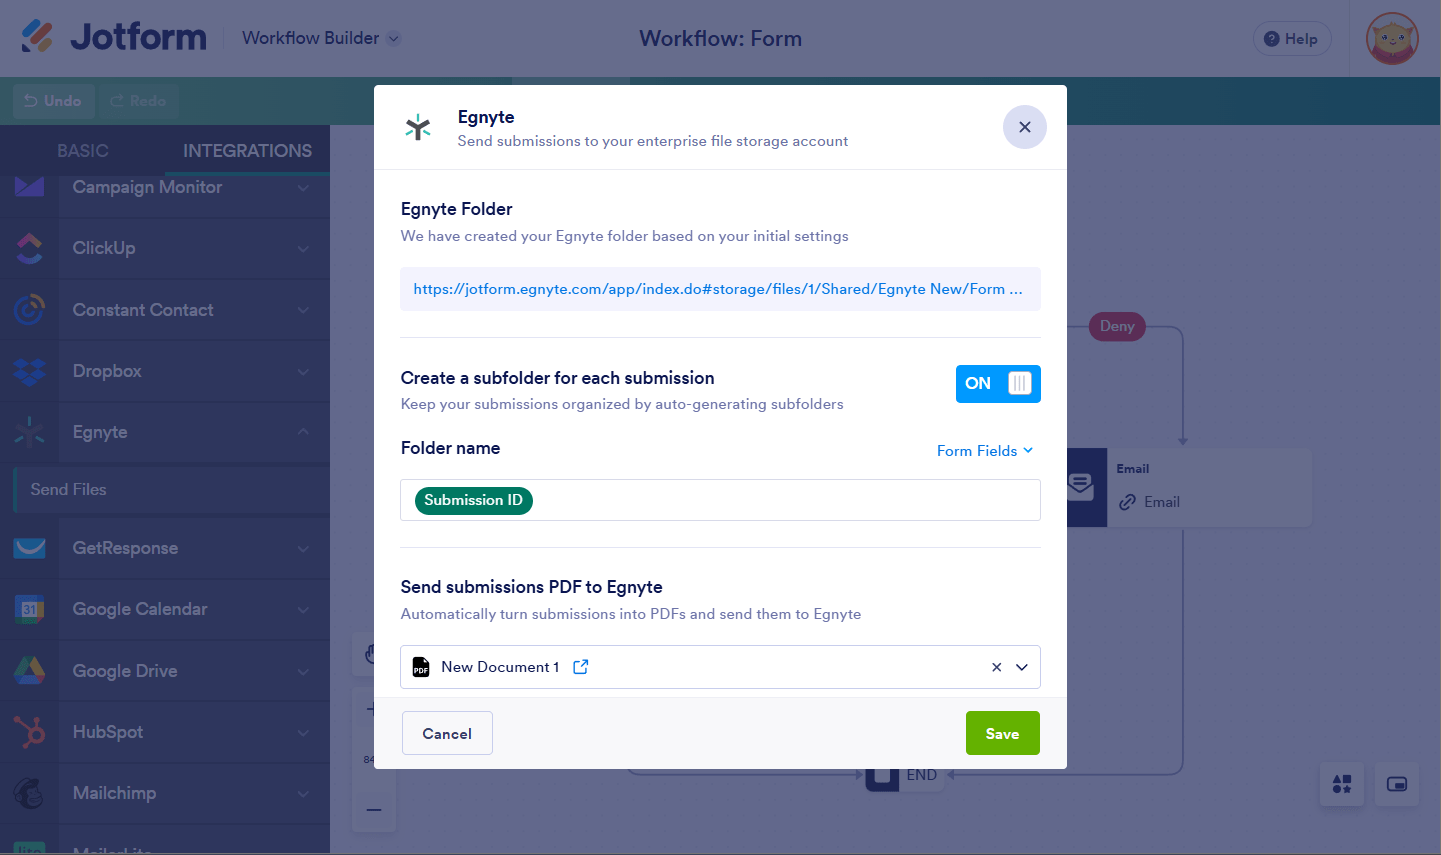
- Send submissions PDF to Egnyte — Select which PDF document to send to Egnyte. You’ll see Default if you haven’t created a PDF document yet.
- Send uploaded fields to Egnyte — Select from which file upload to send to Egnyte. You can select multiple file upload fields here.
- Finally, click the Save button to complete and finish the integration. You’ll also notice that the errors are gone on the page.
Clicking back the Settings icon will allow you to view the Egnyte folder, which you can also click, and re-configure the other settings such as the subfolder, PDF, and file uploads.

Send Comment: