If you already have your app on Jotform platform and you want to add a product list to the app so customers can buy products right from your app, this instruction will show you how to implement this.
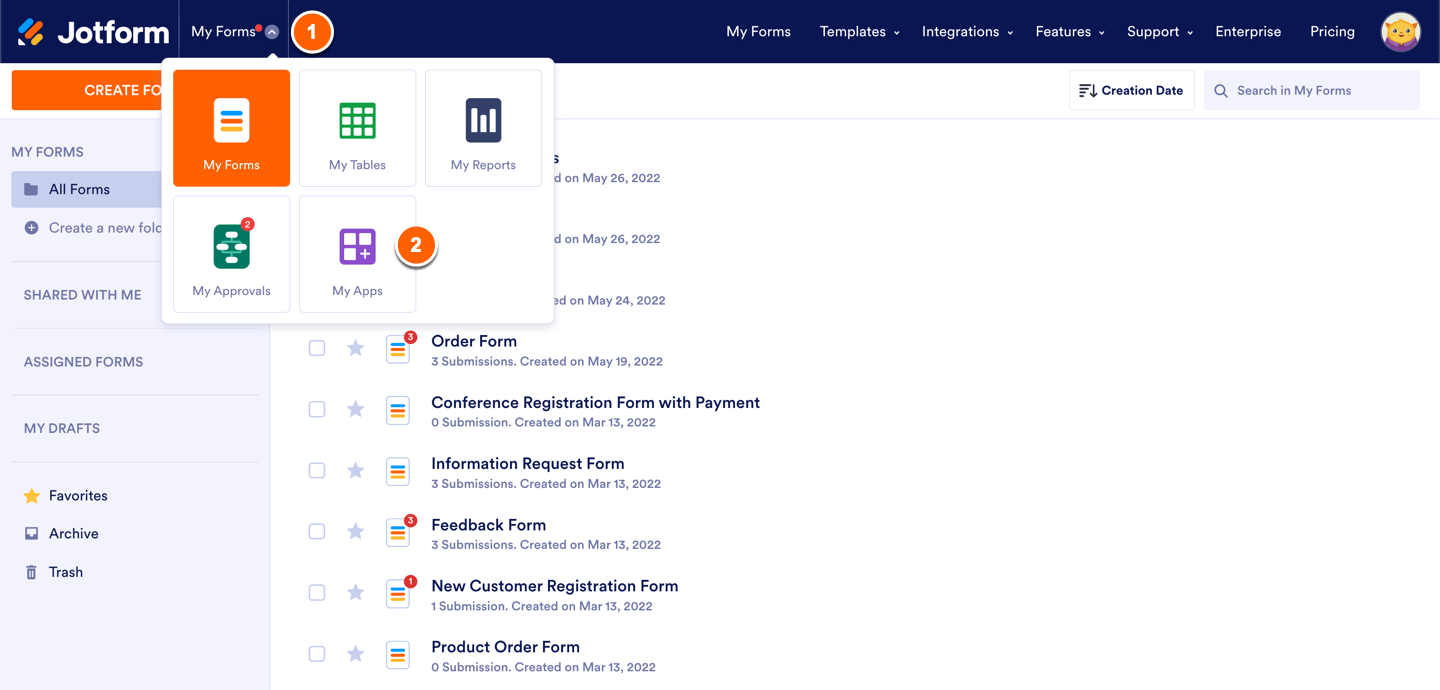
- From the My Forms page, click on the arrow button in the top left corner and select My Apps.
- Once you on the My Apps page, hover over an app where you want to add your product list and click edit.
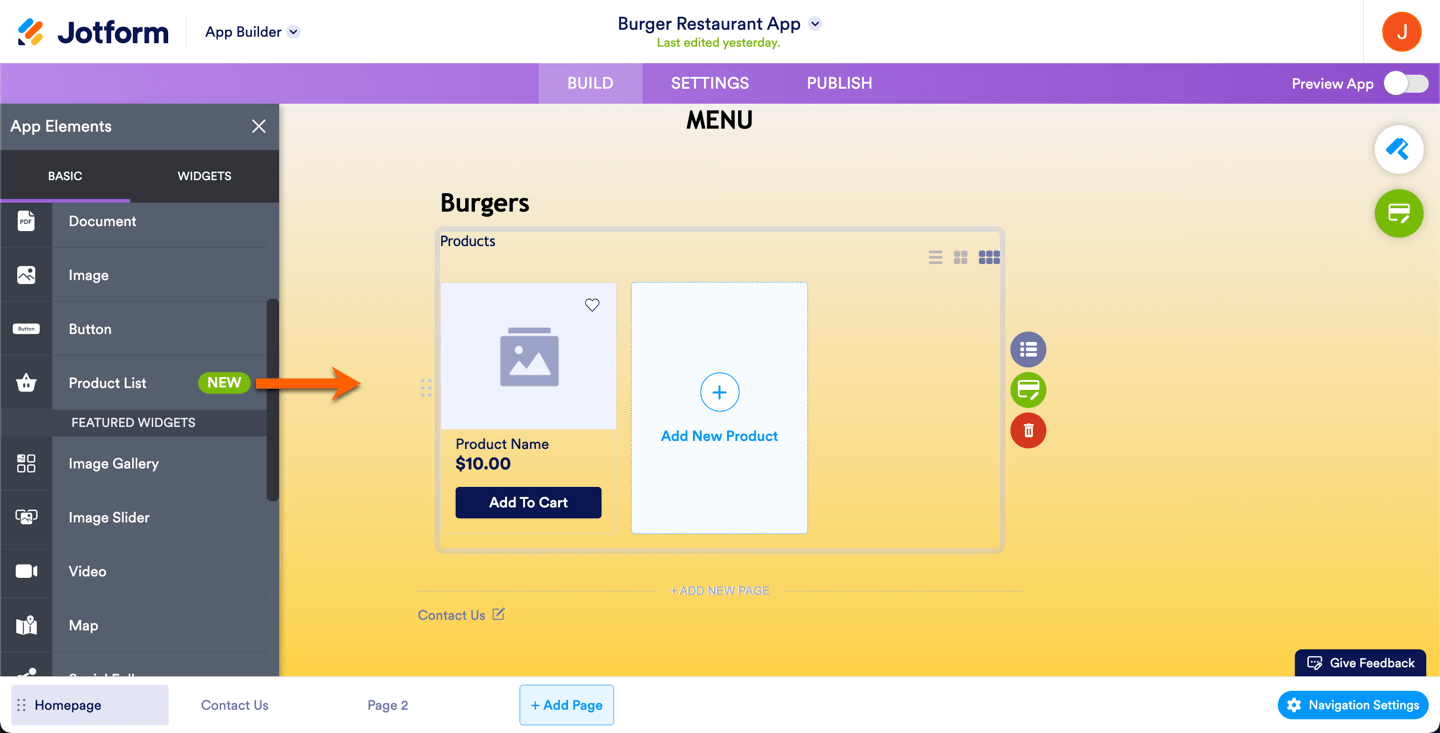
- After that, choose a place for your Product List, drag & drop the Product List element.
Once you added it, you will need to create your product cards and authorize preferred payment integration.
Adding Product Cards to your Store
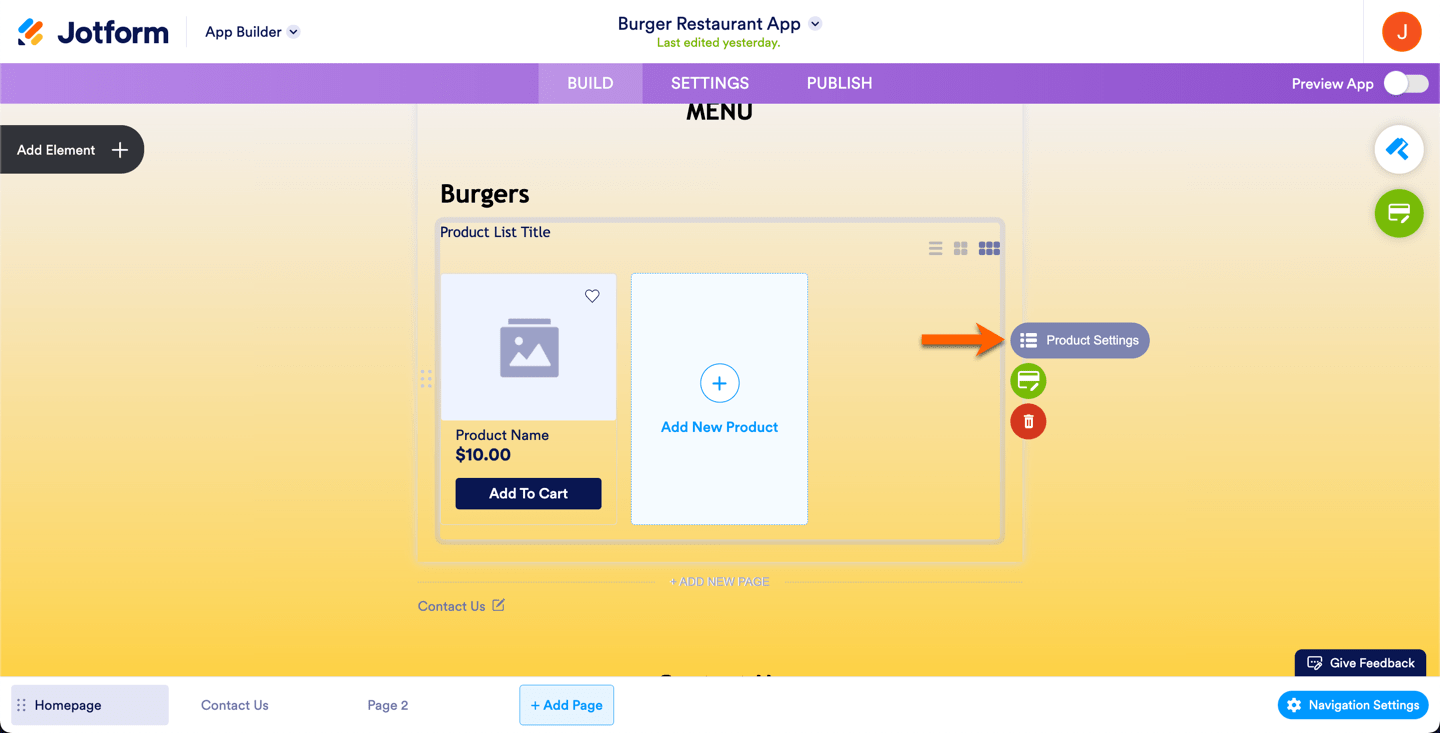
- Select your Product List and click on the Product Settings button.
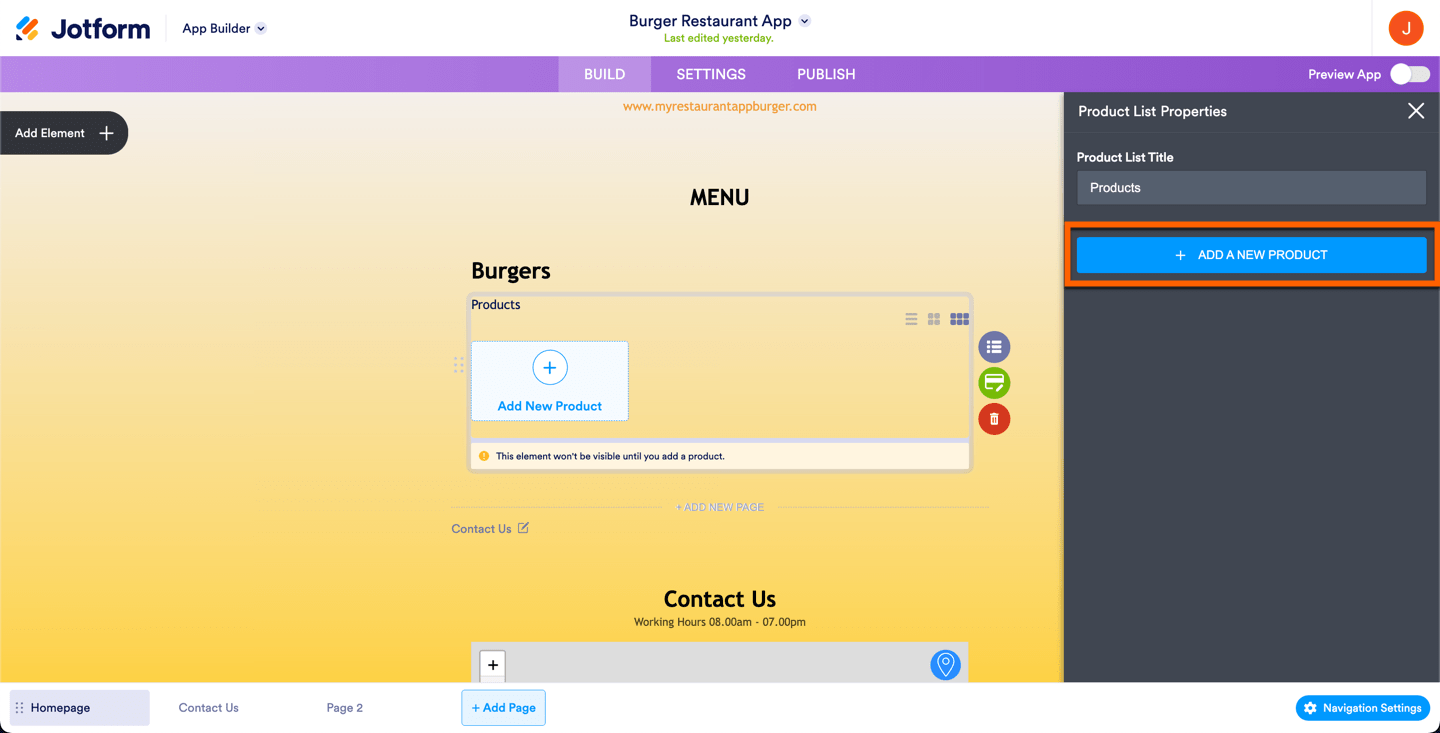
- Once Product List Properties opened, click on the +Add a New Product button.
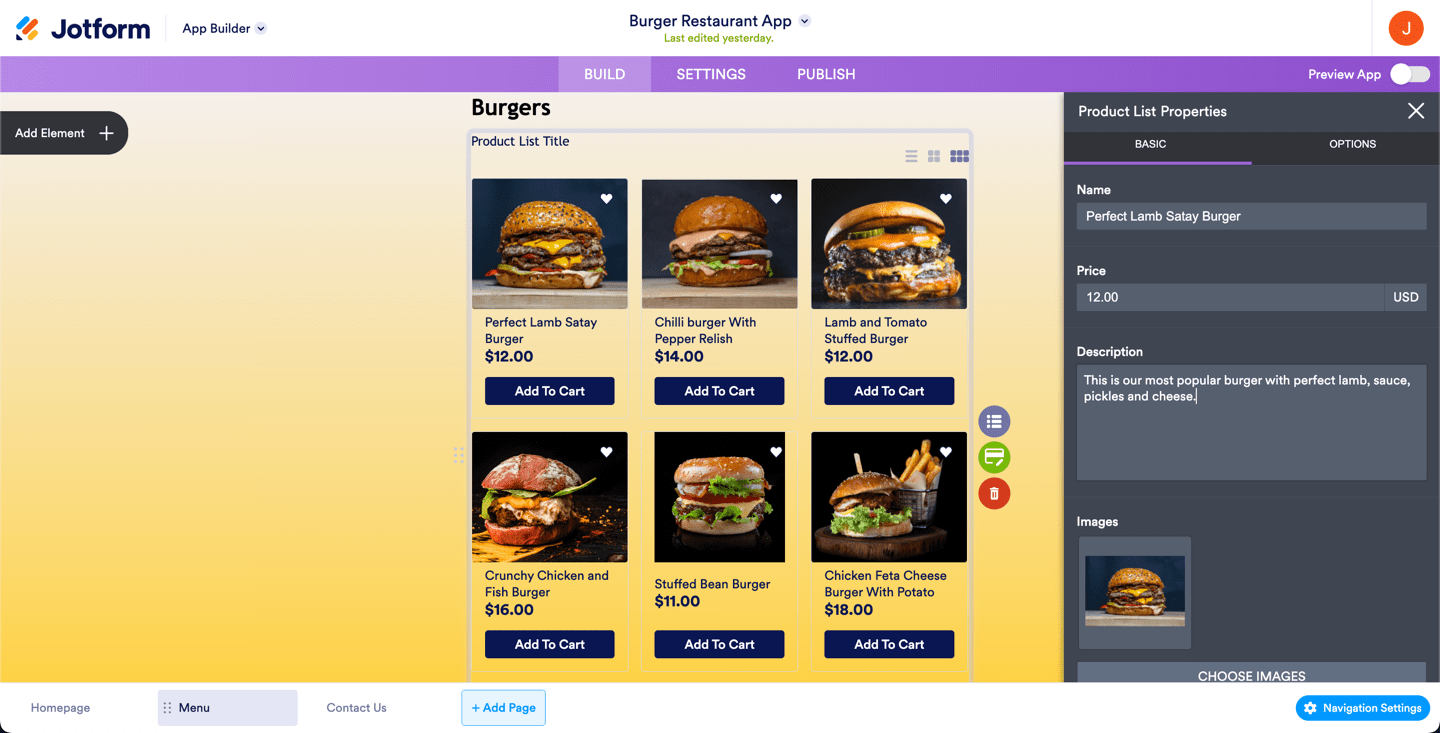
- Under the Basic tab of the product card, you can add the following parameters:
- Name
- Price
- Description
- Images
- Autoscale Images
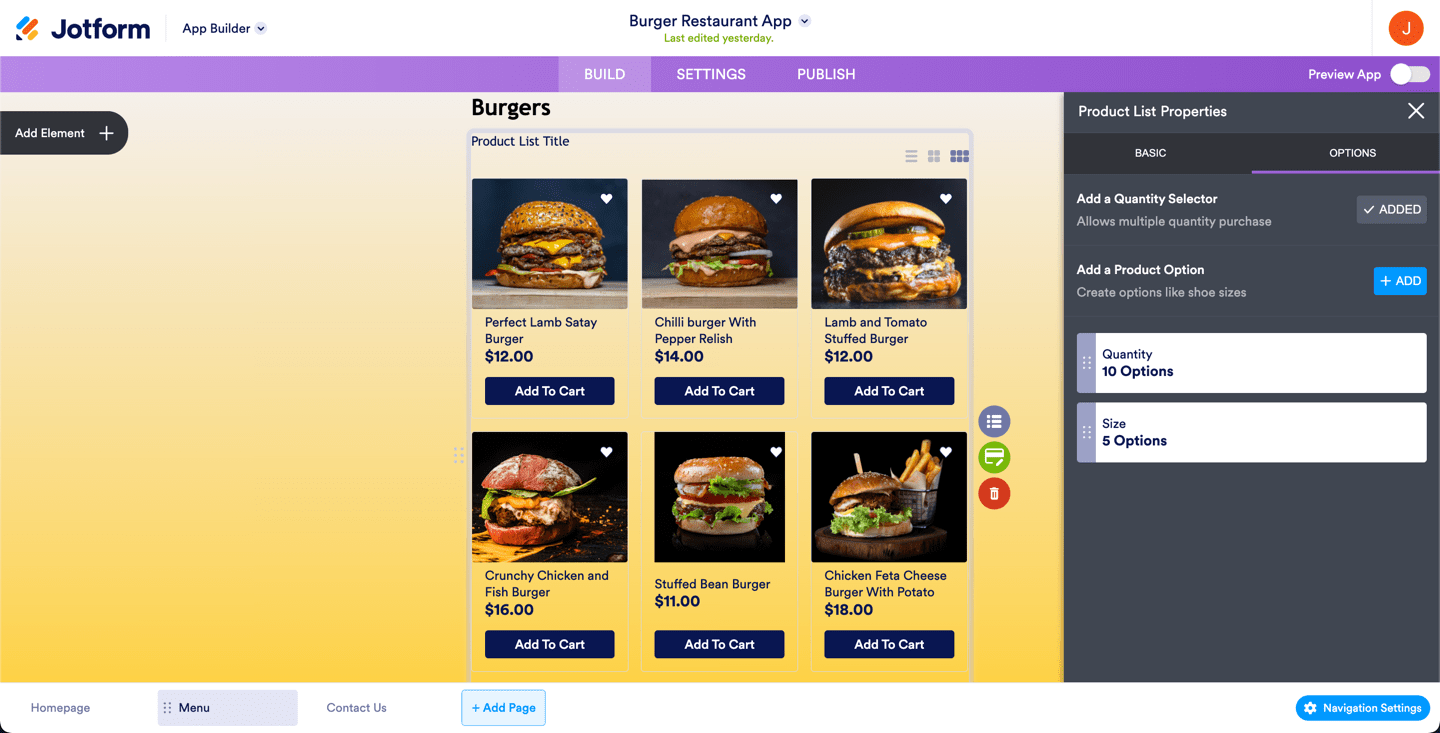
- Under the Options tab, you can set up the following:
- Add a Quantity Selector
- Add a Product Option
Setting up the Payment Method and Customer Information
The Product List doesn’t come with a payment method by default, so you’ll need to add the preferred payment getaway in the Product List’s settings.
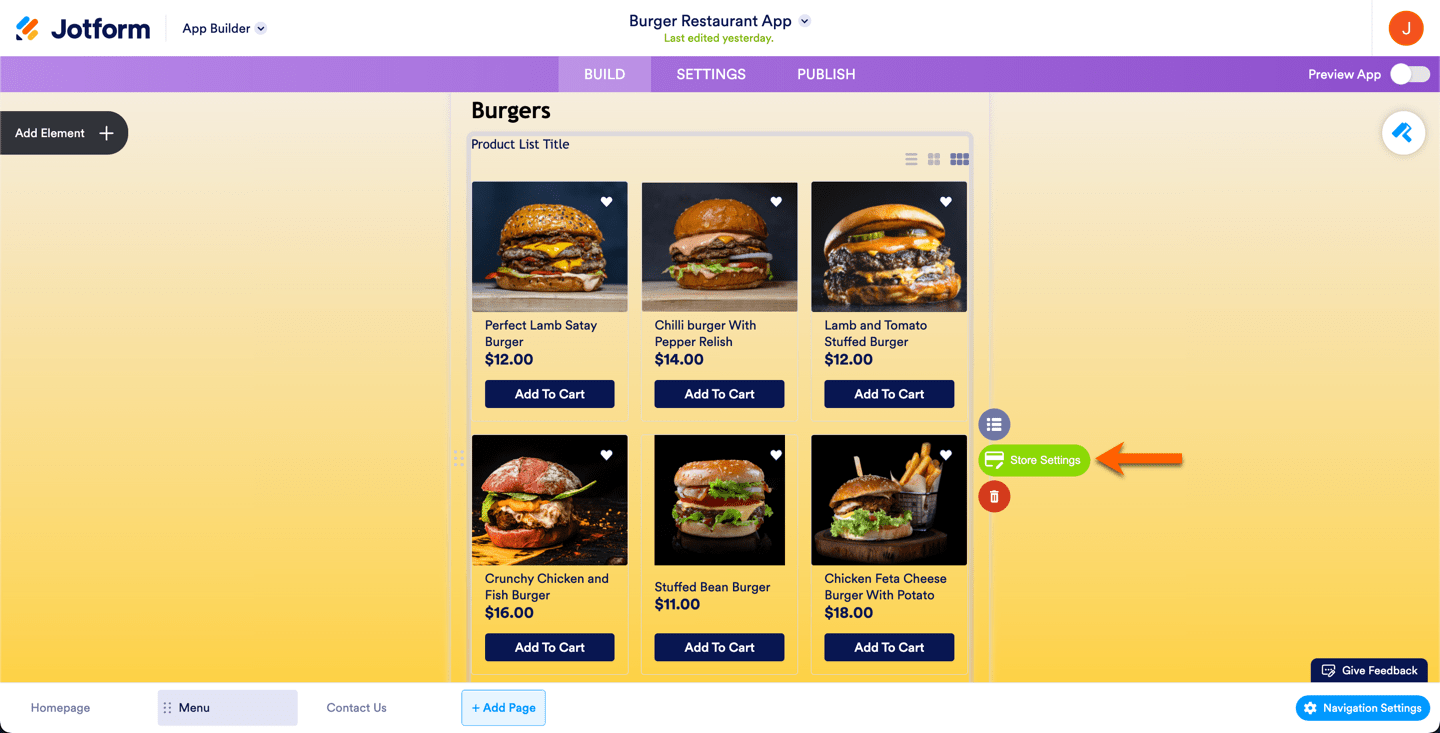
- Open the Store Settings of the Product List element.
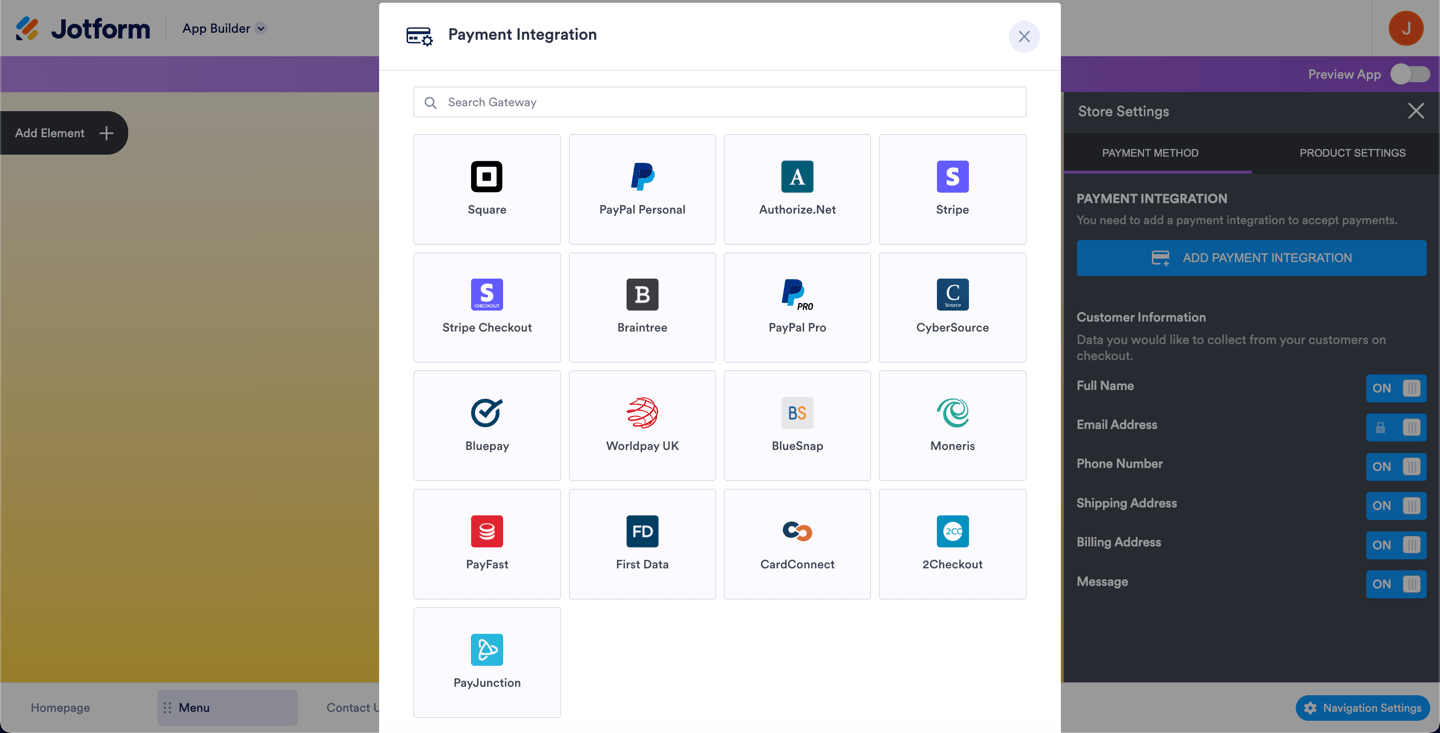
- Under the Payment Method tab, you can set up the following:
- Payment Integration
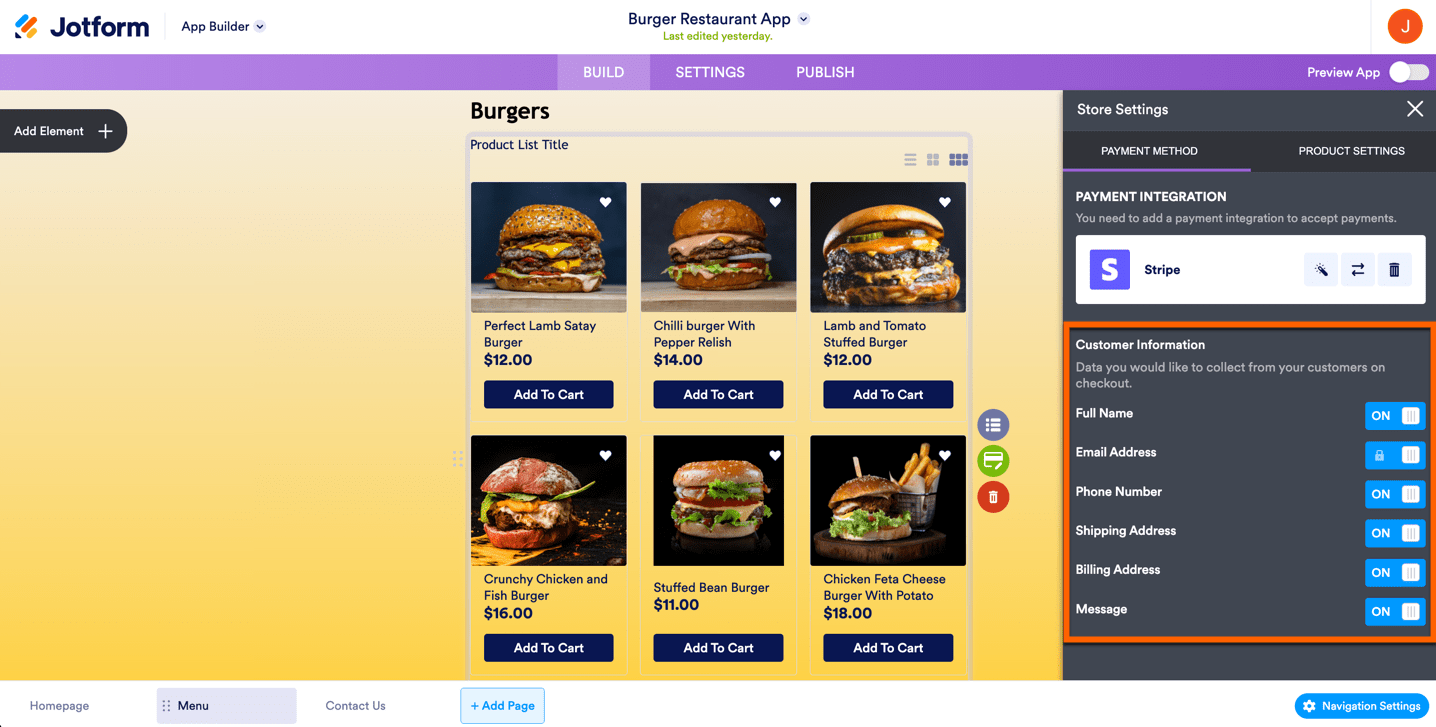
- Customer Information
- Click the Add Payment Integration button to add a payment method for your Store.
- Please select your preferred gateway. We will use Stripe as an example.
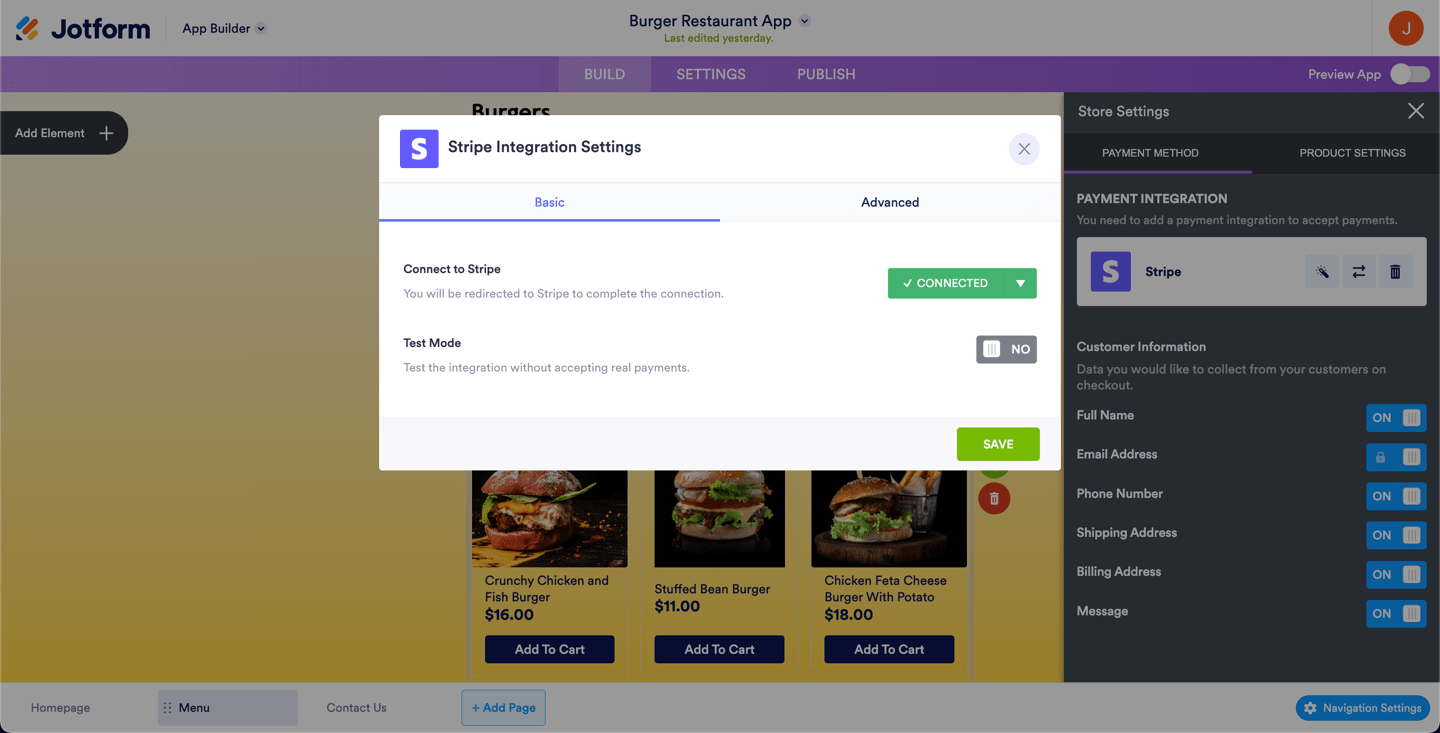
- Connect your Stripe account. Once connected, you should see the button in Green that says Connected:
- In the Advanced tab of the Stripe Integration Settings, you’ll find the Authorization Only toggle. Keep this on if you wish to charge customers at a later date, or toggle this off if you want to charge customers immediately. Also, there you can select when you wish to create Stripe Customer Records.
- Click the Save button to save the payment gateway.
After setting up your payment integration, you can choose the Customer Information you would like to collect from your customers on checkout.
Setting up the Product Settings
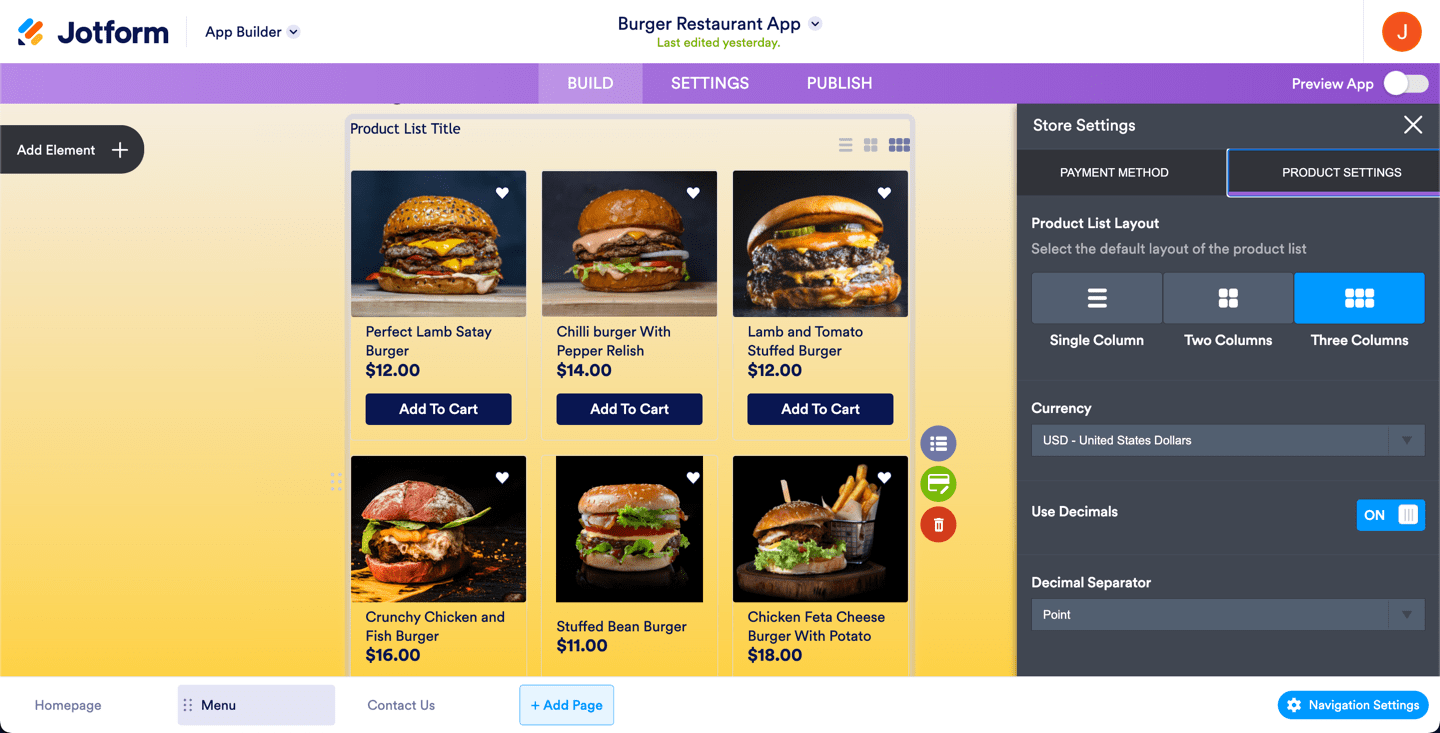
In the Product Settings, you can set up the following options:
- Product List Layout. You can choose Single, Two, and Three Columns.
- Currency. Your Store will only display the currencies supported by your chosen payment gateway.
- Enable Search. Make it easier for your customers to find a specific product using a search box.
- Enable Sort. Allow your users to sort products on the form according to their name or price.
- Use Decimals. To display decimals to both the product price and the total.
- Decimal Separator. You can choose Point or Comma.



Send Comment:
6 Comments:
233 days ago
Please I am Isaac Godo, University of Cape Coast. Please when the app links are share, the button to install the app on your your home sreen does not respond, please might the problem be? How should i go about it
More than a year ago
Is there a way to have an add-on option when checking out an item? I'd like to have an upsell option for customers.
More than a year ago
Is it possible to have multiple product lists on the same form?
More than a year ago
Is it possible to have the prices change based on the customers forms answers?
More than a year ago
I want to use the product list but without the price and add to cart button. We are not ready to "OPEN"/sell online. However, I want to display pictures for the current items and share some information about them. Using the product list will keep me from having to start over once we officially launch. The "add to cart" button would be replaced with a "more info" button that opens each item's page with the product's information, usage and ingredients. How is the best (and simplest) way to achieve this?
More than a year ago
Is it possible to bulk add products to the list? I've got a thousand different parts that my team will order. I'd like them to be able to use the search function to bring up matching items to the search instead of a massive list.