With the Jotform for Salesforce, assigning your form to your contacts is now easier. This saves you time from setting up the prefill settings and creating the prefill URLs for each user.
Assigning to Salesforce Contacts
Assigning is done through the Assign to Salesforce Contacts section of the Jotform for Salesforce. Let’s start!
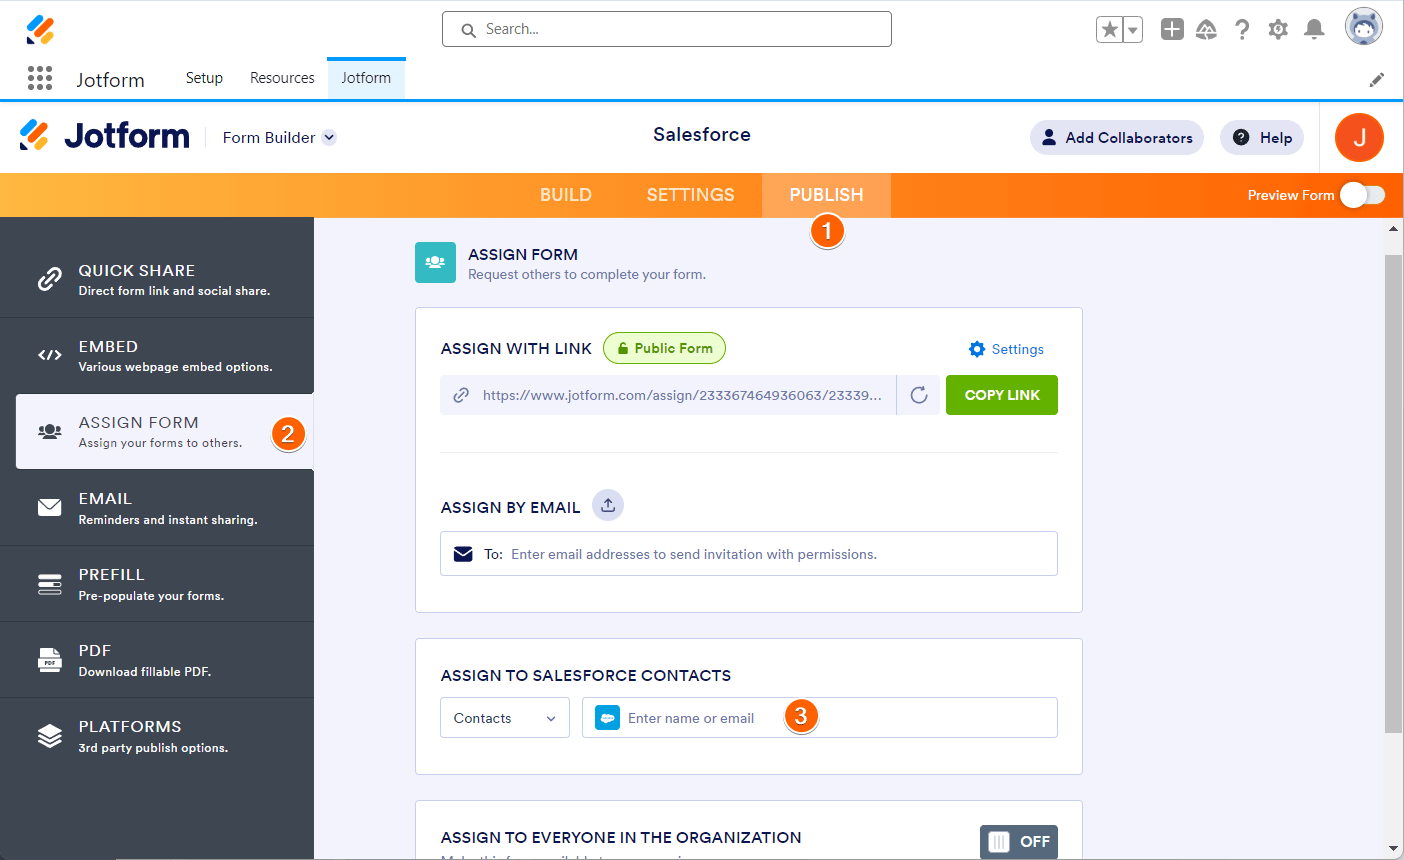
- In the Form Builder, go to the Publish tab.
- Click on the Assign Form option.
- Click the Enter name or email box under the Assign to Salesforce Contacts section to start assigning.
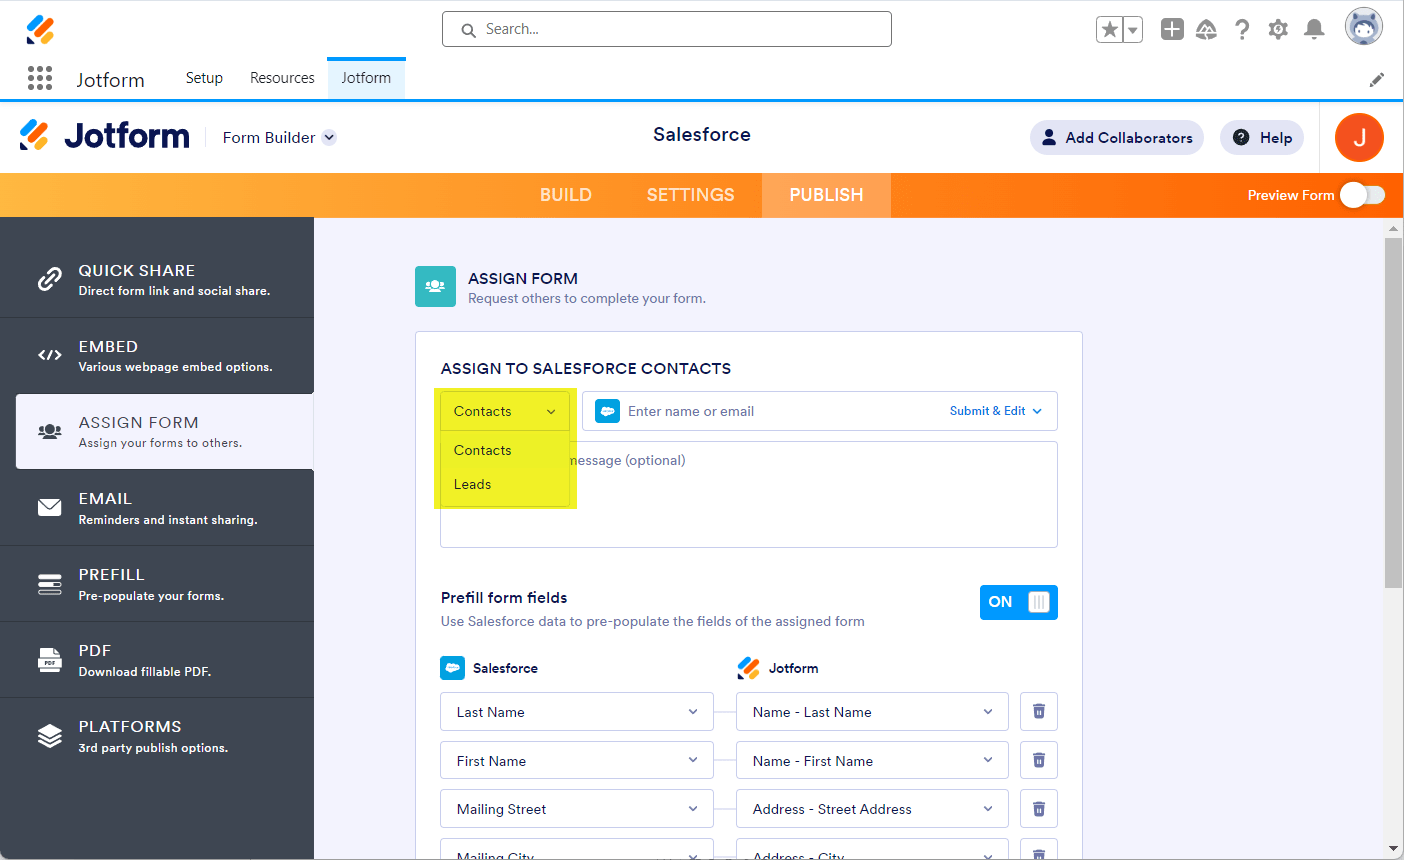
- Select either Contacts or Leads from the list of objects.
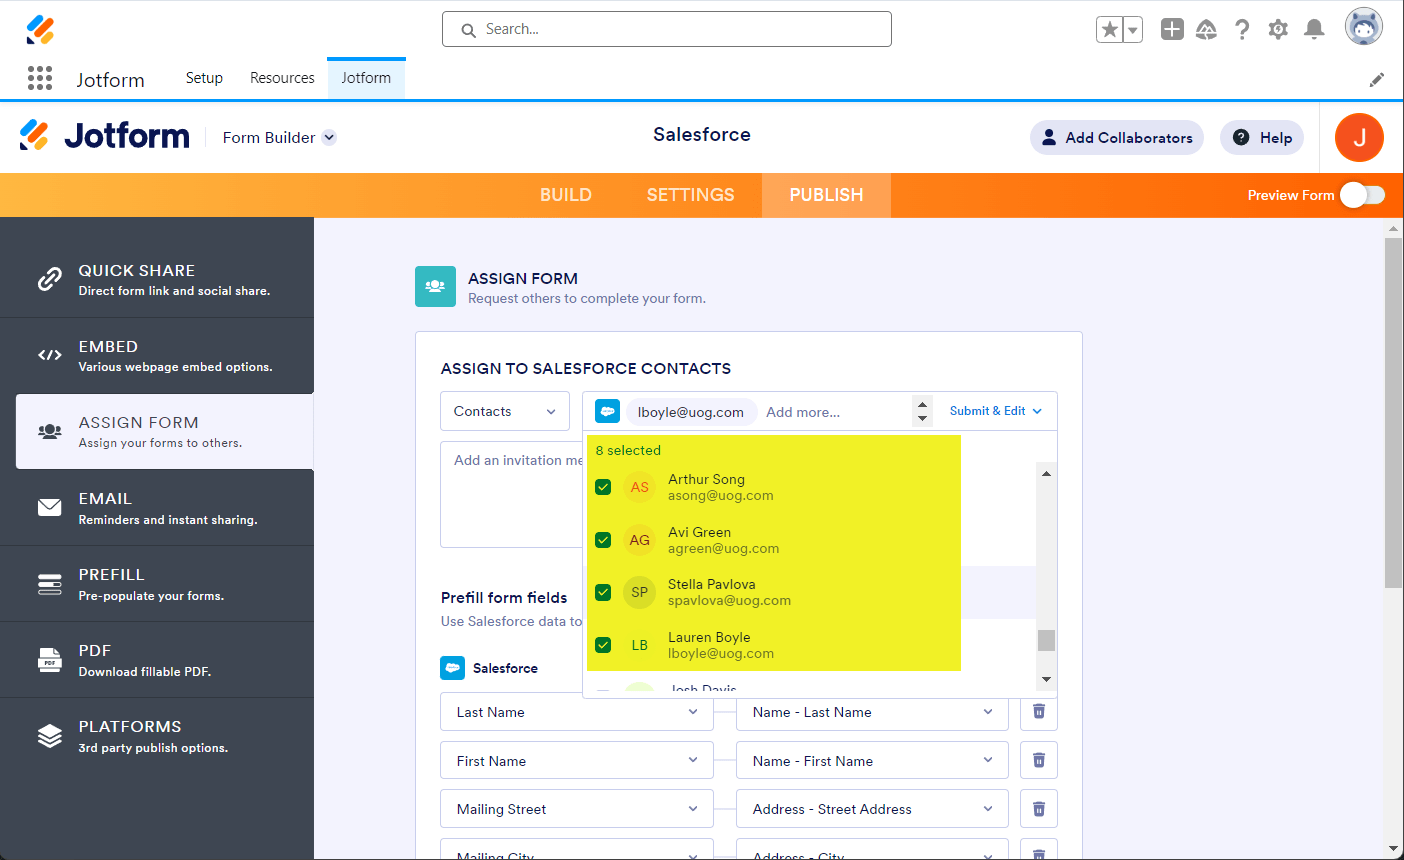
- Next, select the people you want to share your form with, as shown in the image below:
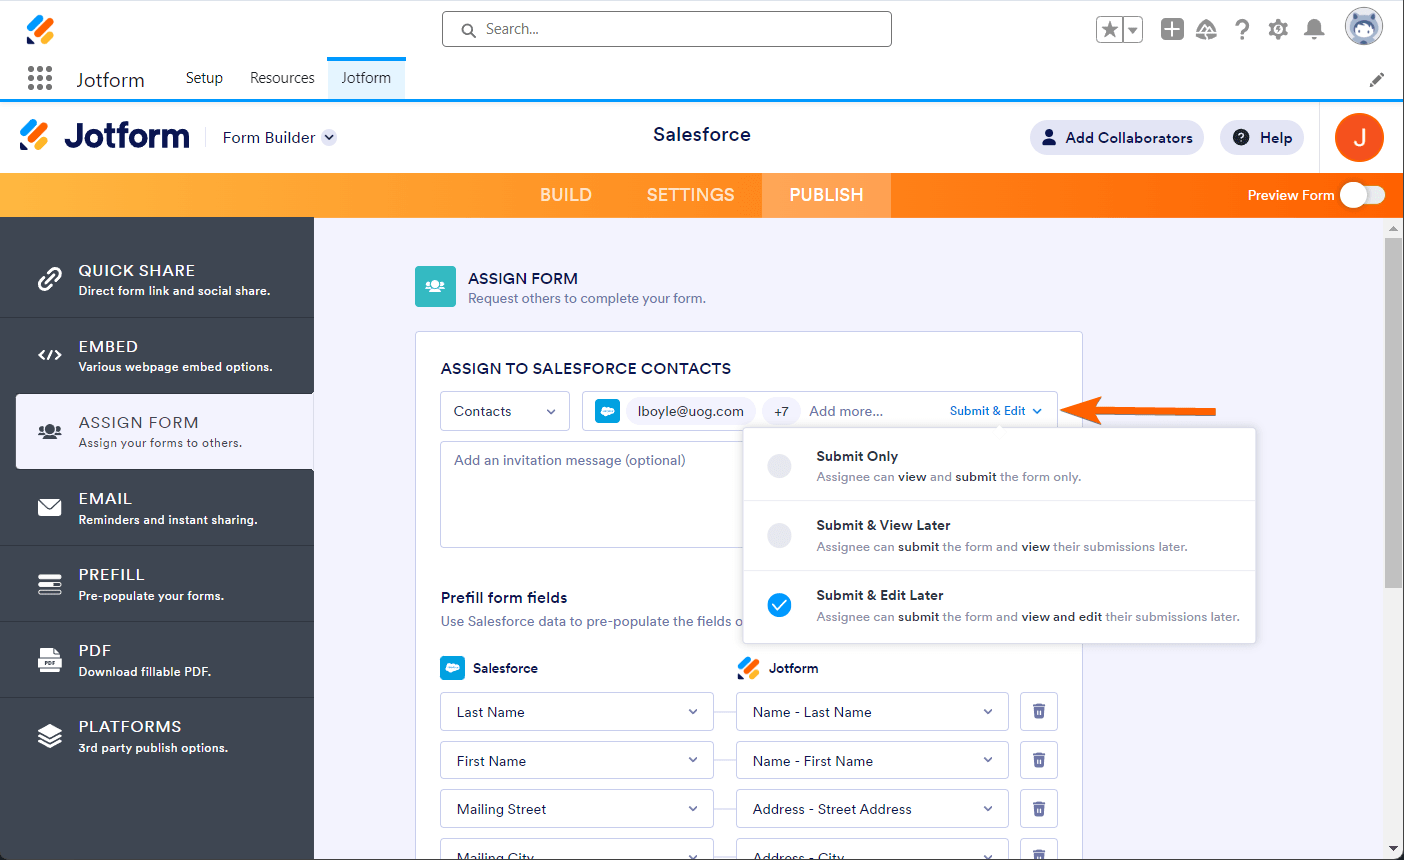
- Click on Submit & Edit to change the permission before sending the invitation. You can choose:
- Submit Only — The Assignee can only view and submit the form,
- Submit & View Later — The Assignee can submit the form and view their submission later.
- Submit & Edit Later — The Assignee can submit the form and make edits later.
Note
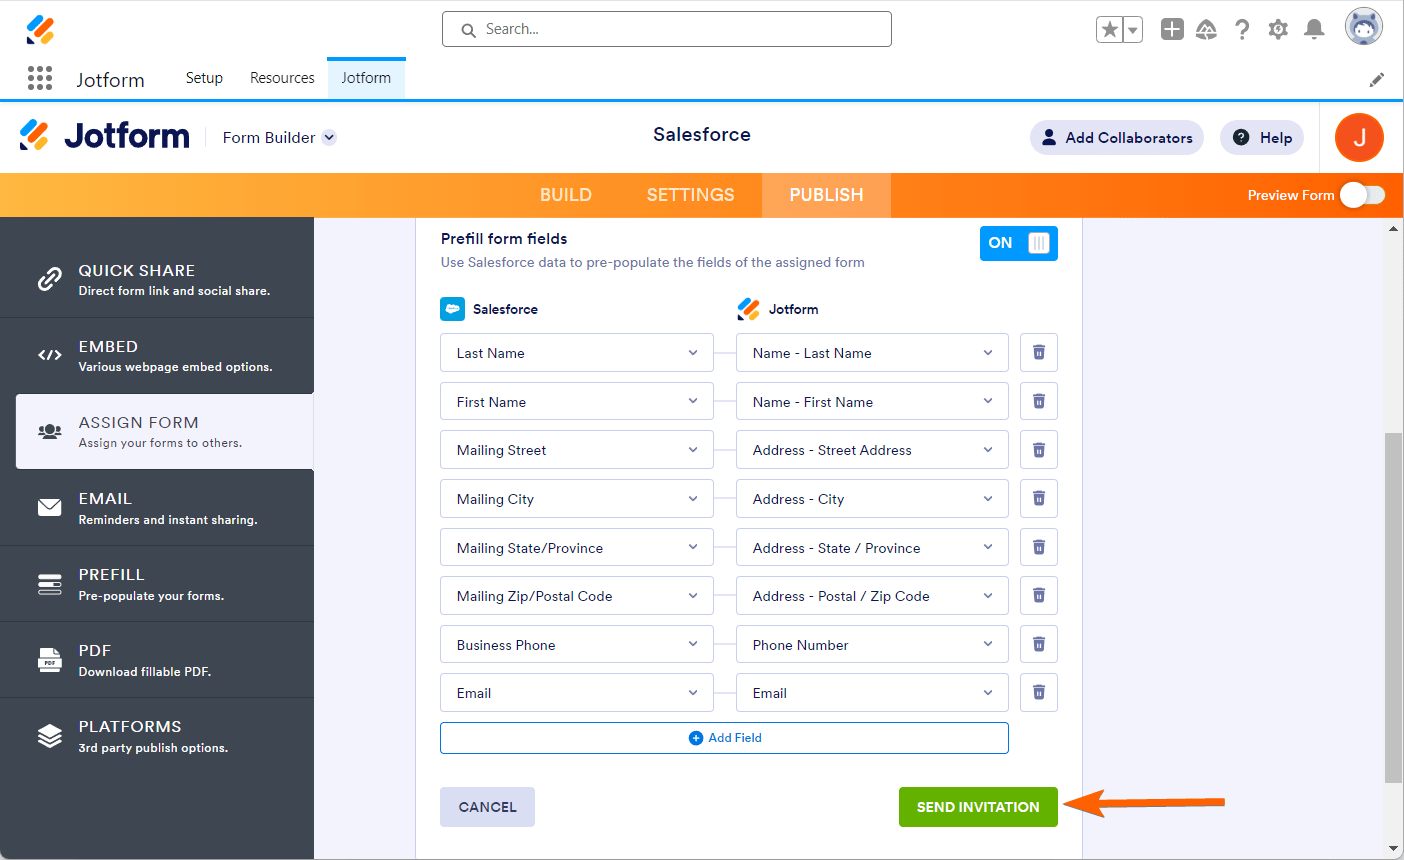
The Prefill form fields is toggled/enabled by default. Both Salesforce and Jotform fields are mapped accordingly. Click the Add New Field if you wish to map additional fields.
- If you are ready, click the Send Invitation button. At this stage, the form will email the selected leads/contacts the invitation email.
Tracking and Managing Assignees
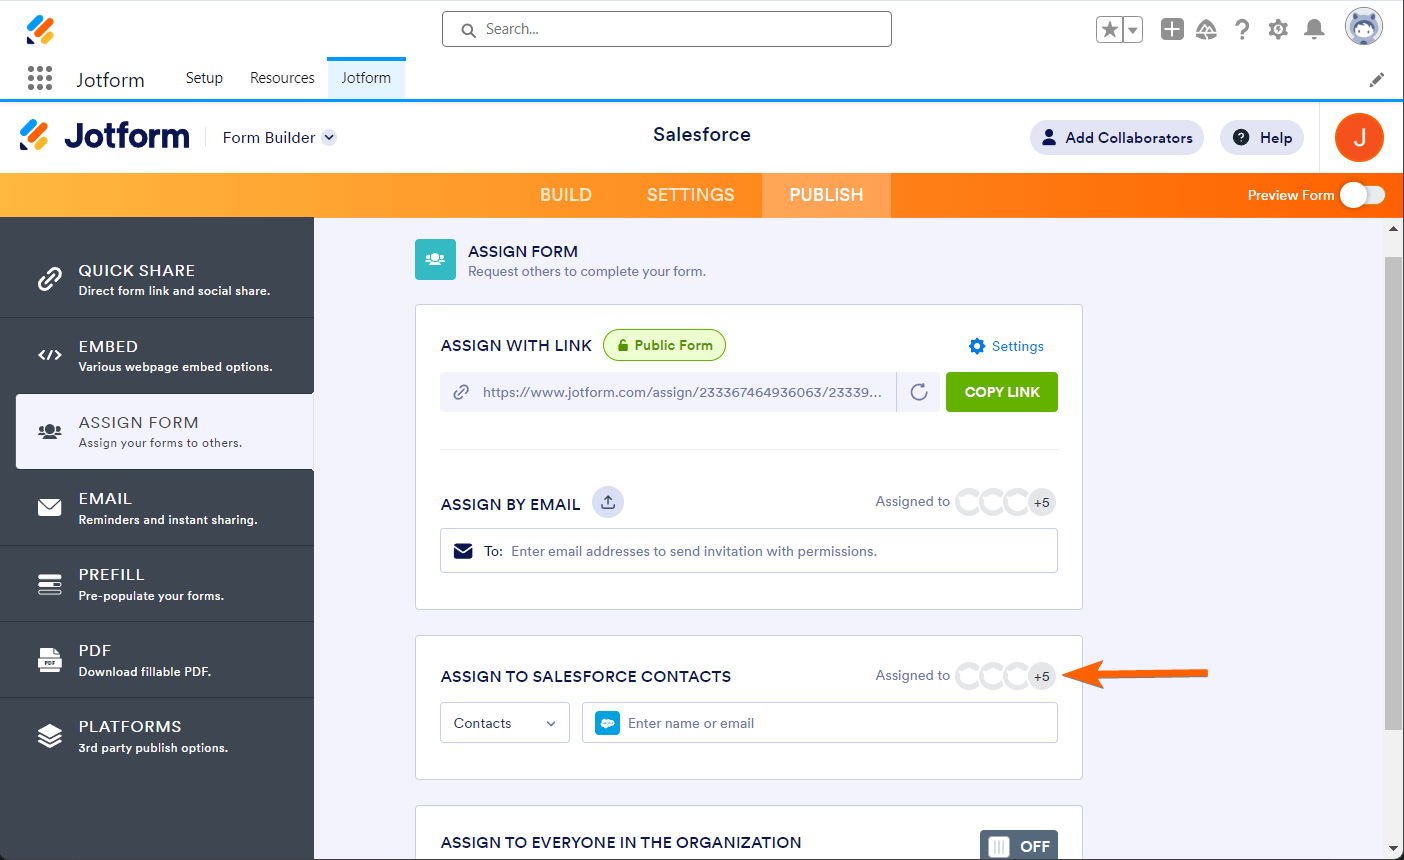
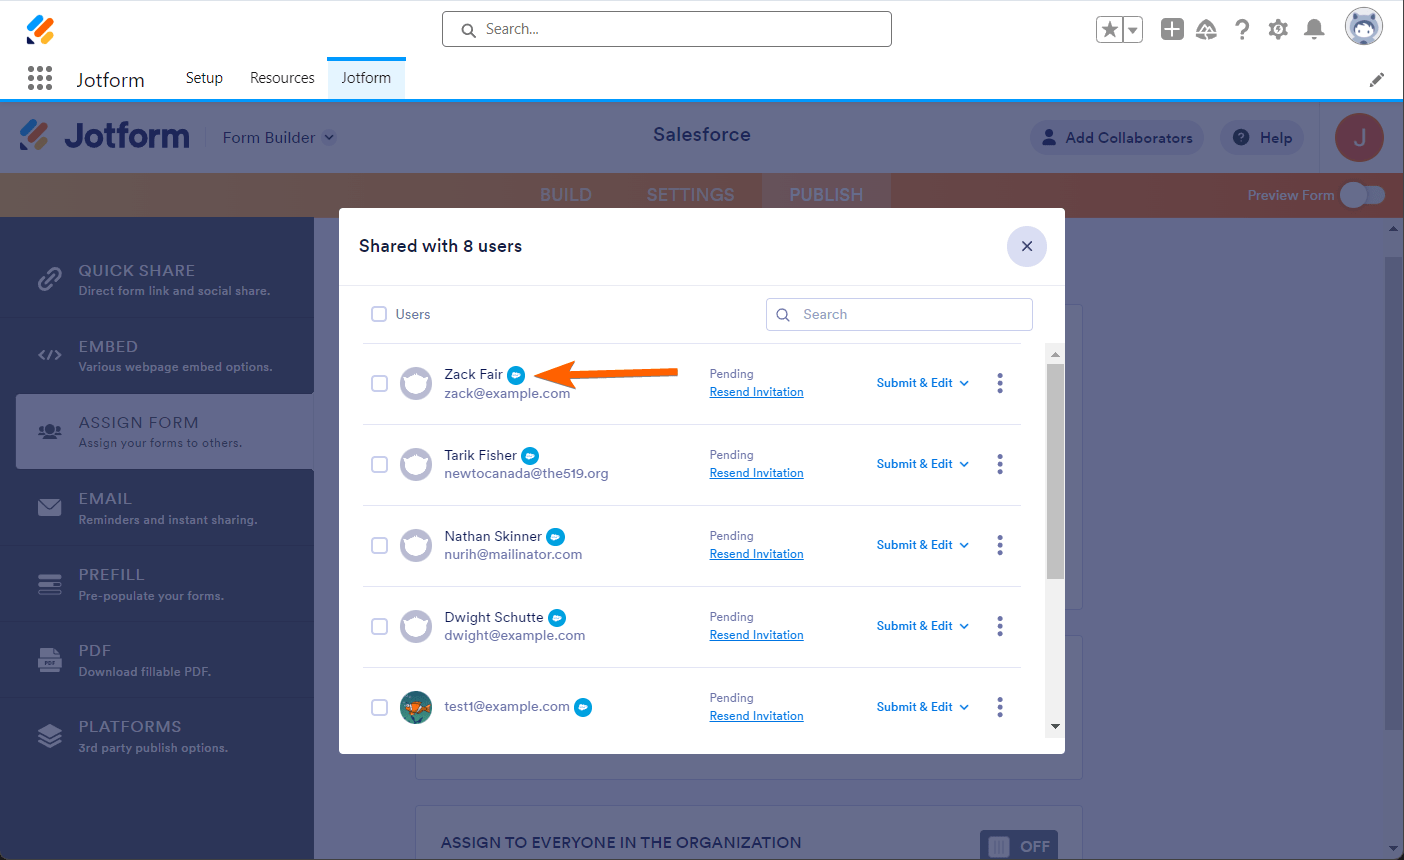
After sending the invitation, you will be taken back to the main section. There, you can track and manage the assignees. On the right side of the Assign to Salesforce Contacts section, click “Assigned to” to view them.
Assignees invited via Salesforce are shown with a Salesforce icon next to them in the assignee list.

Send Comment: