When setting up the Salesforce integration in Jotform Sign, you can set it to attach the Signed Documents to its corresponding record. This feature will help you track completed documents directly into your Salesforce dashboard and view them from there.
You can attach the signed document by setting up the Salesforce integration and enabling the Attachments option. Here are the steps:
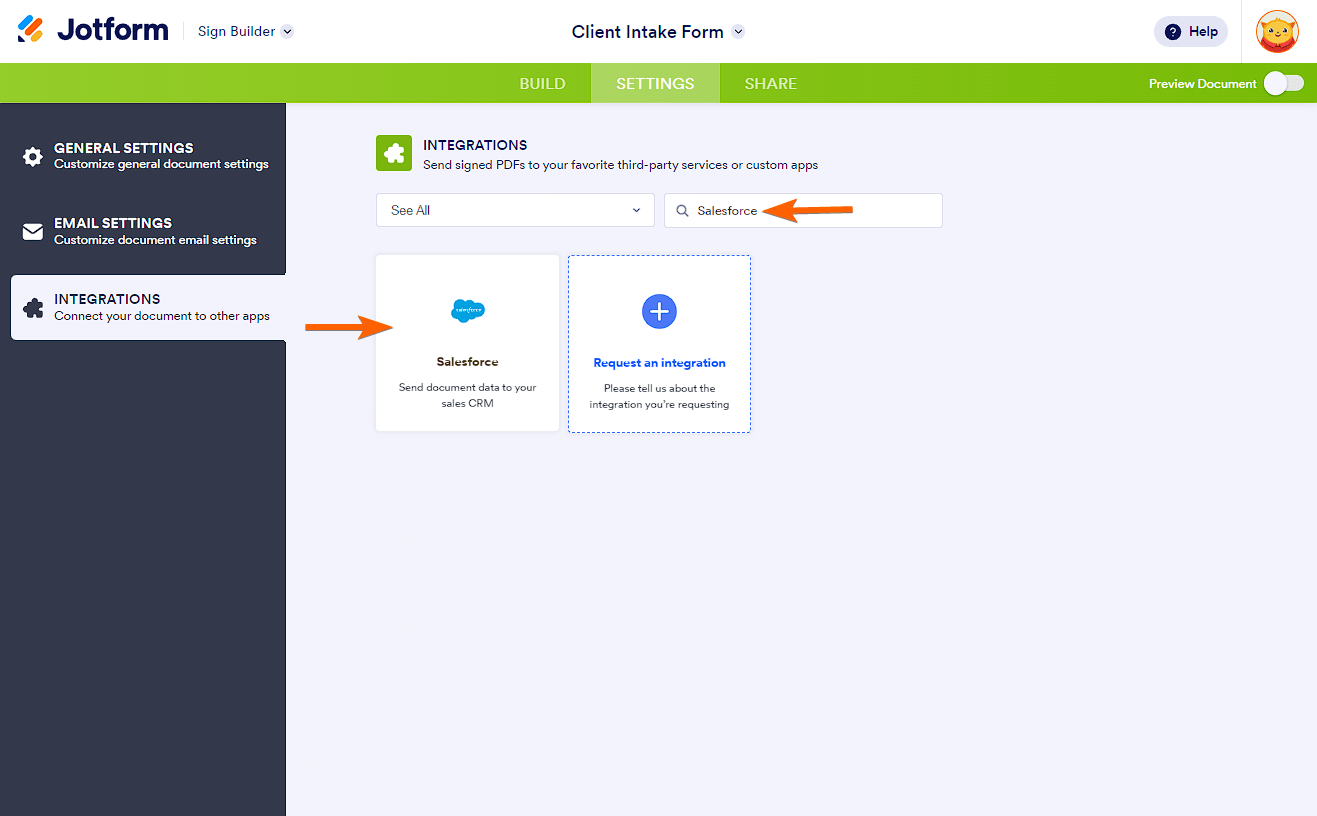
- In the Sign Builder, go to the Settings tab.
- Click the Integrations option from the left panel.
- Search for Salesforce and click it.
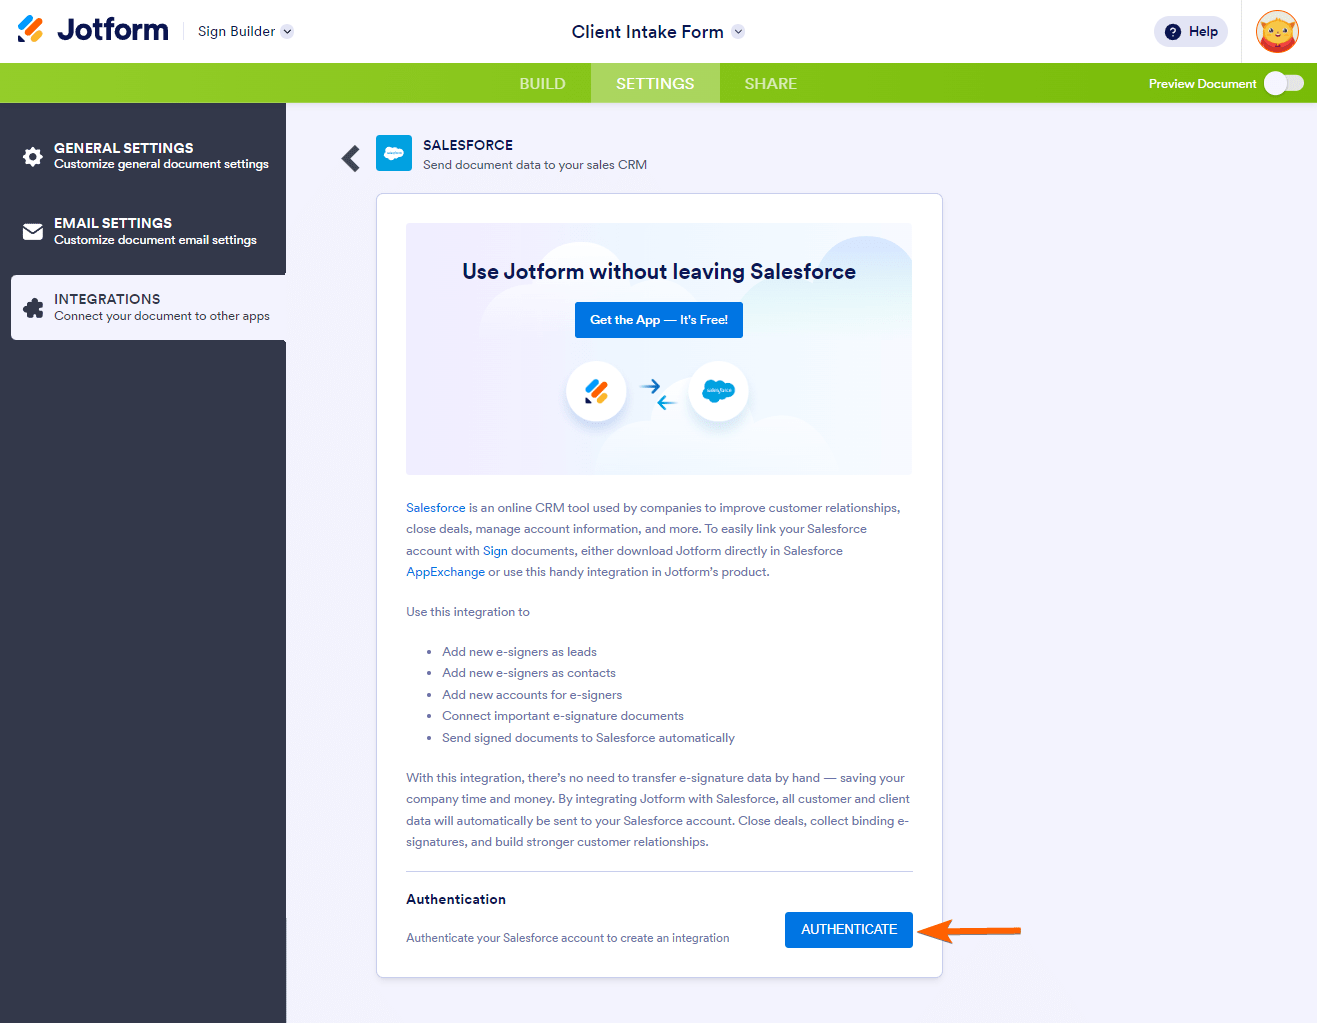
- Click the Authenticate button to connect your Salesforce account.
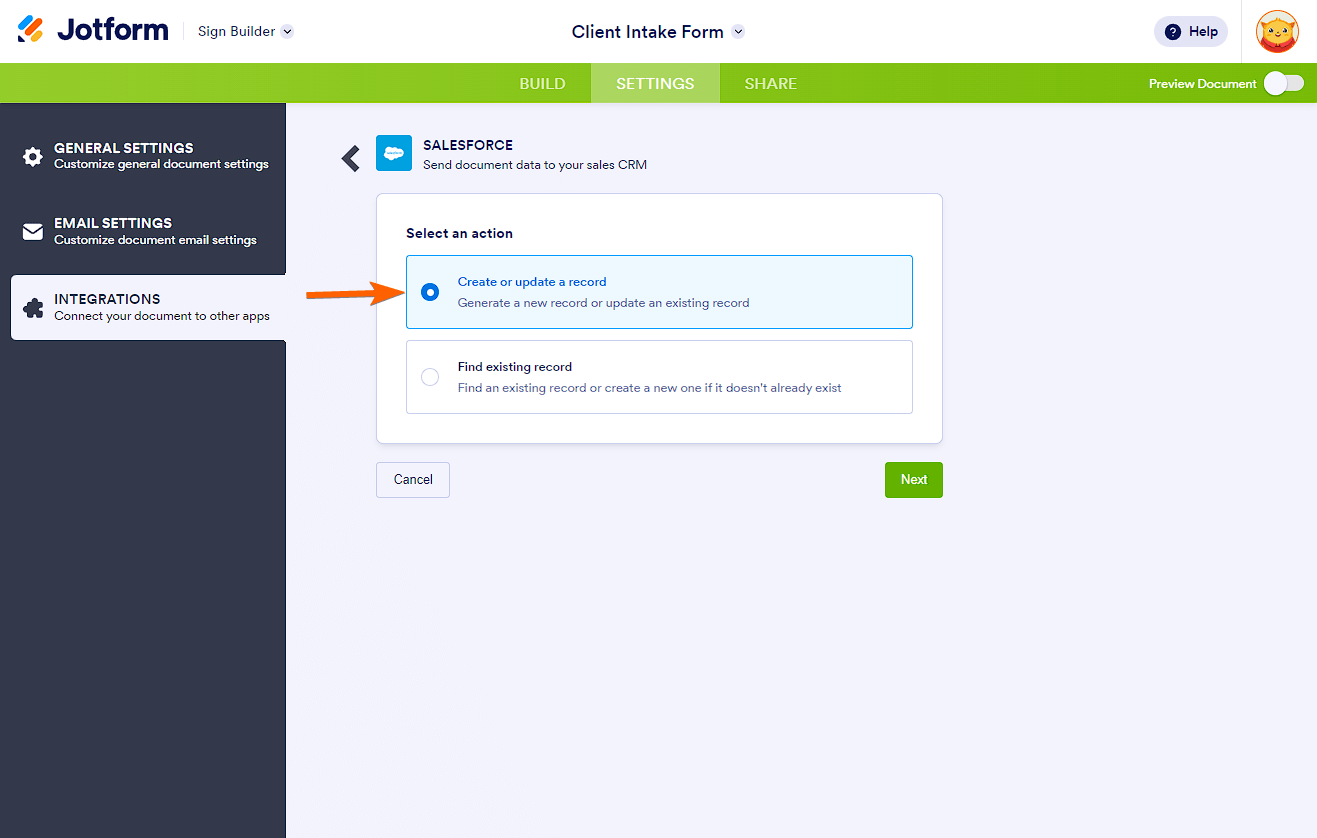
- Select Create or update a record from the action list, and click the Next button.
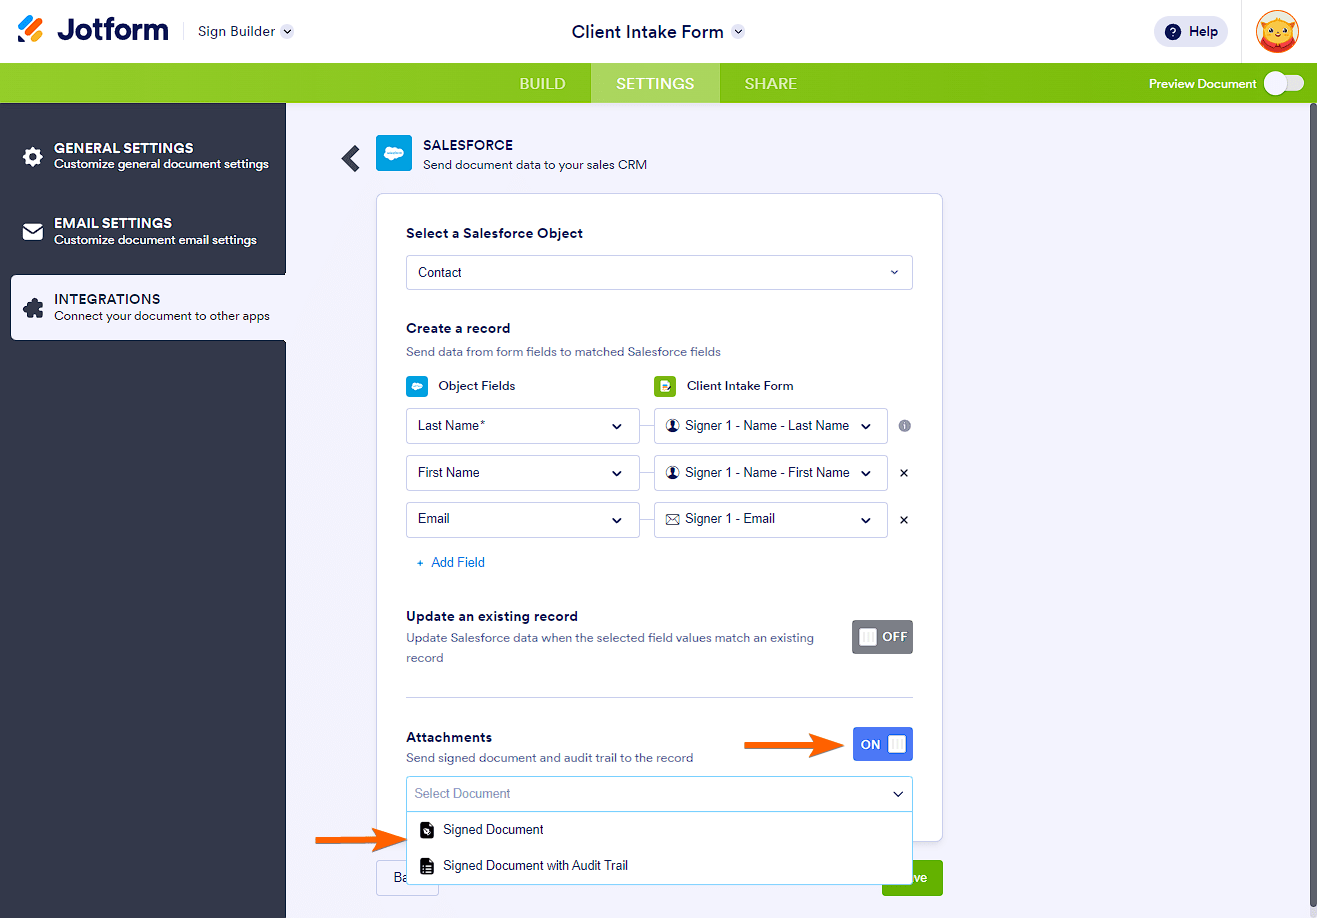
- Now, select your Salesforce object and map the fields accordingly.
- At the bottom, toggle the Attachments option to enable it and select either Signed Document or Signed Document with Audit Trail.
See also: How to Download Your Signed and Completed Document.
- Finally, click the Save button to complete the integration.
Once the integration creates the record on Salesforce, you can view the Signed Document through the Note & Attachments section of the record.
Notes
- If you notice that your form is not sending the Signed Documents, there could be an error with the integration. You can verify the issues through the Integration Log Details. Visit How to View Salesforce Integration Log Details for more information.
- For Signed Documents greater than 20MB, Jotform will send it as a download link to Salesforce.
- For HIPAA accounts, you will be required to enter a password for the document before you can send it for signing. Therefore, you must ensure all parties know the password to open the file. The Signed Document is also sent to Salesforce as a zipped file.
- The Attachments option isn’t available for the following Salesforce Objects: Attachment, Content Document Link, Content Version, Opportunity Contact Role, and Campaign Member.


Send Comment: