Some Jotform Payment Integrations allow you to collect payment information from your customers without charging them on form submission. This allows you to review the submitted data and the products or services they ordered before processing the payment. This particular feature in the Form Builder is called Charge Customer Later, commonly known as Payment Authorization.
The Charge Customer Later or Payment Authorization is available on the following payment integrations:
You can find the feature through the Additional Gateway Settings of each payment processor. Let’s start!
Enabling Payment Authorization
The Payment Authorization option is available with Paypal Personal, Authorize.Net, Square, Braintree, and eWay. Here’s how you can enable it for these vendors:
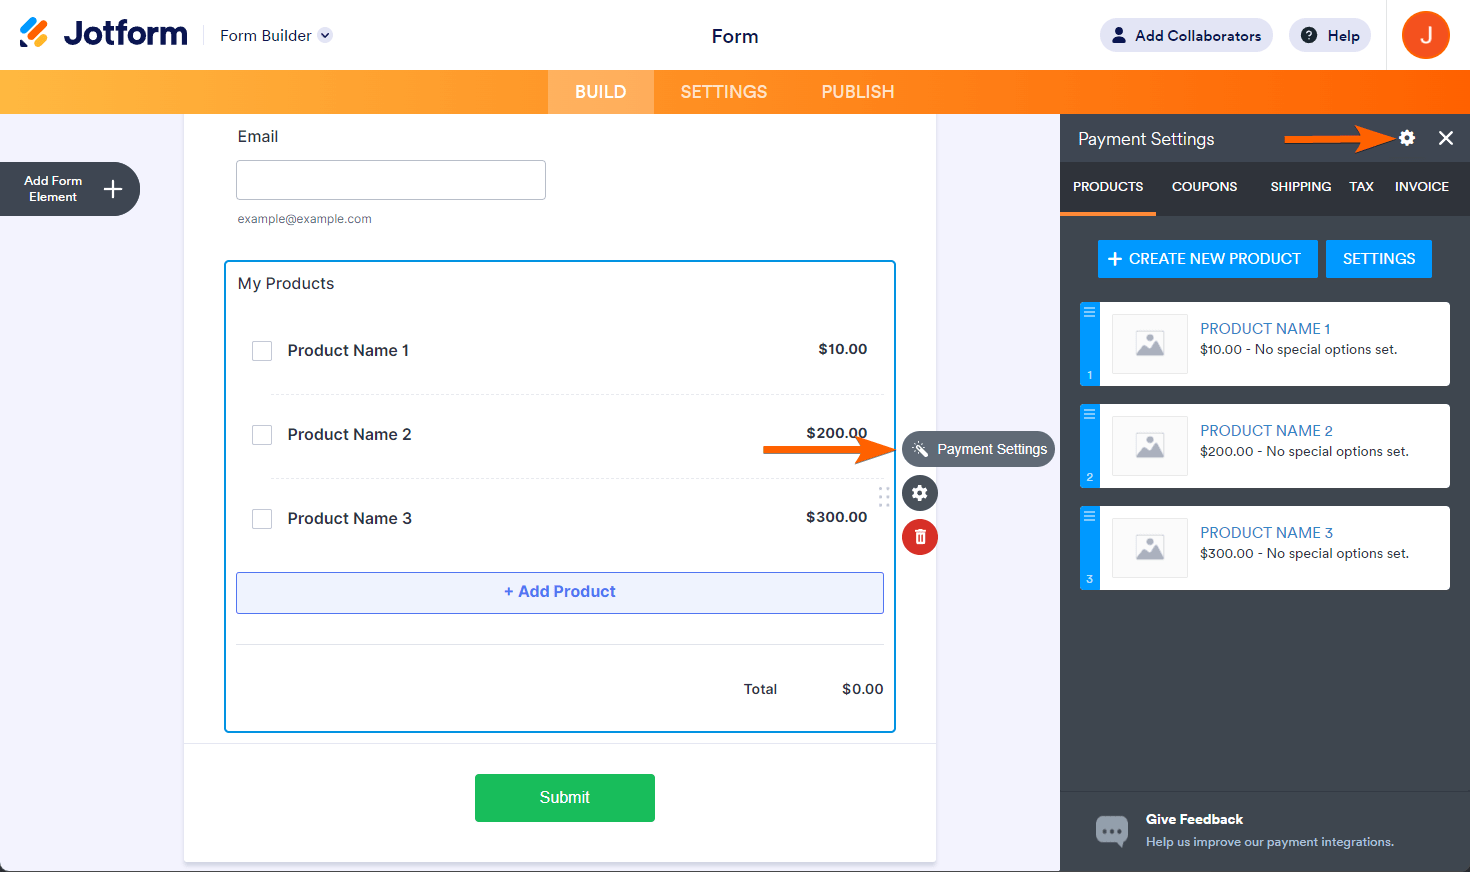
- In the Form Builder, click the Payment element.
- Click the Payment Settings icon.
- At the top right side of the Payment Settings panel, click the Cog Wheel icon to open the integration settings.
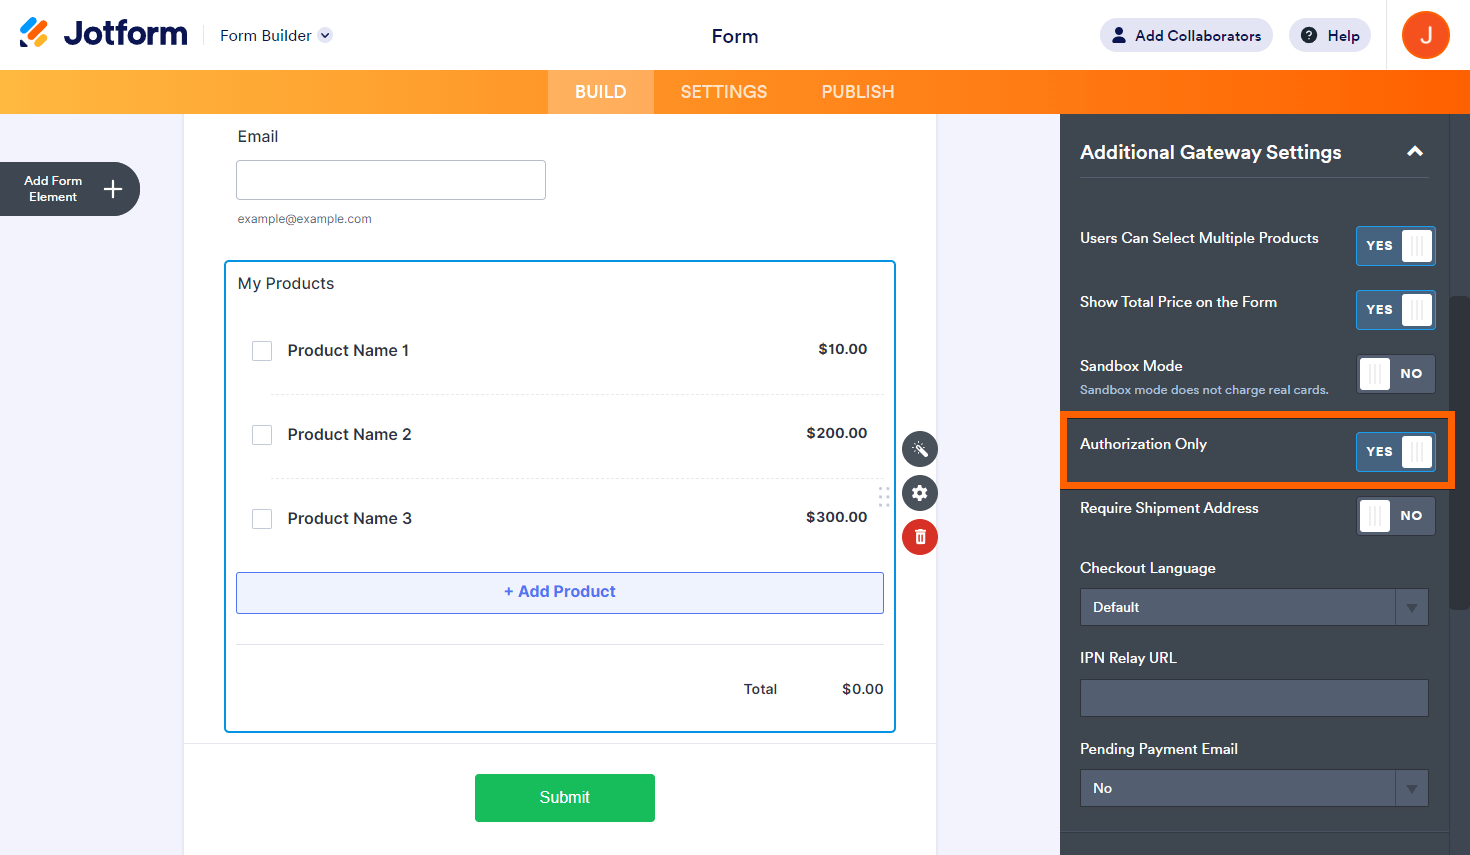
- Scroll down and open the Additional Gateway Settings as mentioned above.
- Toggle the Authorization Only to Yes.
- Finally, scroll down to the bottom and click the Continue button to ensure the changes are saved.
Enabling Charge Customer Later with PayPal Business
For PayPal Business, you’ll have to enable the Charge Customer Later option. Here’s how:
- In the Form Builder, click the PayPal Business field.
- Click the Payment Settings icon.
- Click the Cog Wheel icon at the top-right side of the Payment Settings panel.
- Open the Additional Gateway Settings.
- Look for the Charge Customer Later, and toggle it to Yes.
- Scroll down, and click the Continue button to save the changes. That’s it!
Setting up Charge Customer Immediately with Stripe
With Stripe, you’ll find and have to disable the Charge Customer Immediately option. Here’s how:
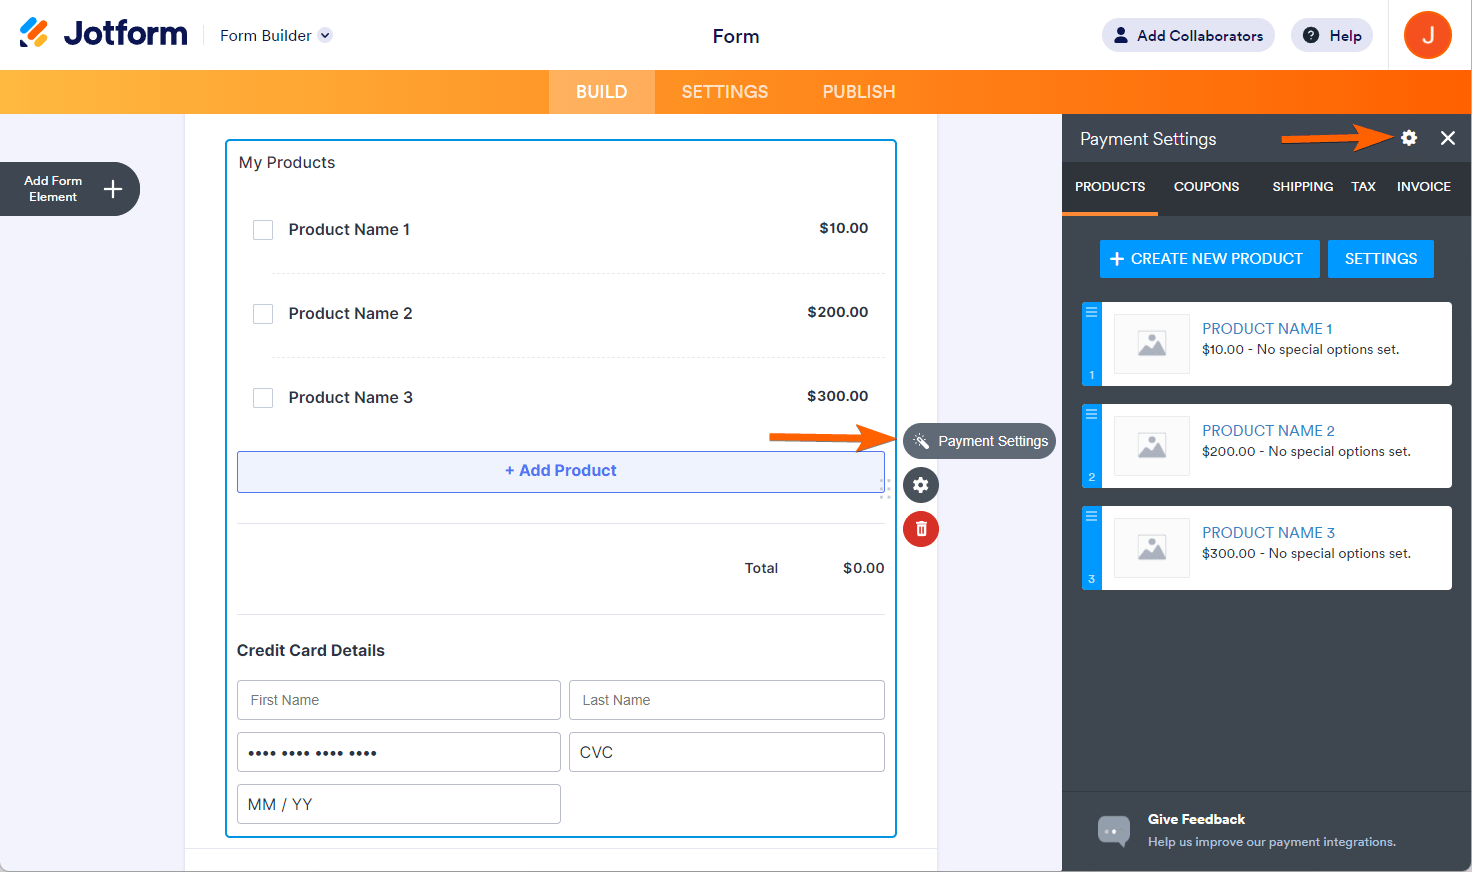
- In the Form Builder, click the Stripe payment field.
- Click the Payment Settings icon.
- At the top right side of the payment settings panel, click the Cog Wheel icon.
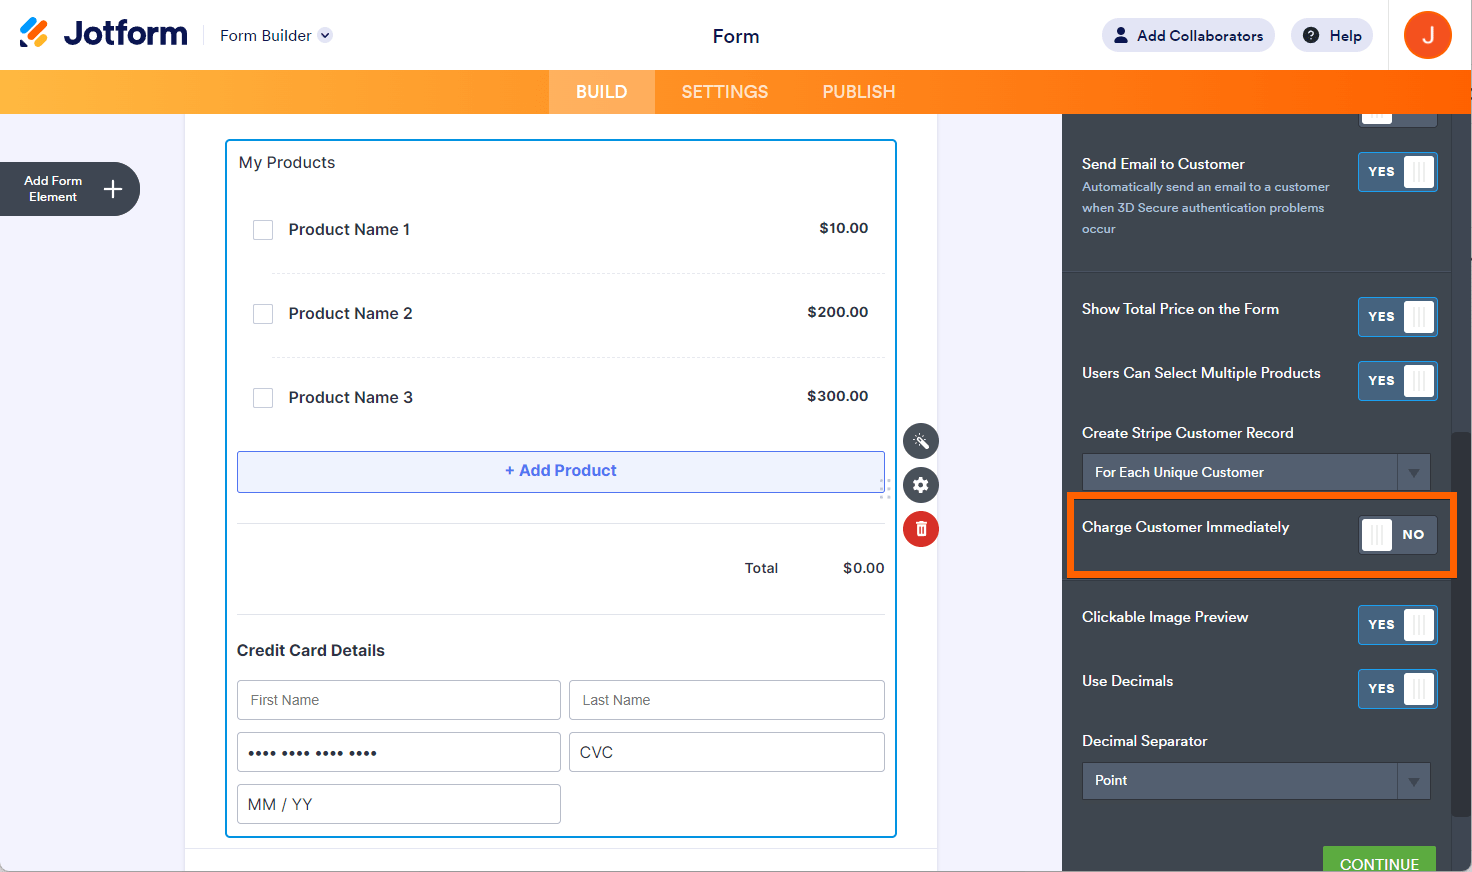
- Open the Additional Gateway Settings.
- Look for the Charge Customer Immediately option and toggle it to No.
- Click the Continue button to save the changes, and that’s it.
Now, to charge your customers the payment they pre-approved in your payment form, you’ll have to do it either through the Form Emails, Jotform Tables, or the dashboard of the payment processor you’re using. For more information, kindly visit: Capturing or Charging Customers for Authorized Payments.


Send Comment:
2 Comments:
139 days ago
How can I retrieve a deleted entry
More than a year ago
can i collect payments with GoDaddy payments?