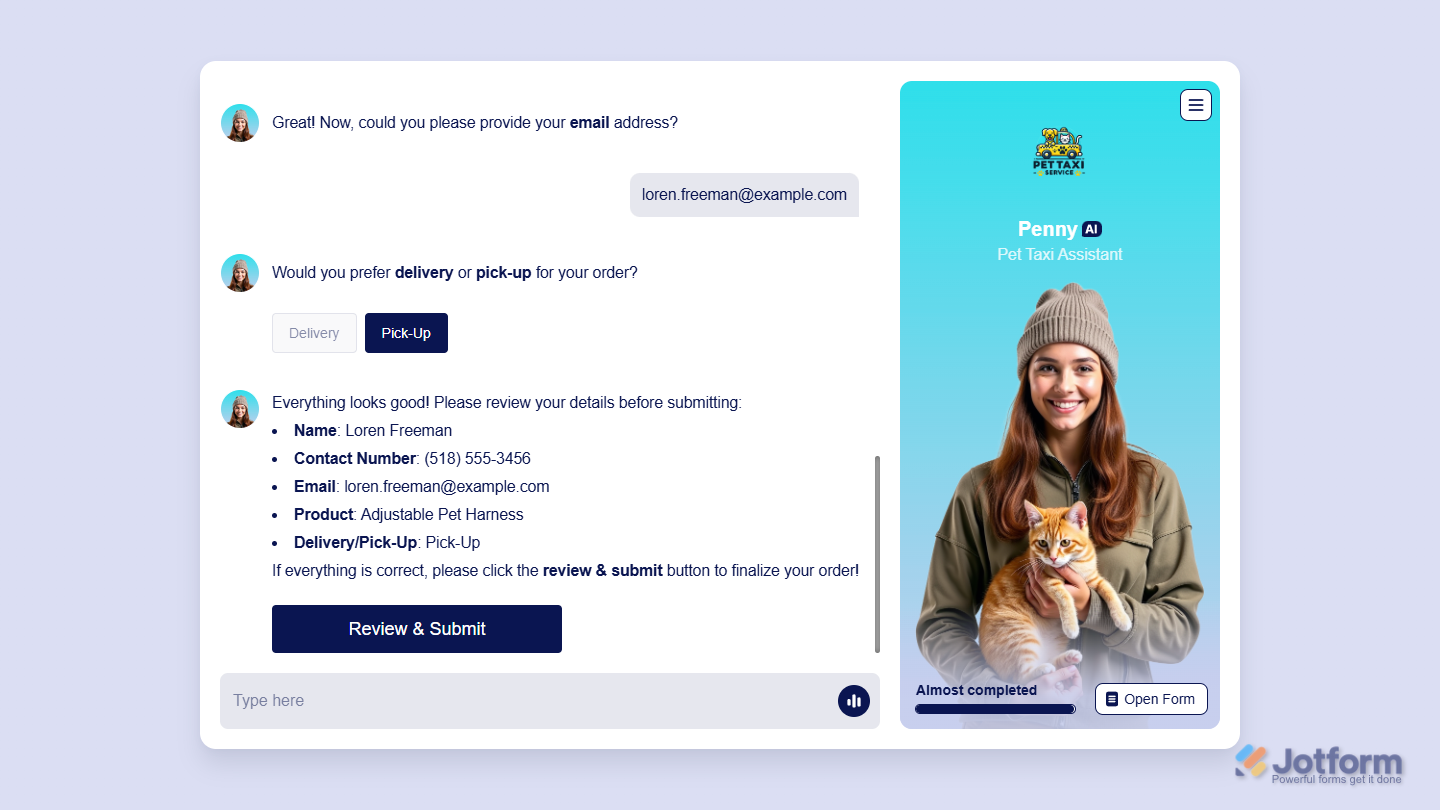
Jotform’s AI Agents make payment collection more interactive by guiding customers through the process. Rather than filling out a form on their own, users get help in selecting products, subscribing to services, making donations, and addressing important details. Once all the information is gathered, the AI agent initiates a structured review and submission flow, ensuring a seamless and secure payment experience.
Connecting Payment Forms to Your AI Agents
You can connect payment forms, or forms set up with one of our 40+ payment processors, to your AI Agents in a few easy steps. Here’s how to do it:
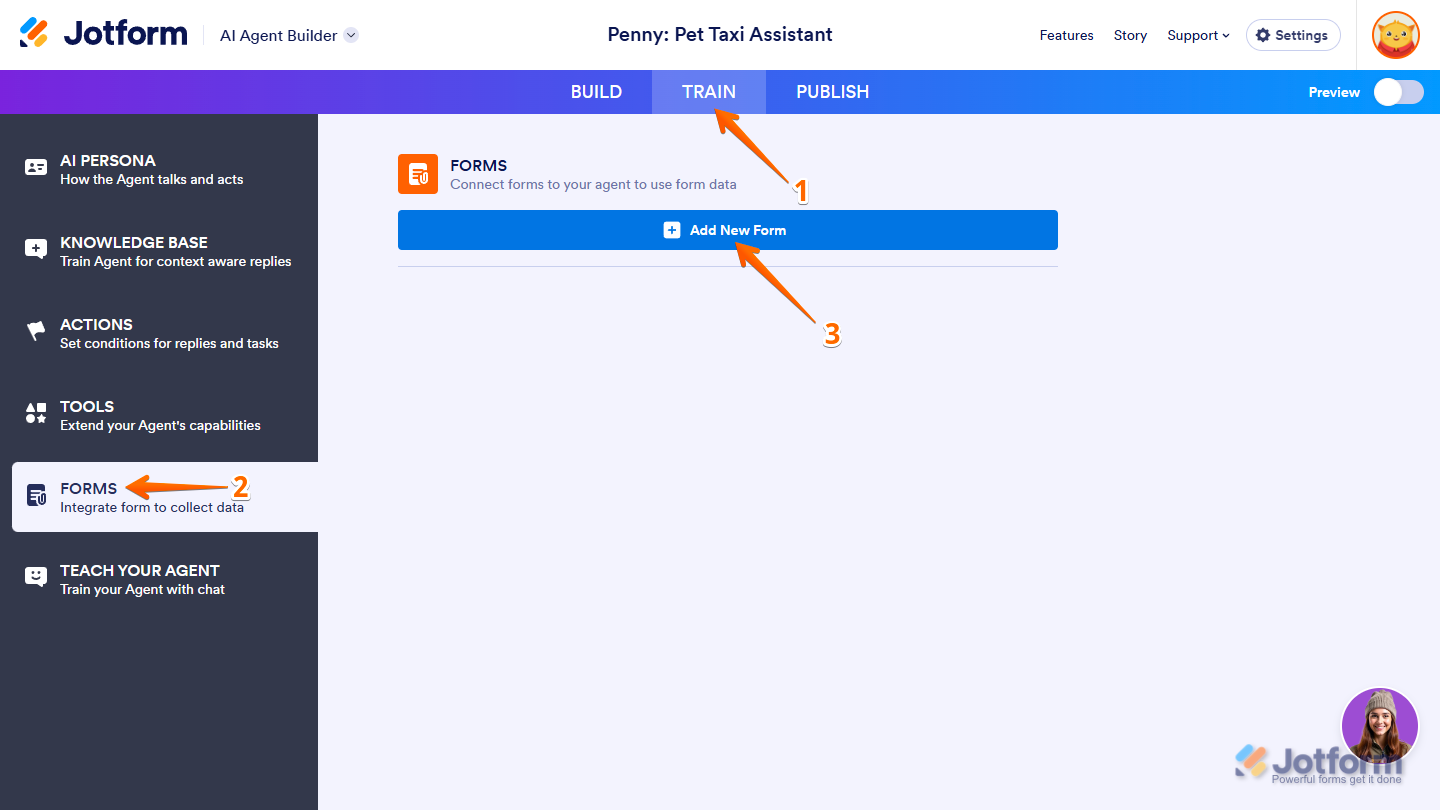
- In AI Agent Builder, in the blue navigation bar at the top of the page, click on Train.
- Now, click on Forms in the menu on the left.
- Then, click on the blue Add New Form button at the top of the Forms section.
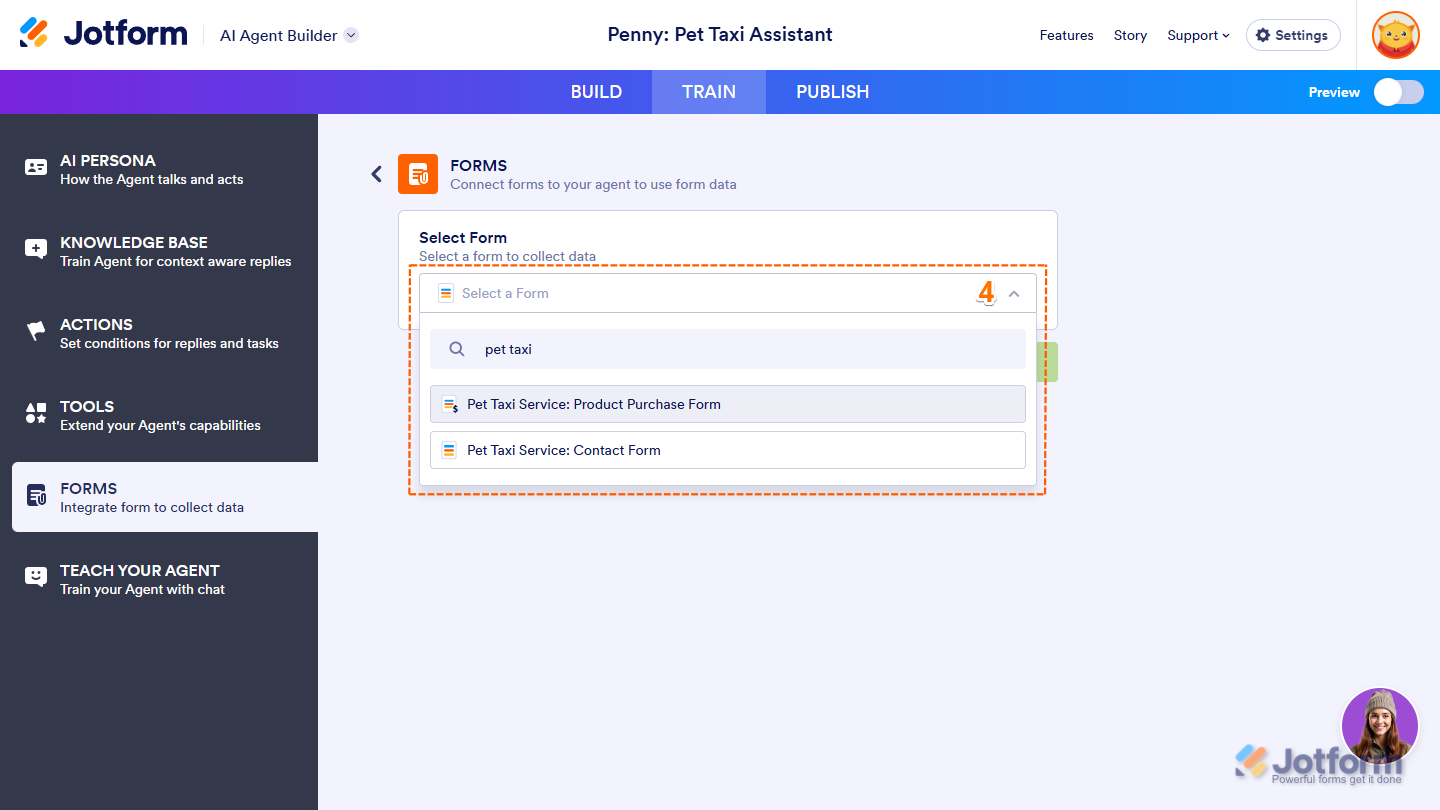
- Next, select your Payment Form in the Select Form dropdown menu. Or use the Search bar at the top of the menu to find a specific one easily.
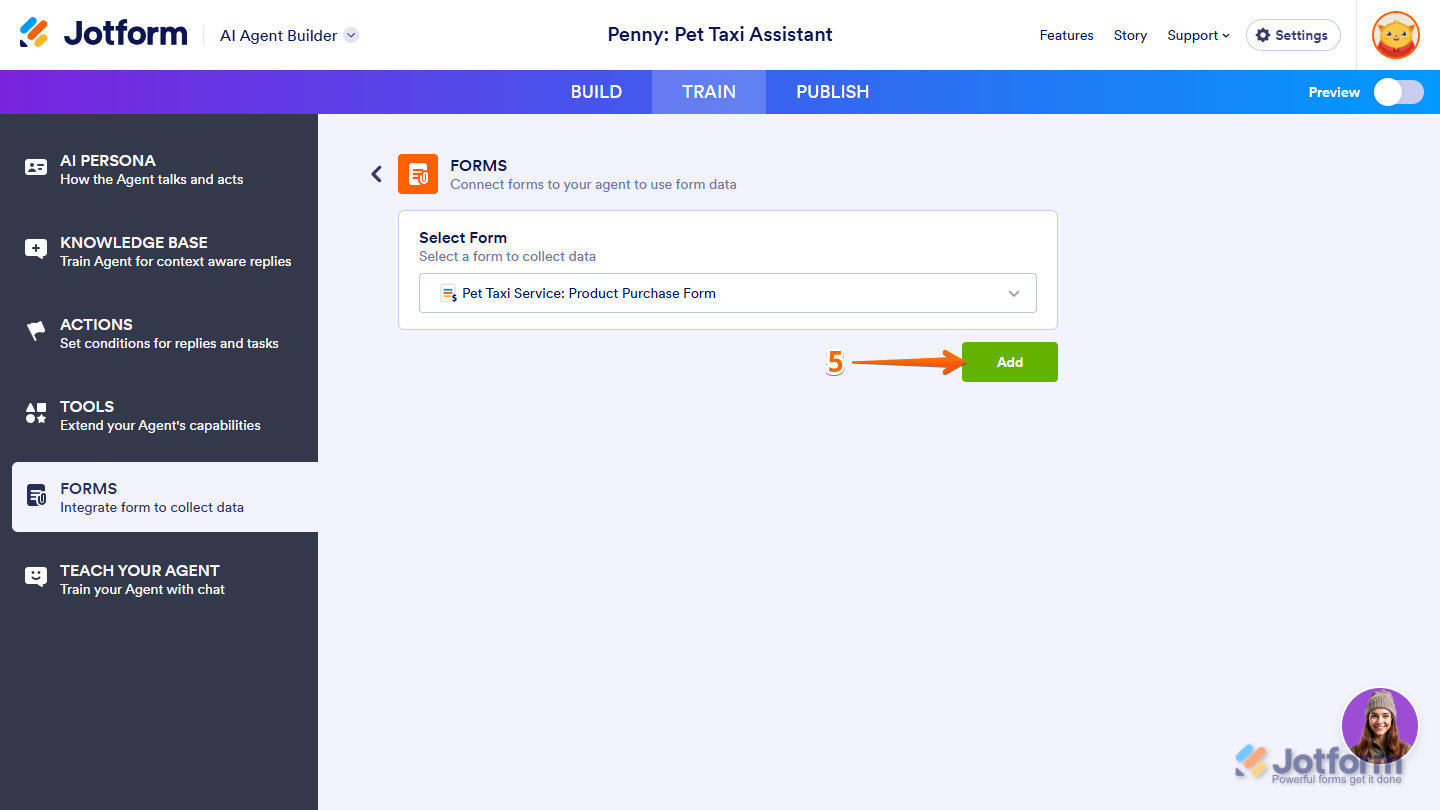
- Finally, click on the Add button.
Note
Payment forms display a dollar sign icon on the right side of the form name, making them easy to identify.
Now, your AI agent can help users who want to make a purchase through your payment forms by taking their orders and completing any required details.
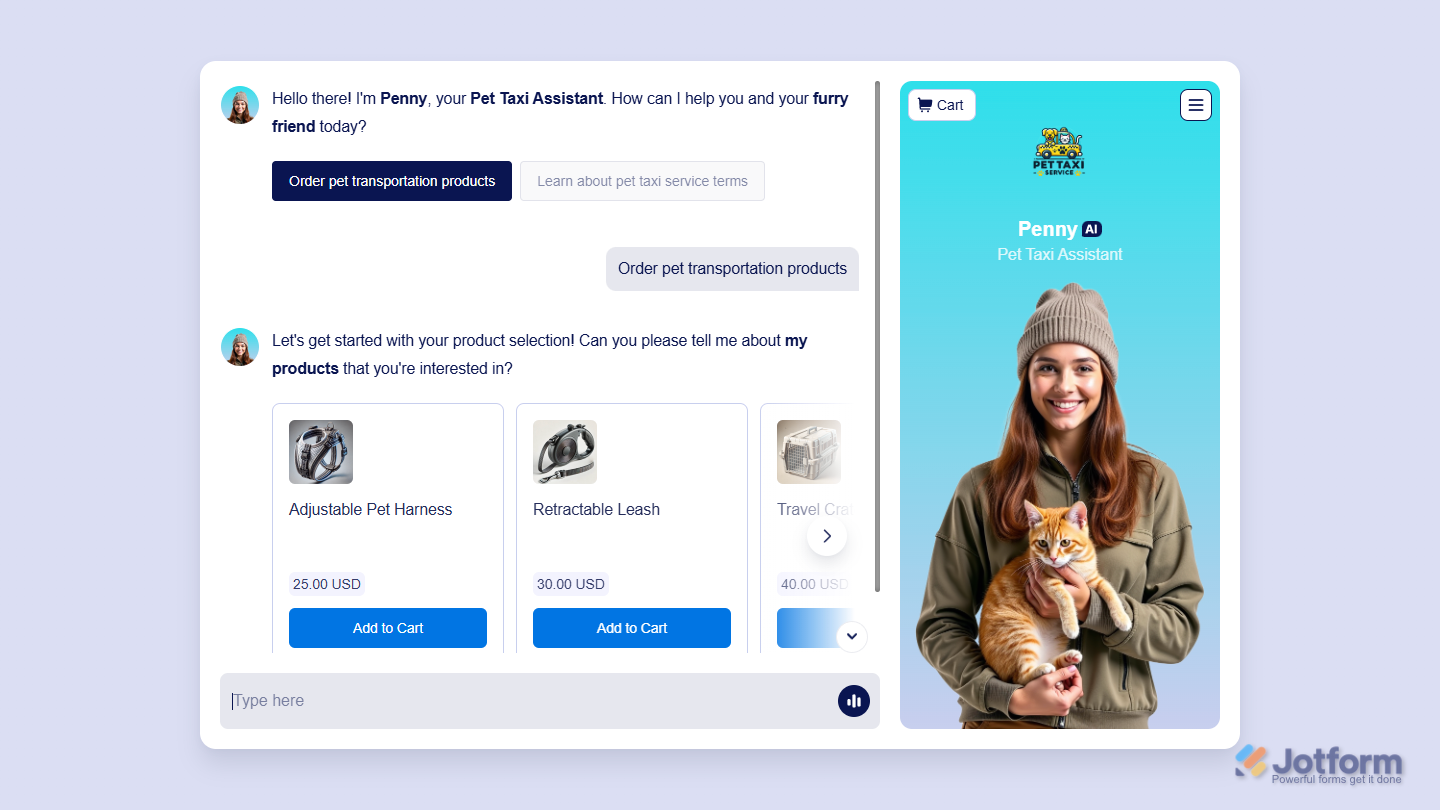
Then, once only the payment step remains, your AI Agent will prompt users to review and submit the populated form.
Creating an Order AI Agent
Using a template, you can create an AI Agent that’s automatically connected to a new form with a payment field you can configure later. Here’s how:
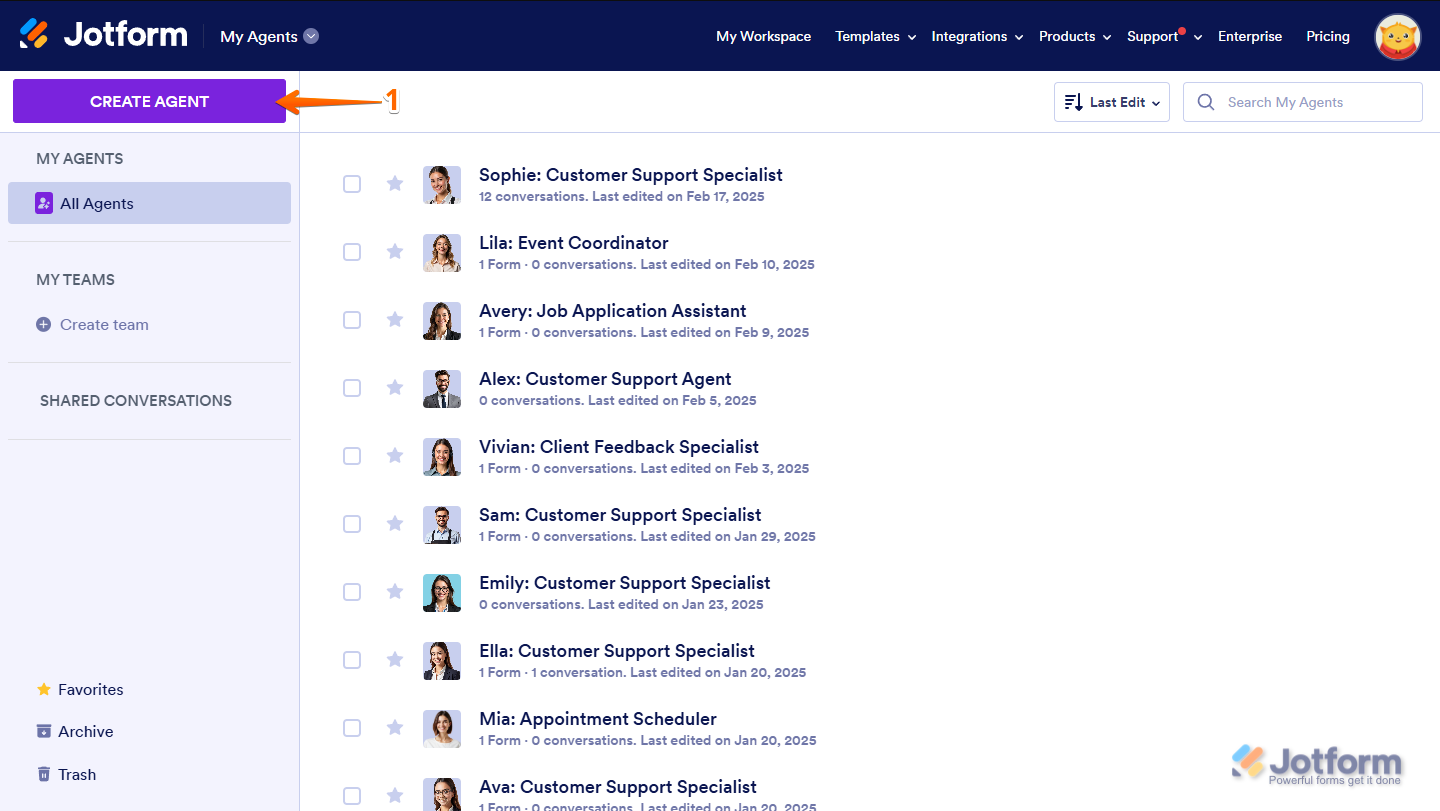
- On your My Agents page, click on the purple Create Agent button in the top-left corner.
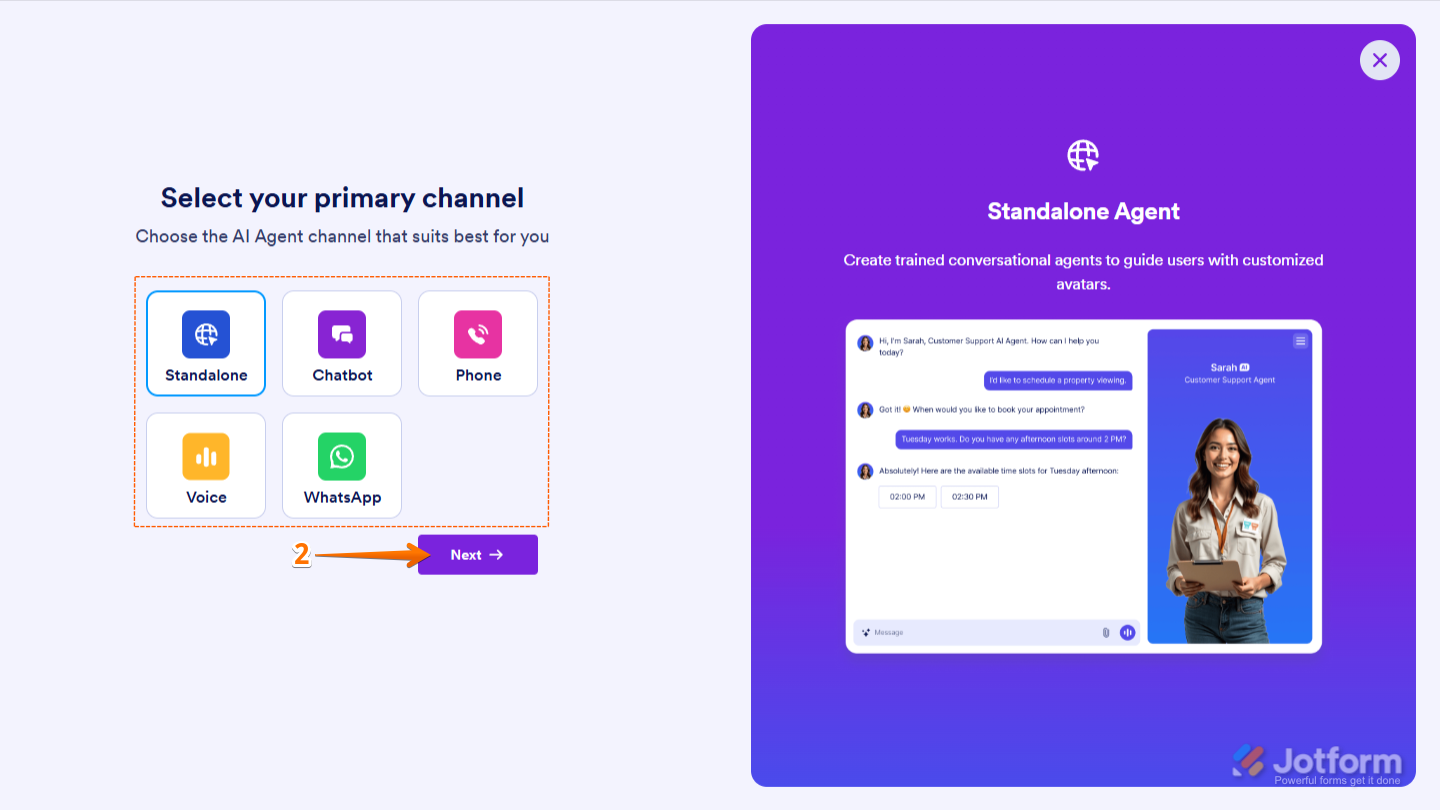
- Next, select the Primary Channel for your AI Agent and click on Next.
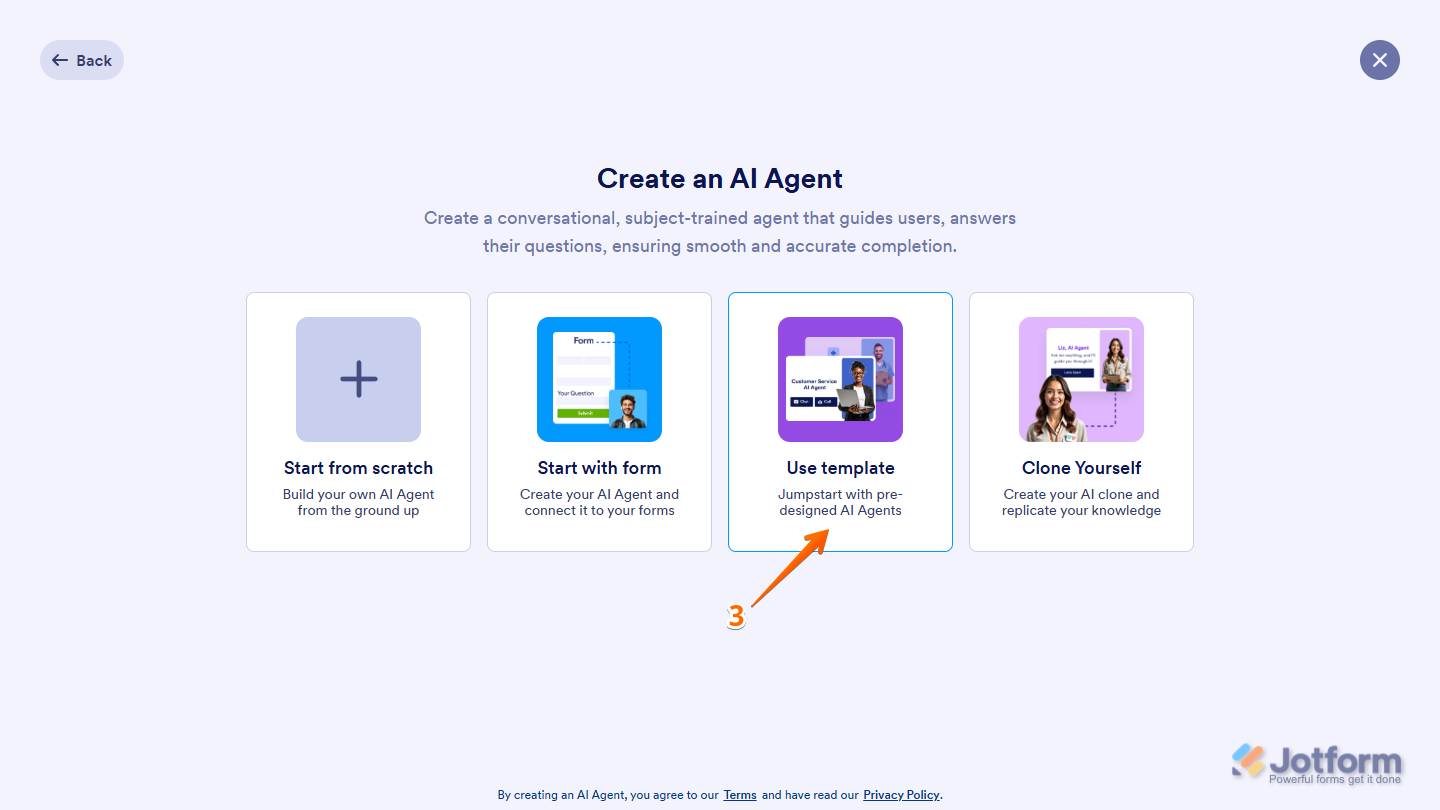
- On the Create an AI Agent screen, click on Use Template.
- Now, on the Choose a Template page that opens, expand the Types section in the menu on the left and select Order AI Agents to filter the templates by that category.
- In the Filter results on the right, click on Use Agent below Order AI Agent to select it.

This generates an AI Agent based on the template you selected and redirects you to AI Agent Builder. Here’s how you can edit the payment form created for your AI Agent:
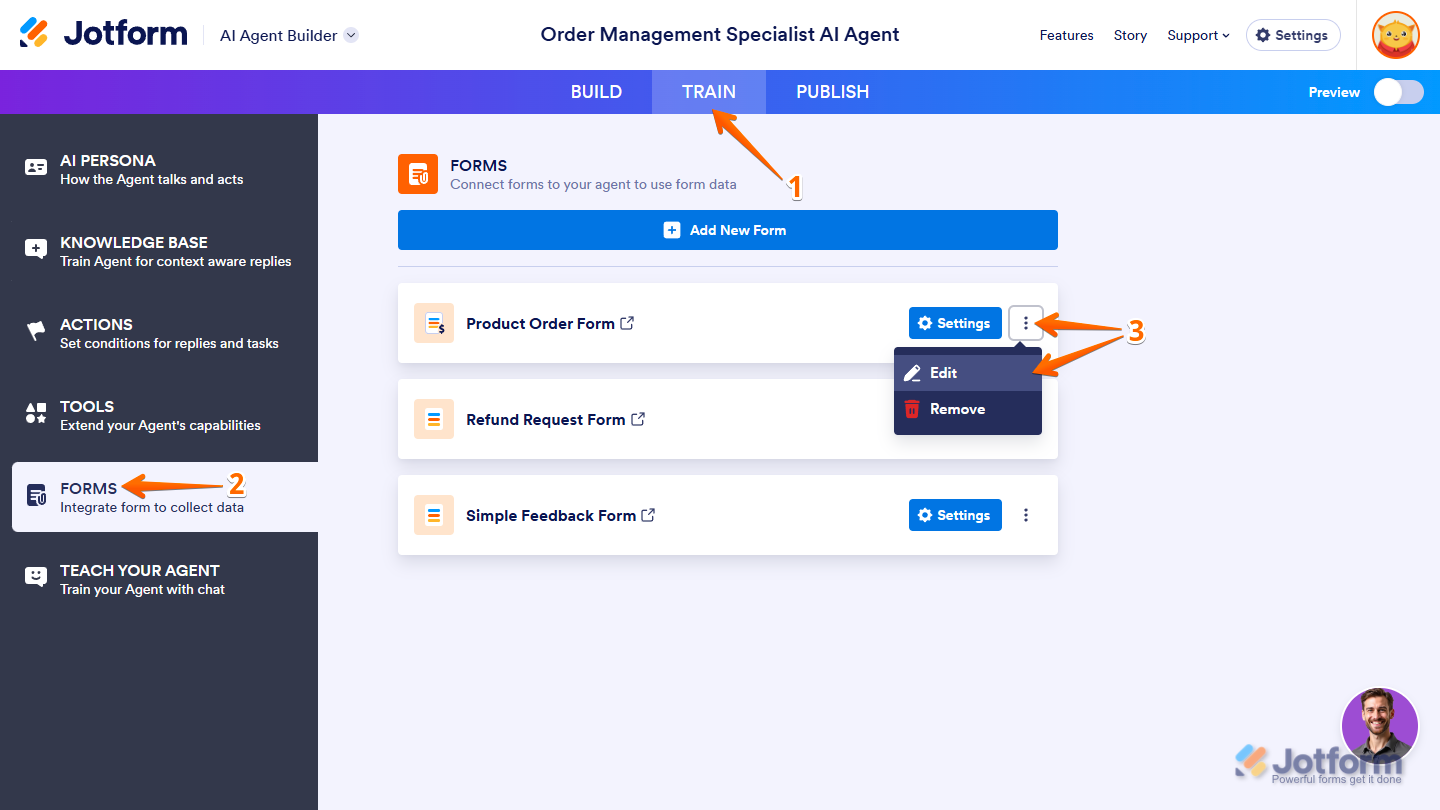
- In AI Agent Builder, in the blue navigation bar at the top of the page, click on Train.
- Now, click on Forms in the menu on the left.
- Then, click on the Three Dots icon on the right of the created payment form and select Edit to open it in Form Builder.
For more details on how you can set up the payment field in your form, check out our guide on Mastering Payment Form Integrations With Jotform.
Note
You can also create an Order AI Agent directly from the AI Agent Directory. Or, create an AI Agent based on the content of your existing payment form. Check out our guide on How to Create an AI Agent from an Existing Form to learn more.
Viewing Payment Form Submissions
You can view payment details on the Conversations page. Here’s how:
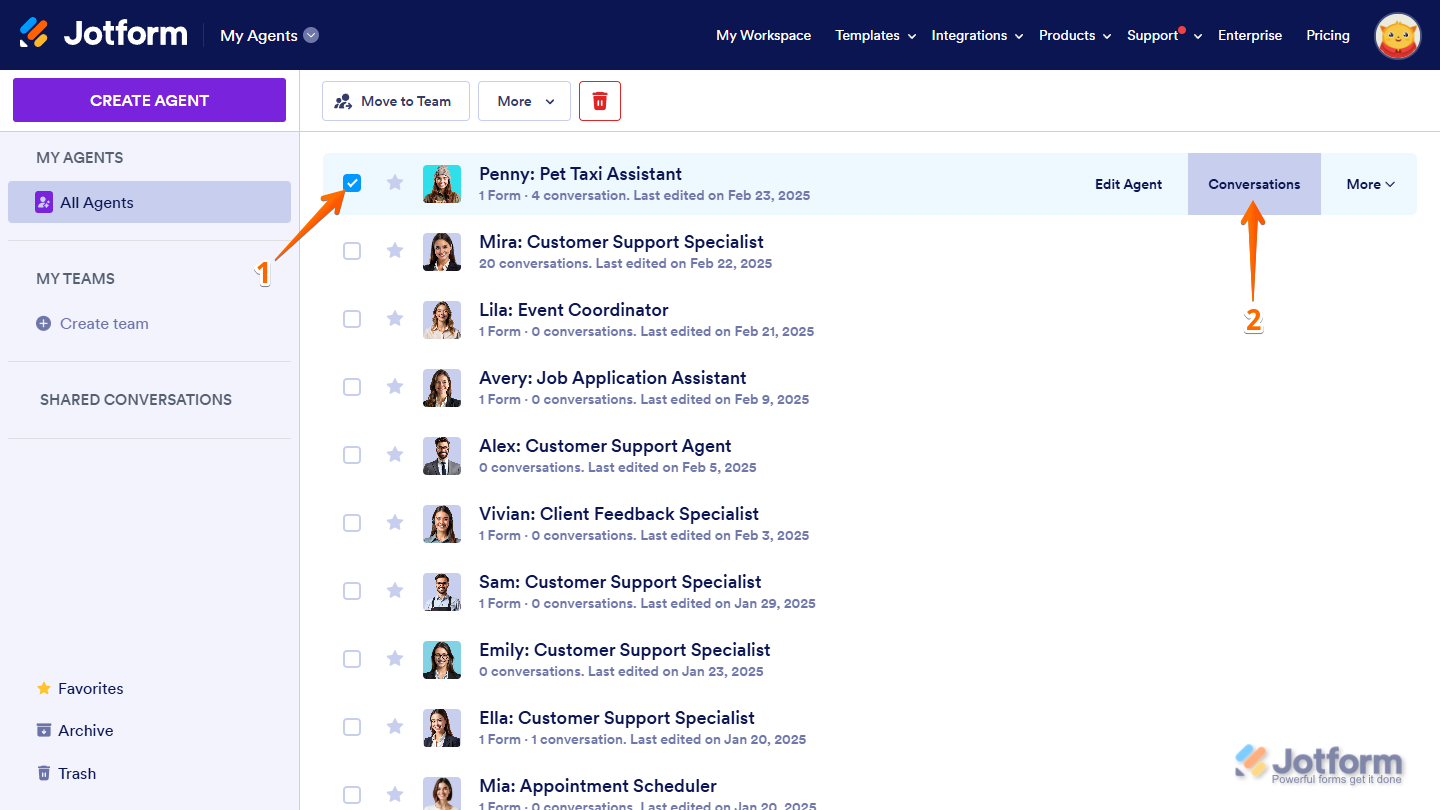
- On your My Agents page, put a check in the box next to an AI Agent connected to your payment form to select it.
- Then, click on Conversations on the right side of the page.
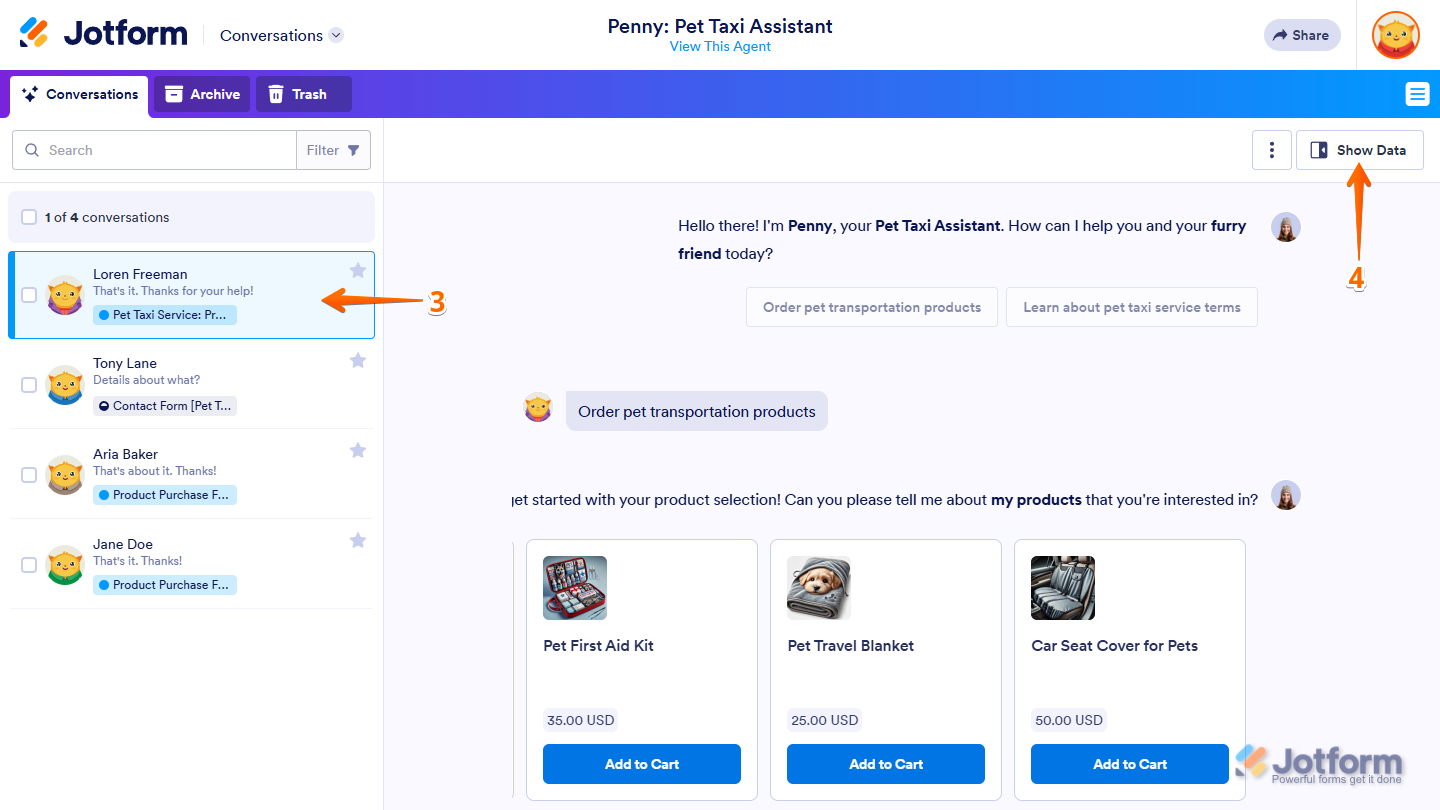
- On your Conversations page, click on a conversation in the list on the left.
- Then, click on Show Data on the top-right side of the page.
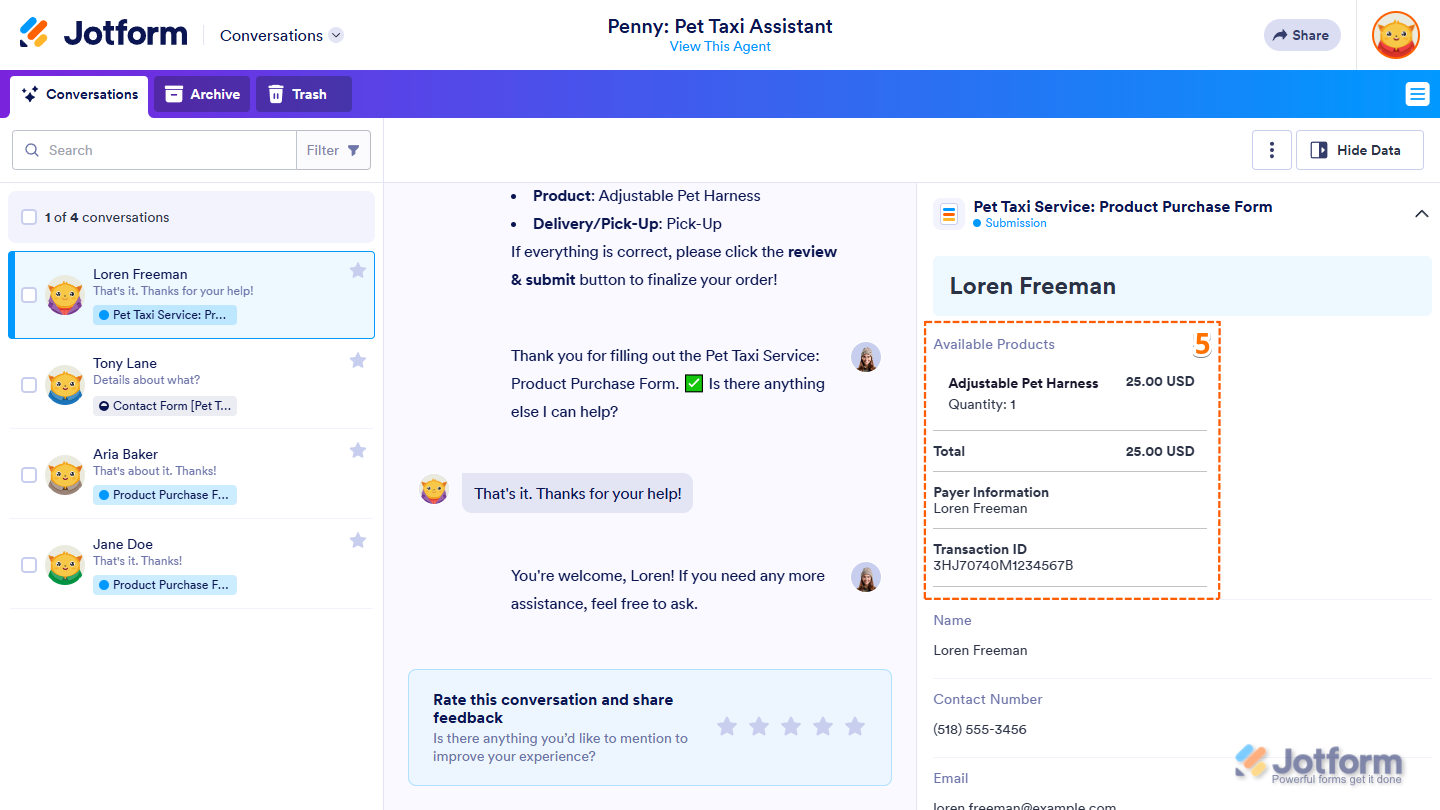
- Now, scroll through the submission details in the menu that opens on the right and locate your form’s payment field section.
For more details, check out our guide on How to View and Manage Conversations.
While you can view your form submission on your Conversations page, you might also want to check out these guides to access them the traditional way:


Send Comment: