With Okta Single Sign-On (SSO), configuring Attribute Statements is a crucial step in your application settings. Attribute Statements define the user attributes that Okta will send to your SSO Prefill settings in Jotform Enterprise. These attributes help ensure seamless user provisioning, access control, and personalized experiences, particularly prefilling user forms with user data.
Configuring SAML Attributes With Custom SAML App
For this part, we will configure the SAML Attributes for the Custom SAML App you created for Jotform SSO. If you’ve installed the Jotform Application from the Okta App Catalog, scroll to the Jotform Okta App. Let’s get started!
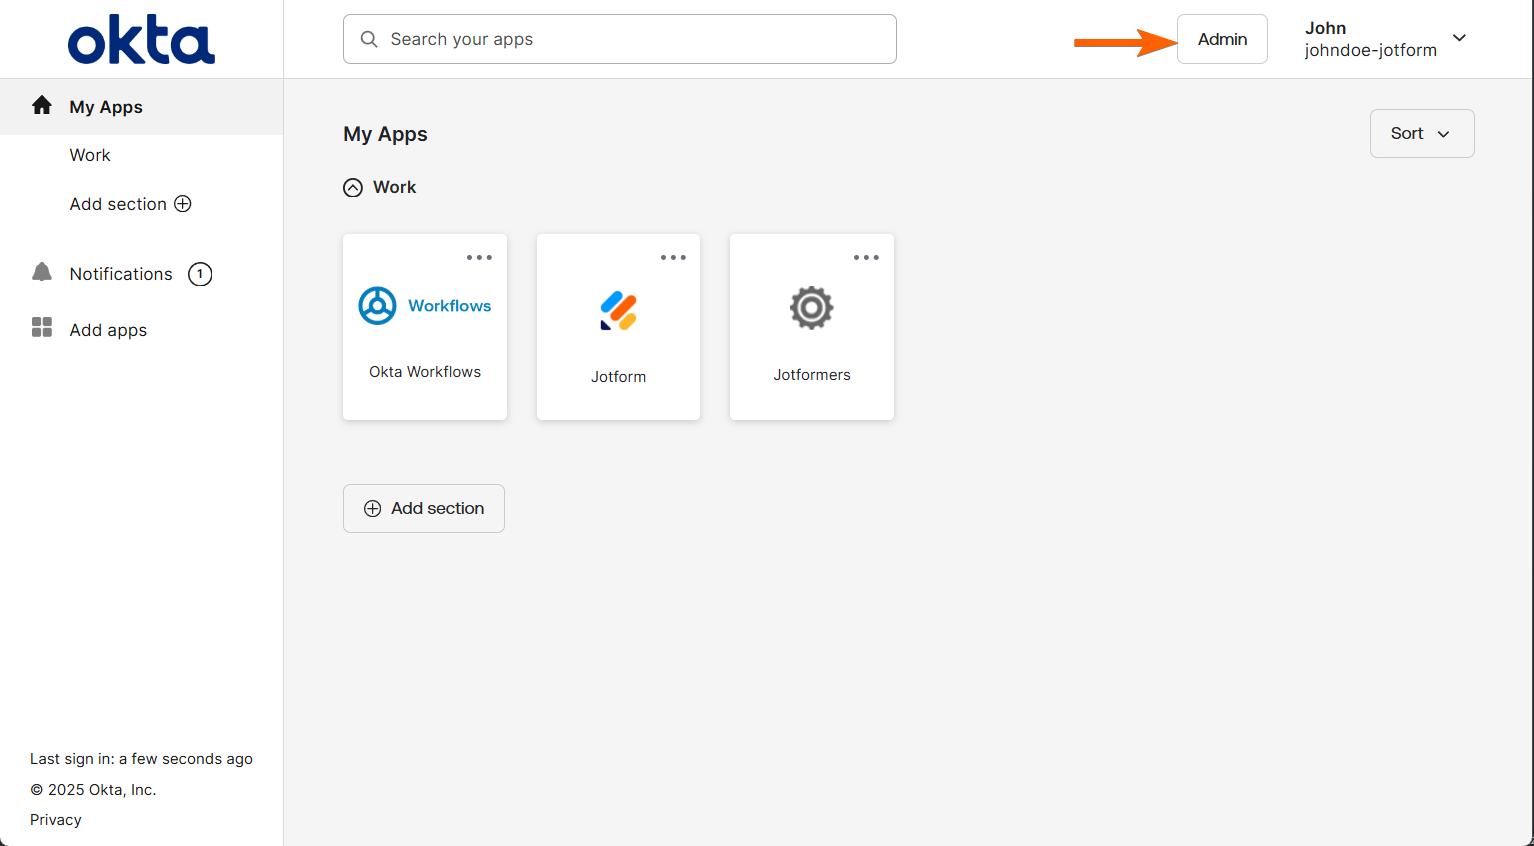
- Log in to your Okta admin account and go to the Admin page.
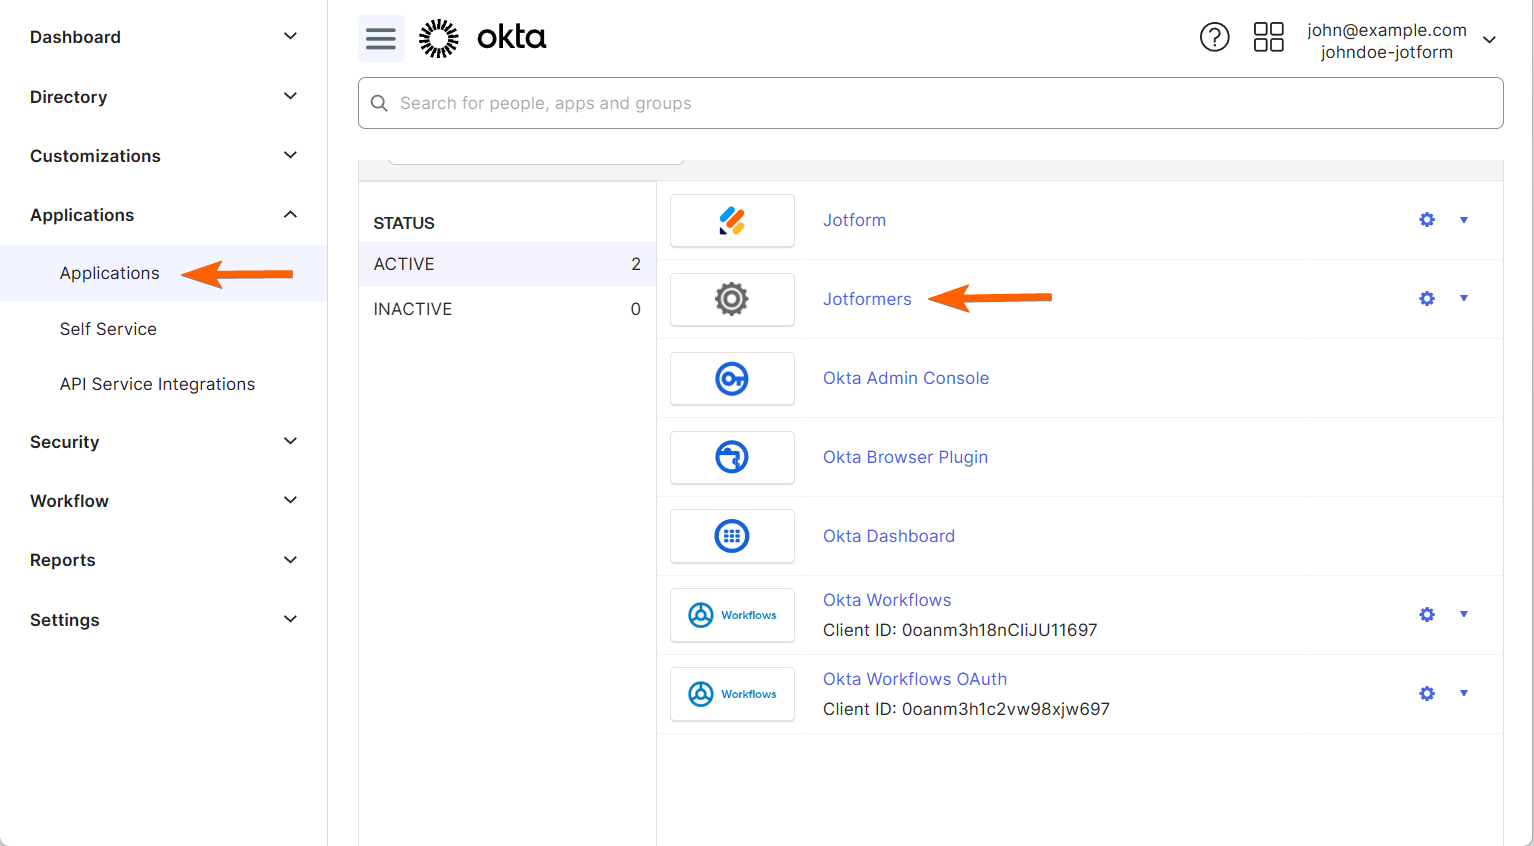
- Go to Applications and select the Custom SAML 2.0 app you created for Jotform SSO.
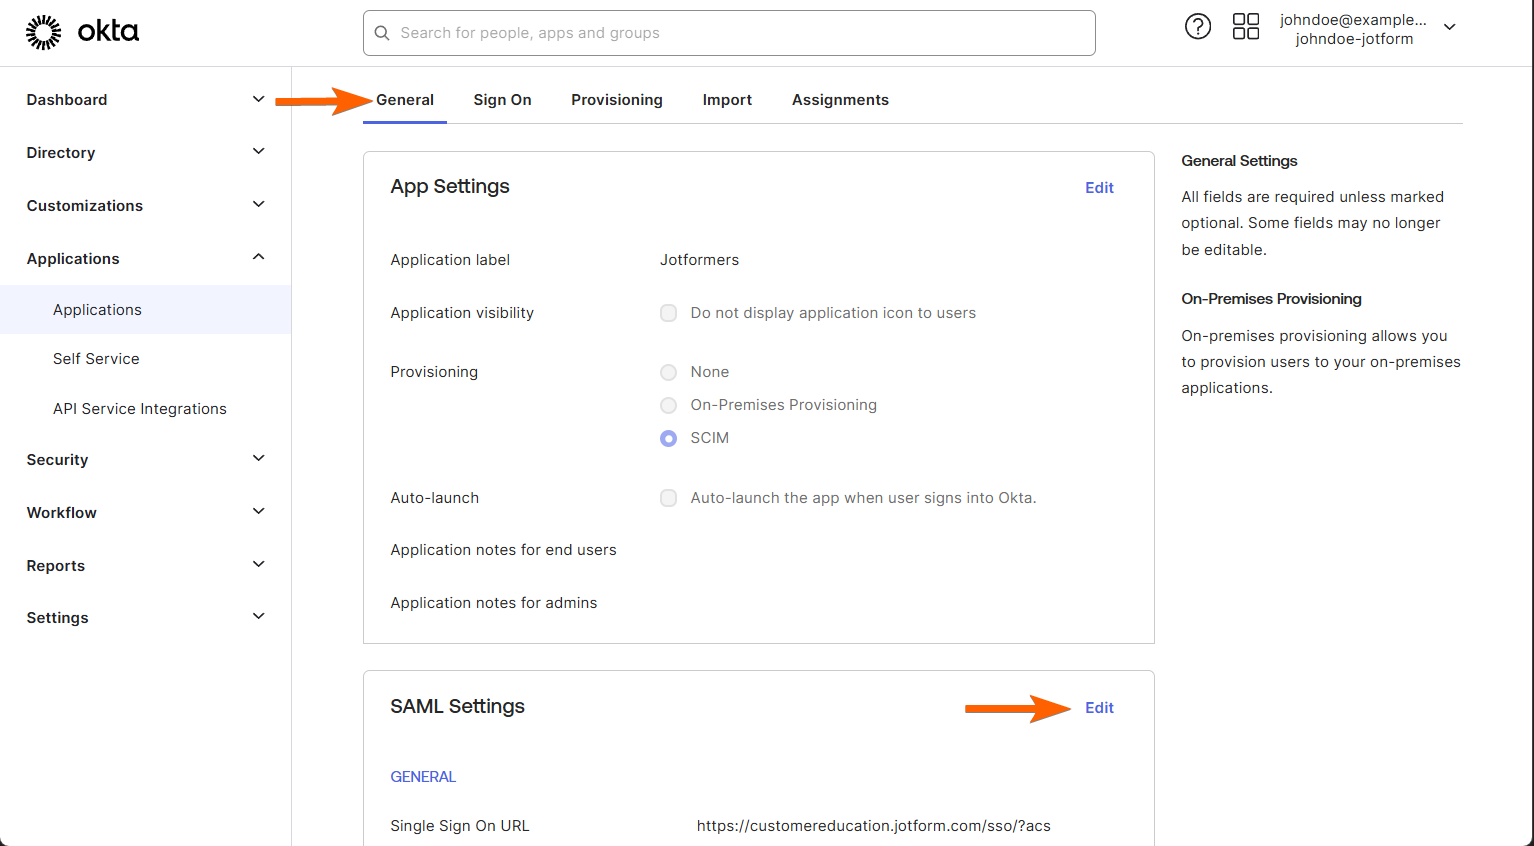
- Go to the General tab of the selected application, then click the Edit link under the SAML Settings.
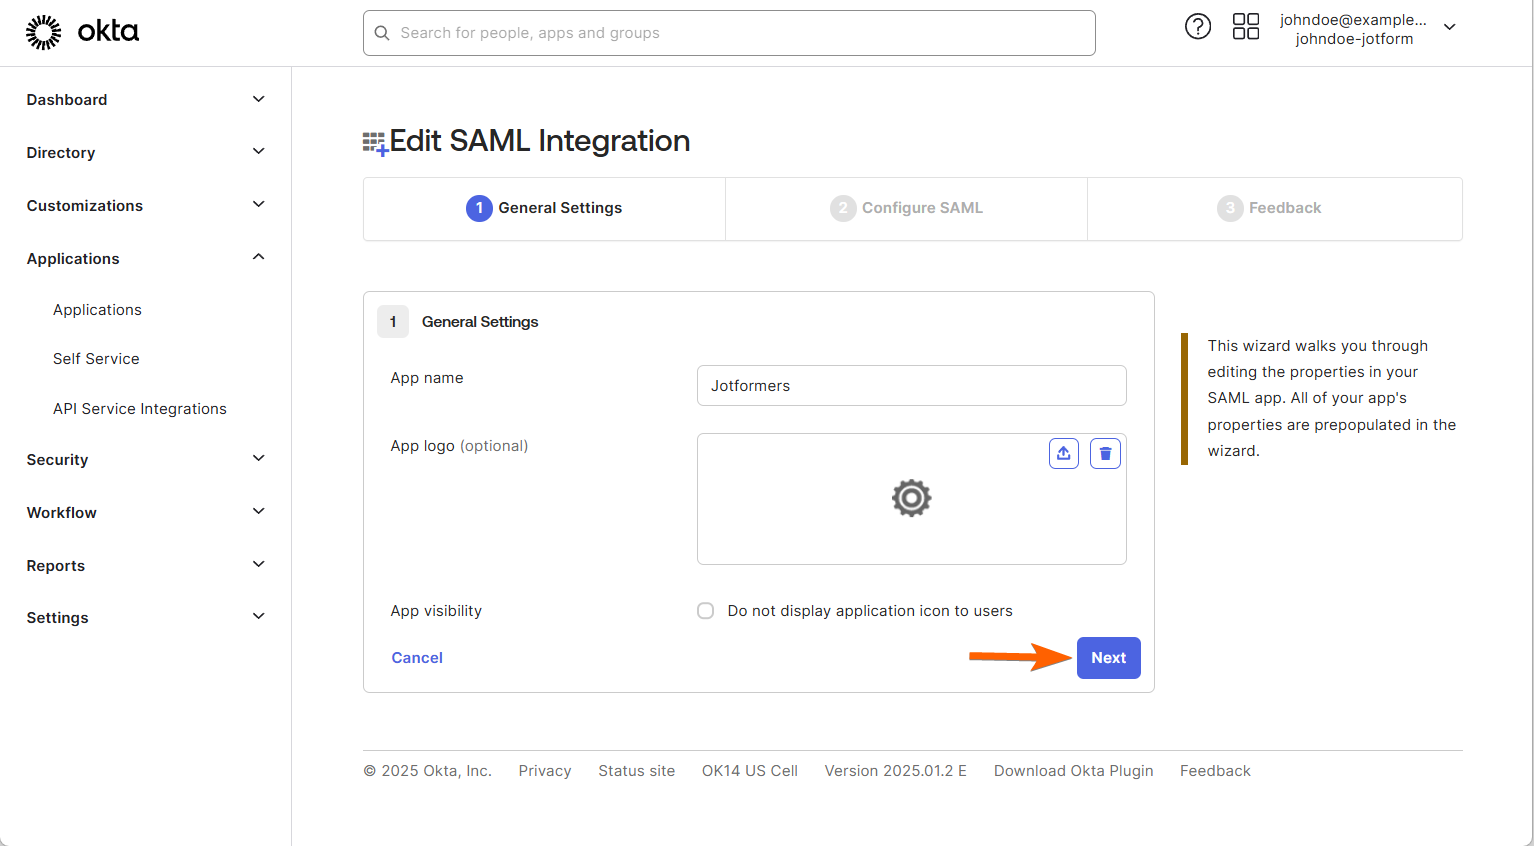
- Select Next to go to Configure SAML.
- Configure your Attribute Statements as follows:
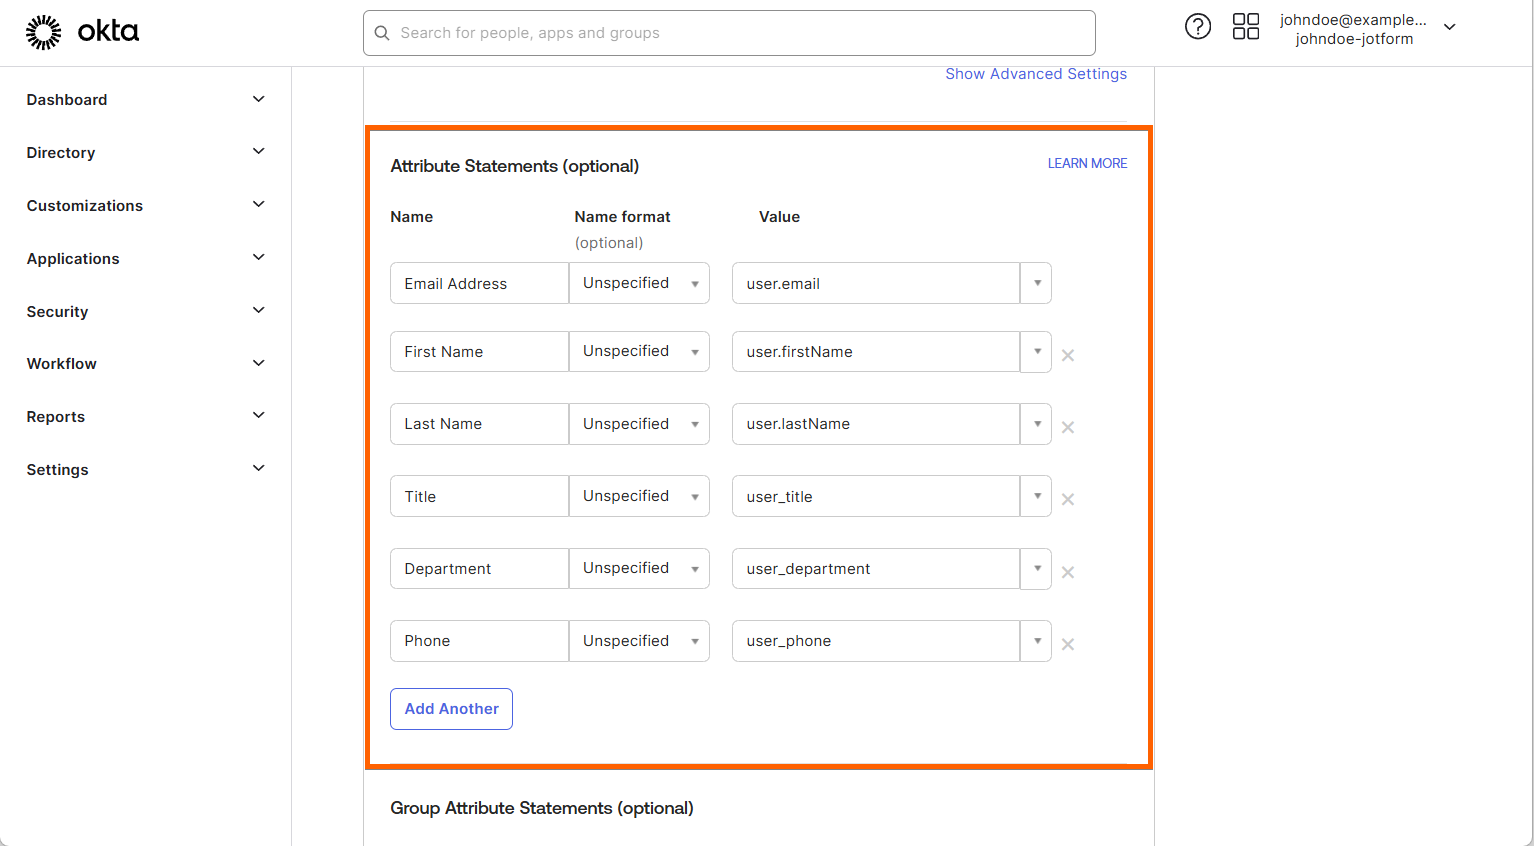
| Name | Name Format | Value |
|---|---|---|
| Email Address | Unspecified | user.email |
| First Name | Unspecified | user.firstName |
| Last Name | Unspecified | user.lastName |
| Title | Unspecified | user.title |
| Department | Unspecified | user.department |
| Phone | Unspecified | user.phone |
- Click the Next button at the bottom of the Configure SAML tab.
- Finally, click the Finish button at the end to save your entire SAML configuration.
Notes
- You can add more attributes with Okta. You only need to define them through the Attribute Statements with their corresponding Profile Attributes, such as the above. You can view the available Profile Attributes through the Directory > Profile Editor in Okta.
- You must also fill these attributes to the respective profiles you added in Okta. If you don’t provide the user details, they will remain blank in your SSO-enabled form.
Configuring SAML Attributes With Jotform Okta App
To configure the SAML Attributes for the Jotform Application
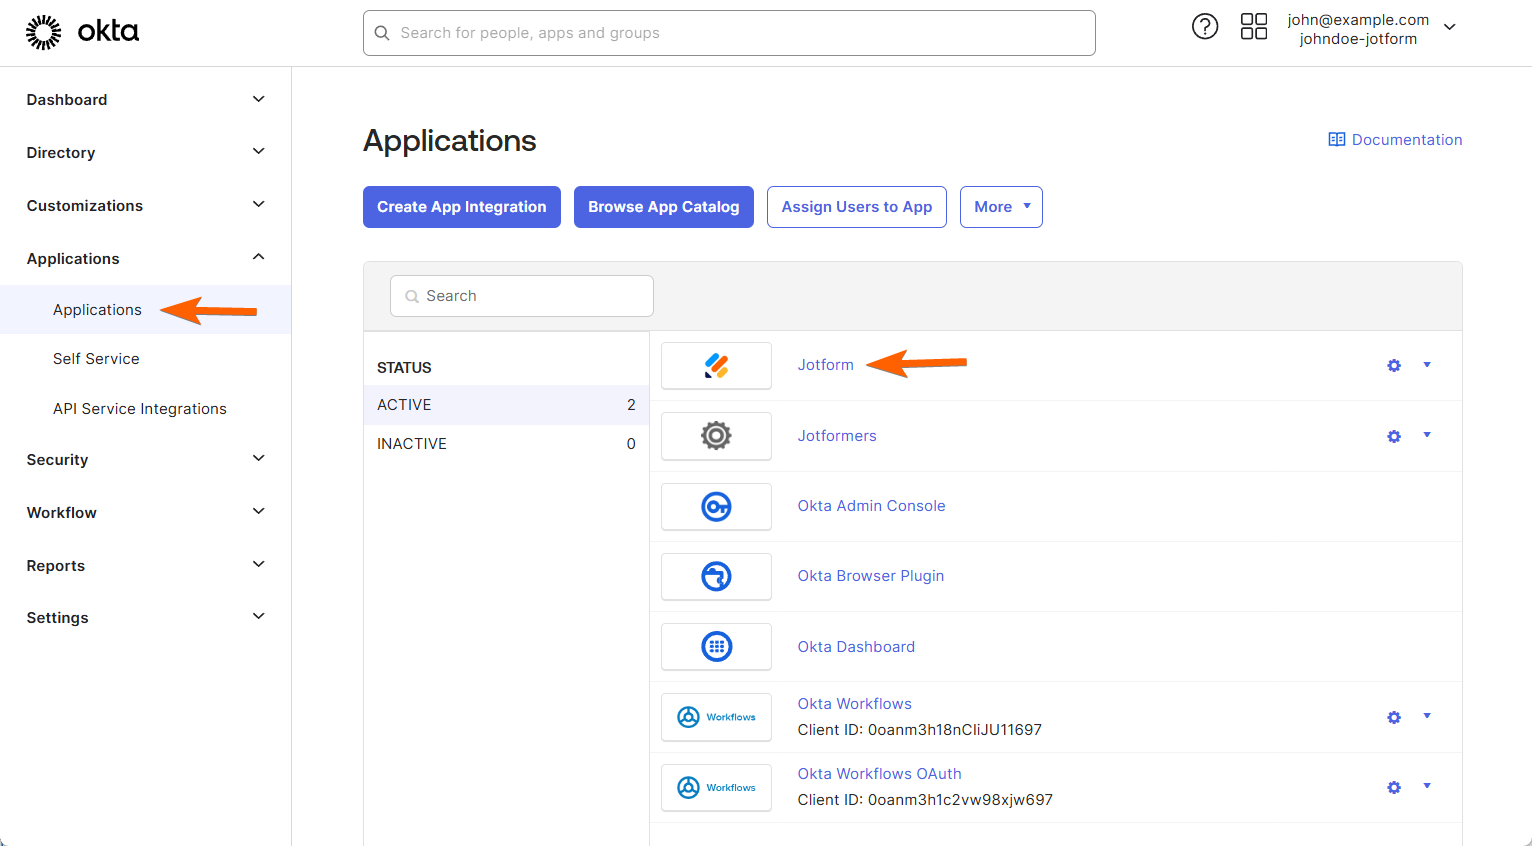
- In your Okta Admin dashboard, navigate to the Applications section.
- Select the Jotform Application you added through the Okta App Catalog.
- Click the Edit link under the Sign On tab.

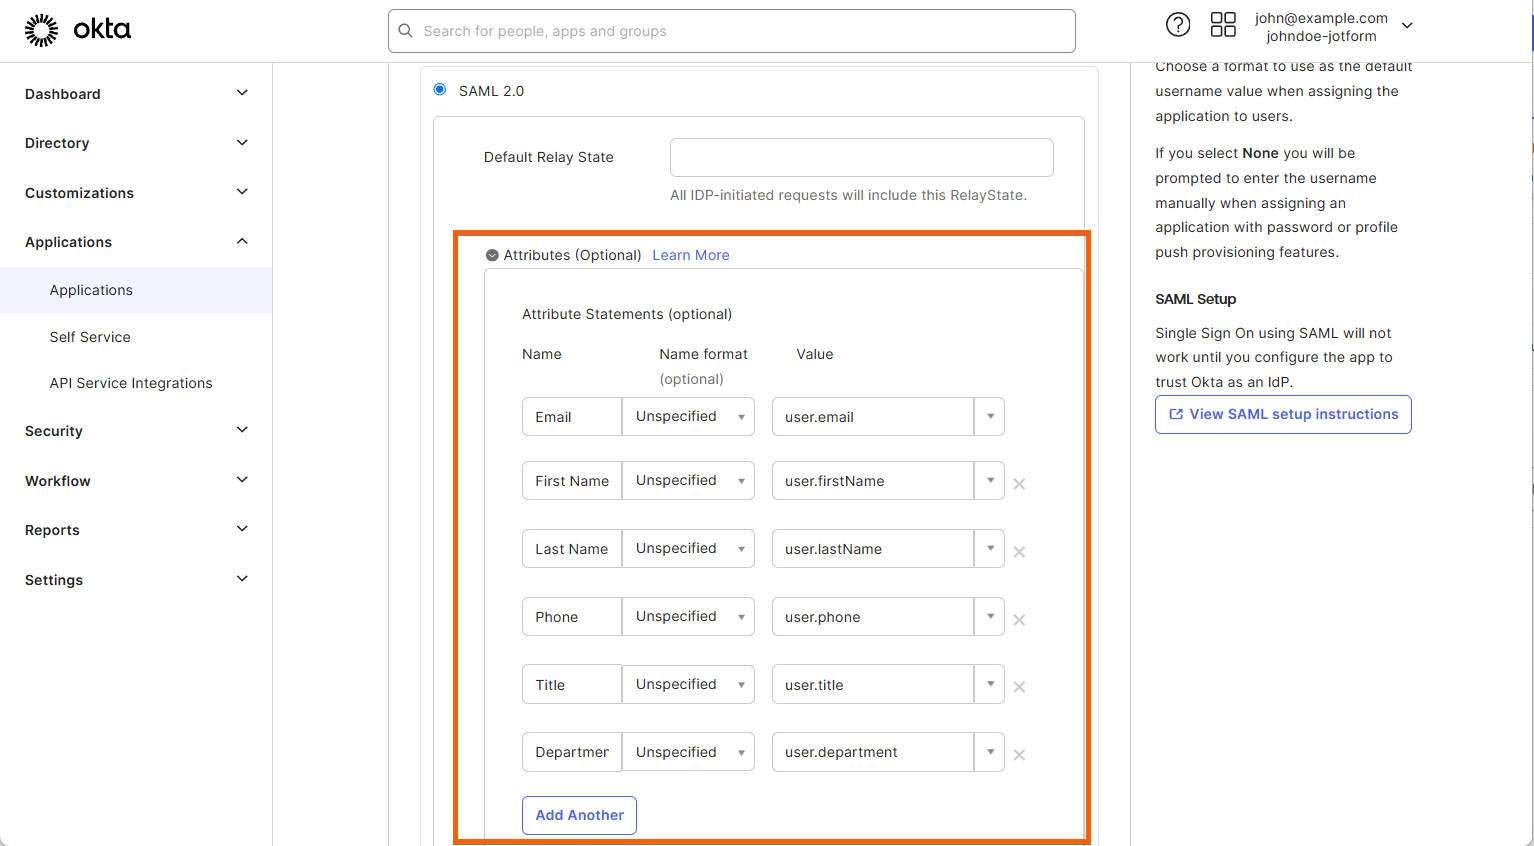
- Under the SAML 2.0 option, expand the Attributes (optional) window.
- Add your Attribute Statements as outlined:
- Scroll below and click the Save button to save your settings.
Setting up the SAML Attribute Mapping in Jotform Enterprise
After configuring the Attribute Statements, these attributes will not appear in your SSO Prefill settings without first adding them through the SAML Attribute Mapping in your Jotform Enterprise Server. Here’s how you can do that:
- Go to the Settings page of your Jotform Enterprise Admin Console.
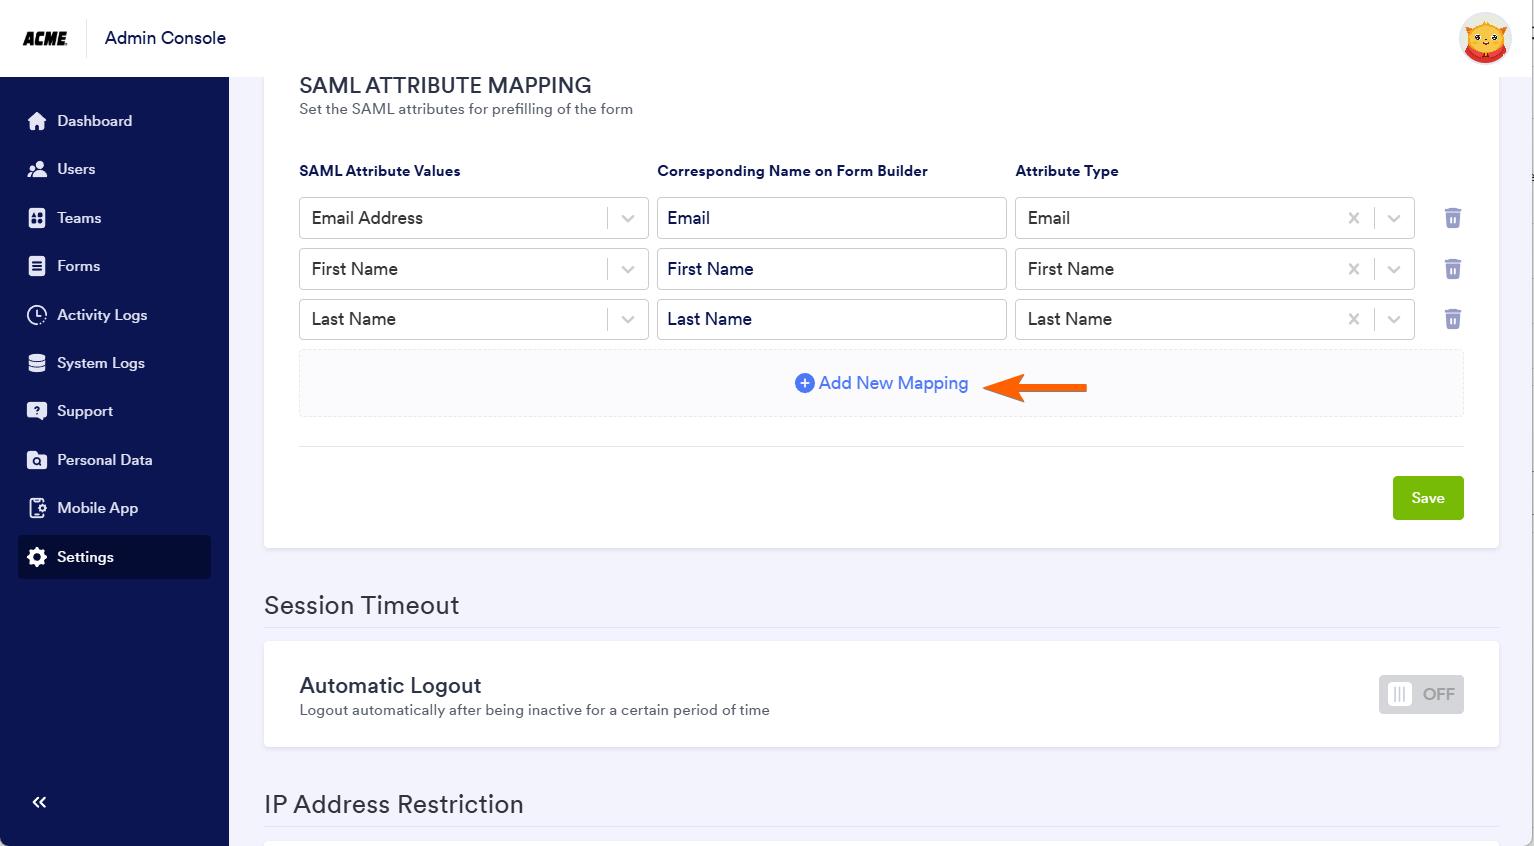
- Locate the SAML Attribute Mapping through the SSO Settings section and click the Add New Mapping button.
Note
The SAML Attribute Mapping will automatically appear on the page as soon as you configure the Attribute Statements with Okta. If not, we highly recommend logging out from your Jotform Enterprise admin account and logging back in to load the new settings.
- Map the attributes you’ve added earlier through your Okta Attribute Statements, and click the Save button to save all the mappings.
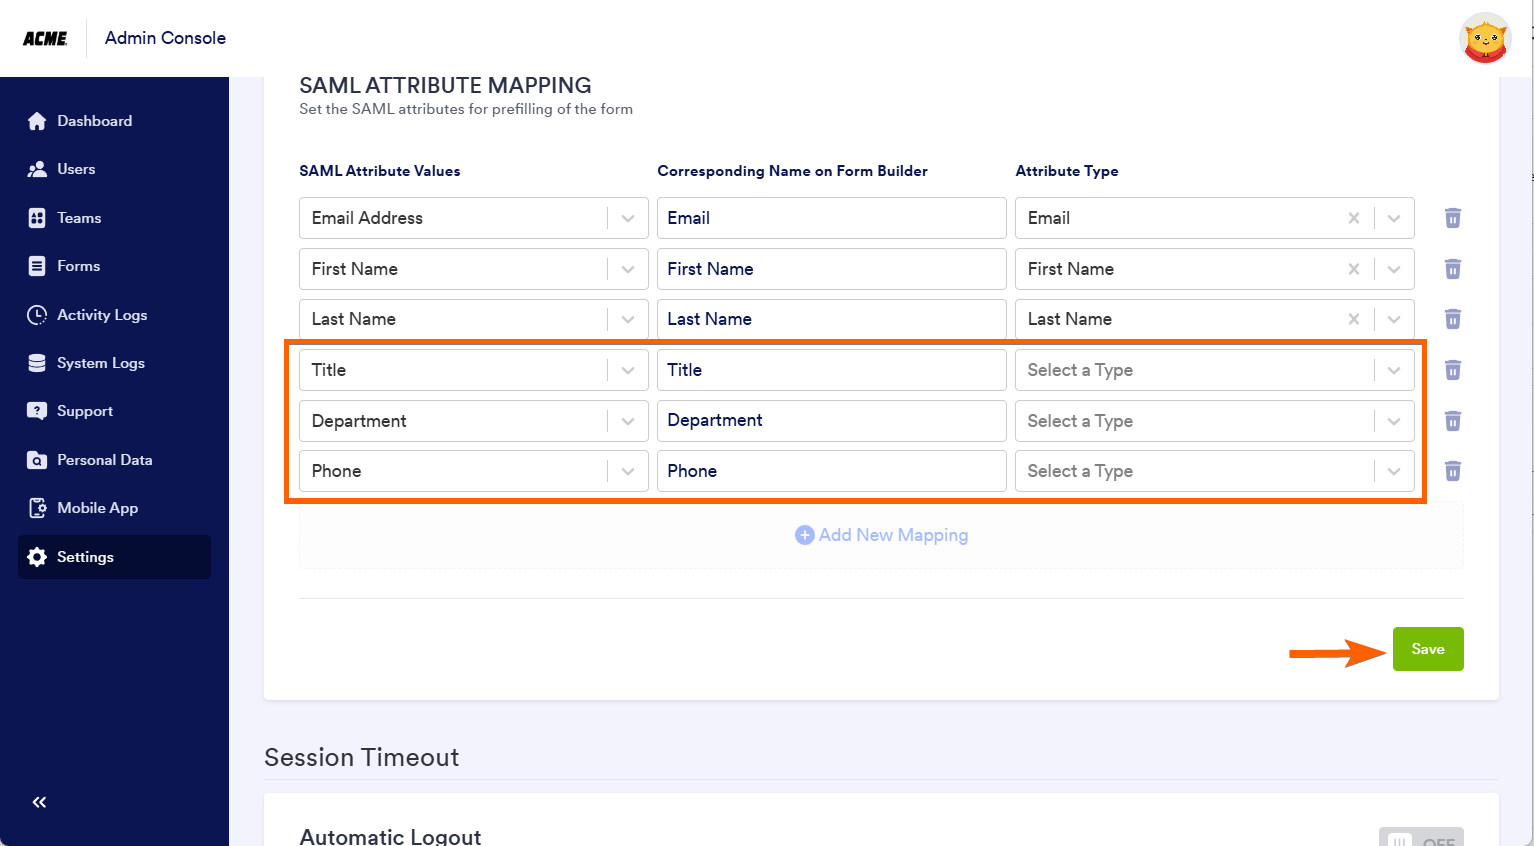
Note
The available Attribute Types are specifically designed for the first name, last name, and email in Jotform Enterprise. However, you can add more mapping without selecting from the Attribute Type as long as you input both SAML Attribute Values and Corresponding Name on Form Builder fields.
- Now, go back to your SSO Prefill settings. You should now be able to add these new fields.


Send Comment: