Jotform Store Builder is an extension to Jotform Apps, enabling app owners to collect payments and orders more efficiently. It’s a no-code app, which means no coding skills are required to build your online store and collect payments from your customers.
Creating your Jotform Store is super easy. Let’s start!
Creating a Jotform App
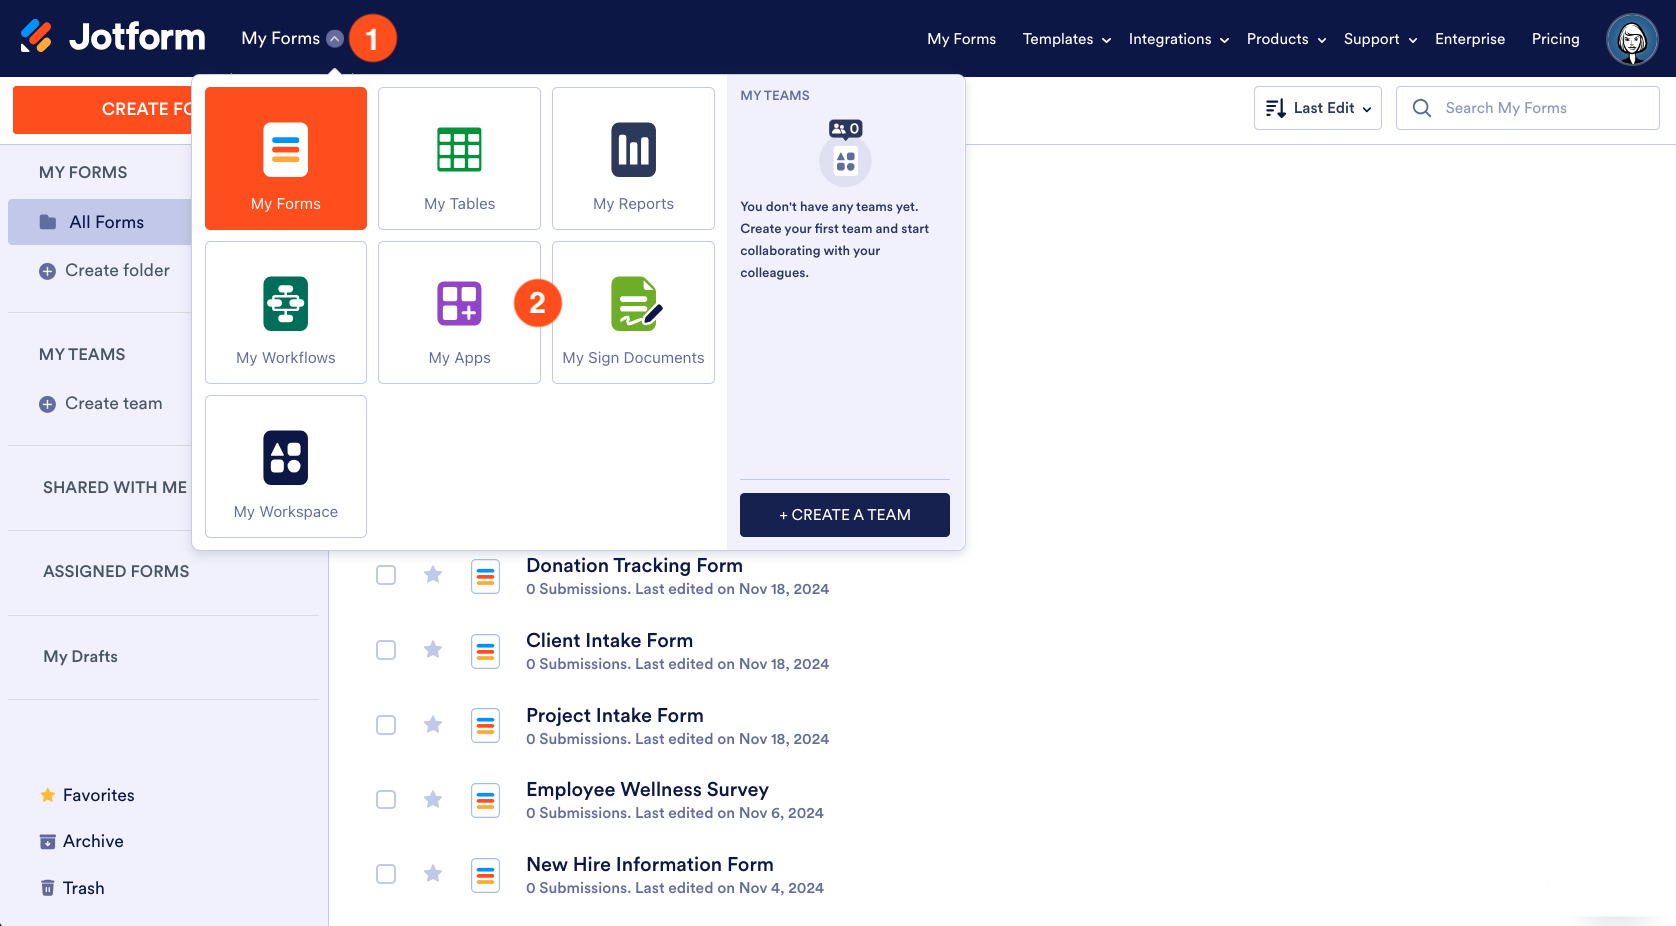
- On the My Forms page, click My Forms beside the Jotform logo.
- Click My Apps from the list of available features.
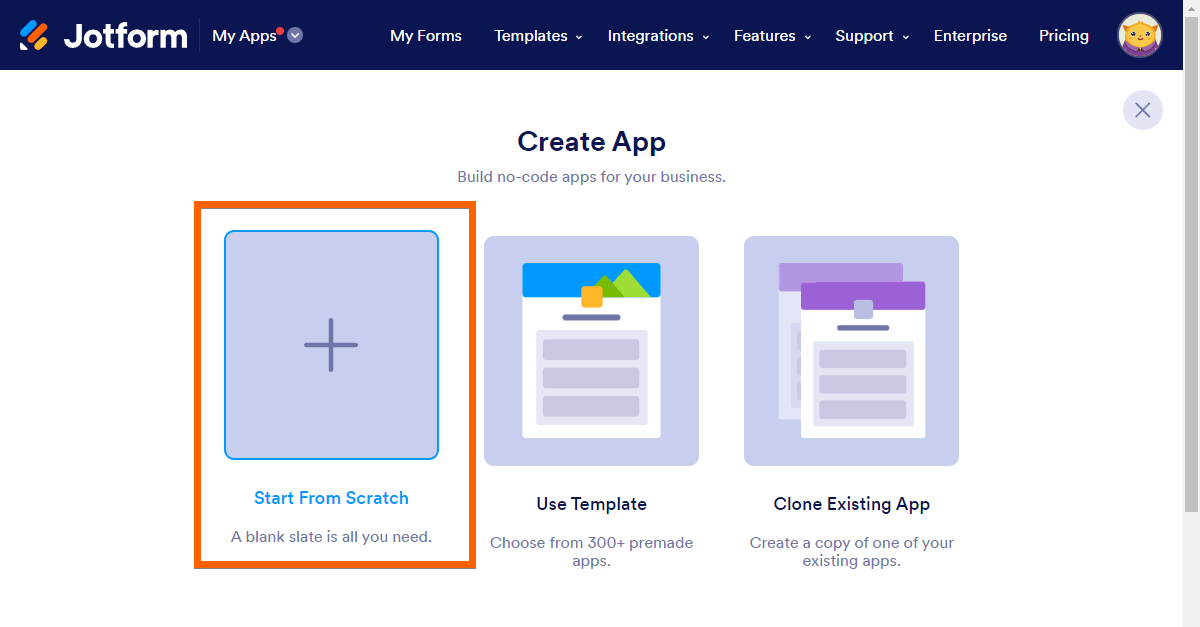
- On the My Apps page, click the Create App button.
- Choose the Start from Scratch option. The option will redirect you to the App Builder with a blank app.
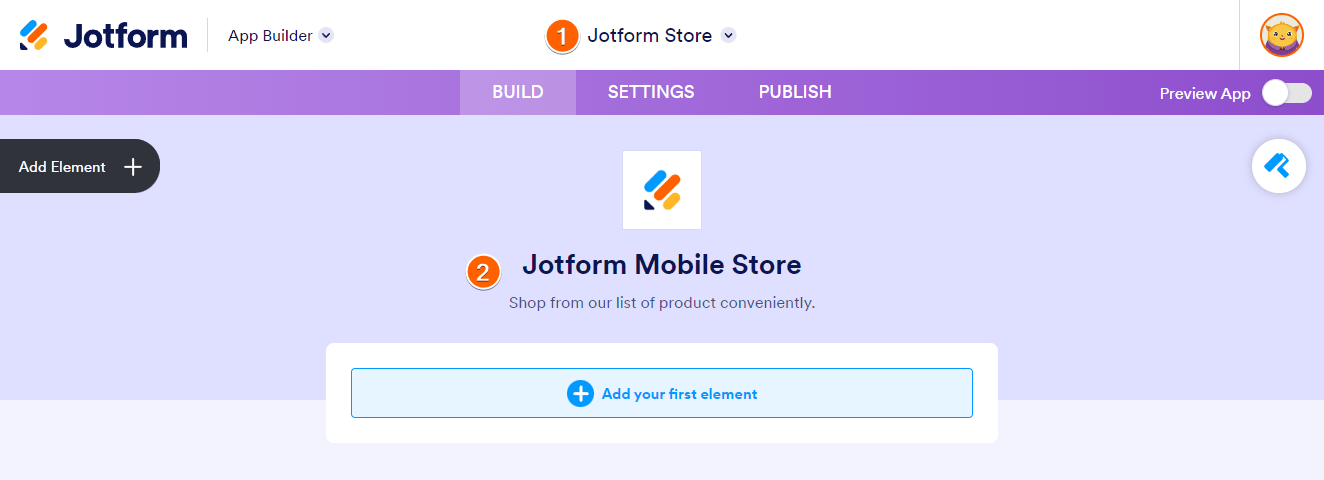
- Give your Store a name (1) and a title/description (2).
Create your Jotform Store
To create your Jotform Store, you must first add the Product List element. Note that you cannot use the Product List element and the Donation Box element at the same time. Please continue reading for the whole steps.
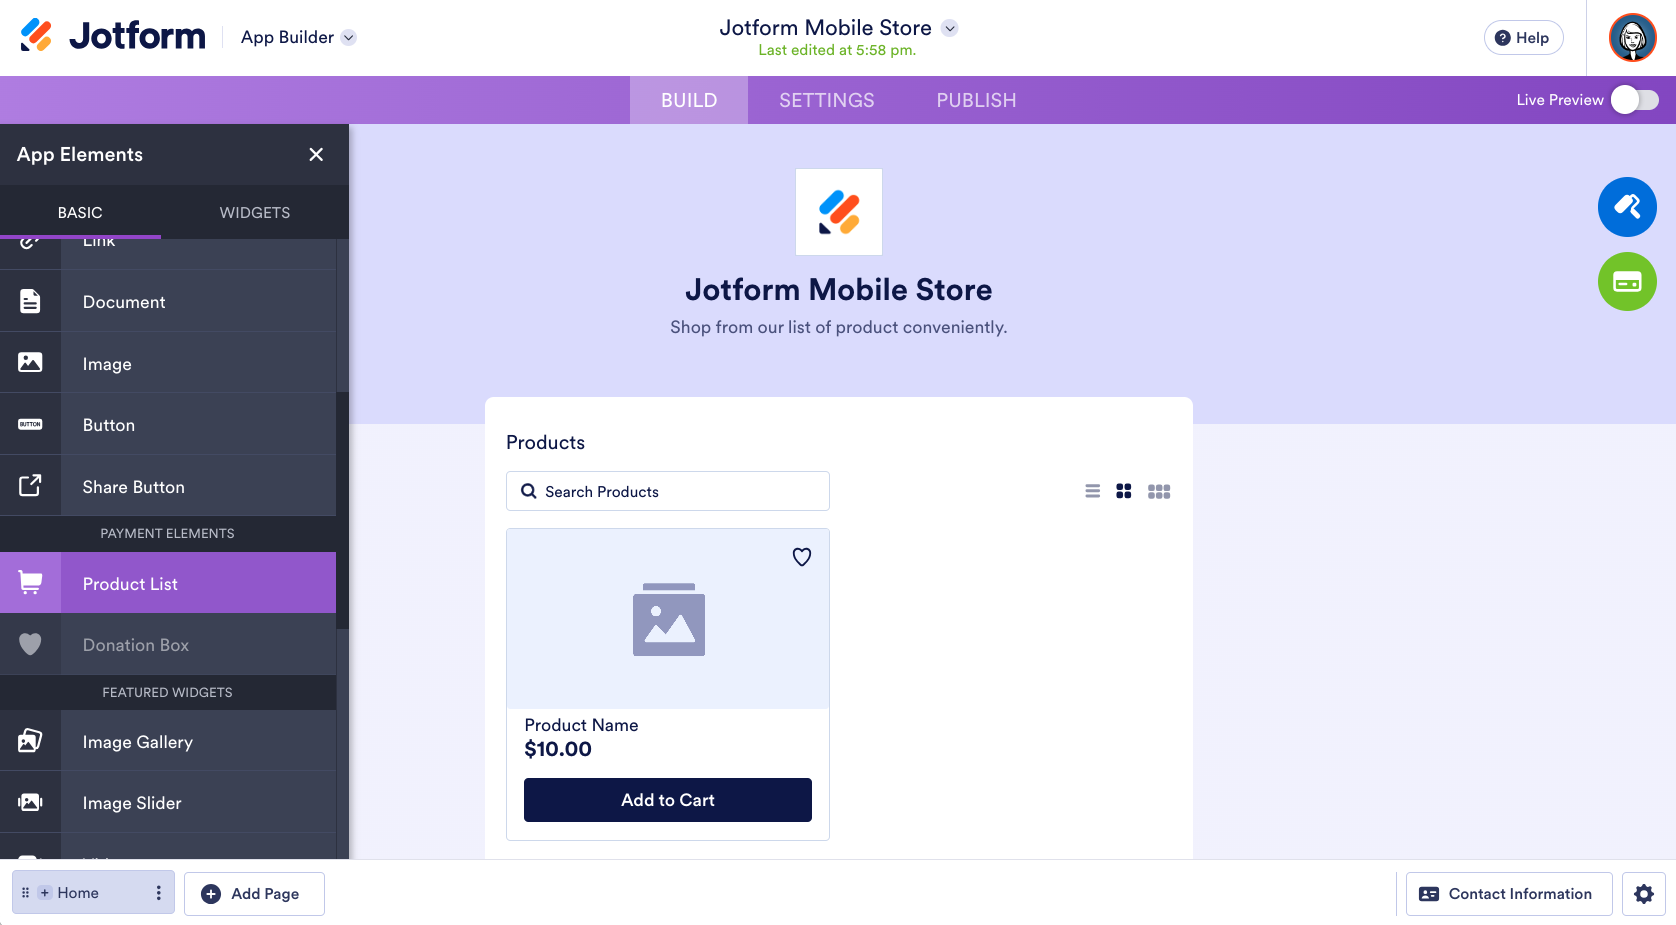
- In the App Builder, click the Add Element on the left side of the screen or the Add your first element button in the center of the app.
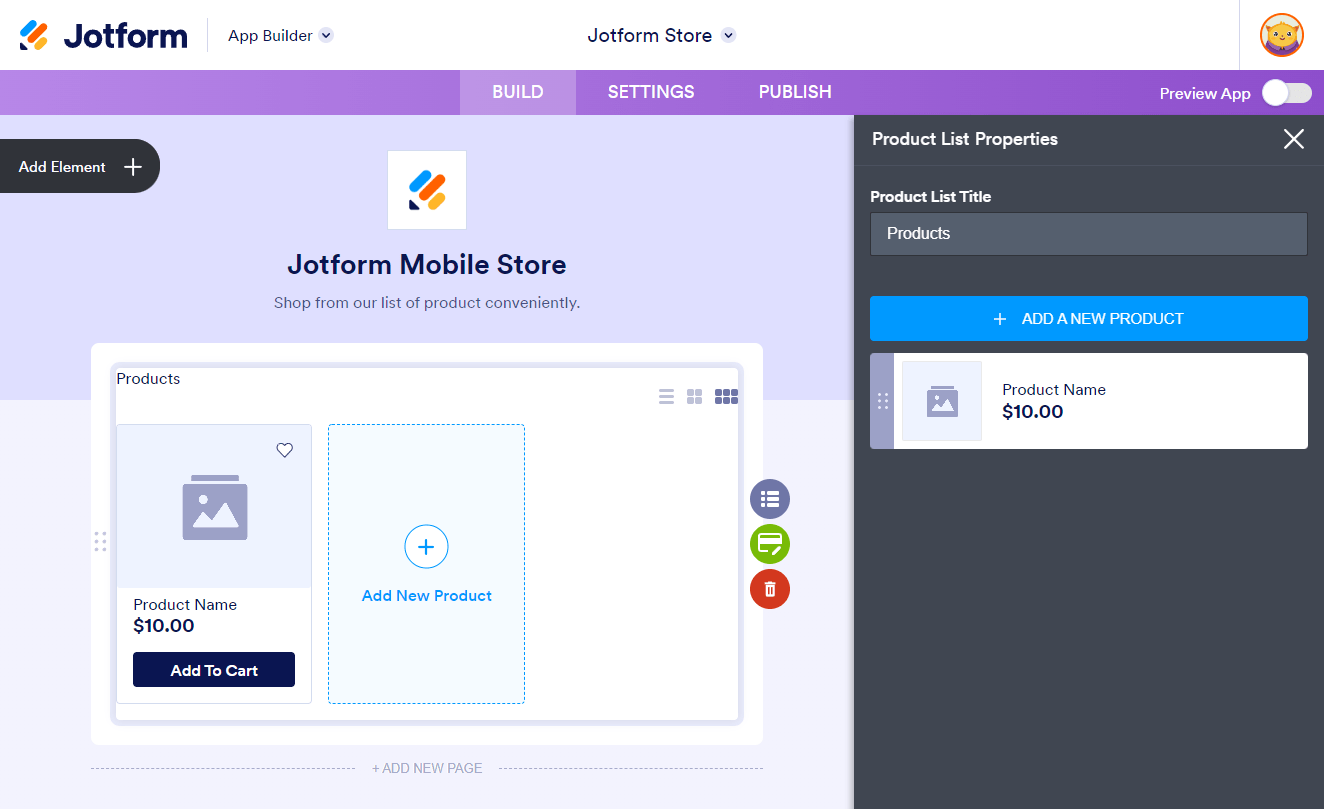
- Under the Basic tab, click or drag/drop the Product List element to add.
- You will immediately see one product added to the element. It is the same as adding the Product List in the Form Builder.
Adding and Editing a Product in the Product List Element
To add a new product, you can click the Add New Product button in the element or through the Product Settings.
To edit a product, click the product from the Product List element. The Edit button will immediately appear, or you can do it through the Product Settings. See the below GIF:
Under the Basic tab of the product, you can set up the following:
- Name
- Price
- Description
- Images
- Autoscale Images
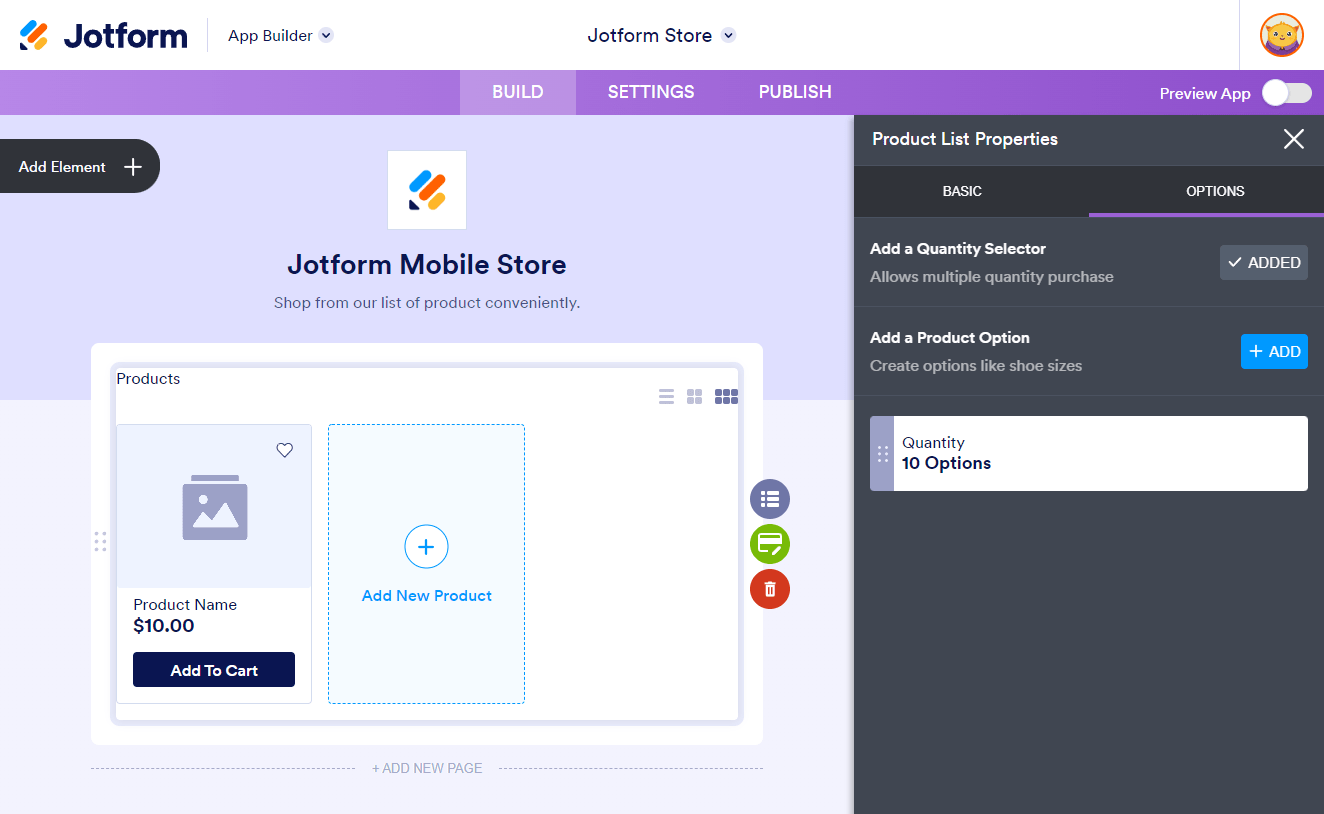
Under the Options tab, you can set up the following:
- Add a Quantity Selector
- Add a Product Option
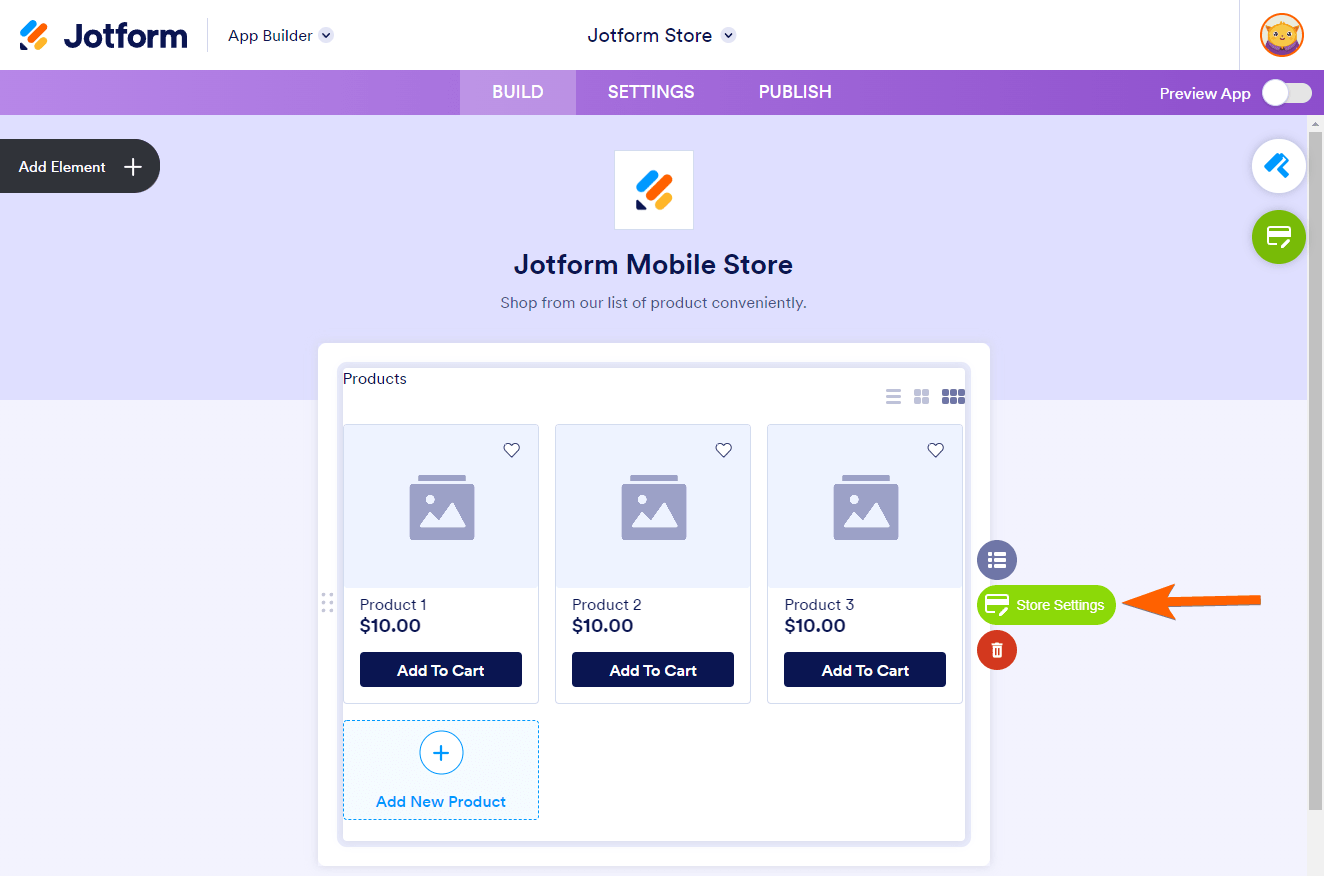
Add your other products and set up your other store options through Store Settings.
Setting up the Store Settings
The Product List doesn’t come with a payment method by default, so you’ll have to add it in the Store Settings.
- Open the Store Settings of the Product List element.
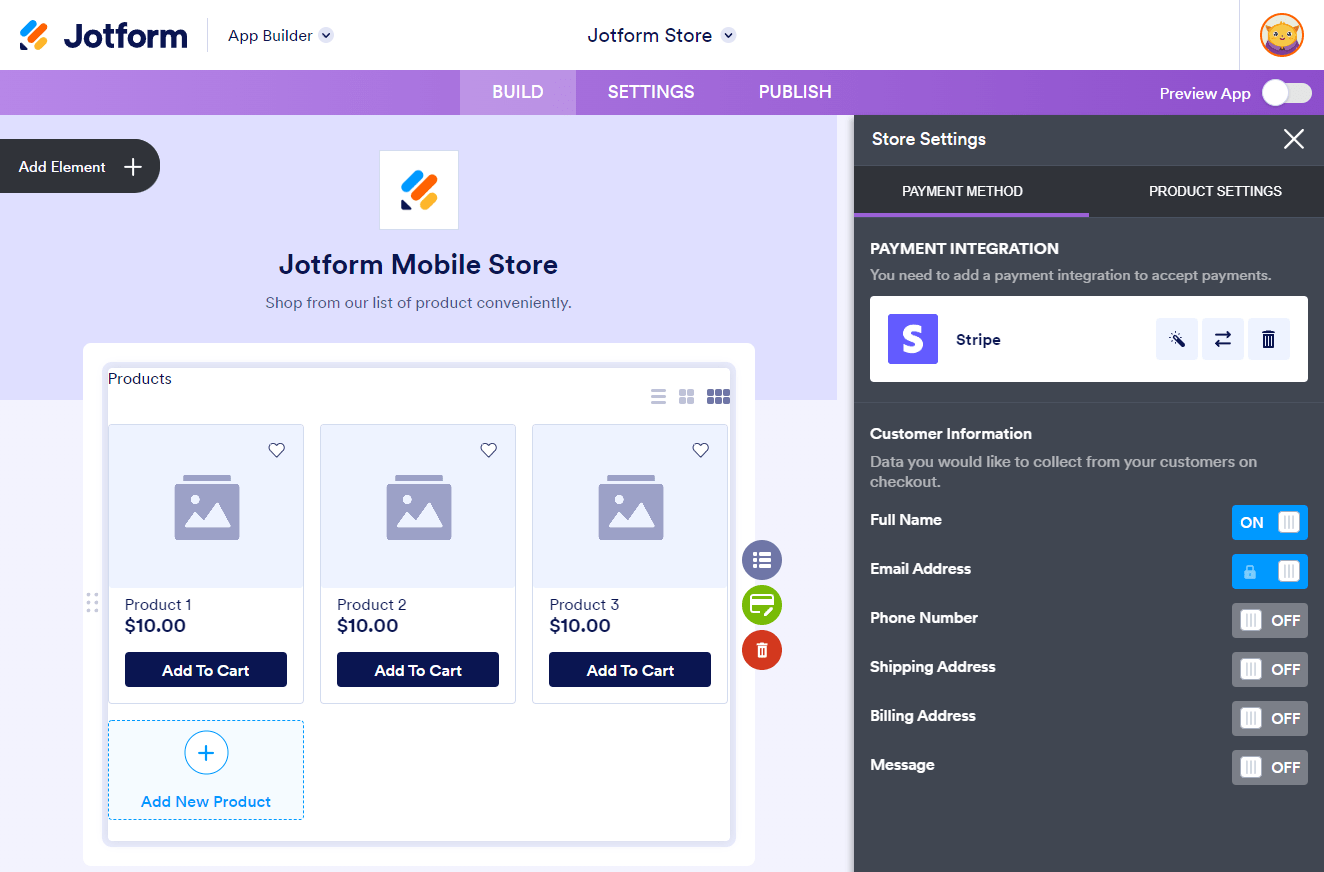
- Under the Payment Method tab, you can set up the following:
- Payment Integration. There are 25+ payment gateways available to be used in Jotform Store Builder. You can find the list of gateways here.
- Customer Information. You can collect additional information from your customers.
- Click the Add Payment Integration button to select/add a payment method for your Store.
- Please choose your preferred gateway, and click it to set up—for example, Stripe.
- Connect your Stripe account. Once connected, you should see the button in Green that says Connected:
- In the Advanced tab of the Stripe Integration Settings, you’ll find the Authorization Only toggle. Keep this disabled if you wish to charge customers immediately, or toggle this on if you want to charge customers at a later date.
- Click the Save button to save the payment gateway.
Under the Customer Information, you’ll find both Full Name and Email Address enabled. You can turn off the full name, but the email address is always required and can’t be disabled. You can toggle the other information, such as the following:
- Phone Number
- Shipping Address
- Billing Address
- Message
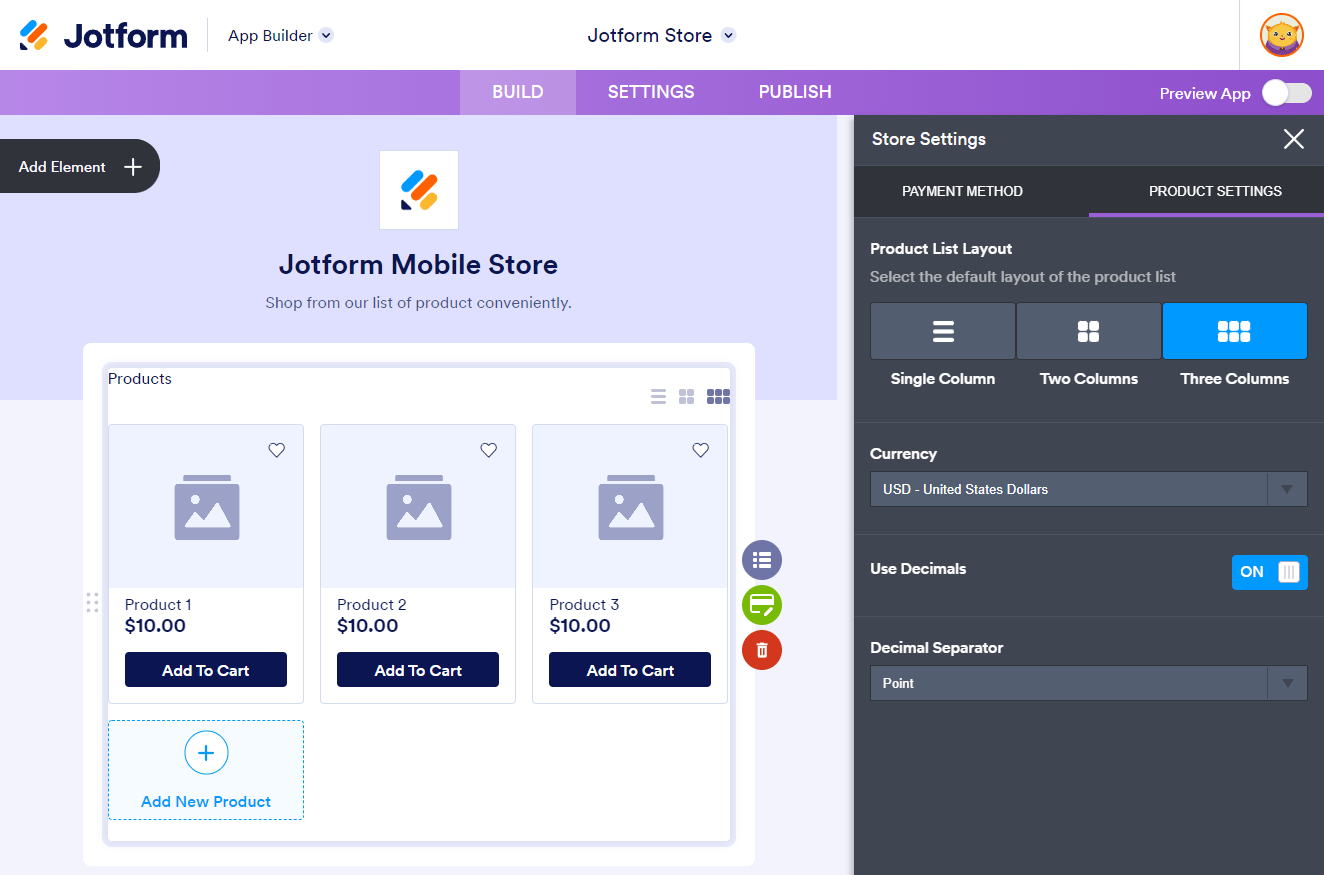
Setting up the Product Settings
In the Product Settings, you can set up the following options:
- Product List Layout. You can choose Single, Two, and Three Columns.
- Currency. Your Store will only display the currencies supported by your chosen payment gateway.
- Use Decimals. To display decimals to both the product price and the total.
- Decimal Separator. You can select Point or Comma.
Publishing your Jotform Store
Publishing your Jotform Store is quick and easy! You’ll find the steps below.
- In the Store Builder, click Publish on the top.
- Click the Copy Link button under the Quick Share window.
You can download a QR Code if you prefer to let your customers scan a QR to open your store. You can also opt to Embed the form by copying the embed code from the Embed tab.





Send Comment:
3 Comments:
83 days ago
Hello is it possible to custmize the email response people recive when placing an order?
288 days ago
How can I integrate payment to my Hitpay or Paymongo payment gateway?
More than a year ago
No info on sending out receipts or notifications to customers. Nothing about tracking and processing orders. This is a very basic guide