When you create a Salesforce form (a form integrated with Salesforce), you have to make sure your fields are mapped to each other correctly. You also have to make sure your form submitters fill them out to ensure the fields you map to integrate correctly.
When you first create an object in Salesforce, at least one field will automatically be required so Salesforce can create an object. Keep on reading to learn how to make fields required in Salesforce.
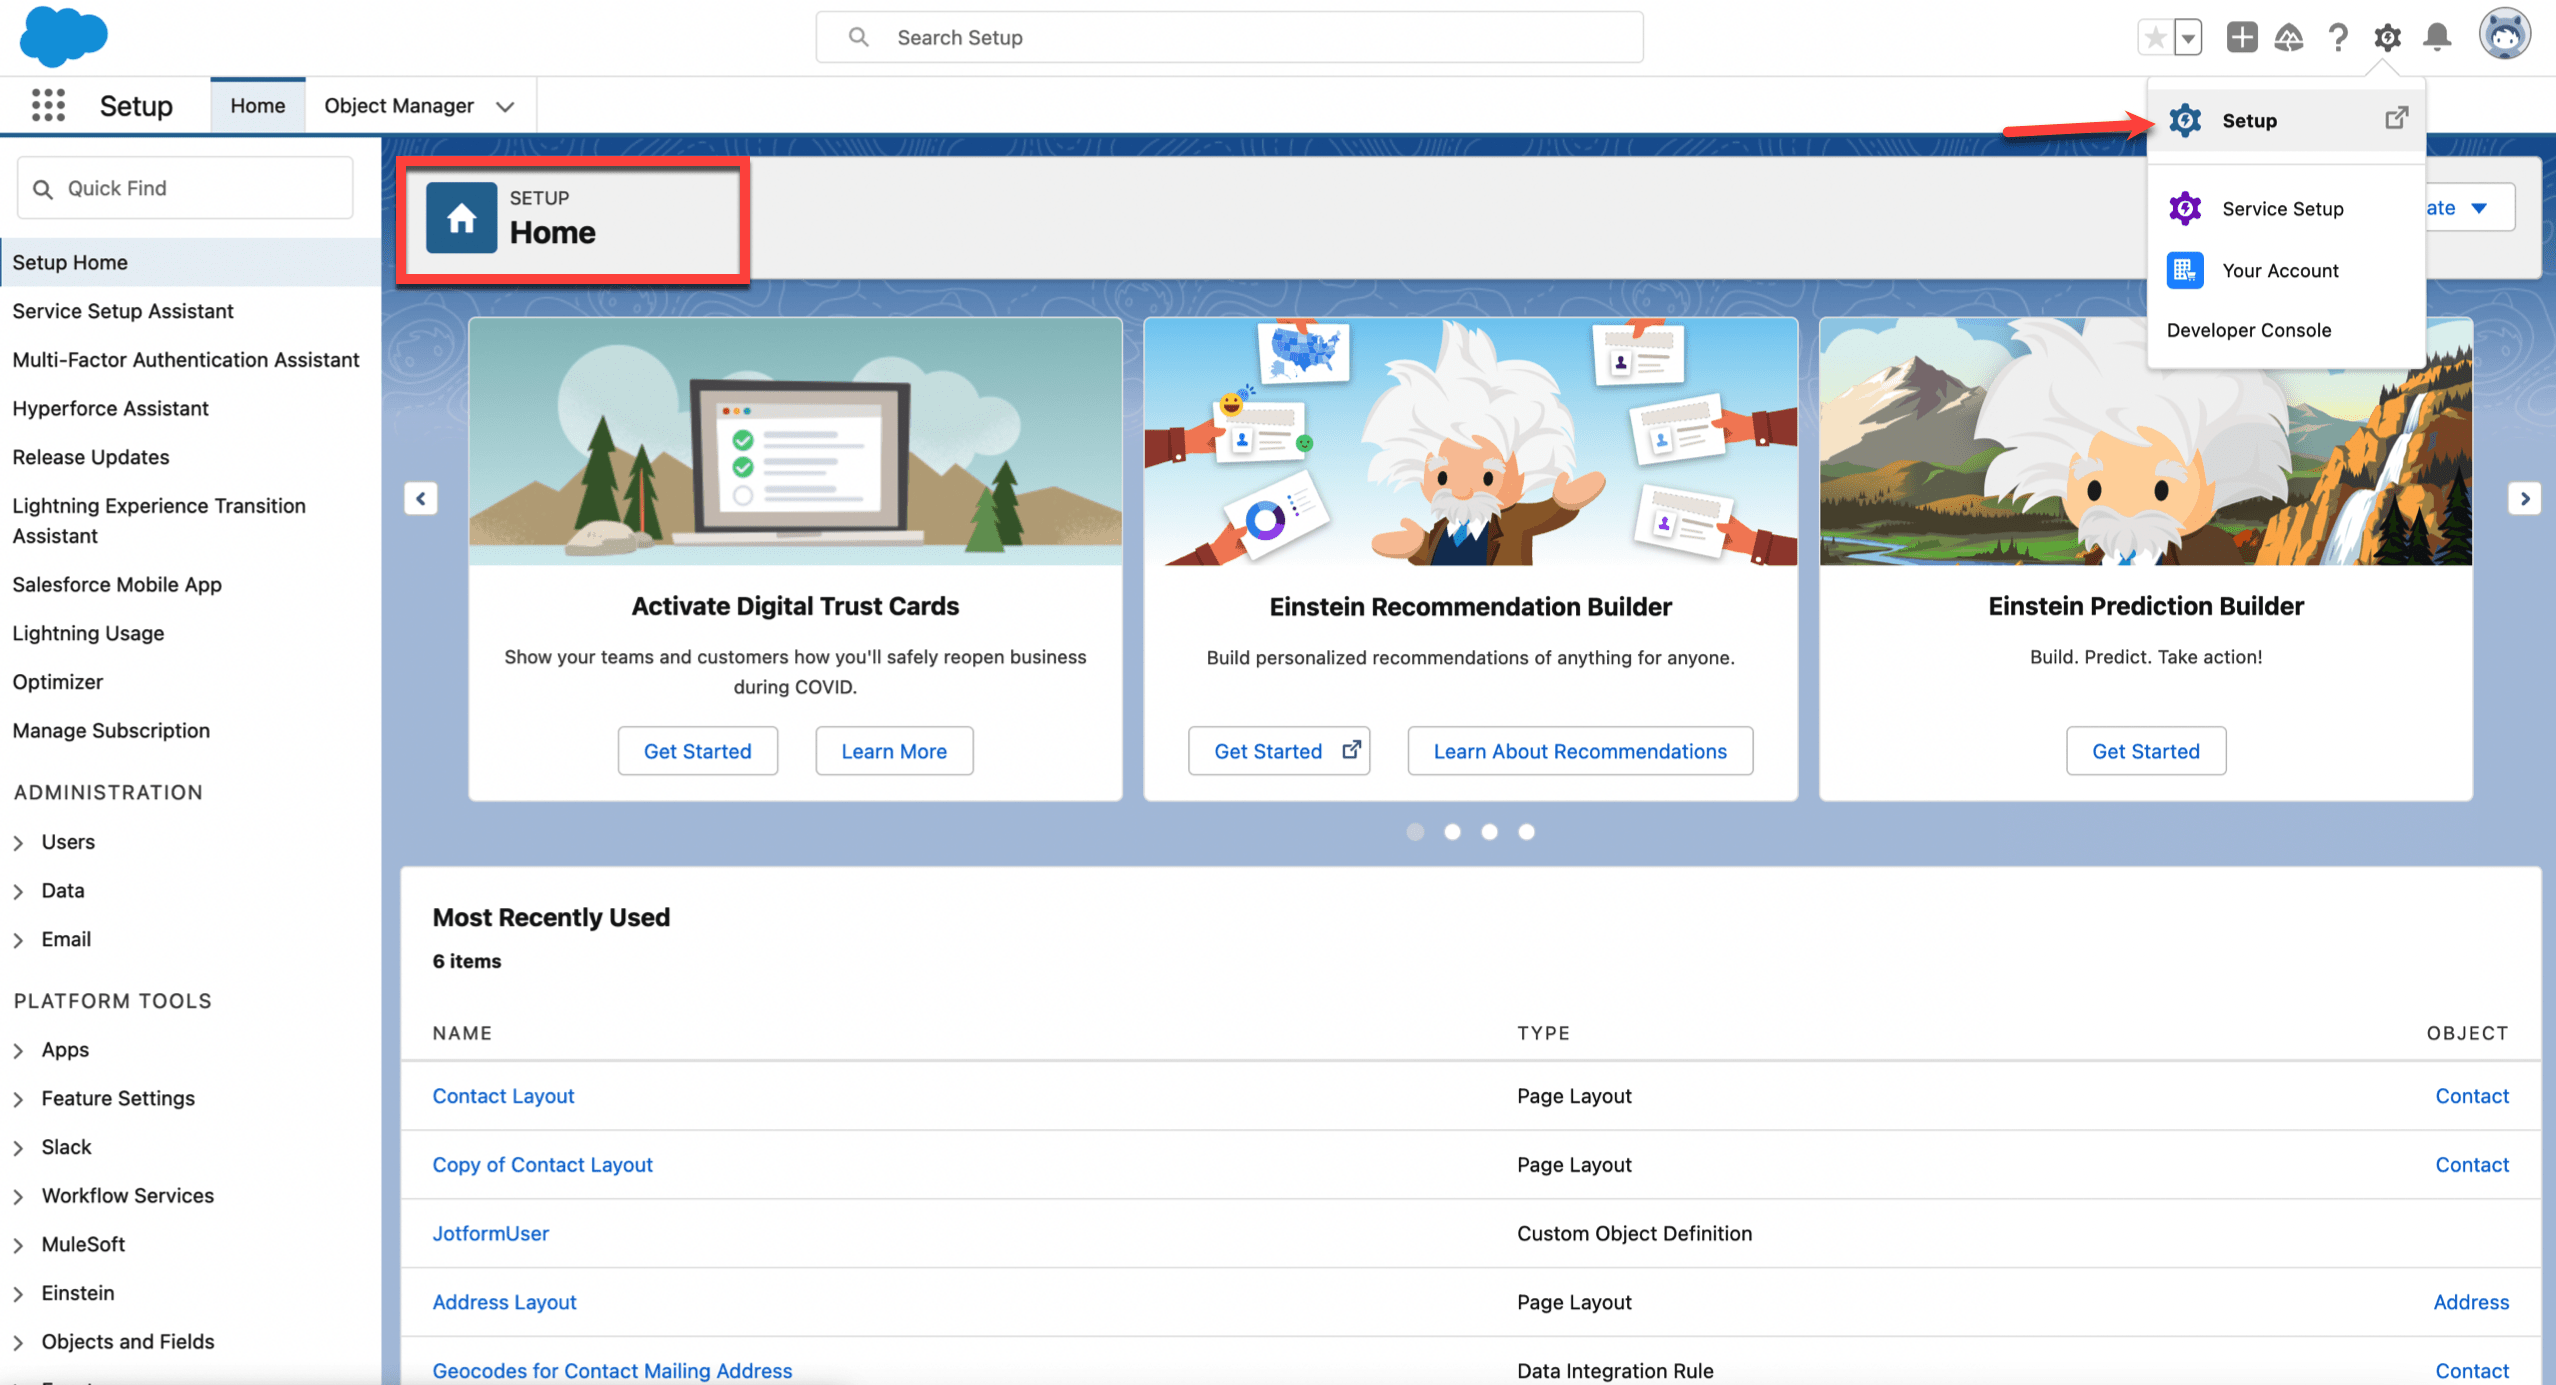
- Go to Setup, then make sure you’re in Setup Home.
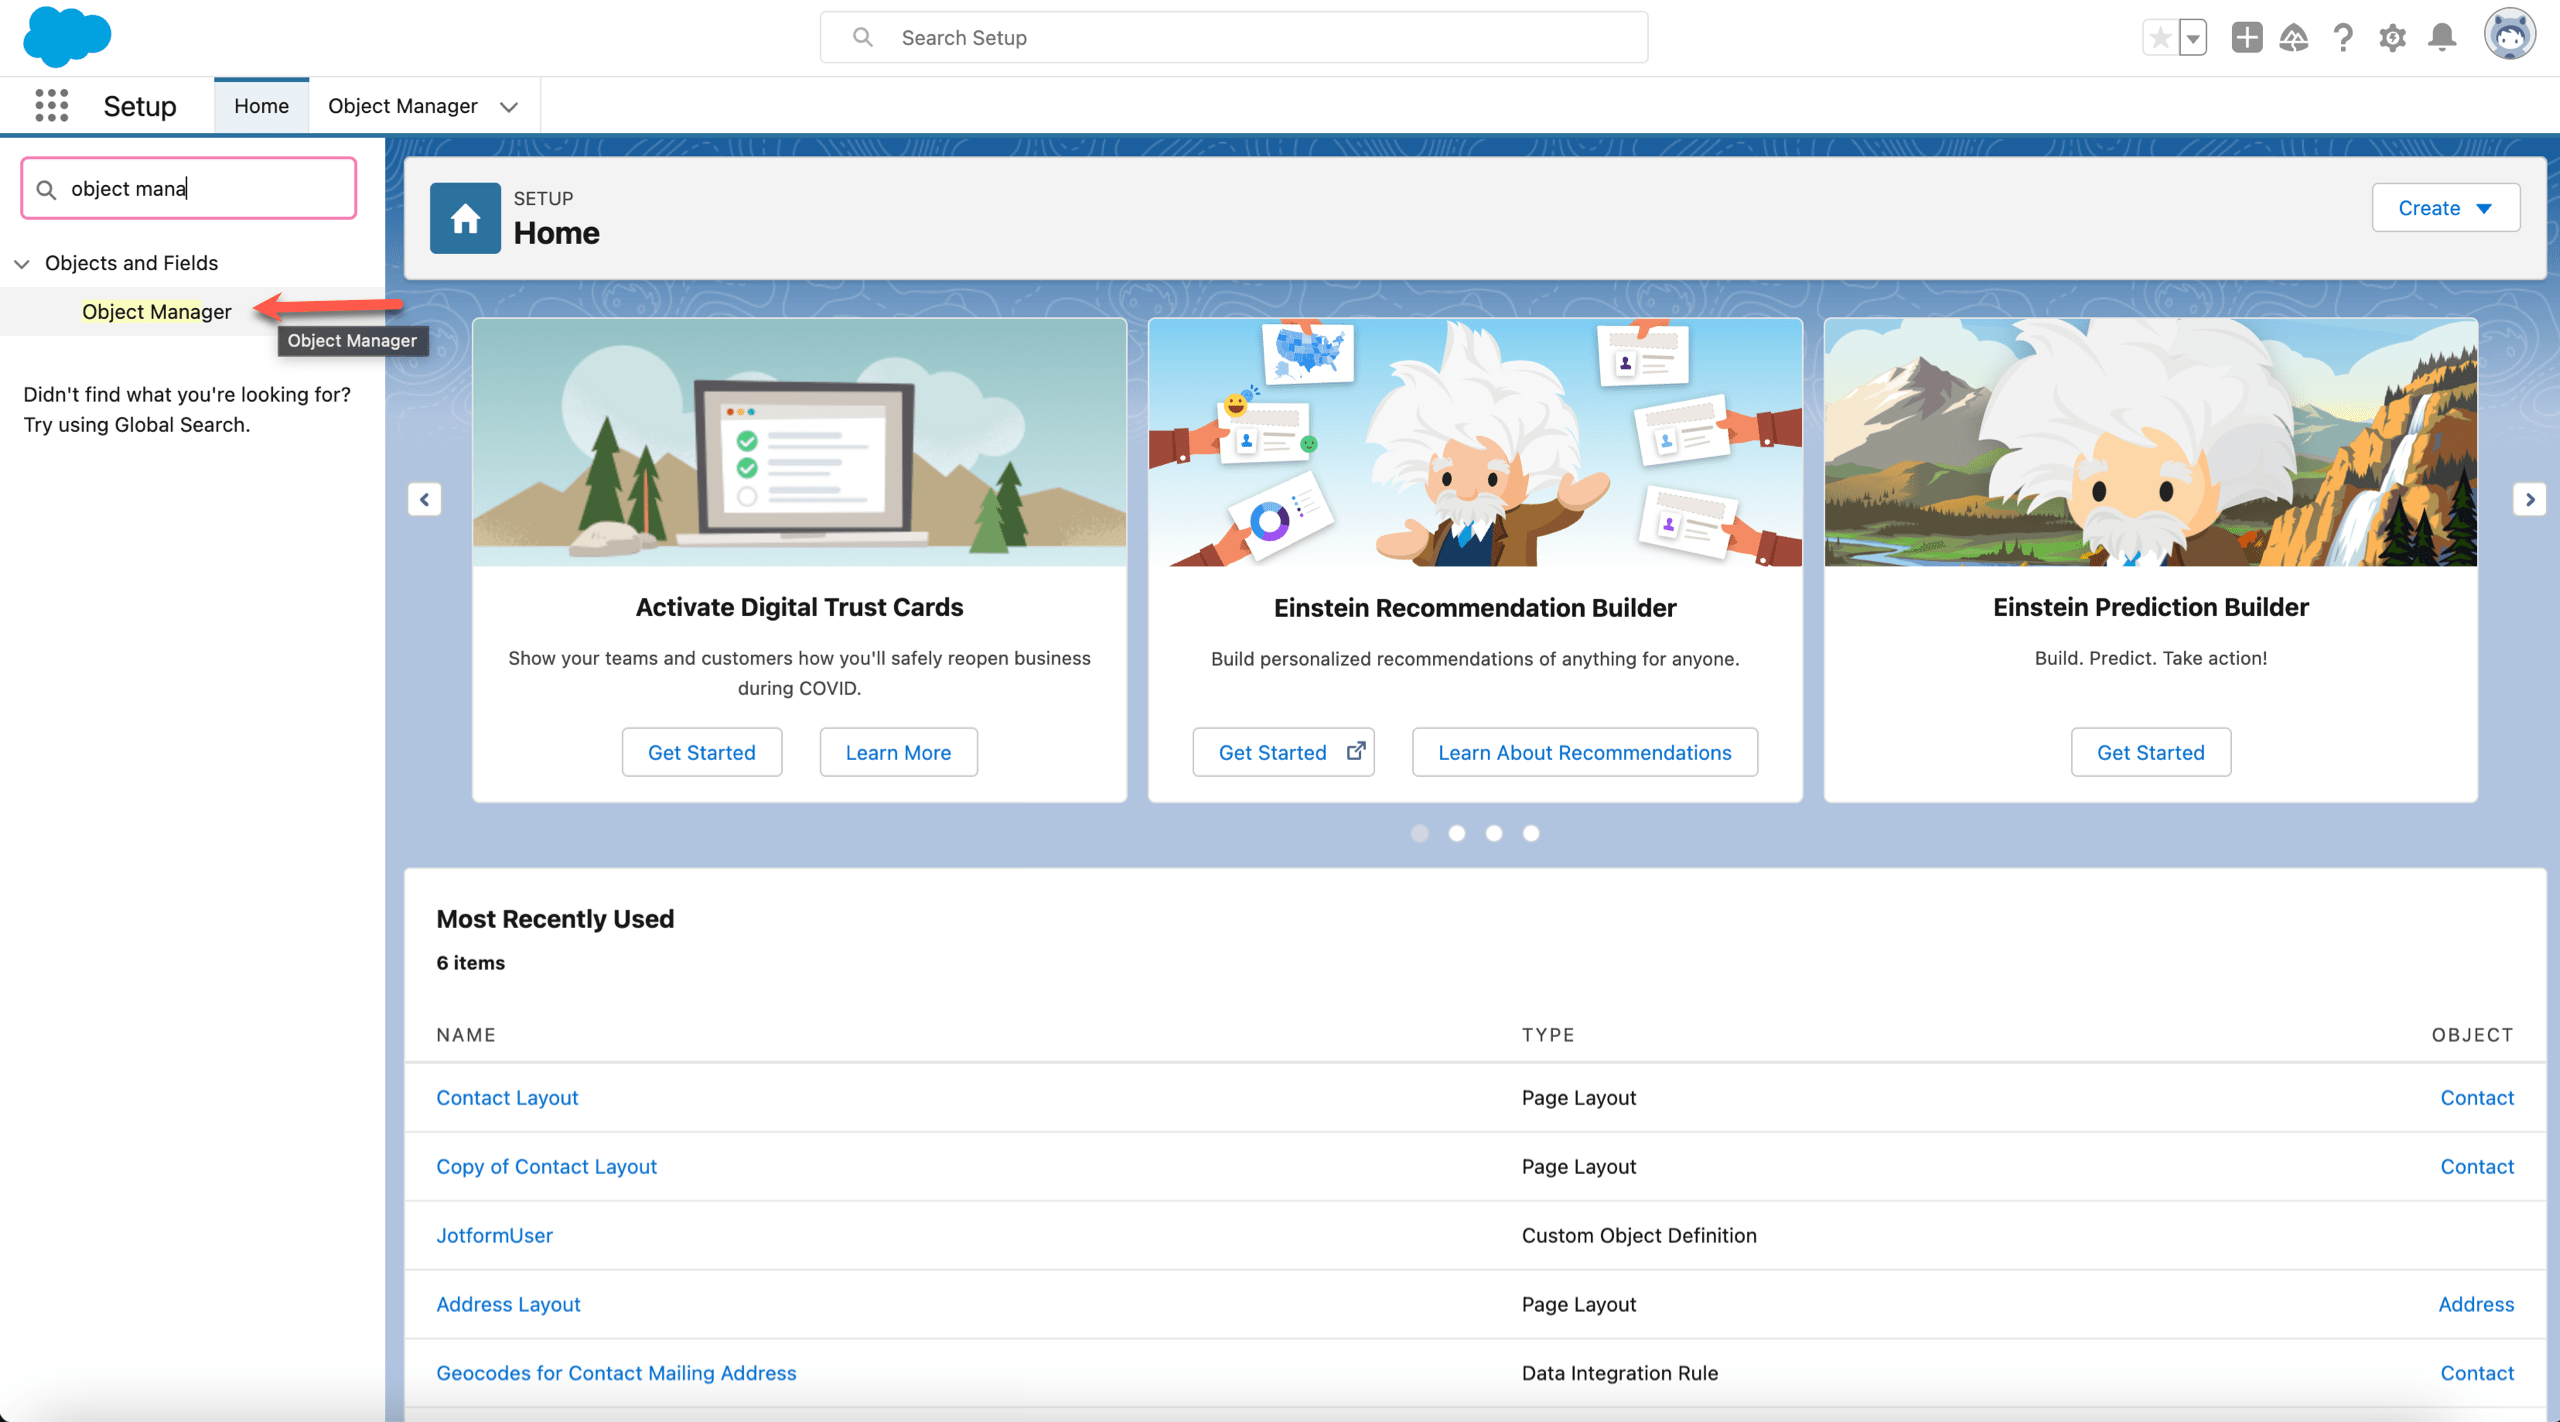
- Go to the Quick Find menu on the left and search Object Manager, then click to open it.
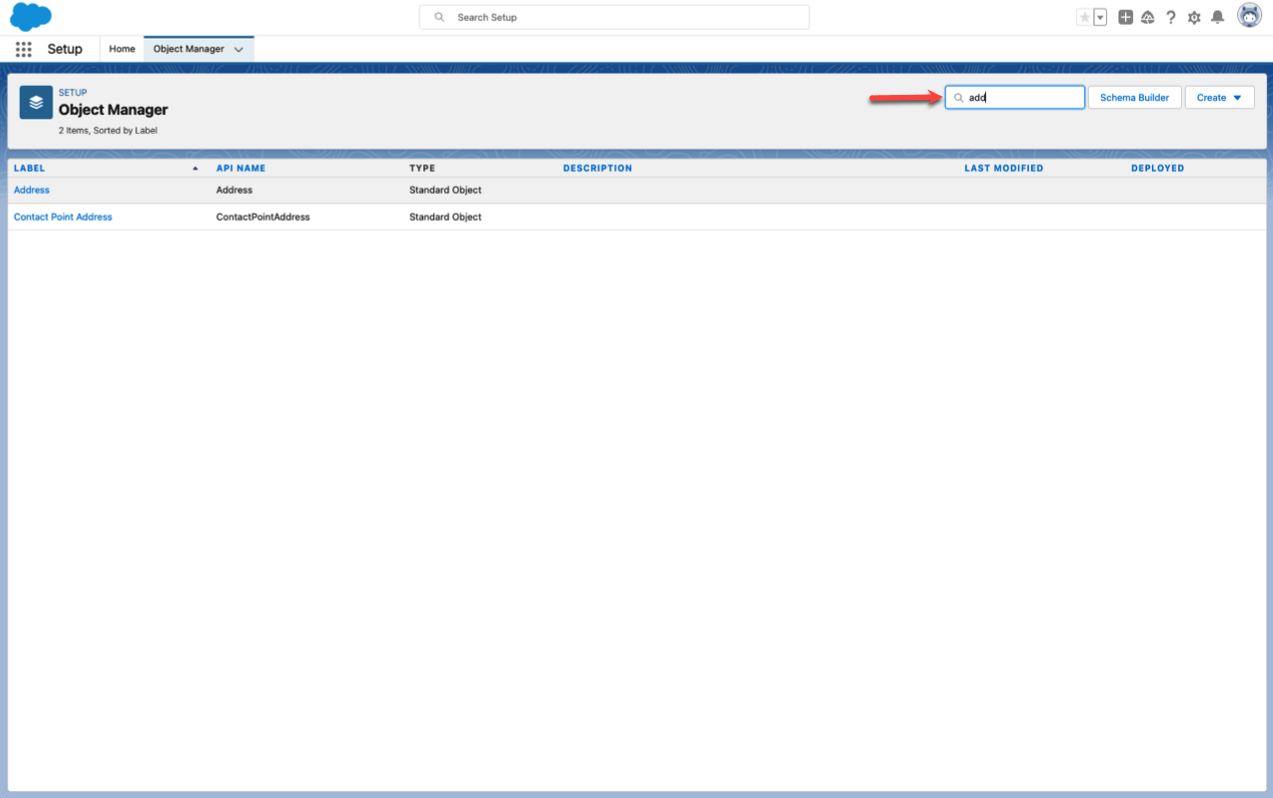
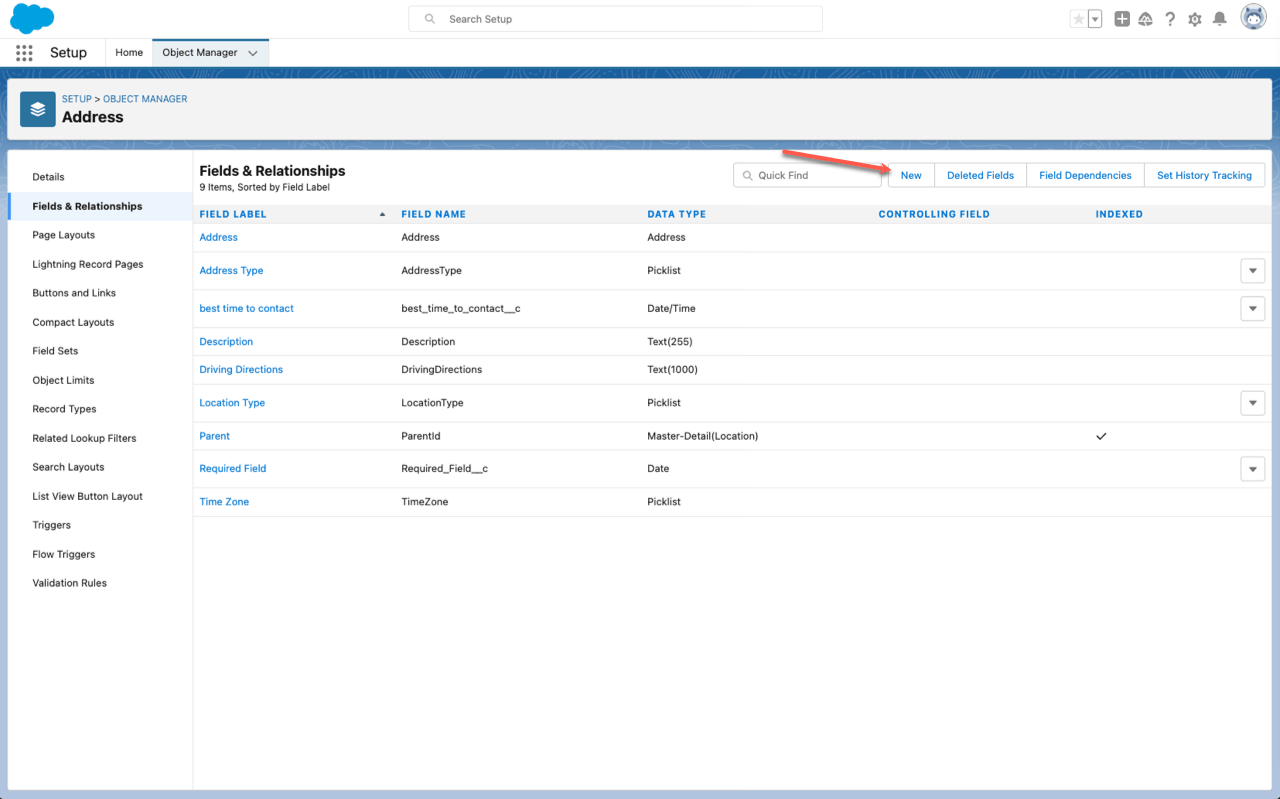
- Find the object you want to add a field to, you can either scroll through the list or search it in the Quick Find bar. In this example, we’re going to edit the fields in an Address object.
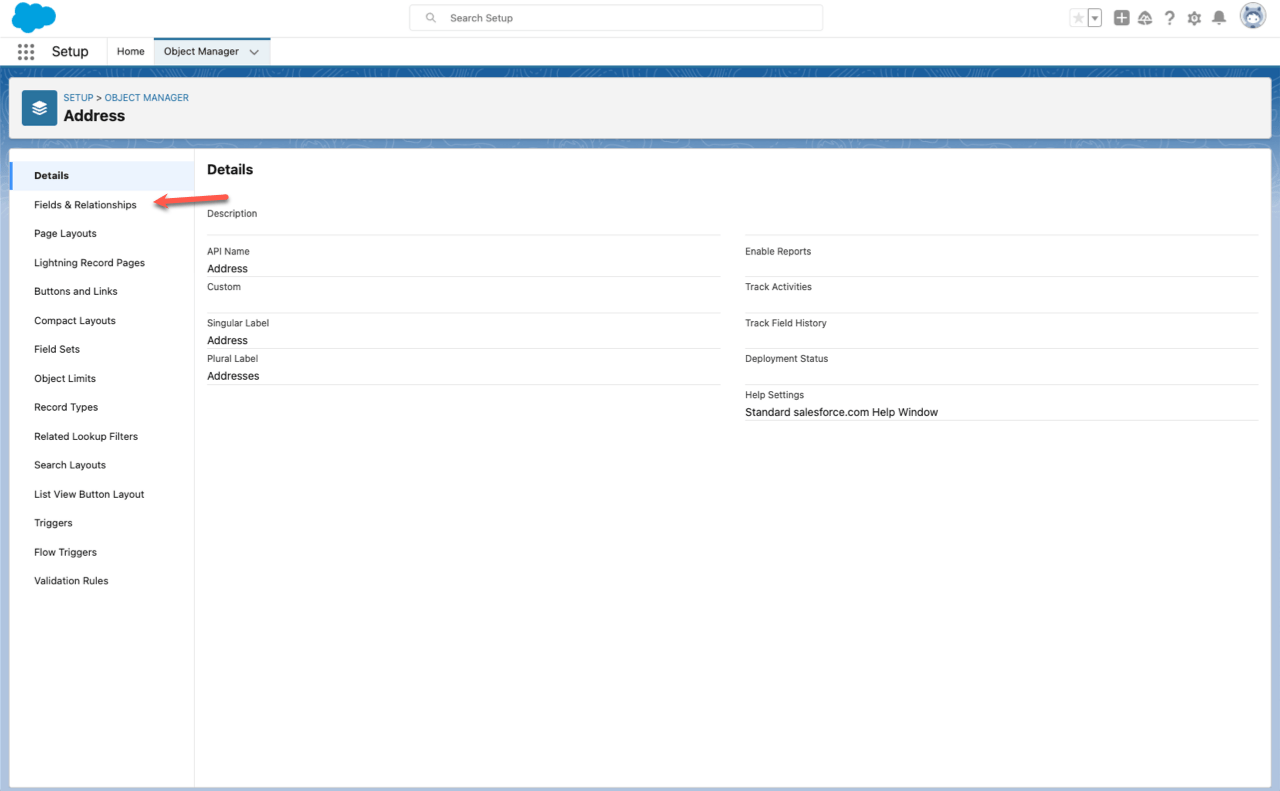
- Click the Object, then click Fields and Relationships.
- Click New.
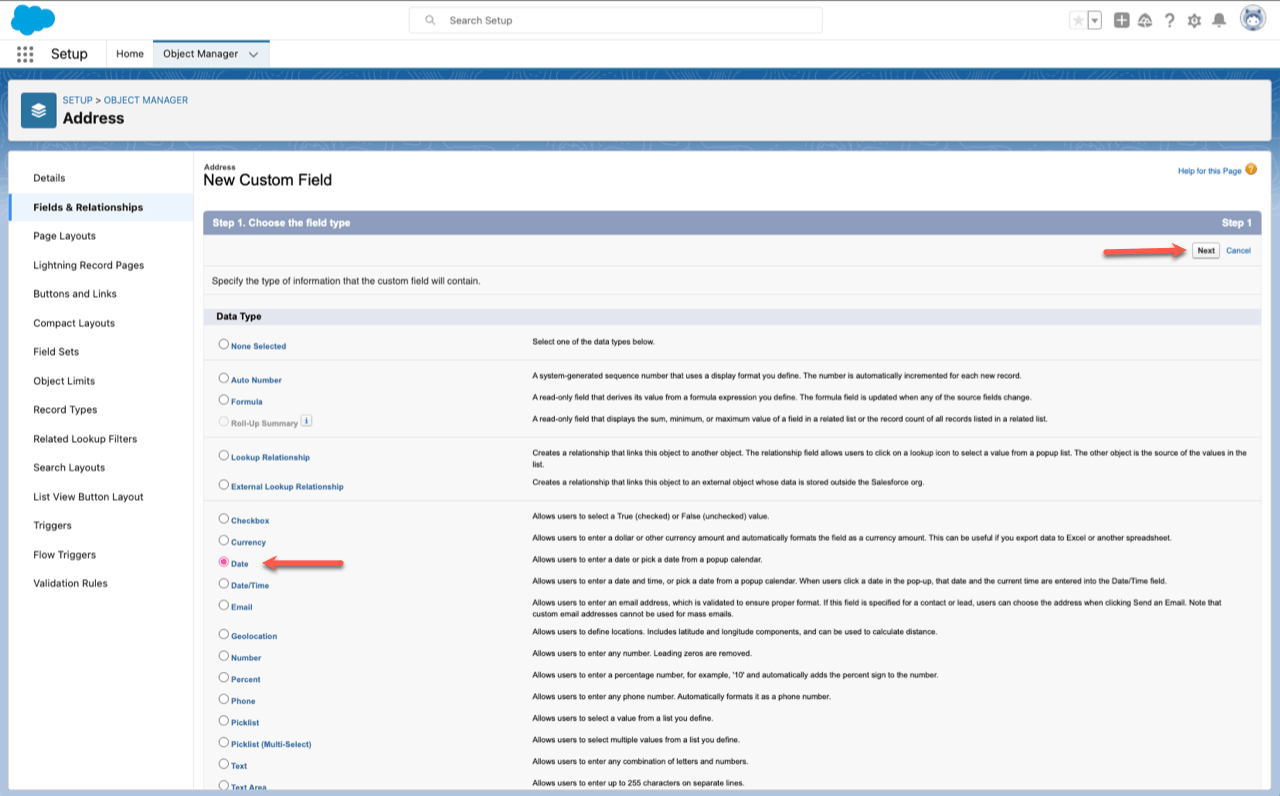
- Choose your data type, then click Next.
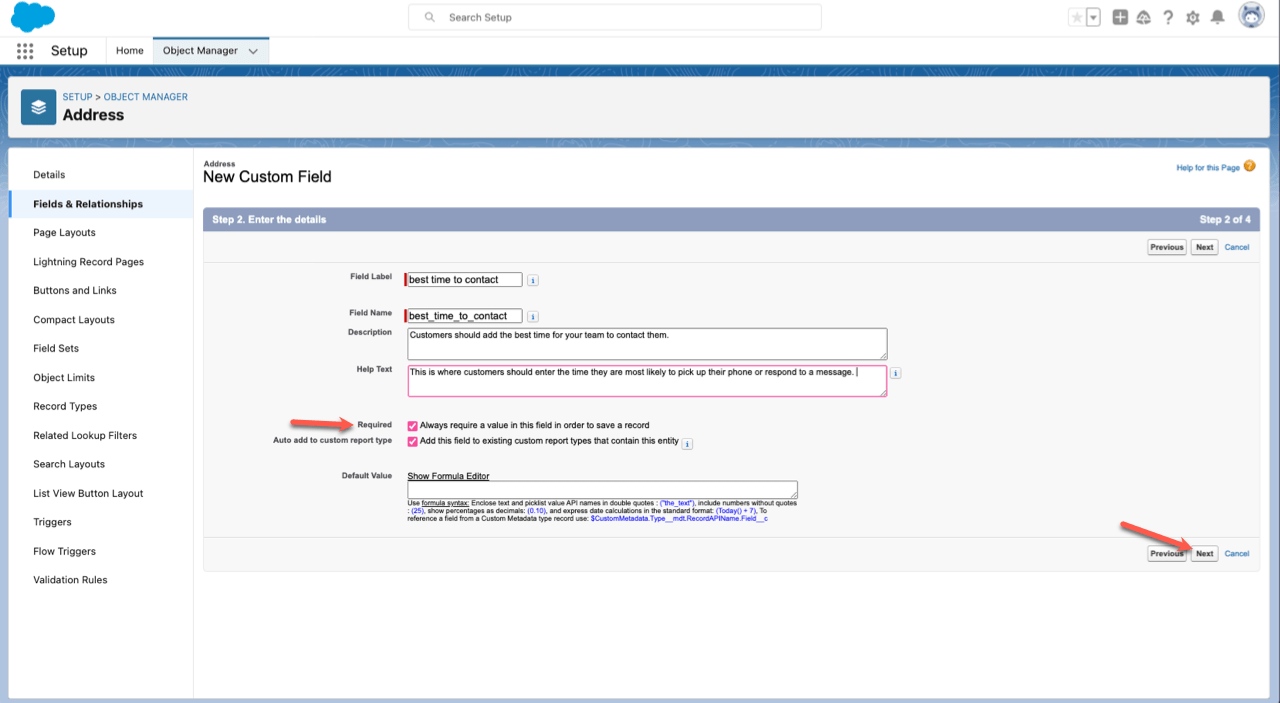
- Enter the details for your field, and make sure you check the Required checkbox. Click Next.
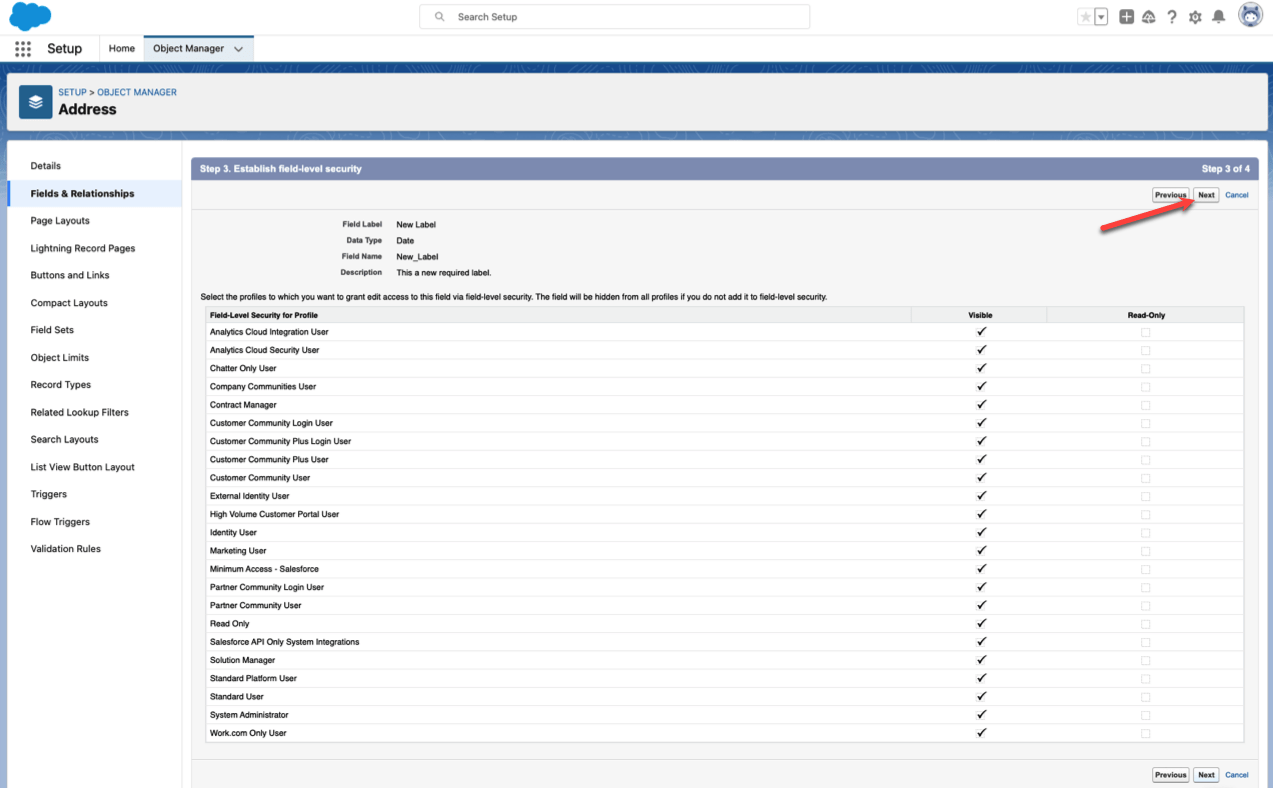
- If you want, personalize your field level security settings. They are all checked by default. Once your settings are personalized to your liking click Next.
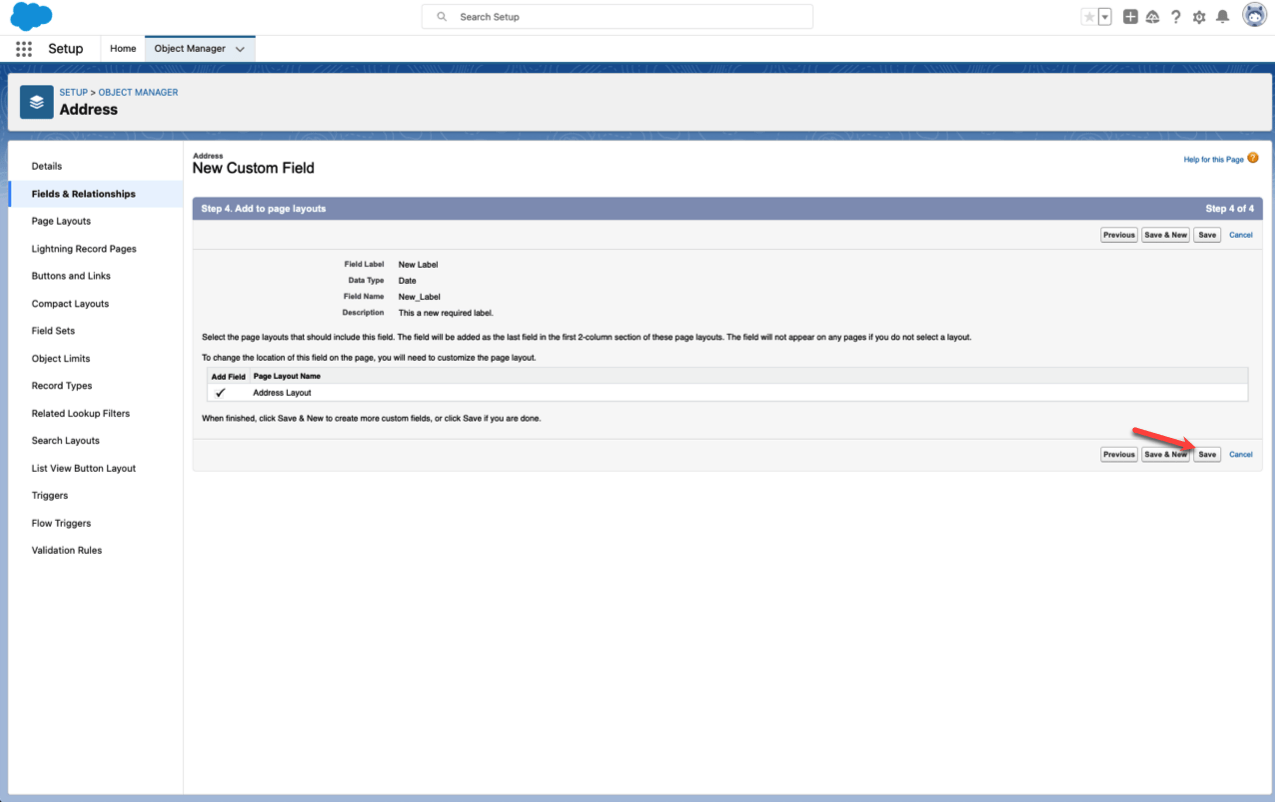
- Click Save, and then you’re done! But if you want to create another new required field, you can click Save and New.
- Go to Jotform and select Create a Salesforce form to make sure your new field is required.
How to Make a Field Required in your Salesforce Form
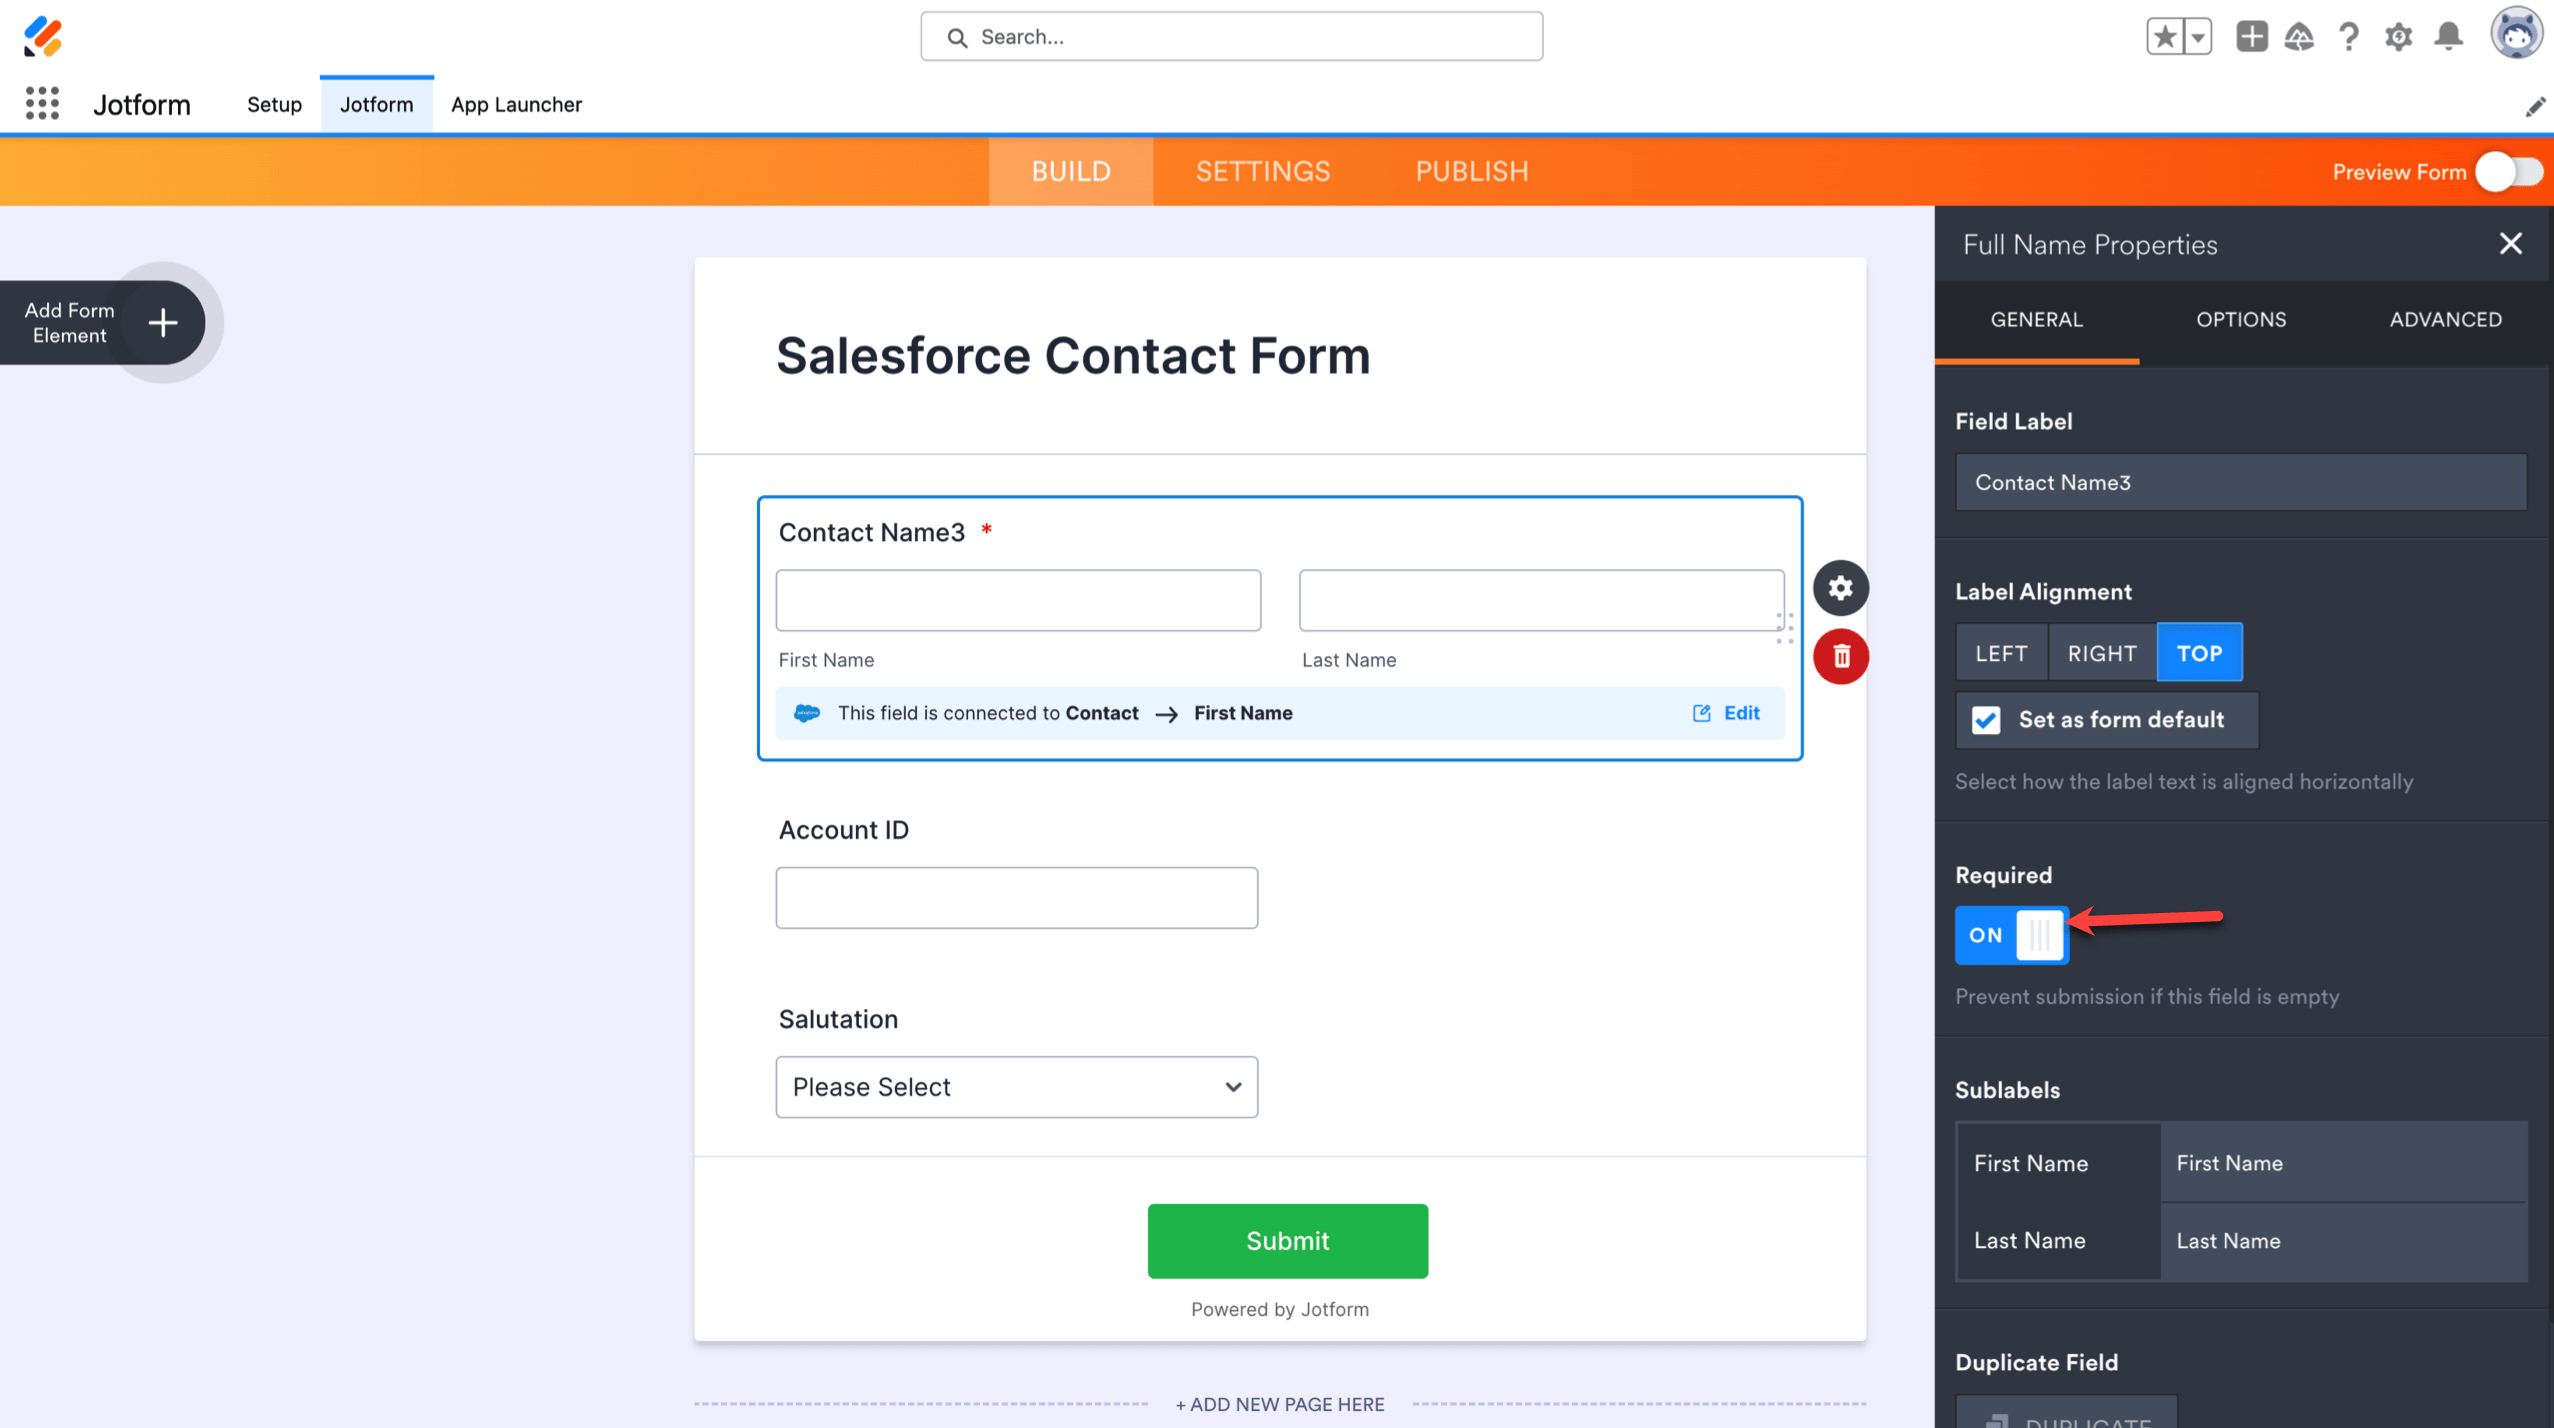
If you want to ensure your submitters fill out all the required fields, you can easily mark them as required in the Form Builder. Go to properties, then make sure the Required switch is toggled on.



Send Comment: