Creating tickets automatically with AI agents is easy using the Send API Request action. This feature allows you to send data via a POST request to create tickets in your ticketing system based on issues reported by users. By setting up actions for your agents, you can streamline the process of generating tickets without manual input. This automation helps agents provide faster and more efficient support, improving the experience for both your team and users.
To set up an action that lets your agent create a ticket based on user interactions, follow these steps::
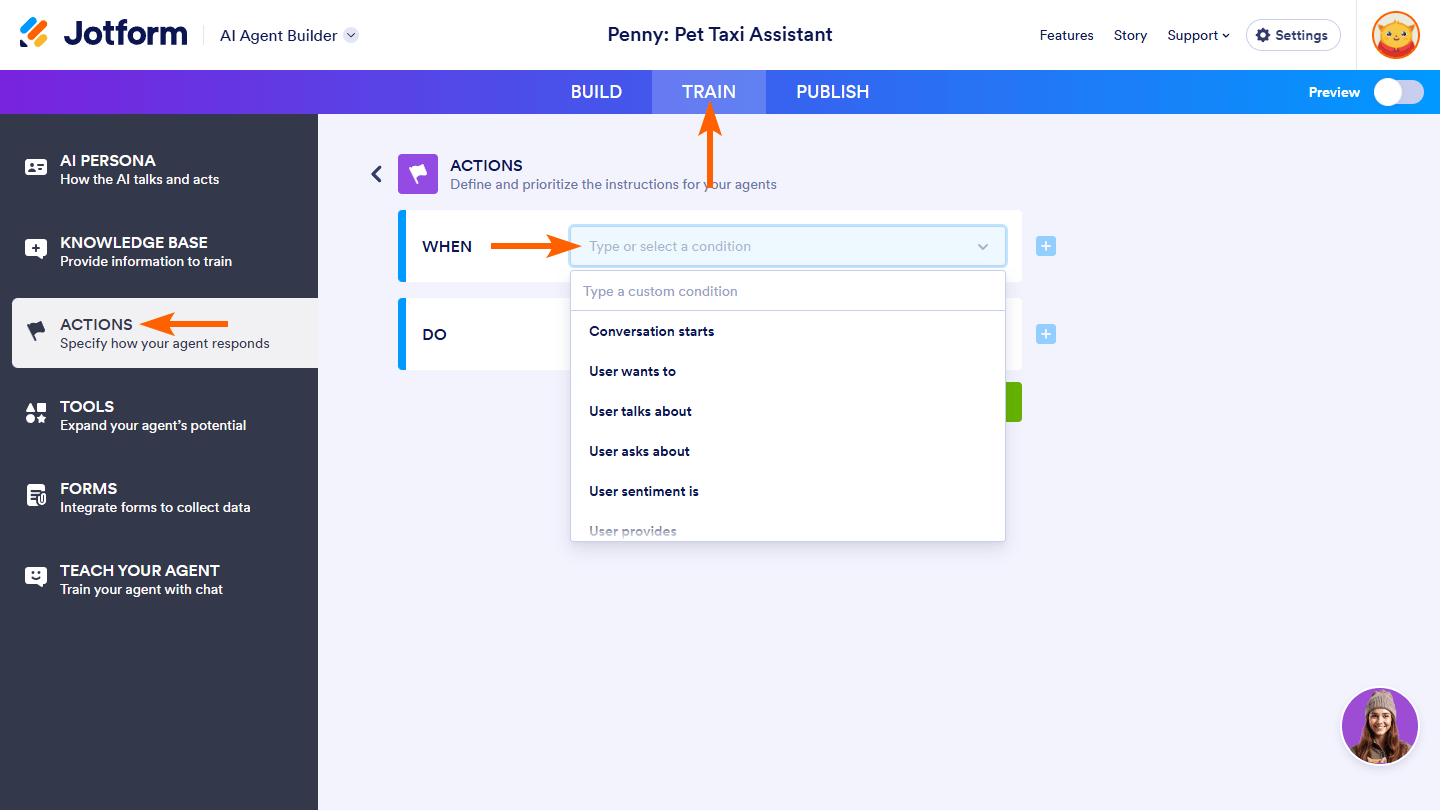
- In AI Agent Builder, click on the Train tab.
- Then, click on the Actions tab in the menu on the left side of the page.
- In the Actions section on the right, click on the When dropdown to select and define a condition that will trigger your agent to send data to your designated ticketing system’s API endpoint through an API request. If your AI Agent already has a saved action, click on the Add New Action button at the top first.
Note
You can also type a custom condition in the dropdown and click on the Add button on the right to create one that isn’t in the list of available conditions.
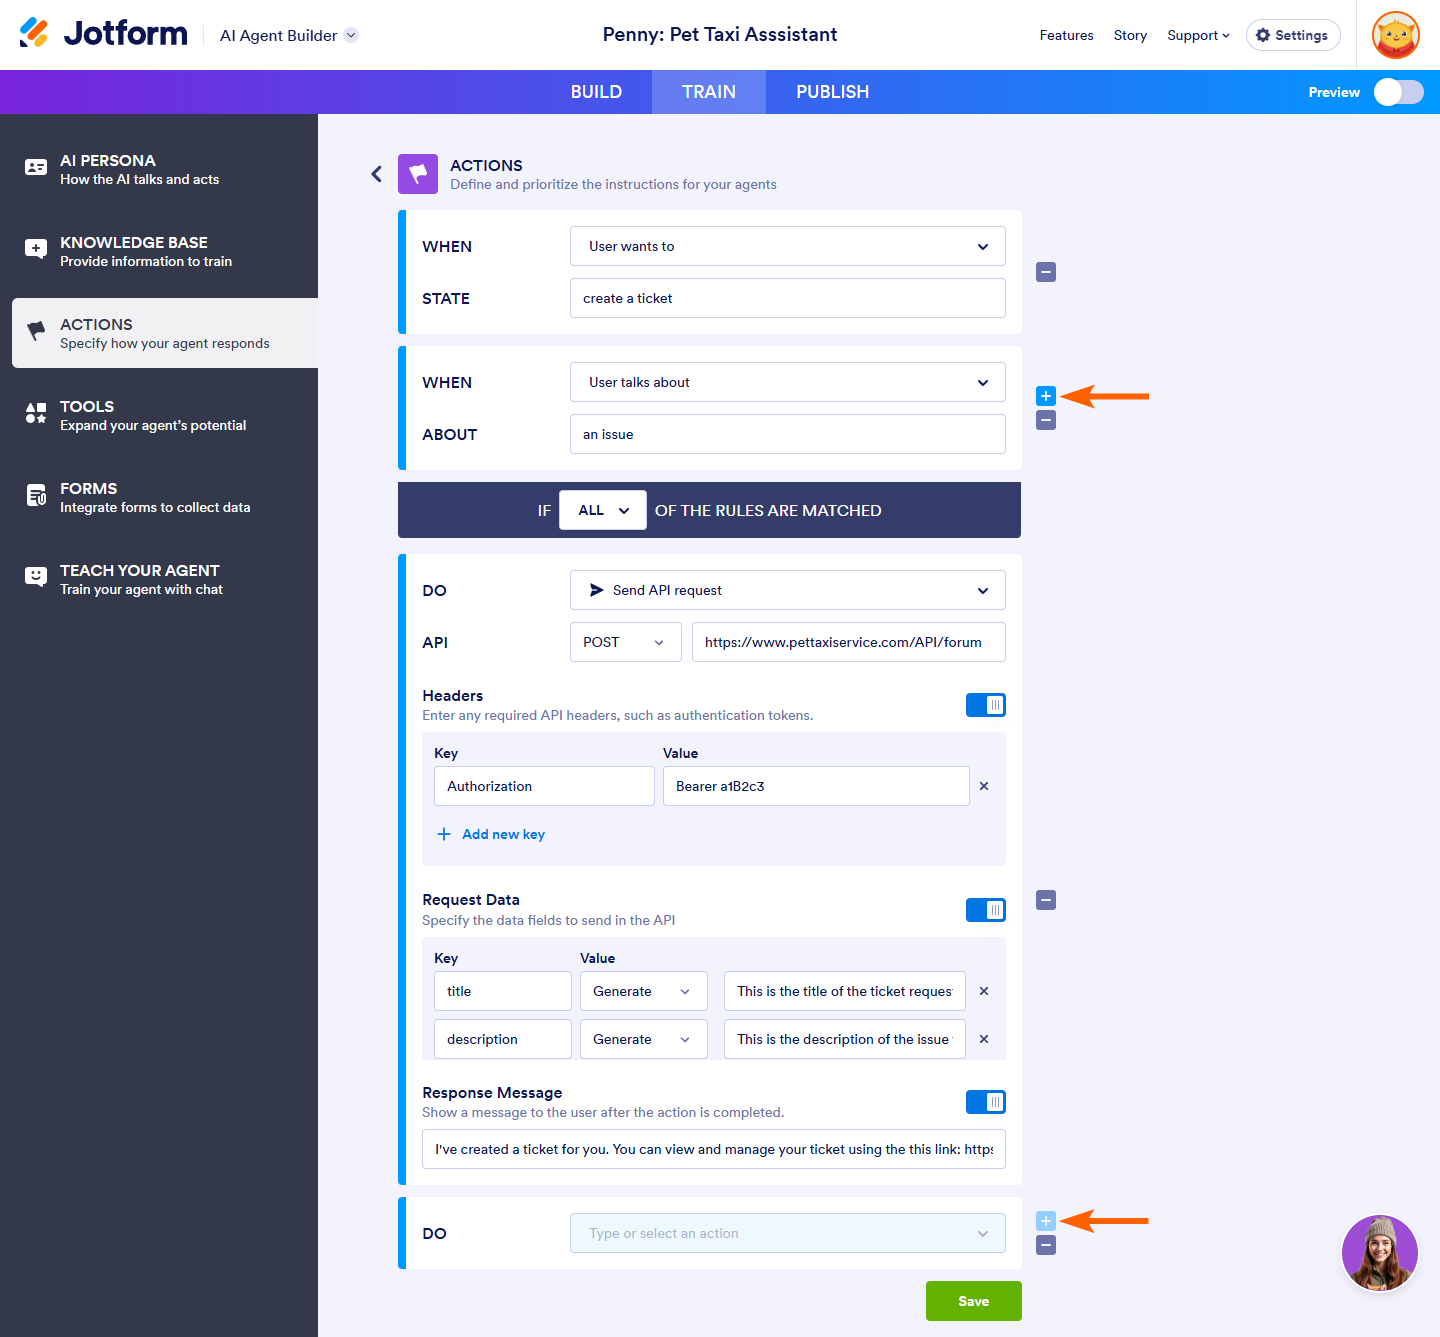
- Next, choose the Send API Request option from the Do dropdown.
- Then, select POST method from the API dropdown and enter the API endpoint in the input box next to it. You can also enable and configure the following:
- Headers — Enter any required API headers, such as Authentication Tokens, Content-Type, etc. This accepts key-value pairs.
- Request Data — Specify the data fields to send in the API, such as the ticket title and description of the issue to be included in the ticket. You can enter a key and a value that can be static or generated from the conversation with the agent.
- Response Message — This is enabled by default. Its the message your agent will show to the user after the action is completed.
- Once everything is set, click on the Save button.

Note
You may need to contact your IT team, development team, or the person responsible for managing your ticketing system to get the necessary API details or assistance with setting up this action.
The Plus Sign icon on the right of the condition and action in the Actions section allows you to define additional instructions for your agent within a single action. You can add multiple conditions and choose whether ANY or ALL need to be met to perform the action. Multiple actions can also be added, and they will be performed simultaneously when the condition is met. For more details on each available predefined condition and action, see How to Customize Agent Actions and Triggers.
Toggle the Preview switch in the top-right corner of the page to On to test new actions you added.


Send Comment: