Connecting WhatsApp with AI Agents makes it easier to chat with customers, answer questions instantly, and keep conversations flowing smoothly. Whether you’re using an existing WhatsApp Business account or setting up a new one, AI-powered automation helps you stay responsive and available 24/7. By integrating AI Agents, you can simplify communication, save time, and ensure customers always get the support they need — all while making interactions more engaging and hassle-free.
Integrating Your Existing WhatsApp Account with AI Agents
Creating a WhatsApp chatbot with your AI Agent is easy. Check out the steps below to see how it’s done:
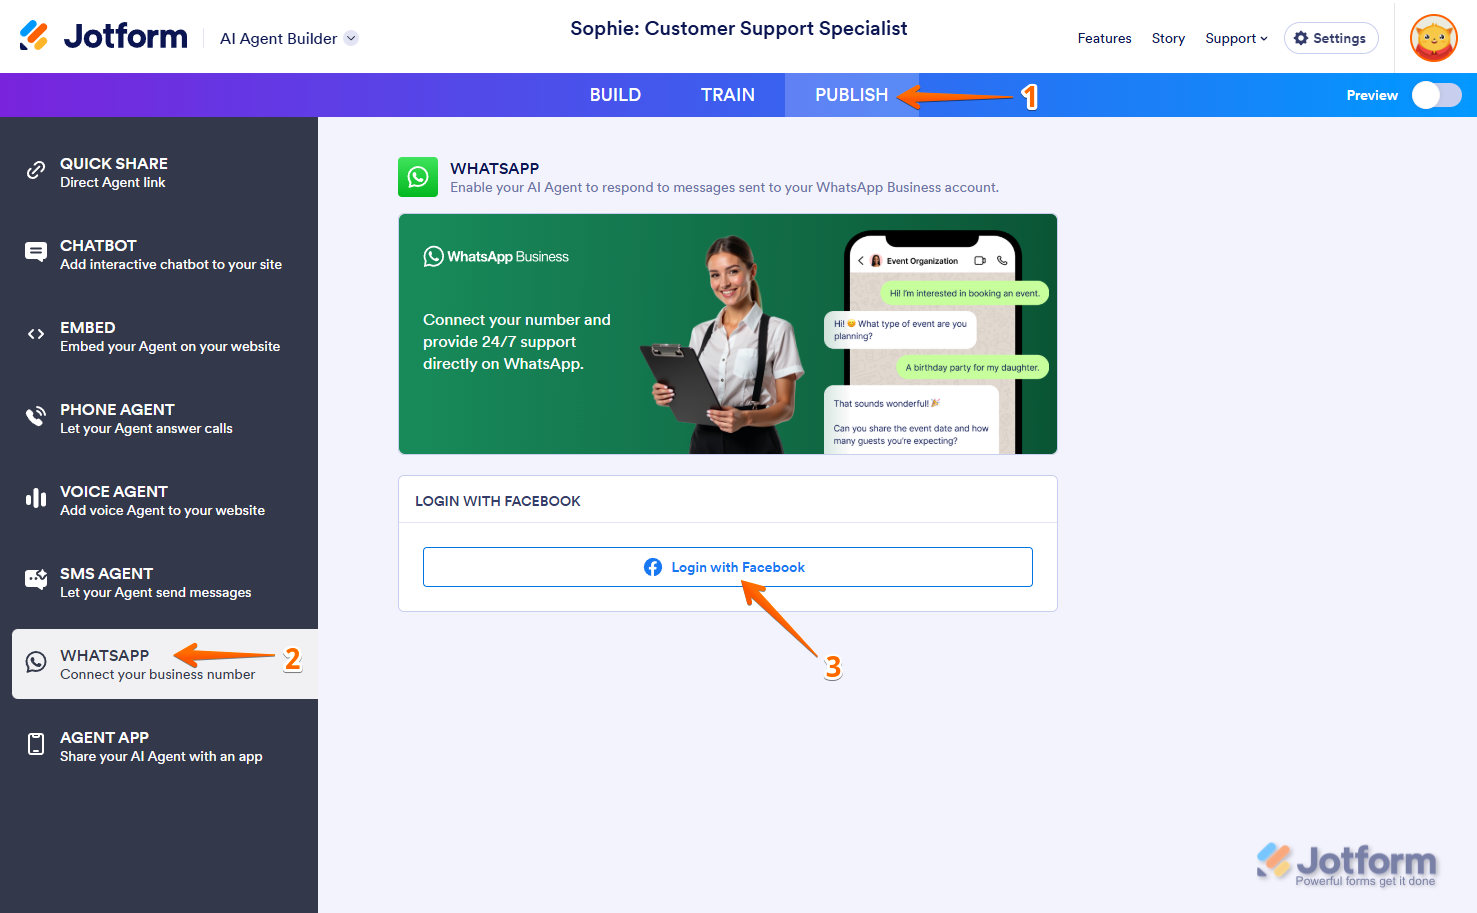
- In Agent Builder, in the blue navigation bar at the top of the page, click on Publish.
- Click on WhatsApp in the menu on the left side of the page.
- Then, click on Login with Facebook and connect your Facebook account.
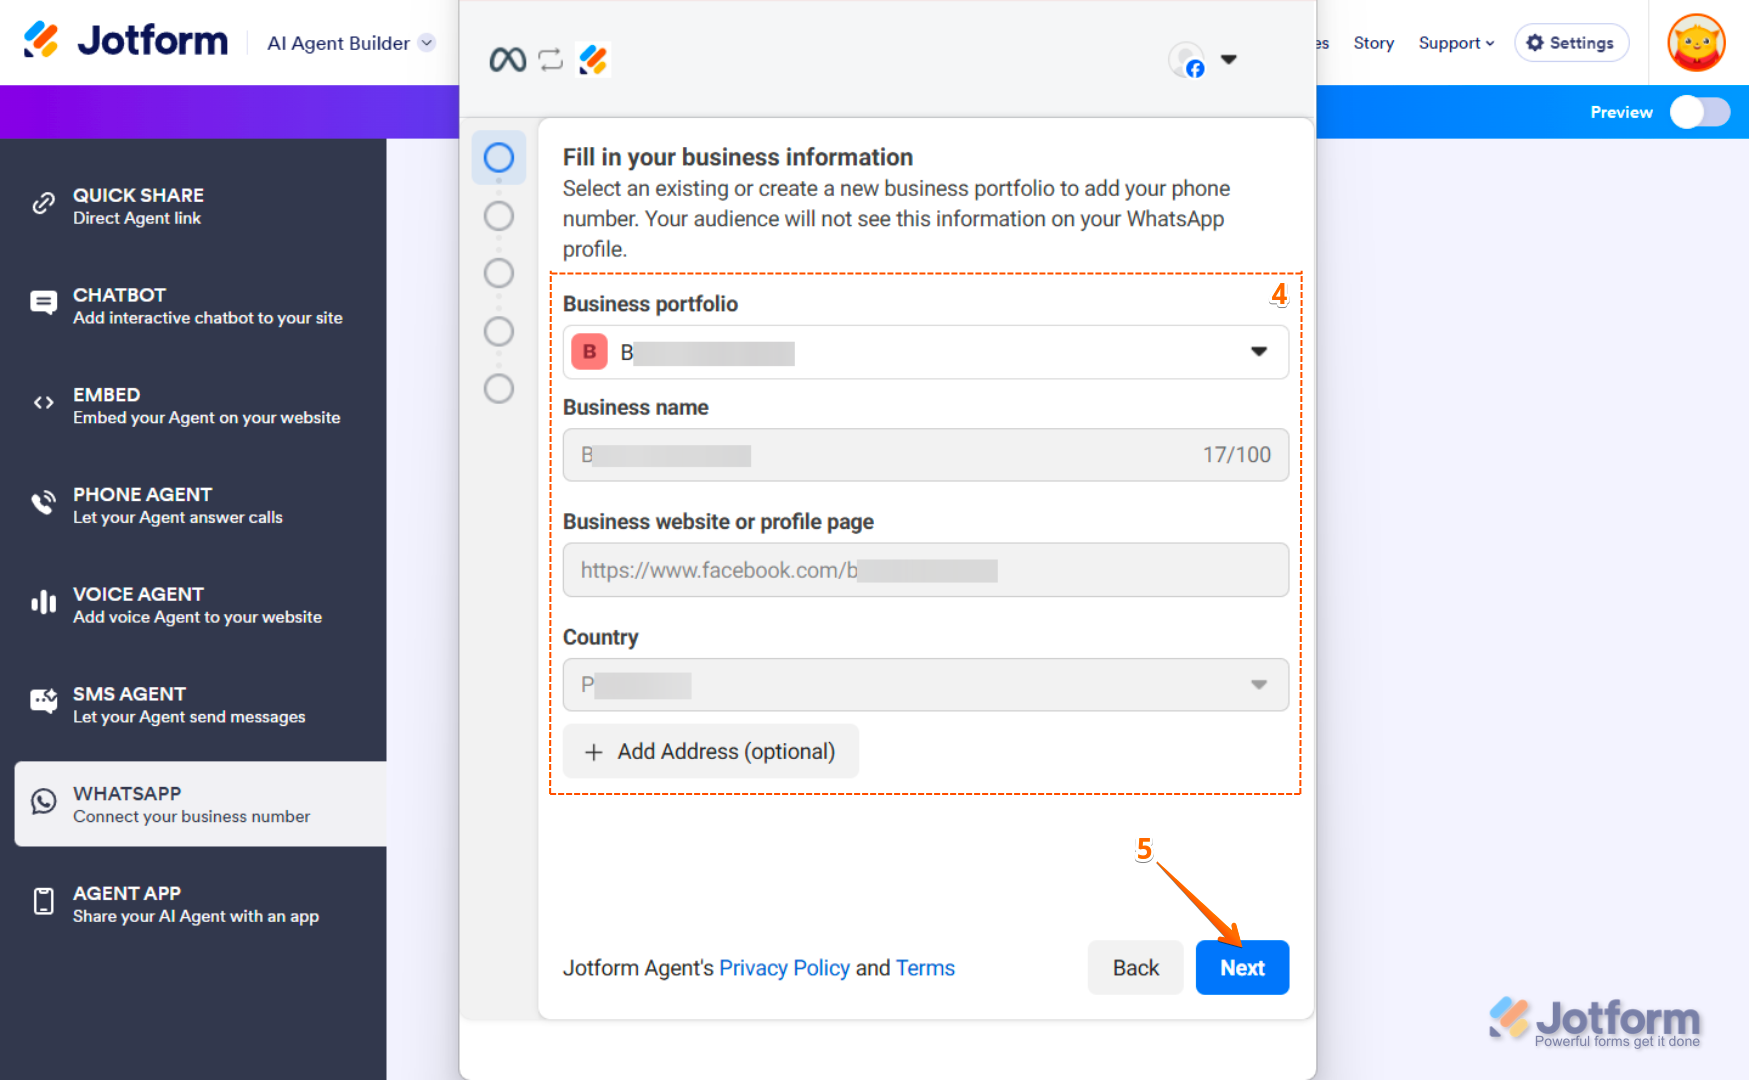
- After connecting your Facebook account, fill in the following business information:
- Business Portfolio — Choose a business portfolio from the list of those you’ve created.
- Business Name — This field is automatically filled in and verified based on the business portfolio you selected.
- Business Website or Profile Page — The system automatically applies and verifies this information from the business portfolio.
- Country — The country is automatically detected and verified based on the business portfolio.
- Add Address (Optional) — Enter your business address if you want to include it.
- Then, click on Next.
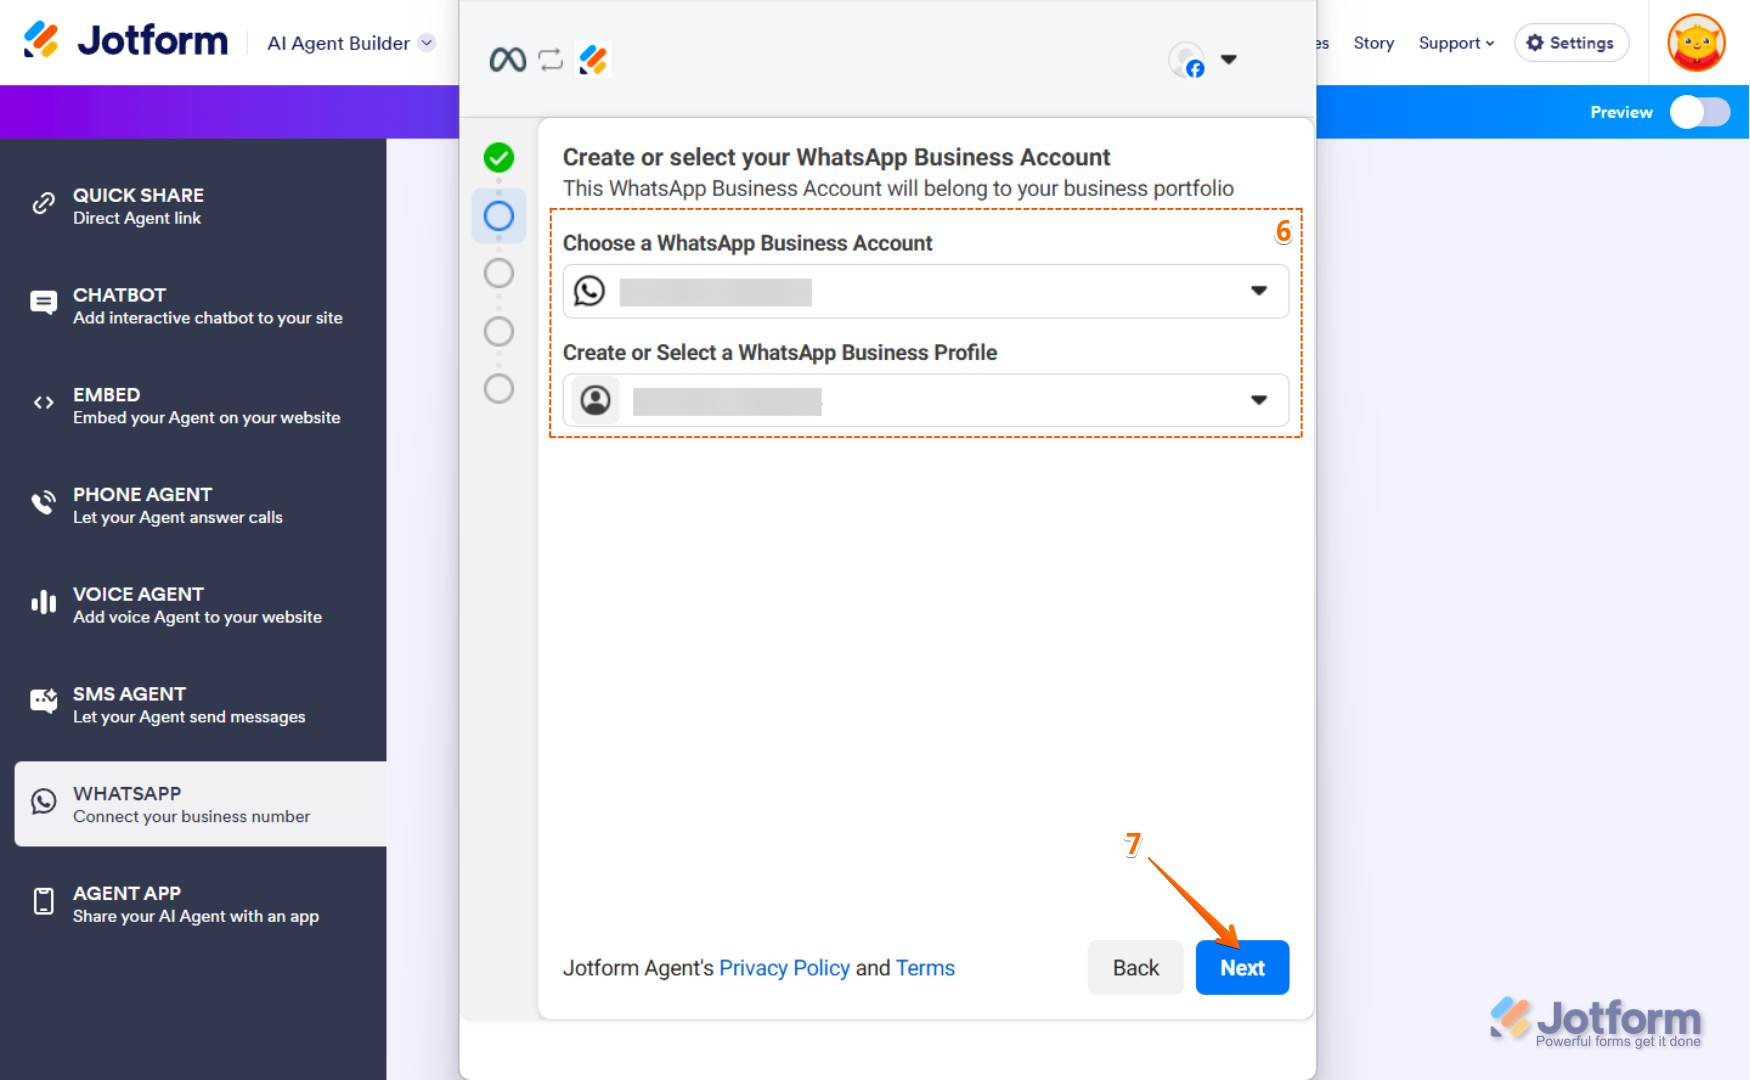
- Now, set up the following options:
- Choose a WhatsApp Business Account — Select an existing WhatsApp Business Account.
- Create or Select a WhatsApp Business Profile — Choose a WhatsApp Business Profile.
- And then, click on Next.
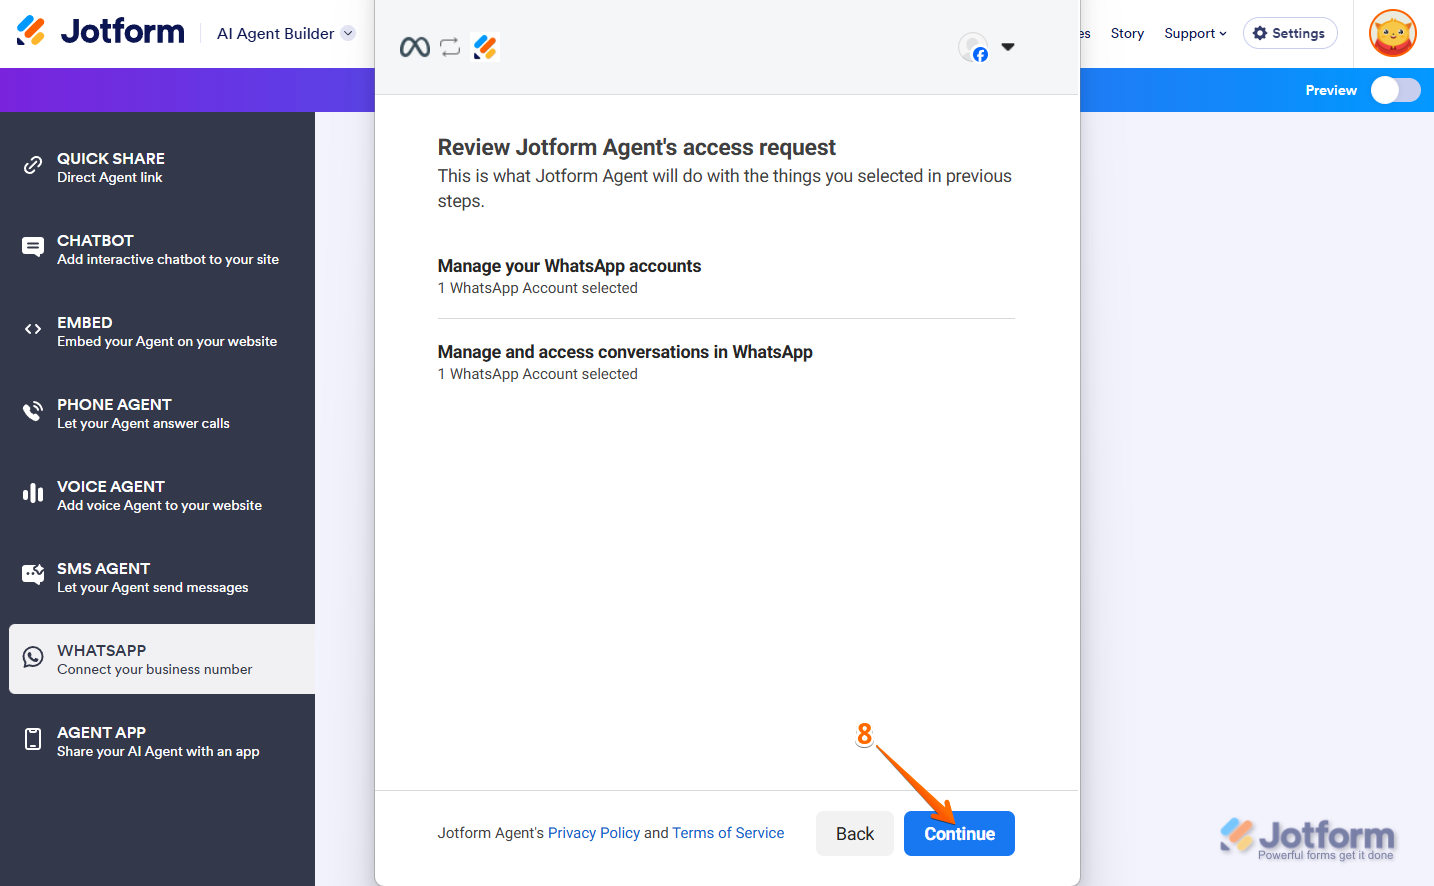
- Now, click on Continue.
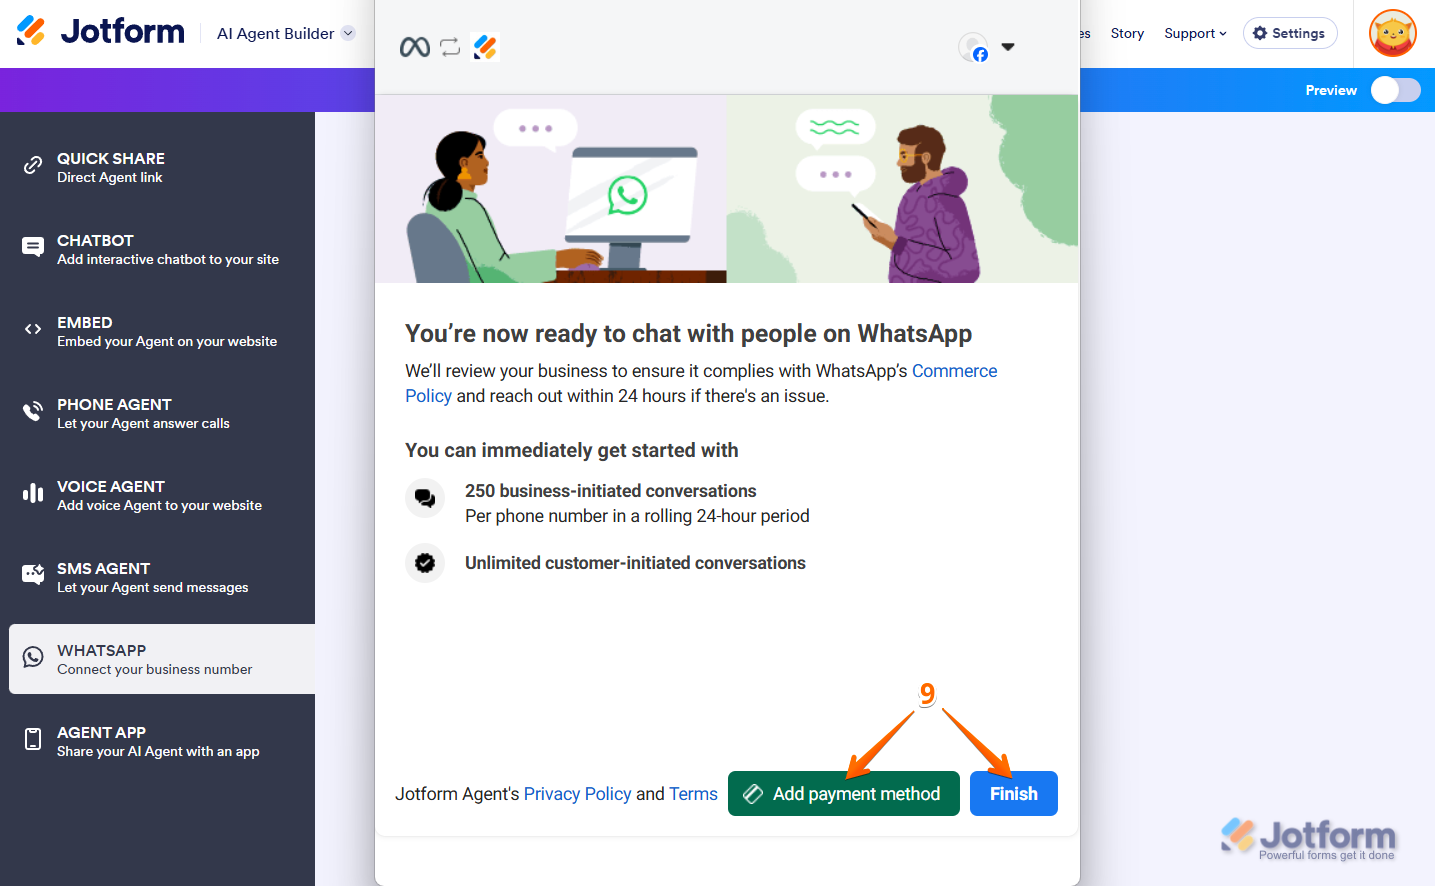
- Here, you can optionally Add a payment method, then click Finish, and you’re all set.
Setting Up a New WhatsApp Account with AI Agents
Setting up a new WhatsApp account with AI Agents is easy. Let’s do it:
- In Agent Builder, in the blue navigation bar at the top of the page, click on Publish.
- Click on WhatsApp in the menu on the left side of the page.
- Then, click on Login with Facebook to connect your Facebook account.
- After connecting your Facebook account, fill in the following business information:
- Business Portfolio — Choose a business portfolio from the list of those you’ve created.
- Business Name — This field is automatically filled in and verified based on the business portfolio you selected.
- Business Website or Profile Page — The system automatically applies and verifies this information from the business portfolio.
- Country — The country is automatically detected and verified based on the business portfolio.
- Add Address (Optional) — Enter your business address if you want to include it.
- And then, click on Next.
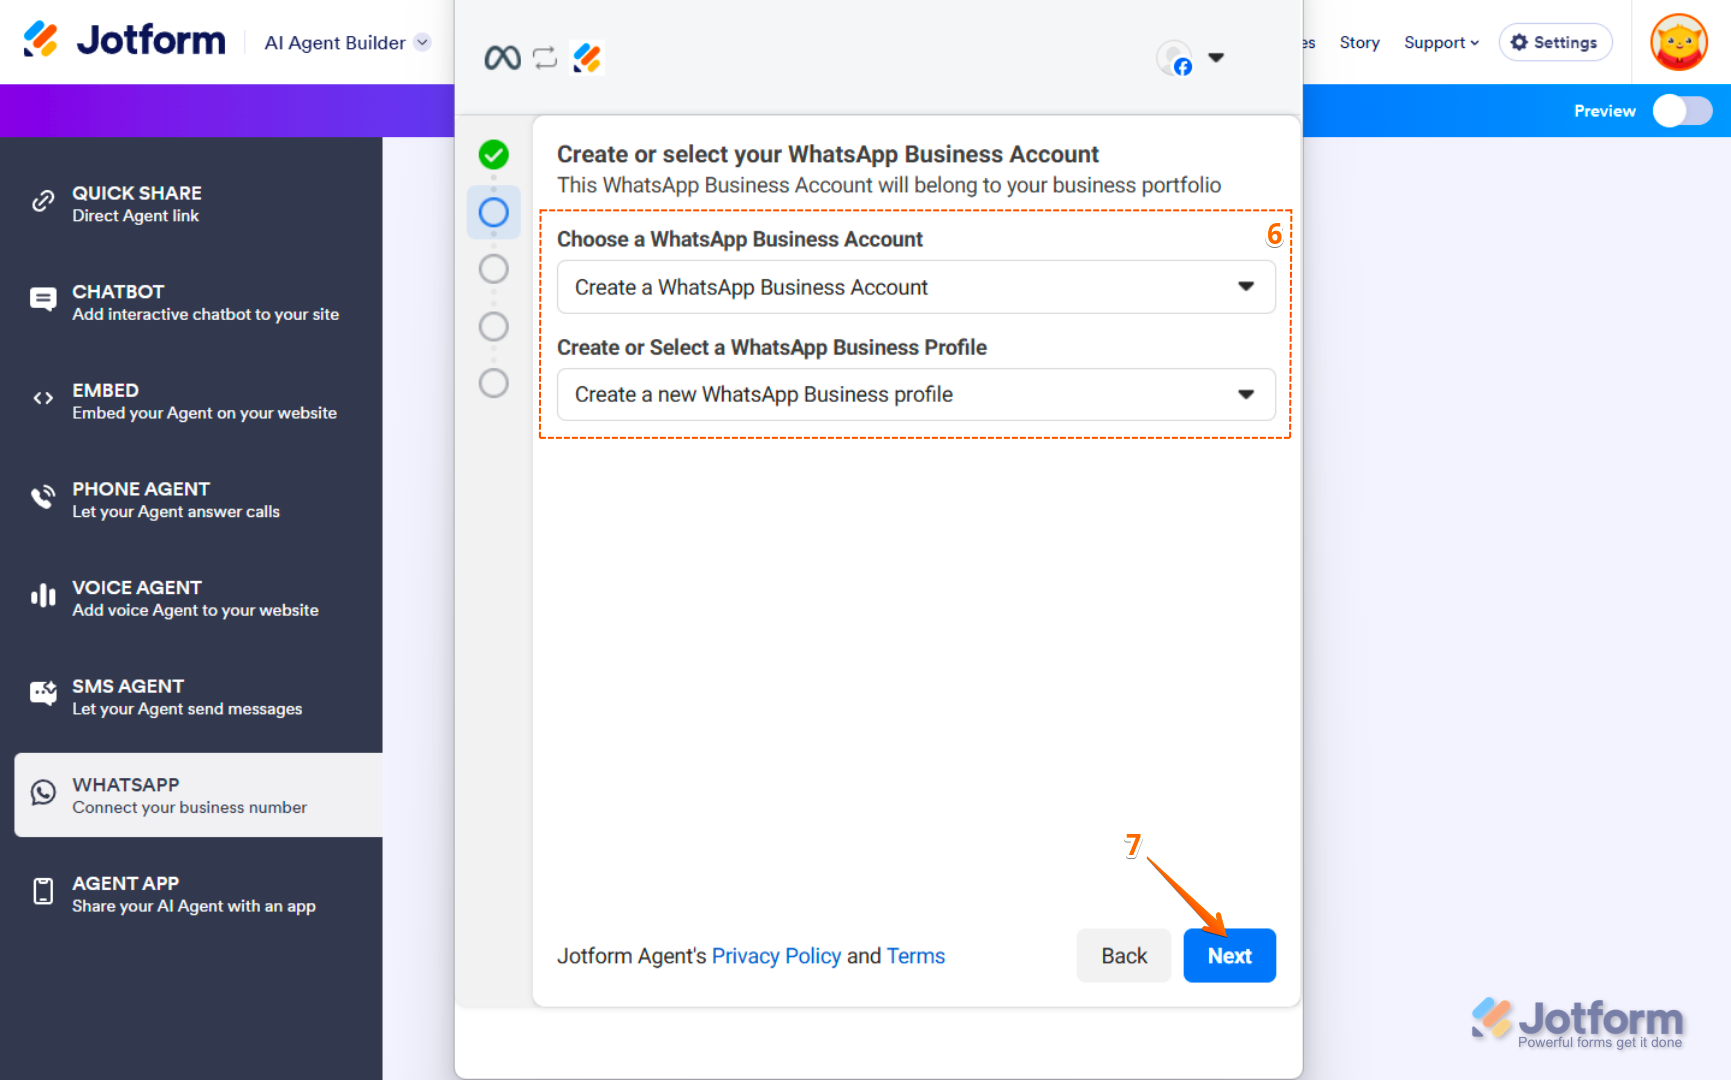
- Now, set up the following options:
- Create a WhatsApp Business Account — Set up a new WhatsApp Business Account.
- Create a new WhatsApp Business Profile — Add a new profile for your WhatsApp Business Account.
- Then, click on Next.
- Next, enter the following details to set up your WhatsApp Business profile:
- Category — Select the category that best describes your business.
- WhatsApp Business Account Name — Enter the name of your WhatsApp Business Account.
- WhatsApp Business Display Name — Choose the name customers will see when they interact with your business.
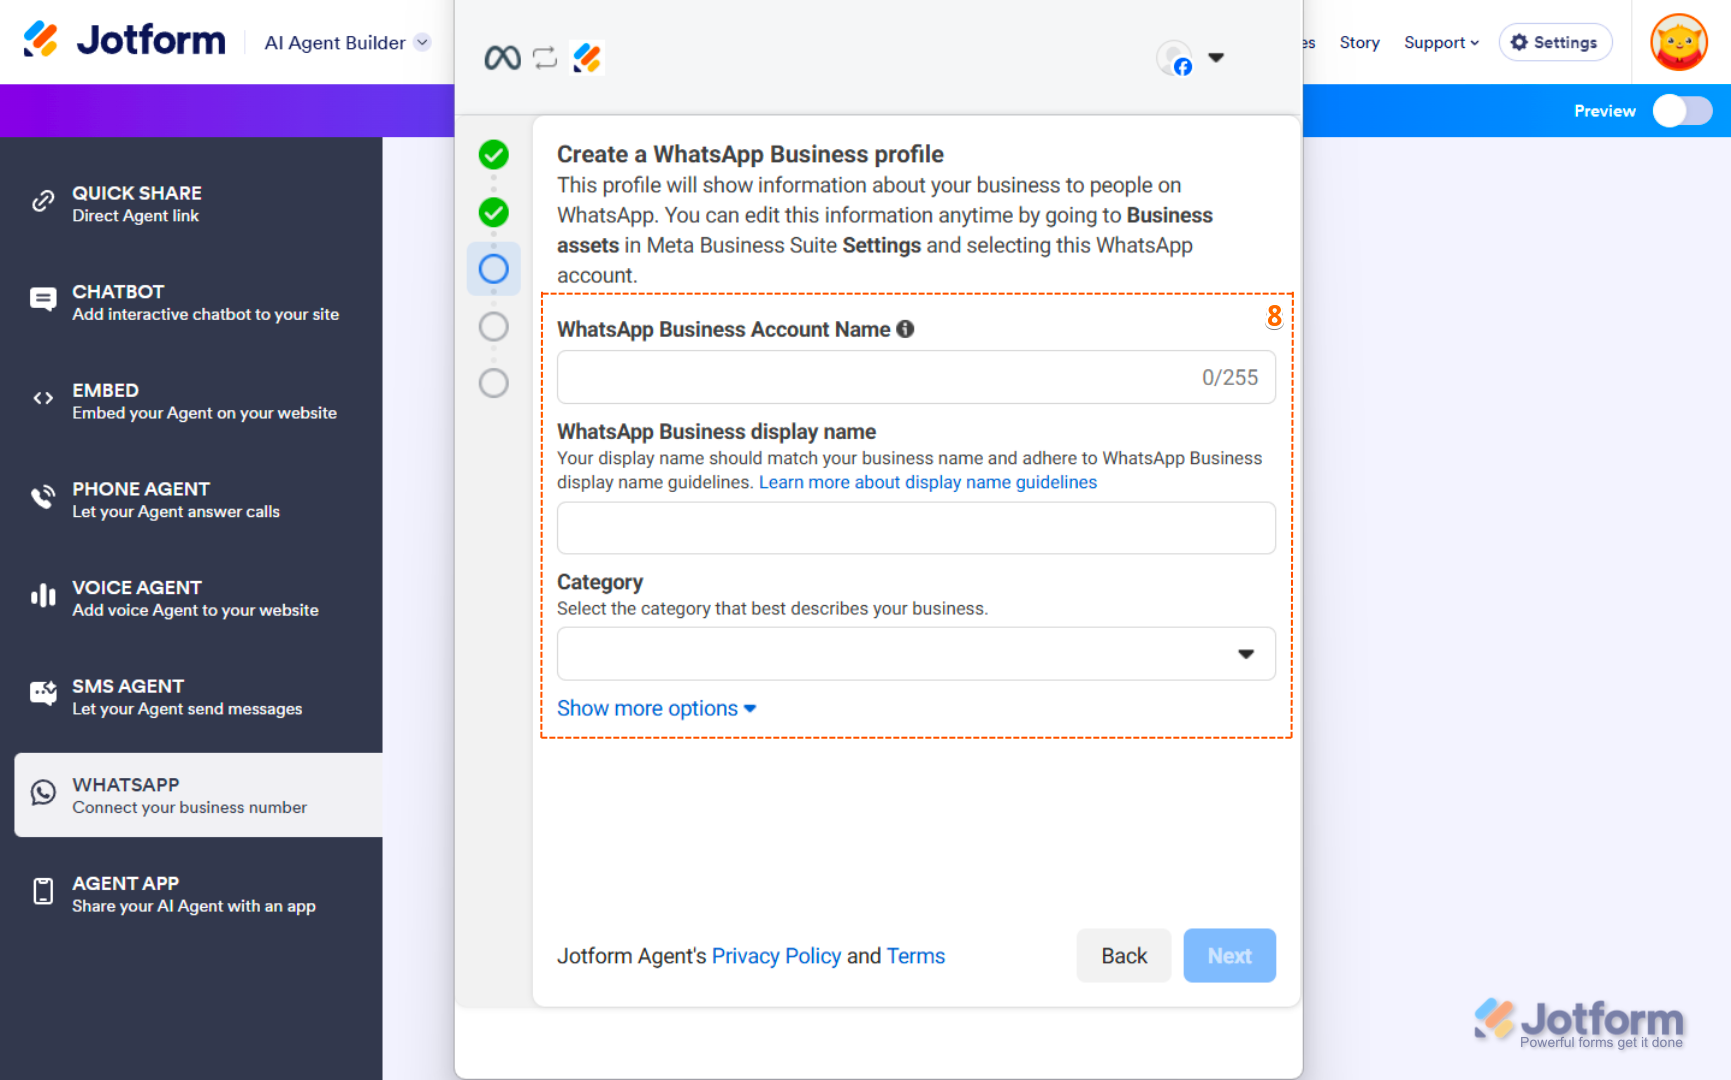
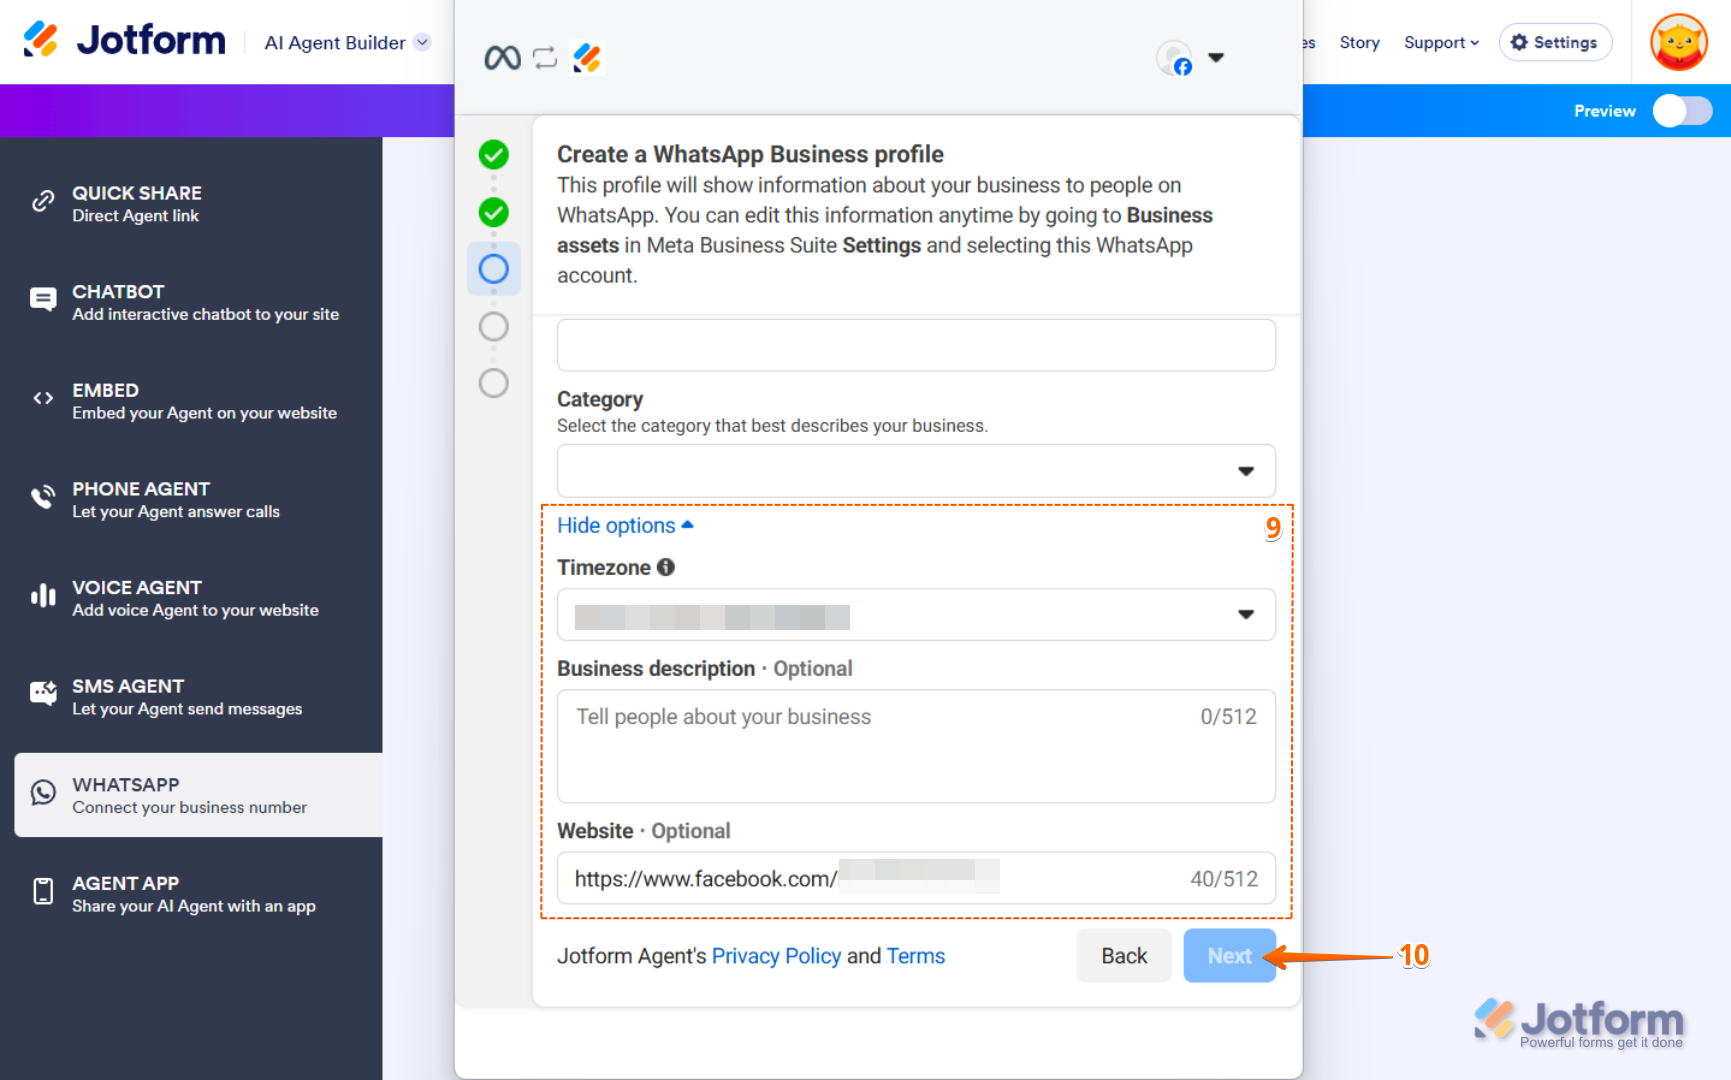
- Here, you can optionally click on Show More Options and set up the following:
- Timezone — Choose the timezone that matches your business location.
- Business Description — Provide a brief description of your business and its services.
- Website — Add the link to your business website.
- Then, click on Next.
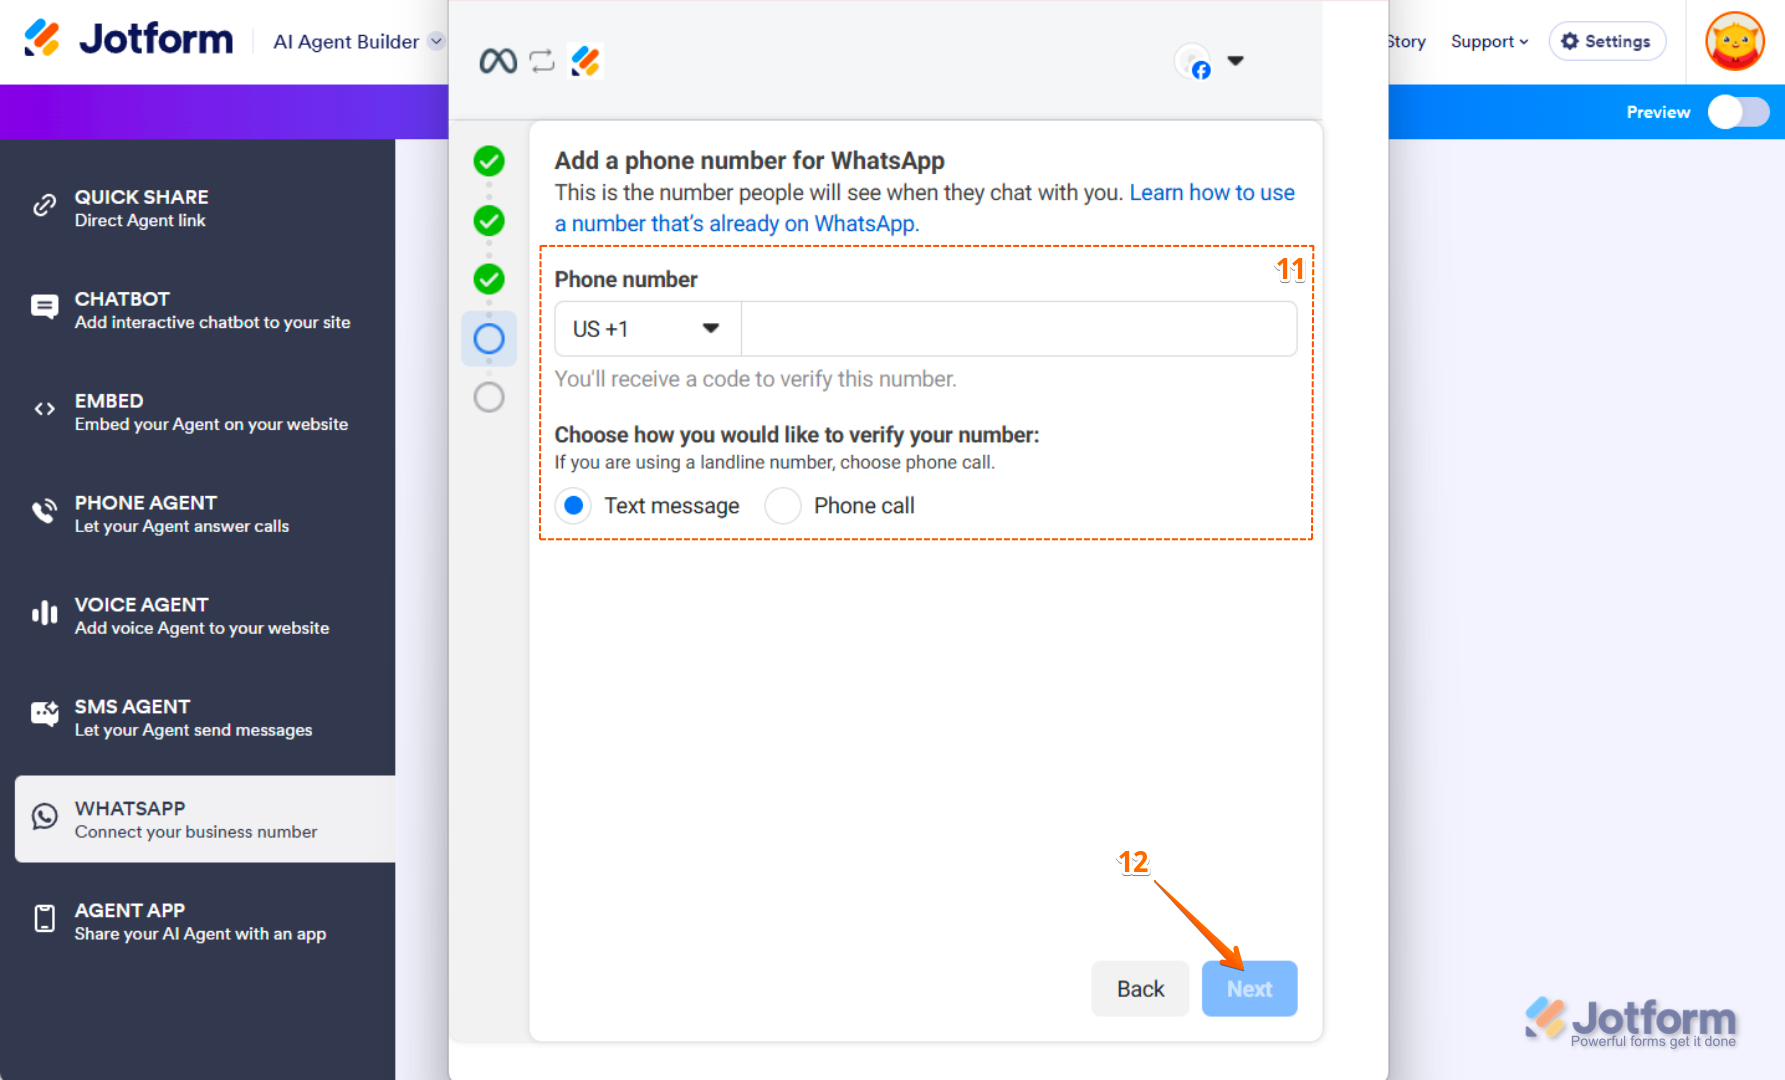
- Now, add your Phone Number and choose how you’d like to verify it:
- Text Message — Receive a verification code via SMS to your phone number.
- Phone Call — Get a verification code through an automated phone call.
- Then, click on Next.
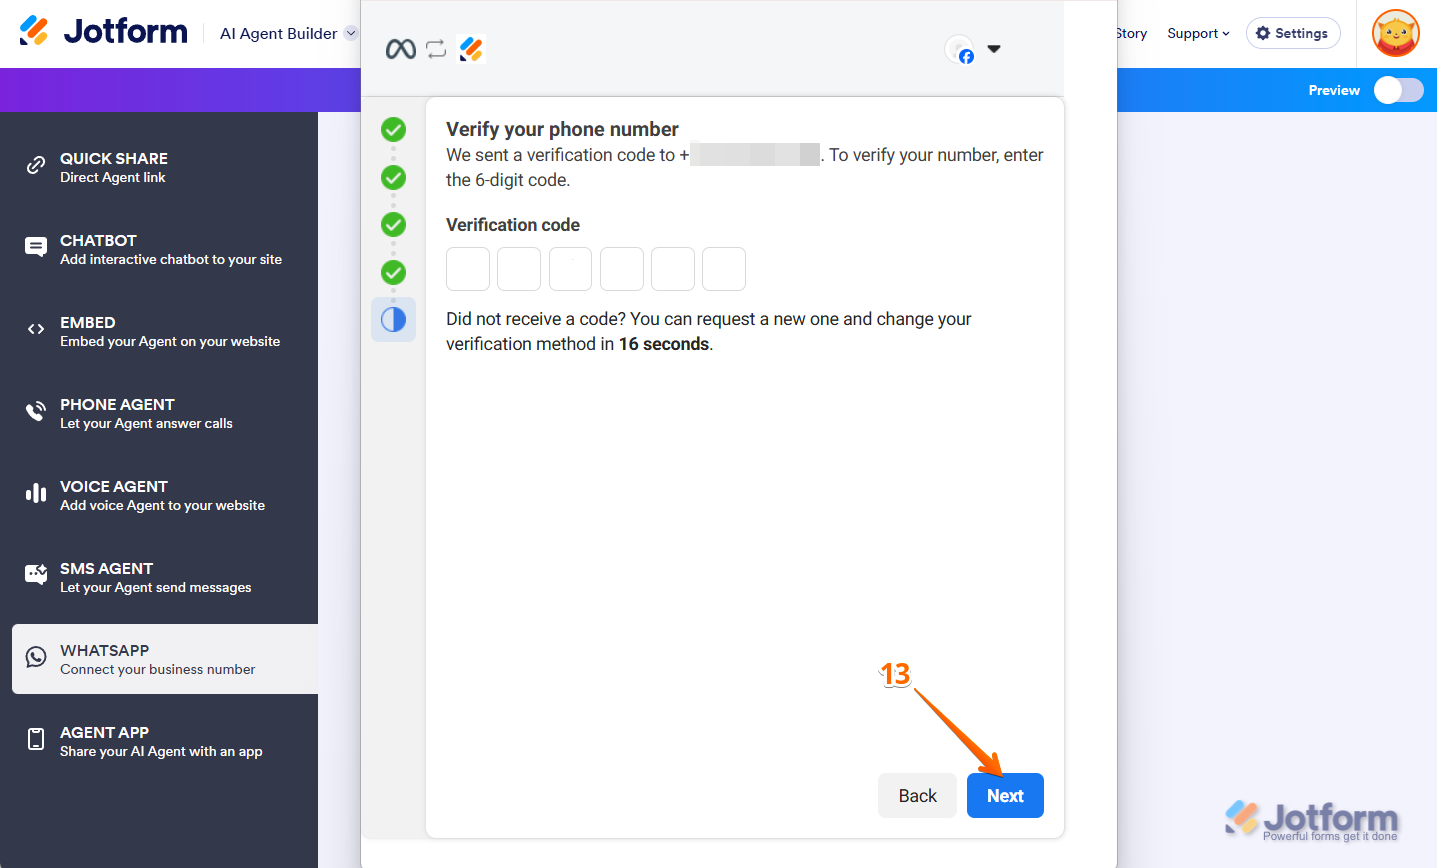
13. Enter your 6-digit code to verify your phone number and click on Next.
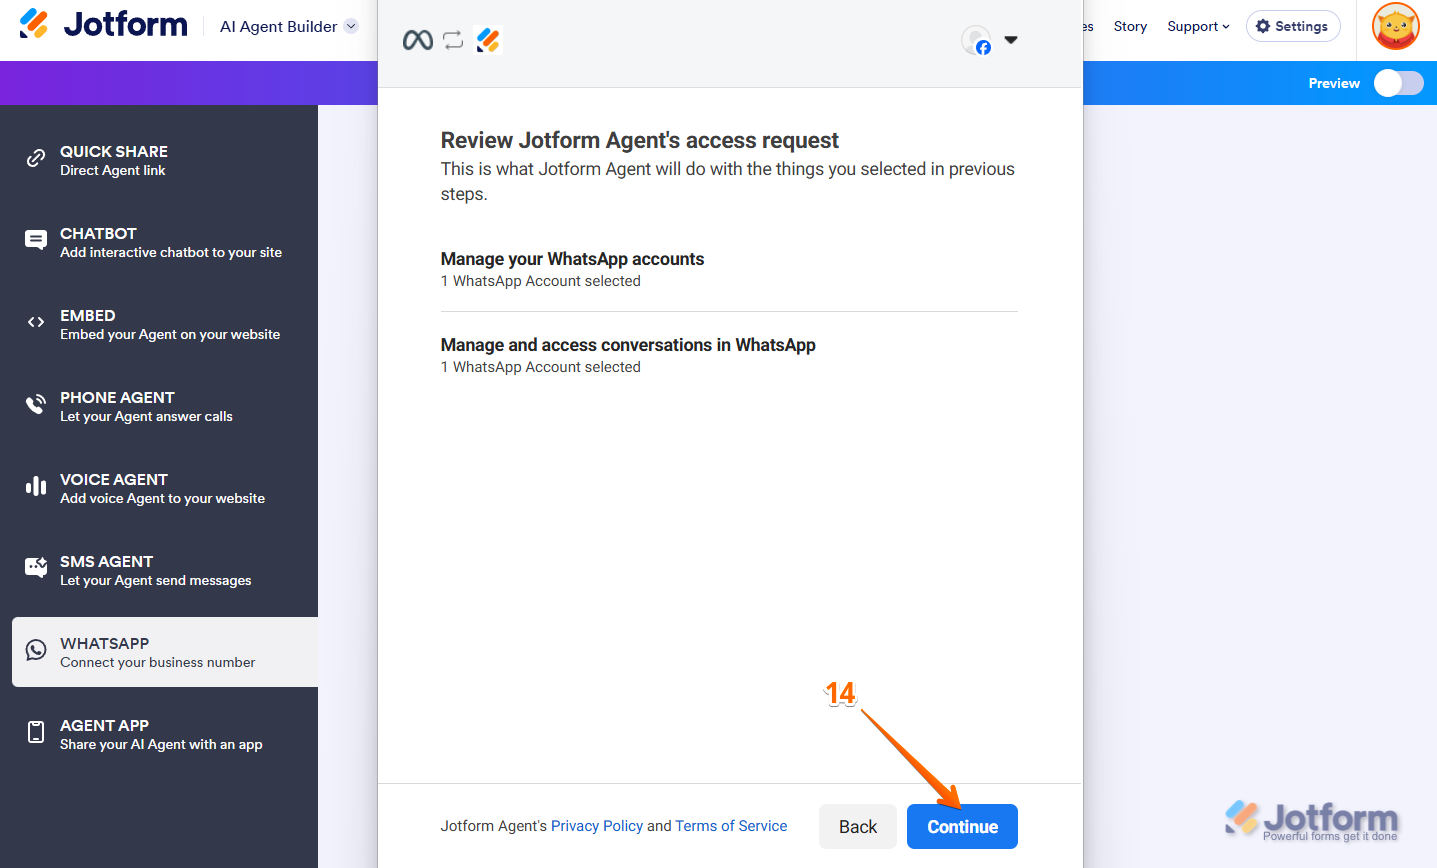
14. Once verified, click on Continue.
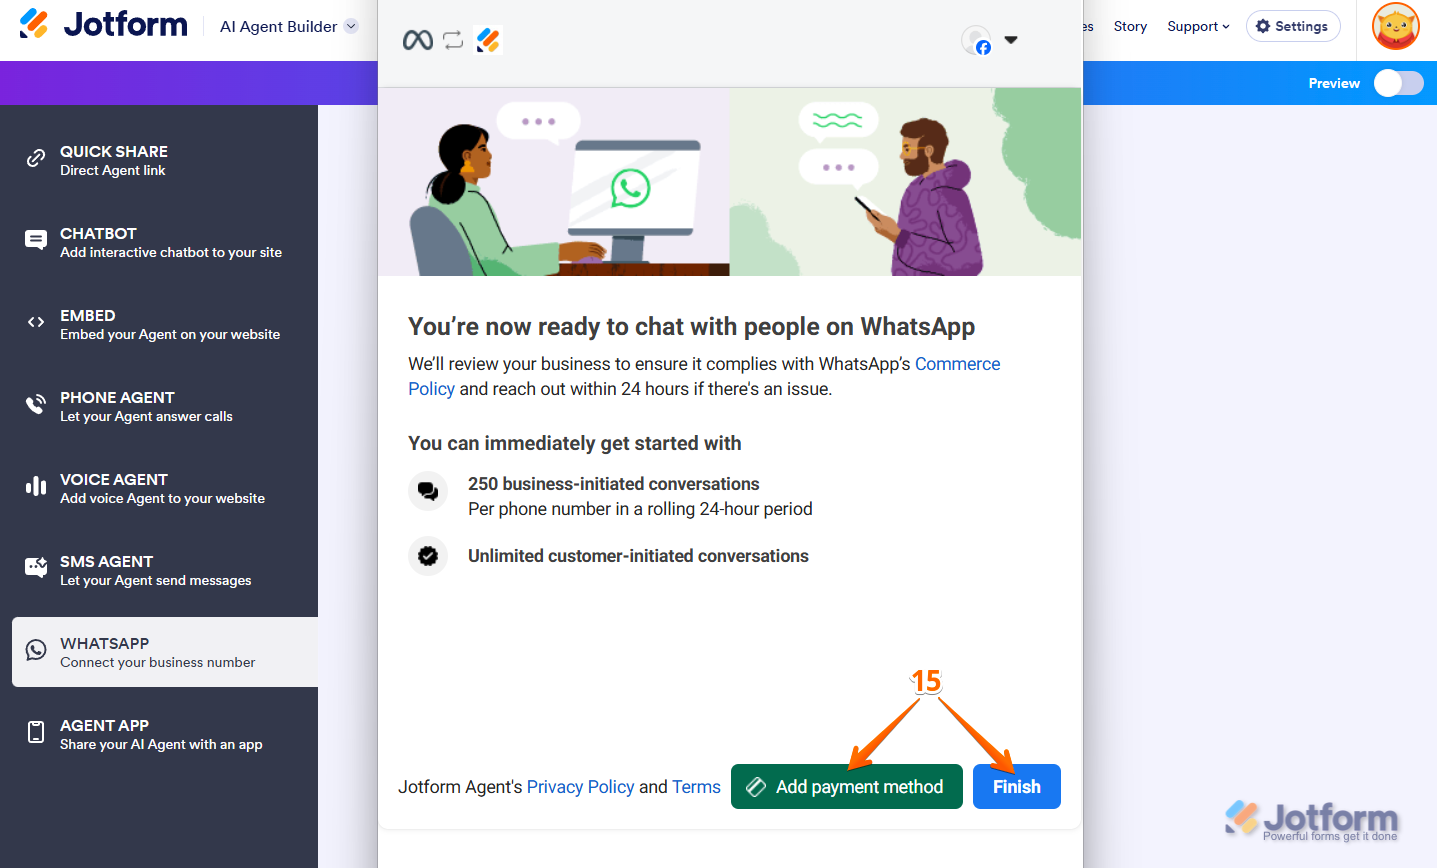
15. Finally, you can optionally Add a payment method, then click Finish, and you’re all set.
Managing Your WhatsApp Integration with AI Agents
Once you’ve completed your WhatsApp setup, you have several options for managing your link. You can remove it if no longer needed, copy it to share with customers or clients, or generate an embed code to seamlessly integrate WhatsApp into your website. This allows visitors to contact you instantly with just a click.
Removing a Connected WhatsApp Account
You can easily remove your WhatsApp account integration with your AI Agent. Here’s how:
- In Agent Builder, in the blue navigation bar at the top of the page, click on Publish.
- Click on WhatsApp in the menu on the left side of the page.
- Then, click on the Three Dots icon on the right side of your connected business number, and click on Remove.
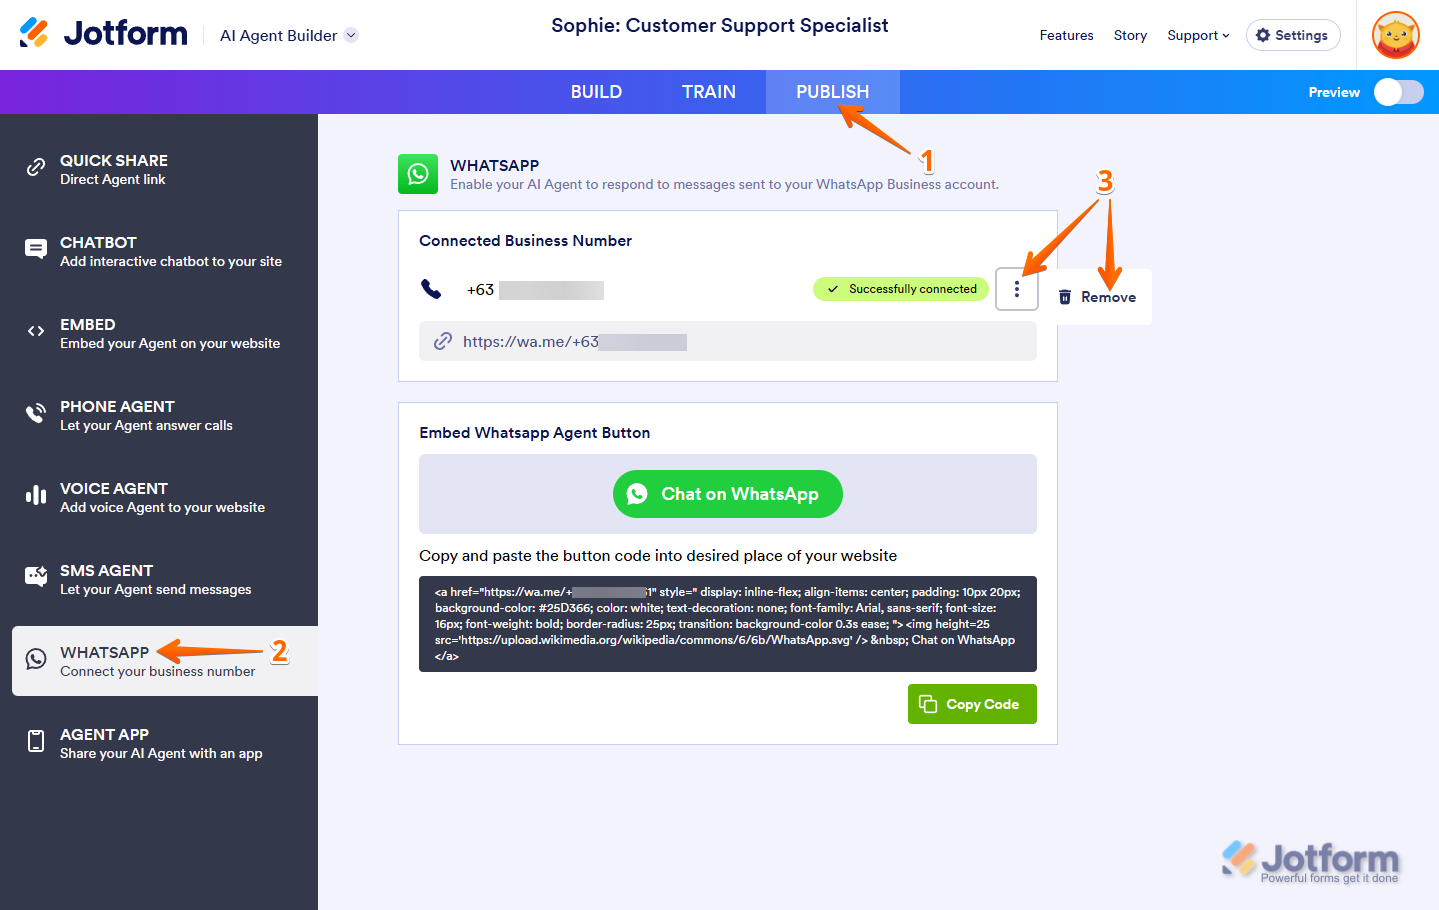
That’s it. Your connected WhatsApp account will now be removed from your AI Agent, giving you the option to connect it again.
Copying the WhatsApp Link
If you want to copy your WhatsApp link to easily share it with your users, it’s easy to do. Here’s how:
- In Agent Builder, in the blue navigation bar at the top of the page, click on Publish.
- Click on WhatsApp in the menu on the left side of the page.
- Then, hover your mouse over the Copy Link icon, and click on it.
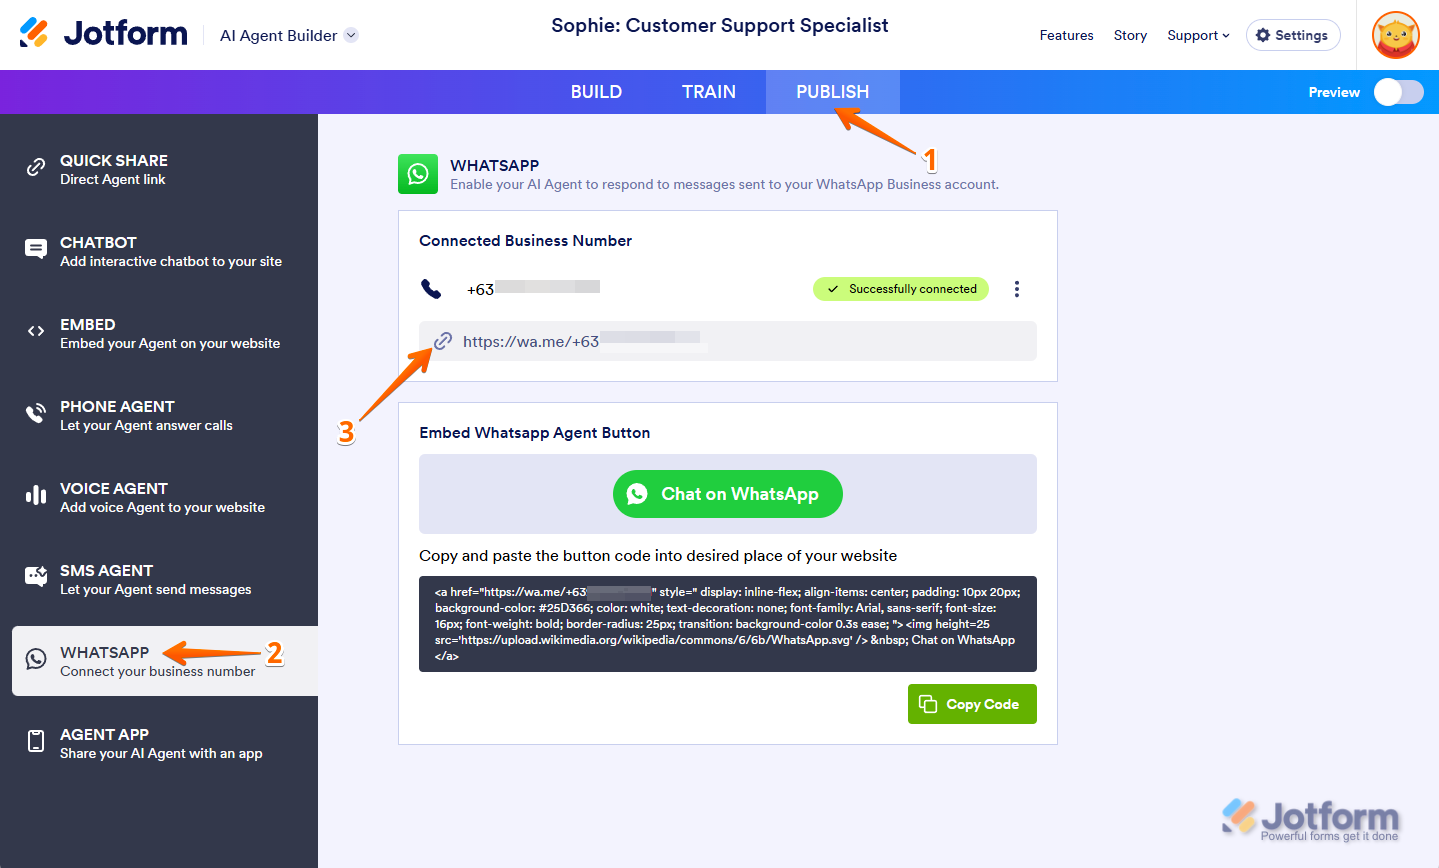
You’re all set. Your WhatsApp link has been copied to your system clipboard. You can now paste it on any social media platform or send it wherever you need to.
Embedding the WhatsApp Agent Button
It’s easy to add your WhatsApp Agent button to your website. Let’s do it:
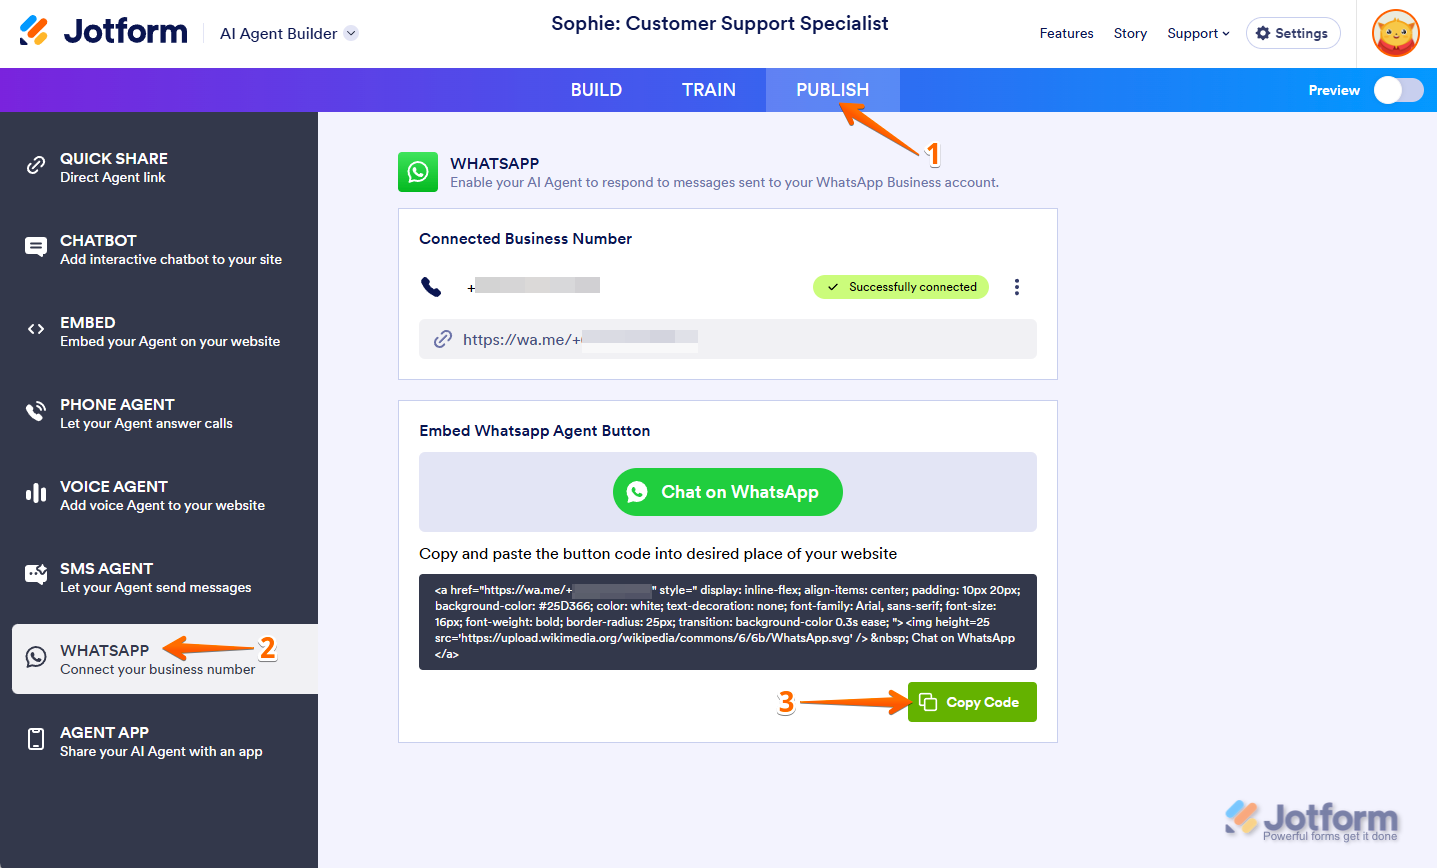
- In Agent Builder, in the blue navigation bar at the top of the page, click on Publish.
- Click on WhatsApp in the menu on the left side of the page.
- Now, click on Copy Code at the bottom of the page, and then paste the code into the embed area on your webpage, and that’s it.


Send Comment: