Customizing your AI agent‘s avatar allows you to create a unique and personalized representation of your agent, making interactions more engaging and human-like. Whether you want your avatar to reflect a professional persona, a fun character, or something in between, the process is simple and intuitive. Fine-tuning the avatar’s appearance, style, and tone will help align your interactions with the intended experience, making conversations feel more connected and authentic.
Customizing Your Agent Avatar
To customize your Agent Avatar
- In the Agent Builder, click on the Designer (paint roller icon) on the right side of the page.
- Under the Avatars tab, you’ll find the Avatars, Generate and Upload tab where you can customize more of your Avatar.
Pro Tip
You can also open the Designer by clicking the Avatar icon directly.
Avatars Tab
In the Avatars tab, you can browse and search for preset avatars to choose from. If you’d like to customize your Avatar further, simply click the Pencil Icon to edit your image. Whether you need to crop, flip, rotate, or change your image, this is the section where you can make all your adjustments. Here’s how:
- Assuming you’ve selected your Avatar, click on Edit (pencil icon).
- In the Edit Image window that pops-up, you can do the following:
- Crop — Crop your image to remove unwanted parts, focusing only on the area you want to keep.
- Flip Vertically — Flip your image vertically to mirror it upside down.
- Flip Horizontally — Flip your image horizontally to mirror it from left to right.
- Rotate to the Left — Rotate your image to the left by 90 degrees.
- Rotate to the Right — Rotate your image to the right by 90 degrees.
- Change Image — Replace your current image with a new one.
- Click on Save button to save the changes.
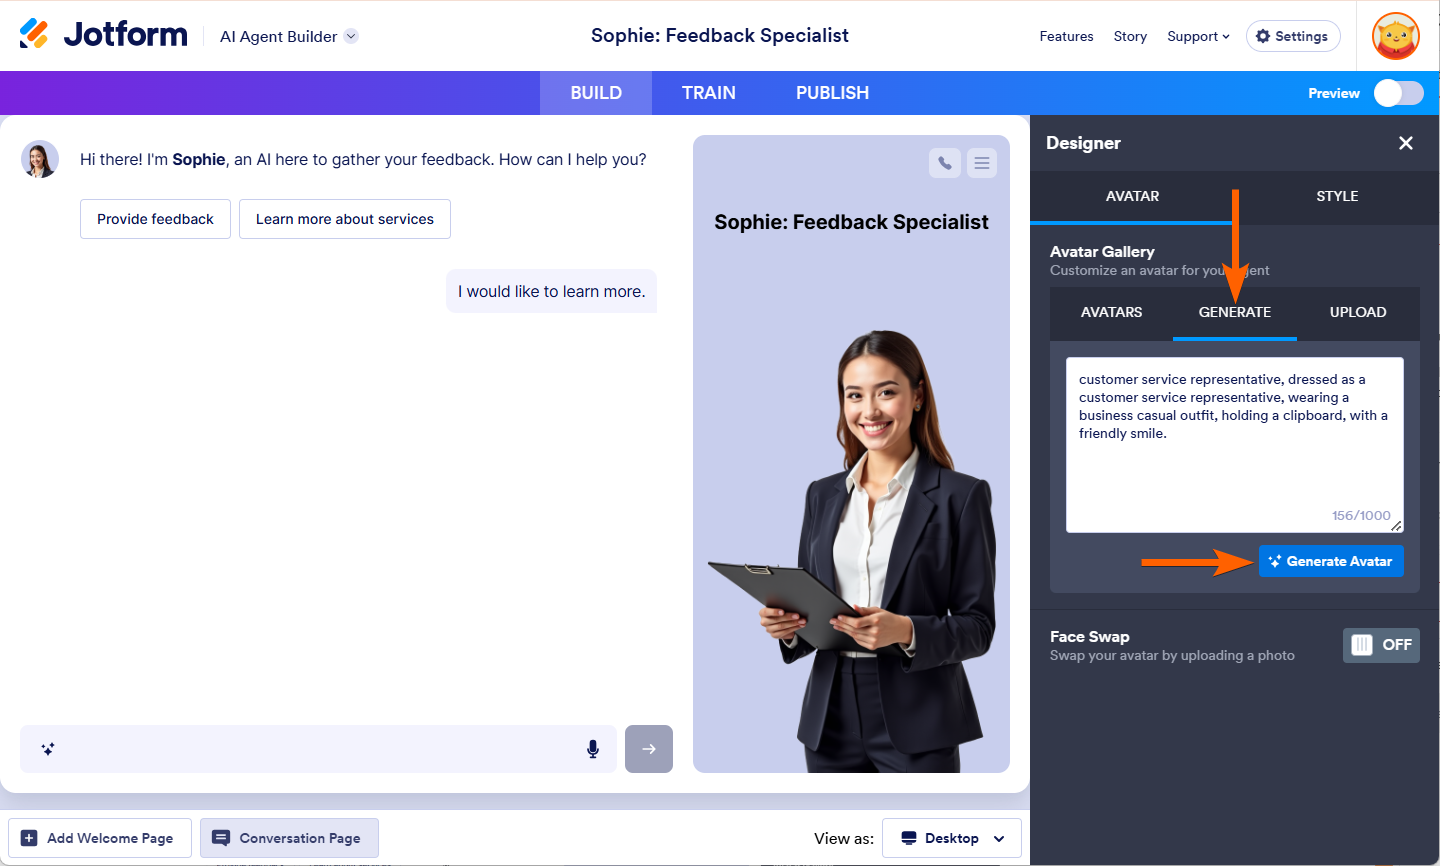
Generate Tab
In the Generate tab, you can generate a custom avatar based on a specific description. For example, if you want an avatar of a customer support representative dressed in business casual, holding a clipboard, and sporting a friendly smile, this is the place to bring that vision to life. Let’s do it!
- In the Generate tab, input your prompt that you want to generate in your Agent Avatar.
- Then, click on Generate Avatar button.
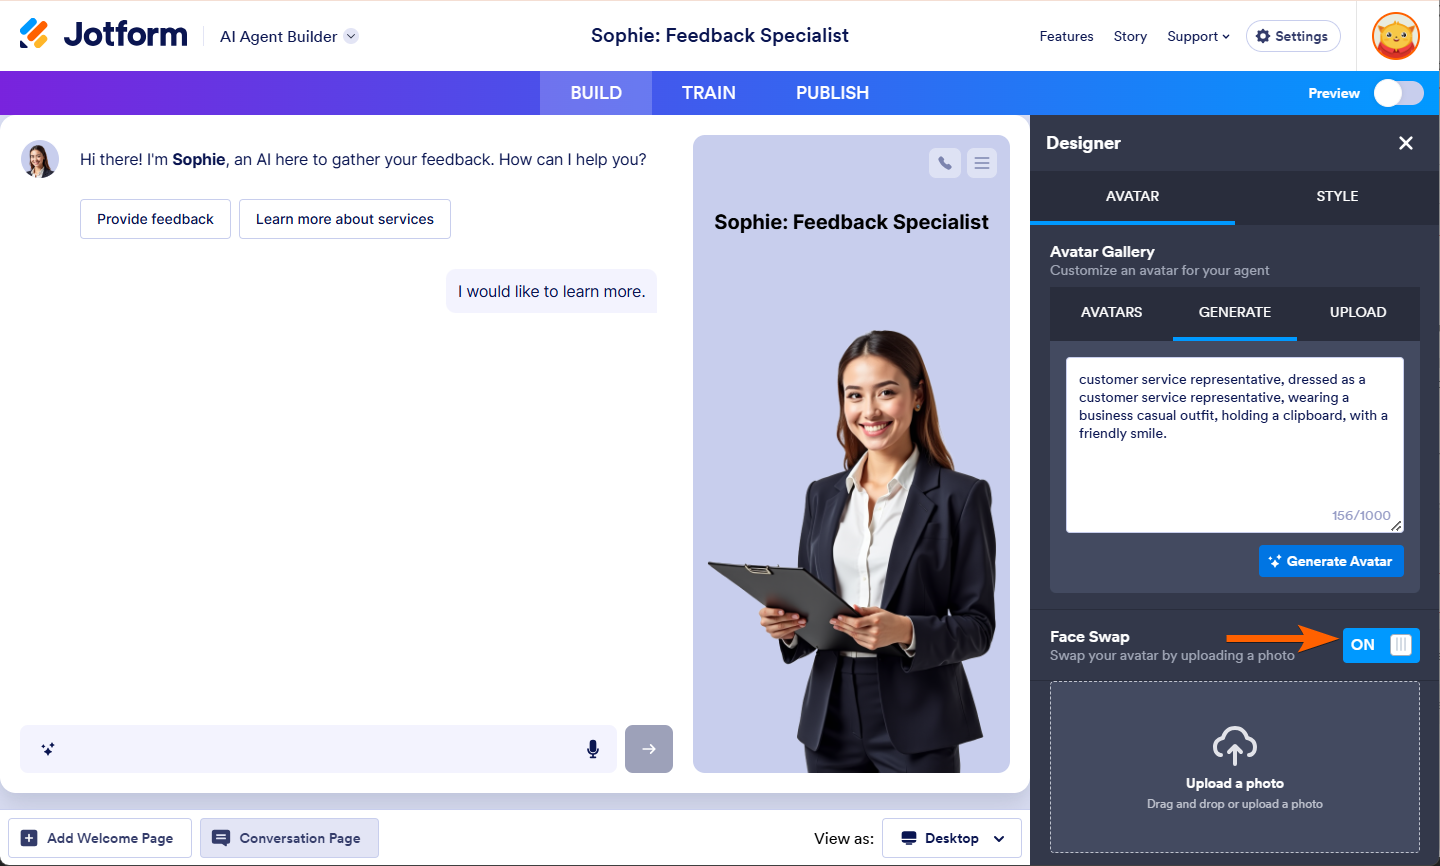
You can also swap your avatar’s face by toggling the Face Swap option to On and uploading your own photo.
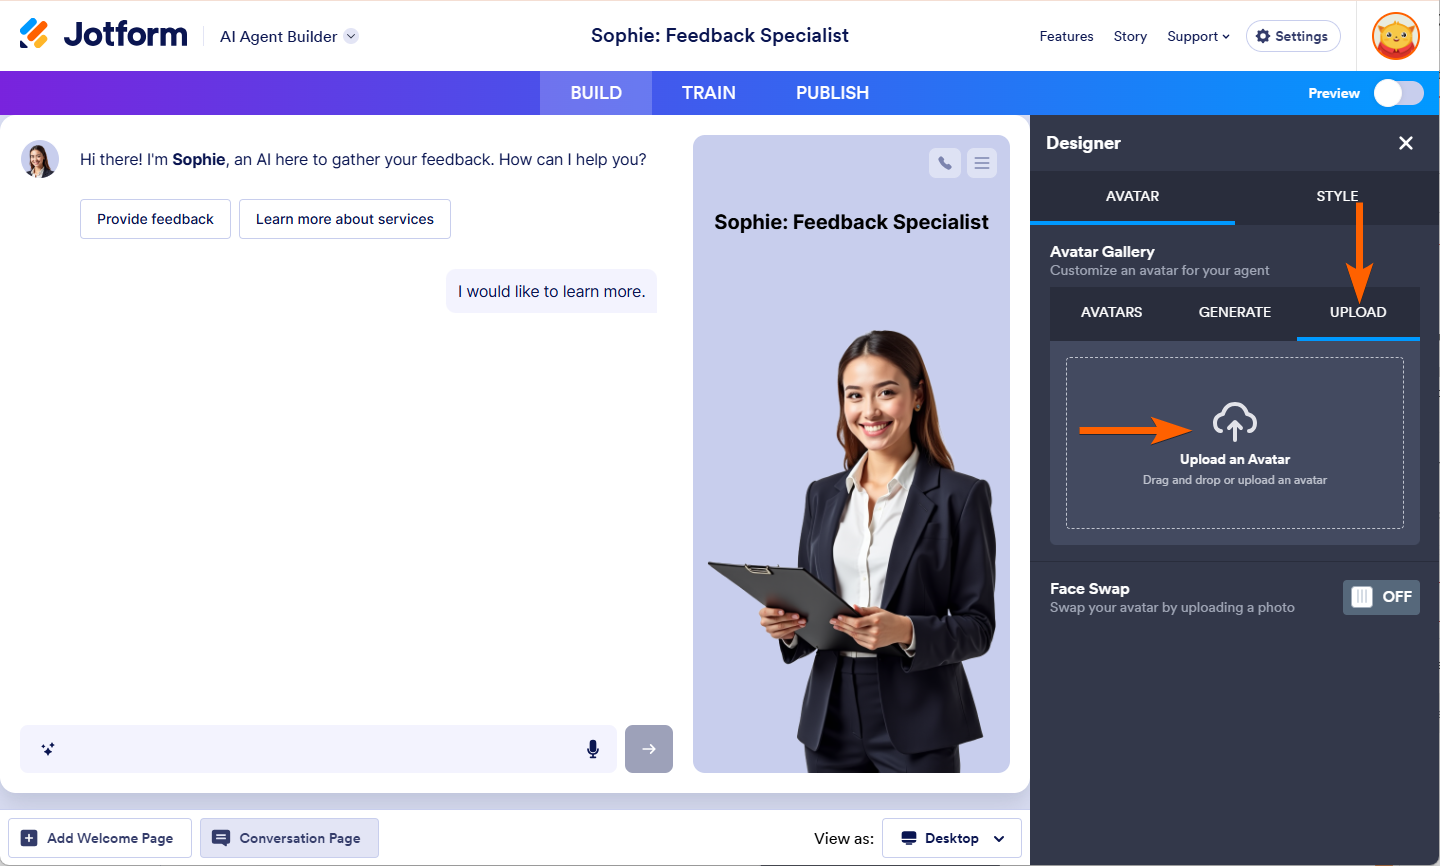
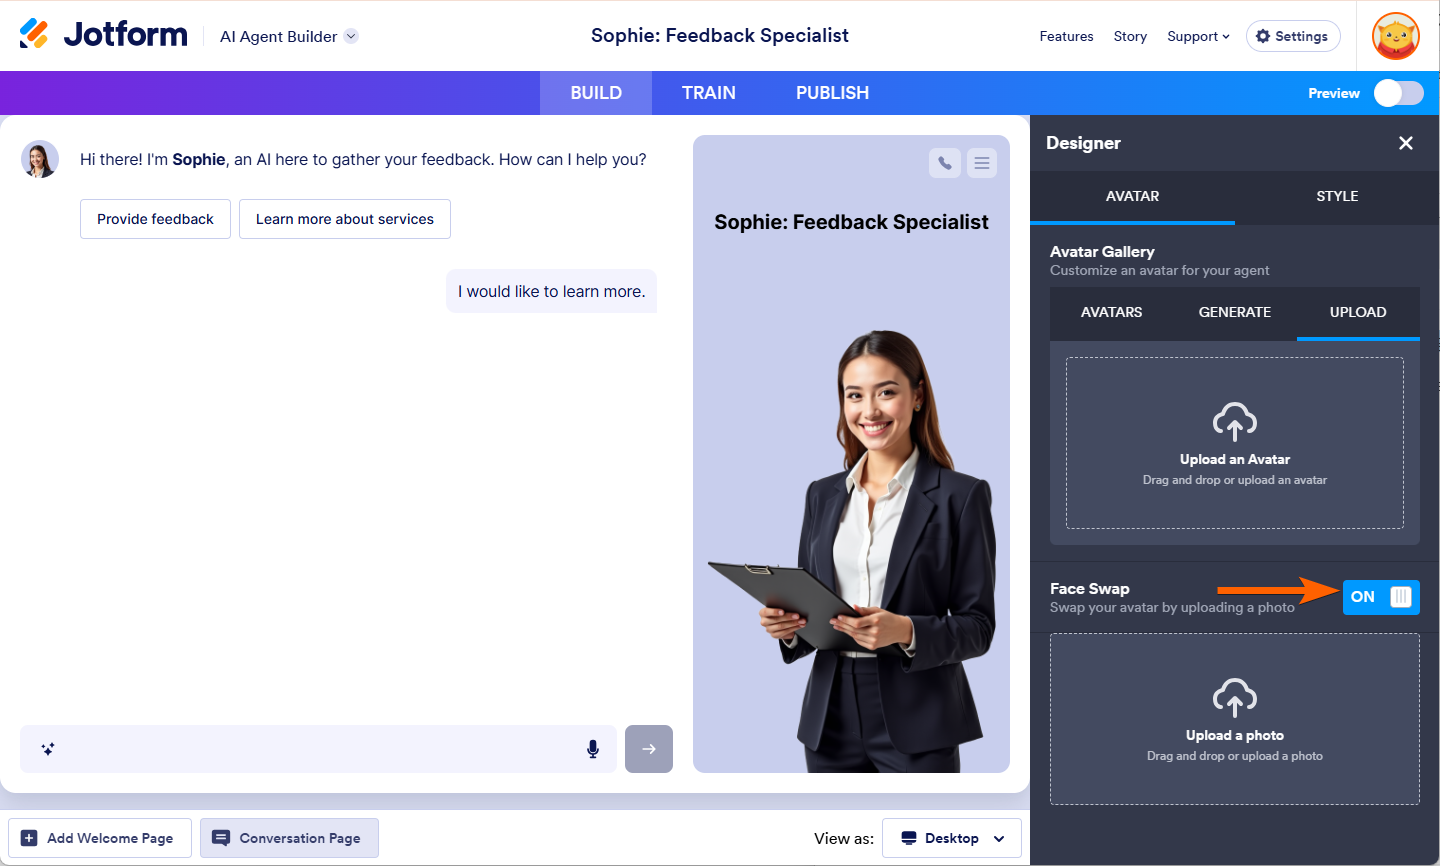
Upload Tab
In the Upload tab, you can easily upload your own custom image to use as your avatar. Simply click the upload button, select your desired image from your device, and the system will automatically adjust it to fit the avatar’s required dimensions.
You can also swap your avatar’s face by toggling the Face Swap option to On and uploading your own photo.


Send Comment: