Adding an AI voice agent to your website makes interactions more engaging and responsive. It can assist visitors, answer questions, and provide real-time support. There are multiple ways to embed it, allowing you to choose the best option for your site.
To get started, follow these steps to embed your AI voice agent:
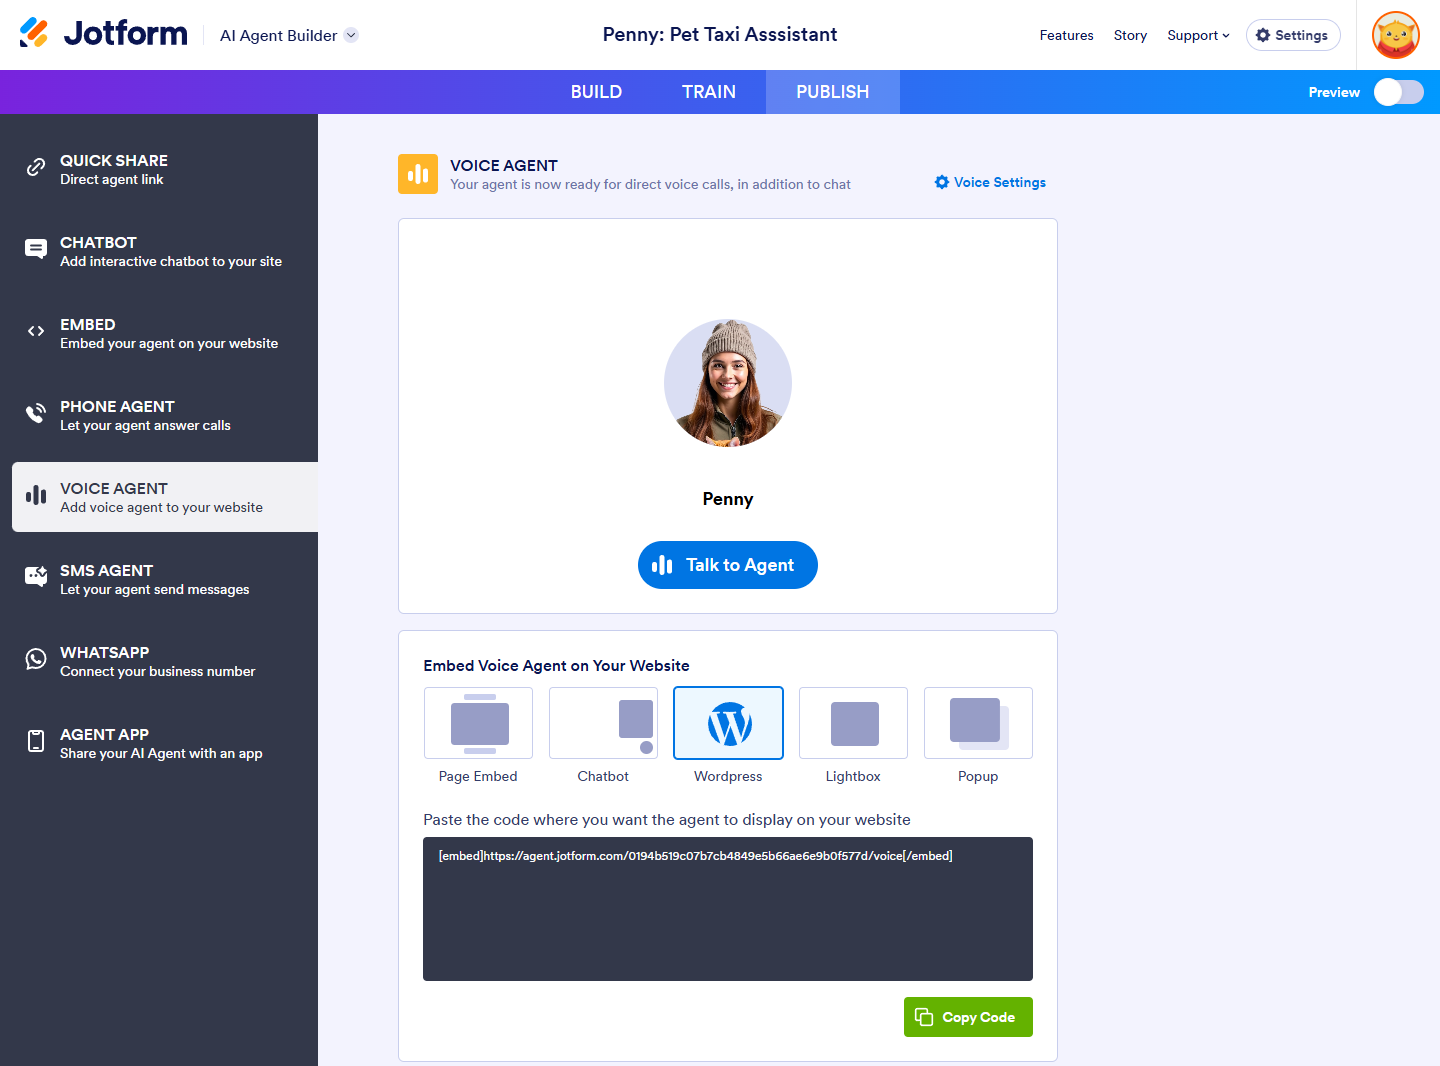
- In AI Agent Builder, click on the Publish tab.
- Then, click on the Voice Agent tab in the menu on the left side of the page.
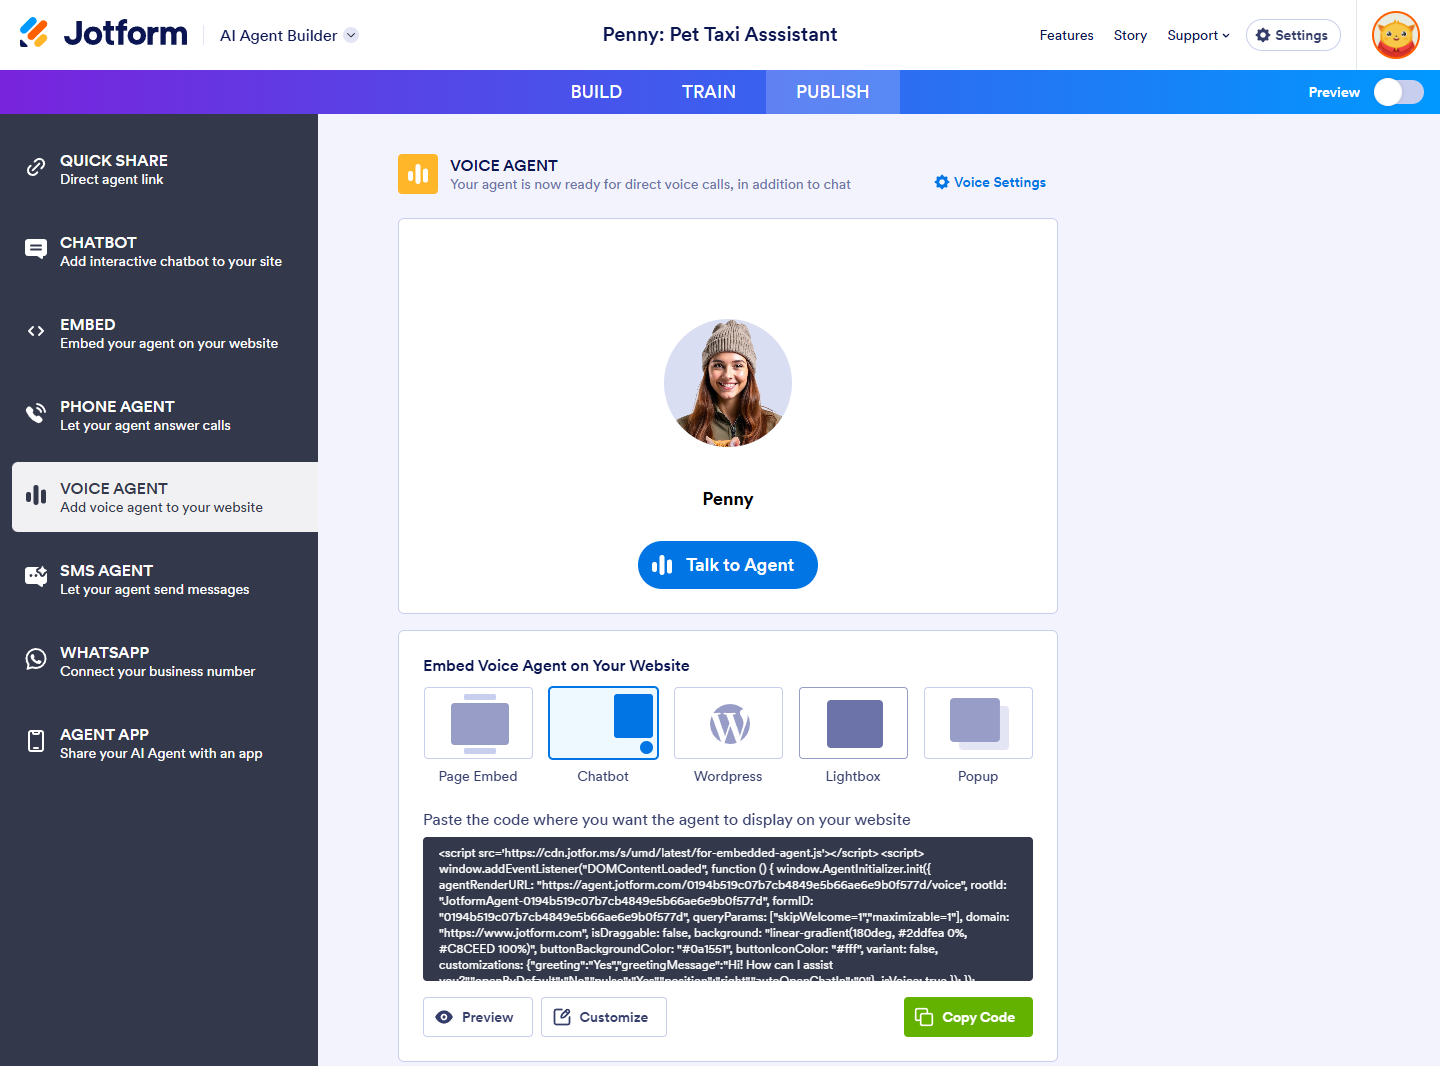
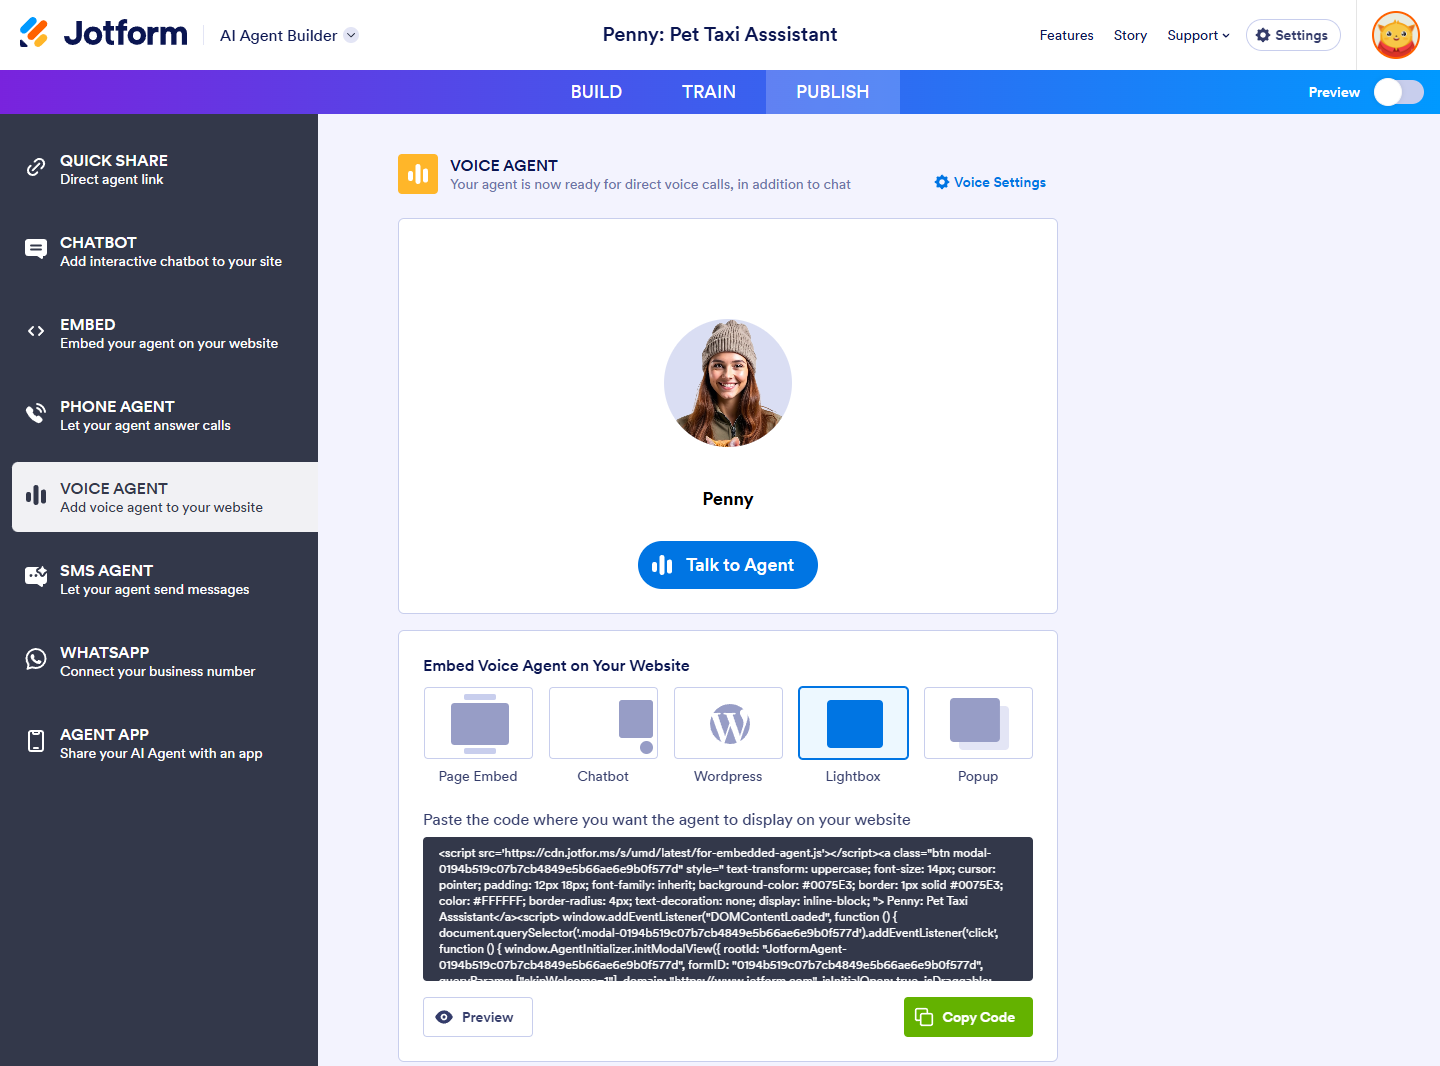
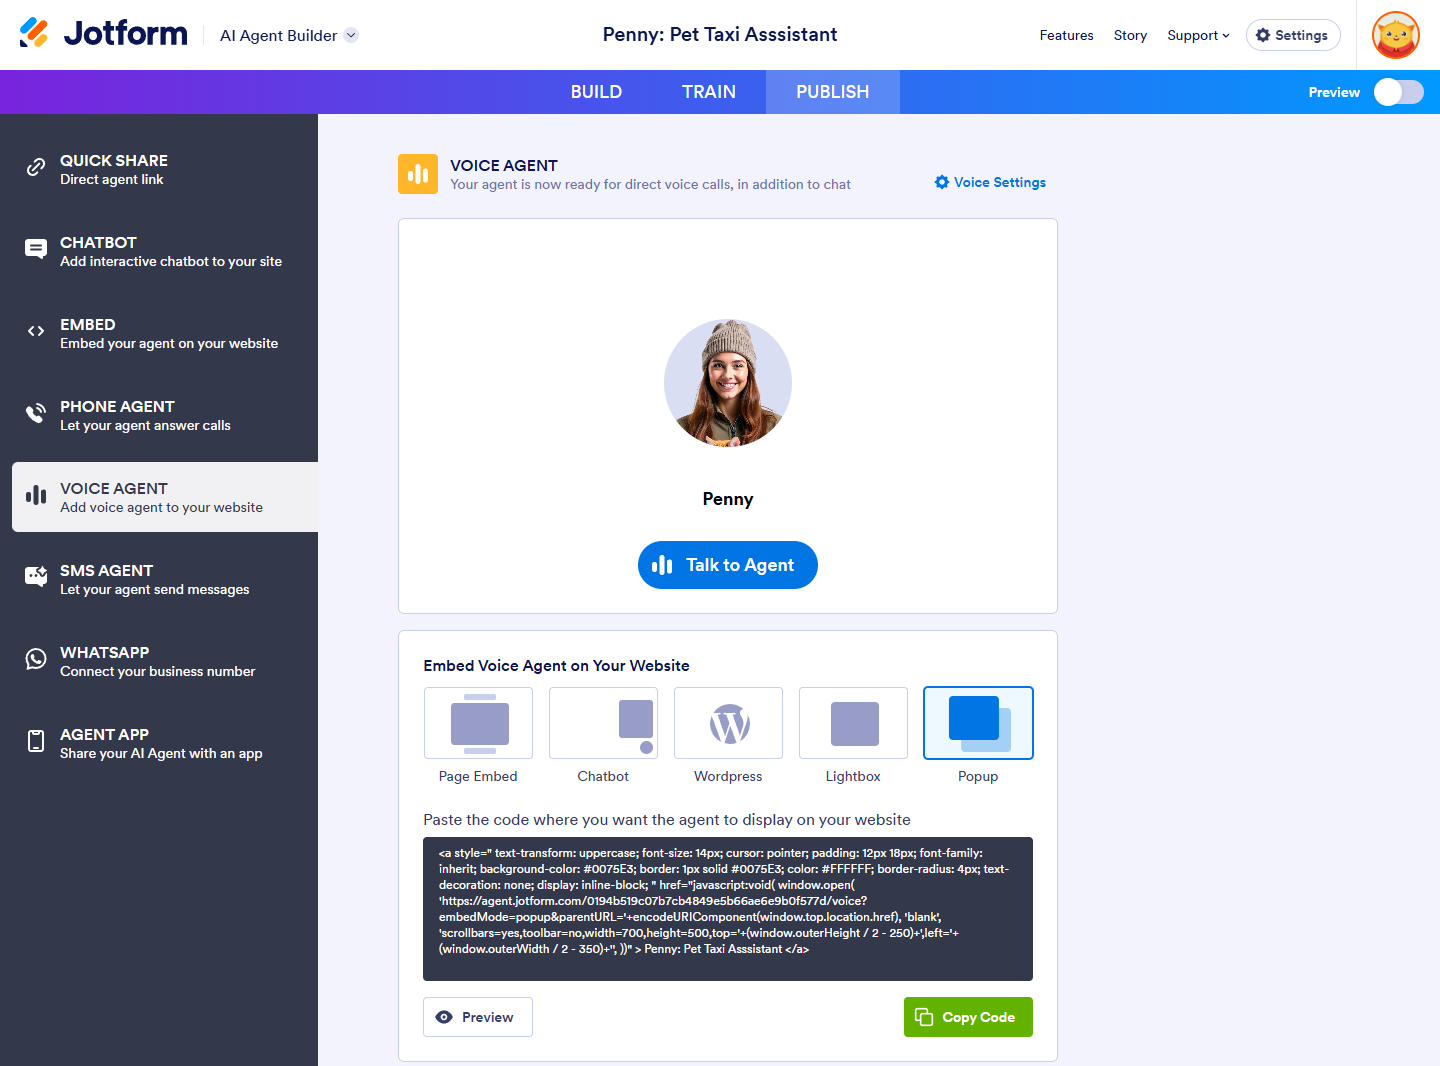
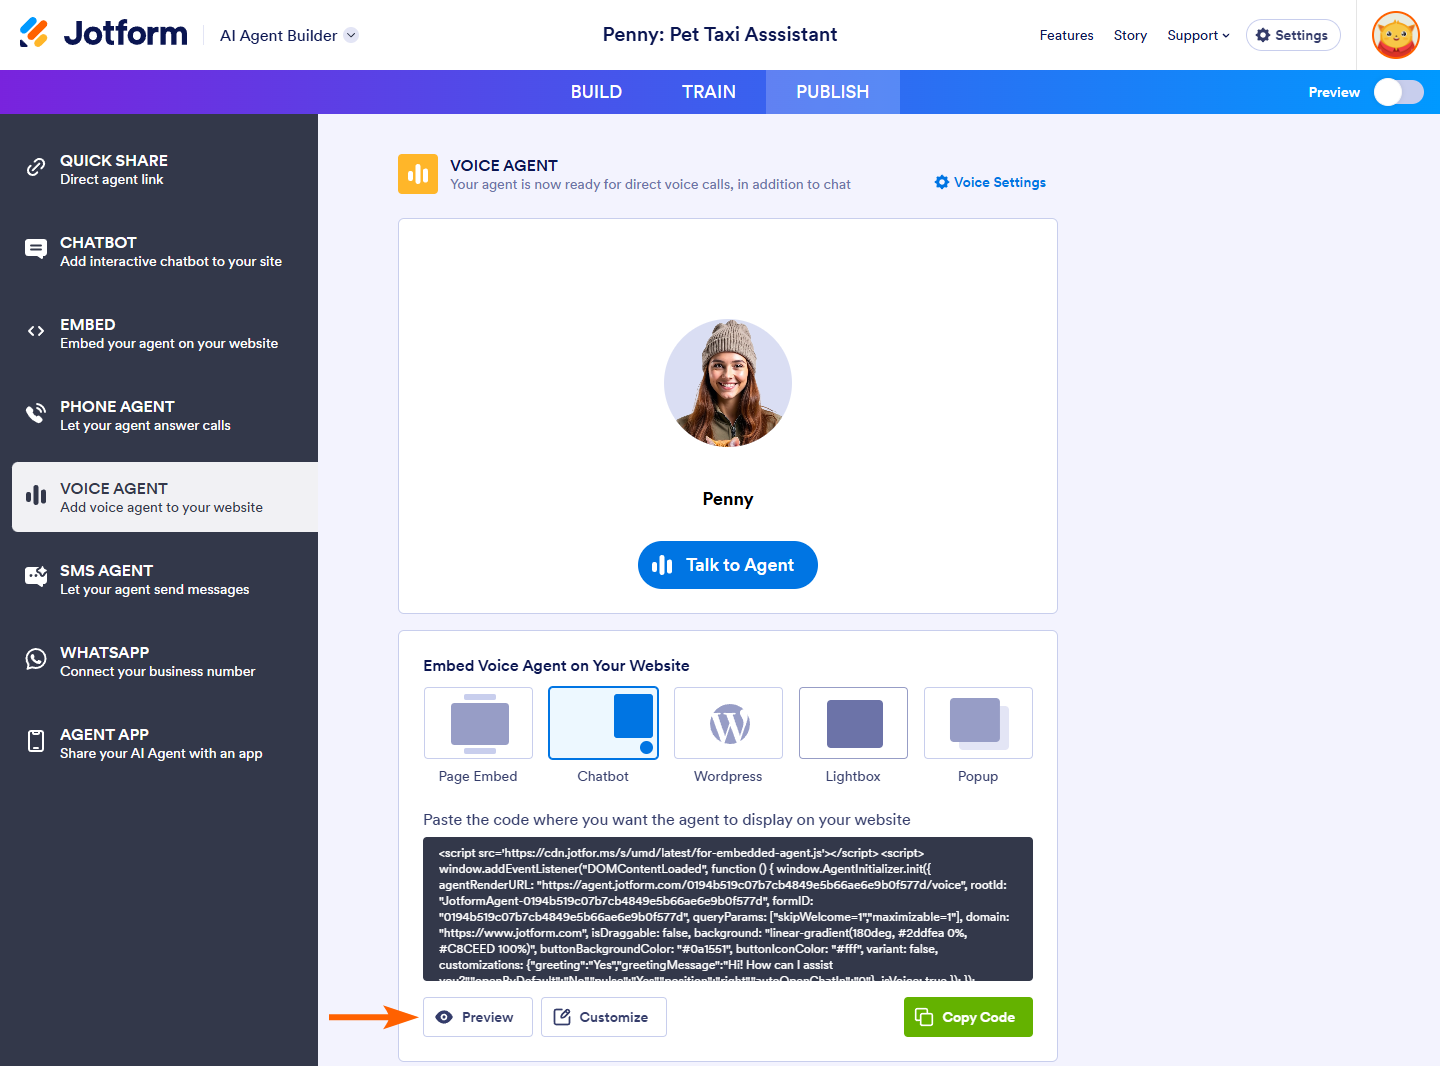
- On the right, select an embed type under the Embed Voice Agent on Your Website section.
- Then, click on Copy Code at the bottom and paste the code into your website’s source code to display your AI voice agent.

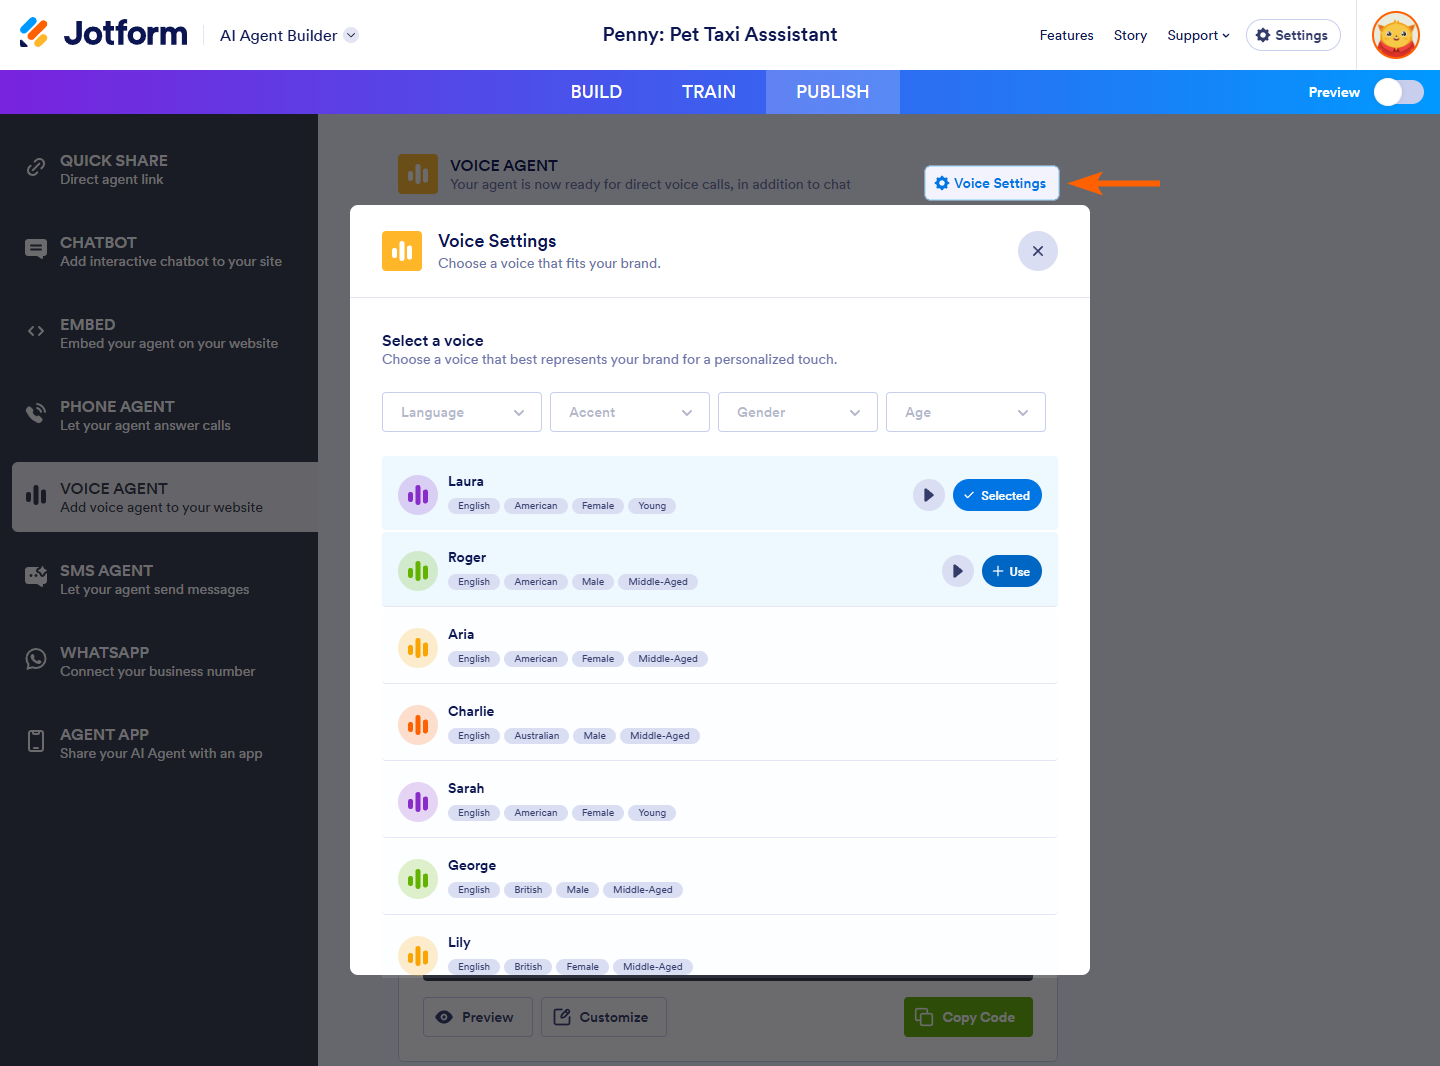
Choosing AI Agent’s Voice
You can choose a voice that best fits your brand for a personalized AI agent experience anytime. Click on the Voice Settings button at the top of the Voice Agent section in the Publish tab of the AI Agent Builder to see which voice is selected. Click on the Play icon to preview it. To switch voices, hover over another option and click on the Use button.
Note
Any changes made in Voice Settings automatically apply to the embedded AI voice agent.
Selecting the Best Embed Option
Choose an embedding method that fits your website’s design and user experience. Each option offers a different way for visitors to interact with the AI agent.
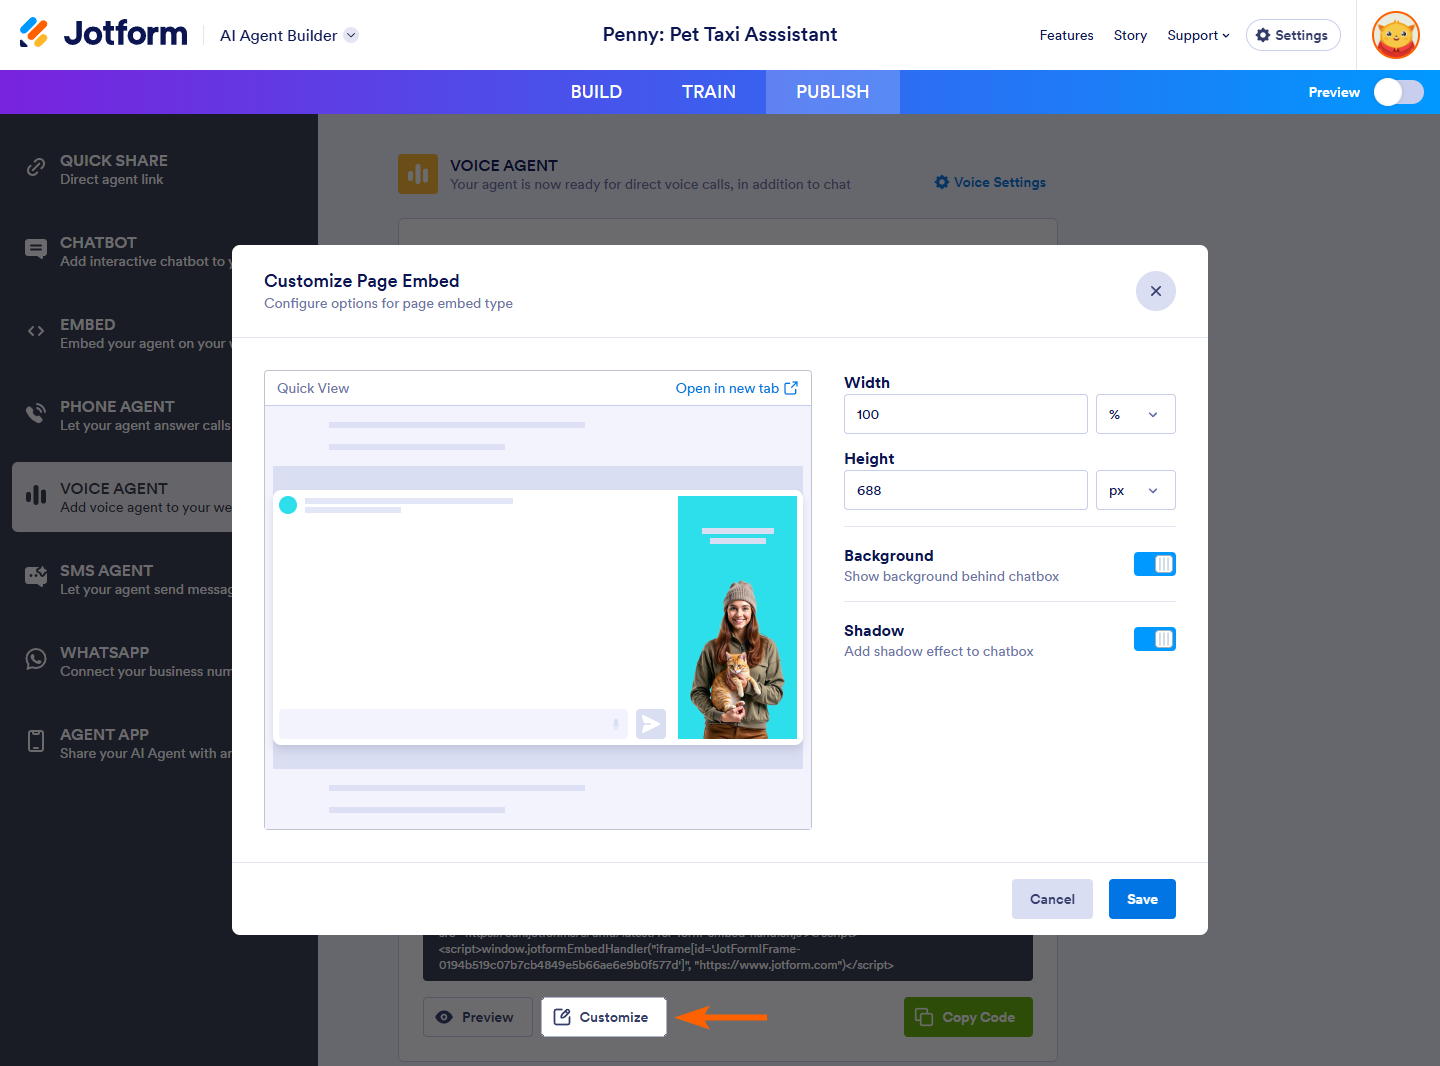
Page Embed
Placing the AI voice agent directly on your webpage makes it a built-in feature of the site. This setup keeps the agent readily available whenever visitors navigate the page.

The Customize button for this embed type opens the Customize Page Embed window, where you can adjust the width and height of the chatbox, add a background behind it, or apply a shadow effect.
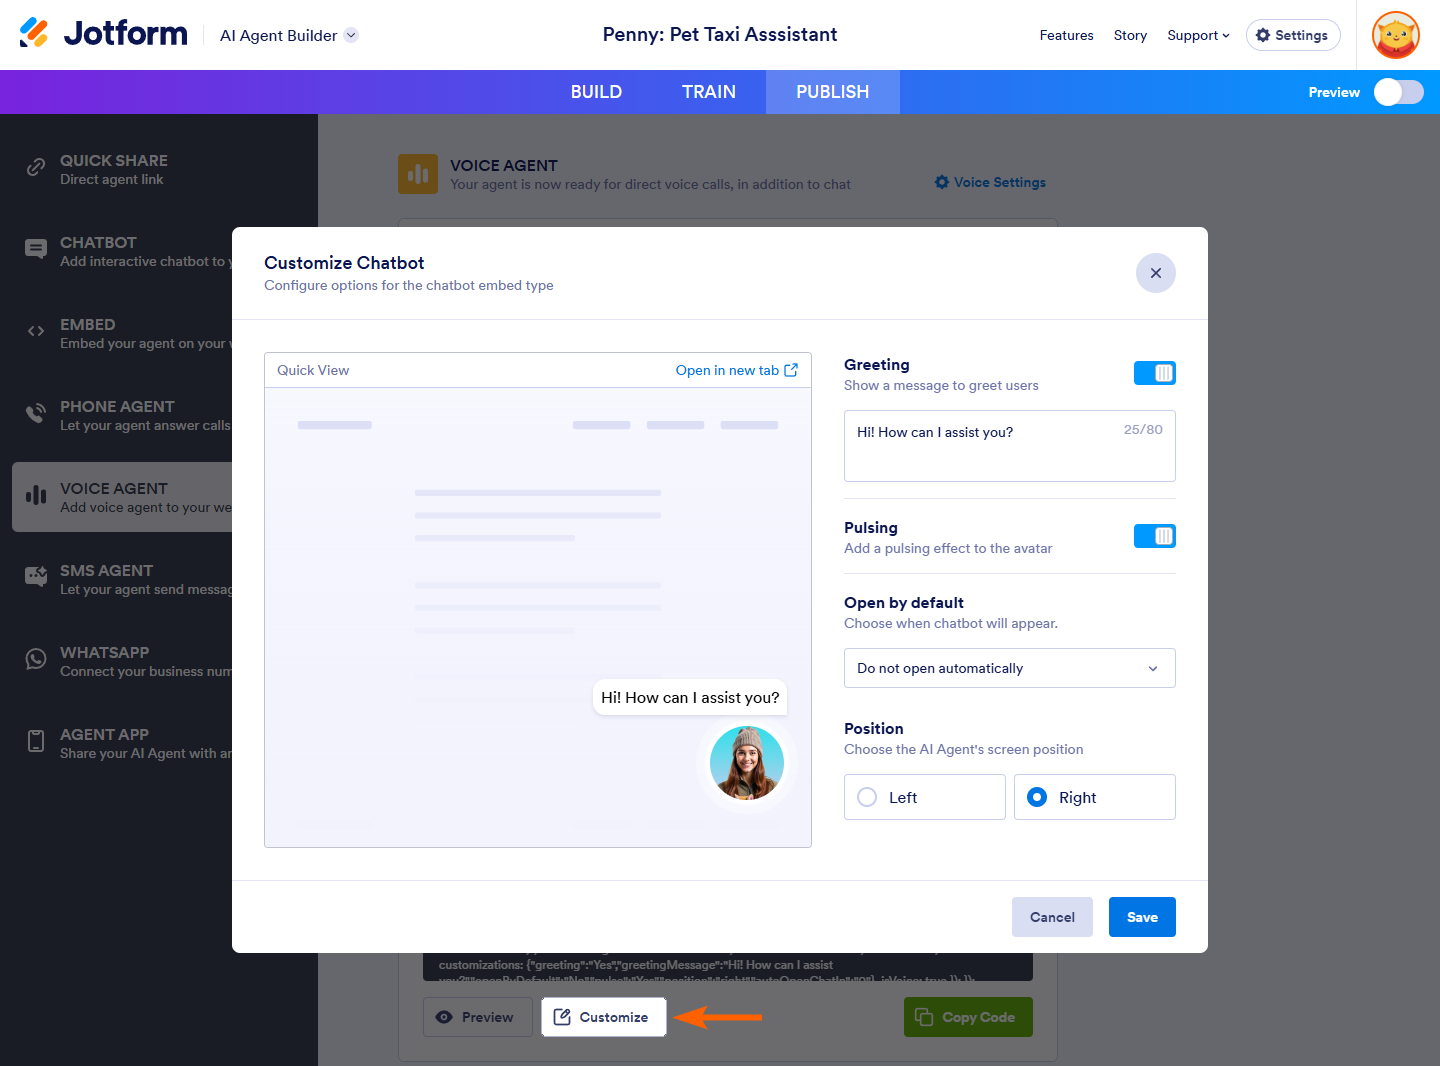
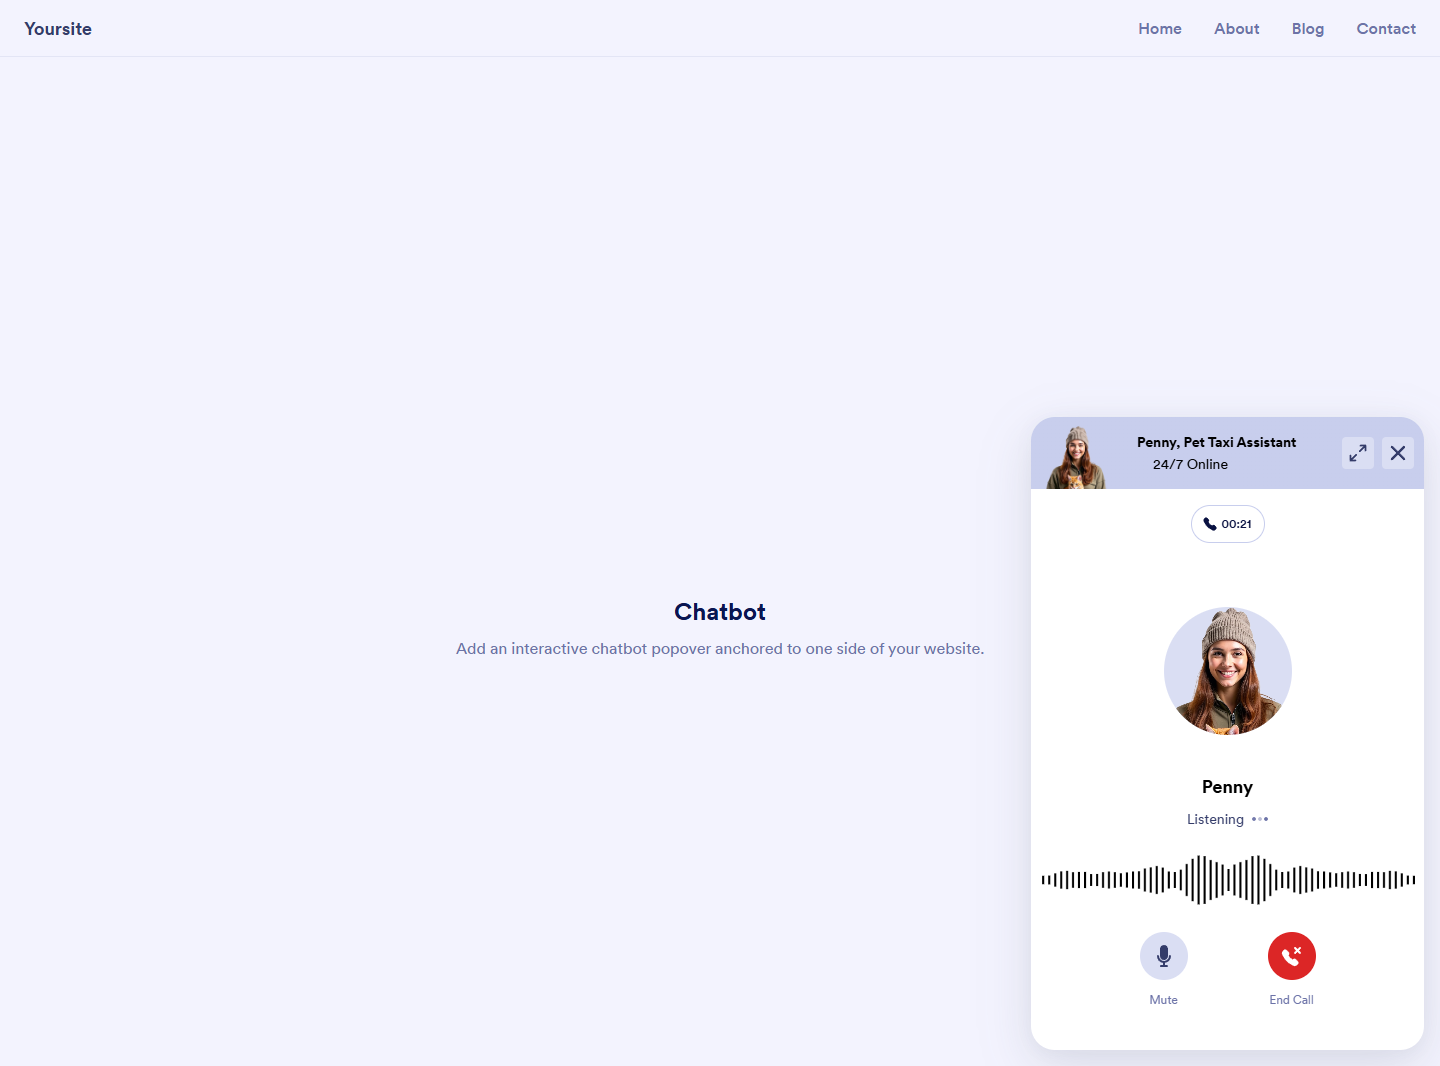
Chatbot
Setting up your AI voice agent as a chatbot enables real-time conversations. This setup keeps the agent accessible on demand, allowing visitors to interact with it whenever they need assistance.
The Customize button for this embed type opens the Customize Chatbot window, where you can enable and set up a greeting, add a pulsing effect to the agent’s avatar, and adjust when and where the chatbot appears.
Note
Click on the Save button in the Customize window for the Page Embed and Chatbot options to apply your changes. These updates won’t automatically reflect on your website, so you’ll need to re-embed your AI voice agent after making adjustments.
WordPress
Add the AI voice agent to your WordPress page or post using a short embed code. This method allows it to function smoothly within blogs, business pages, and online stores, enhancing user engagement.
Lightbox
Trigger the AI voice agent in a centered overlay with a dimmed or blurred background. When users click a button, the agent pops up on the screen, allowing them to interact without leaving the page. This setup ensures users engage fully with the agent before returning to the main page.
Popup
Open the AI voice agent in a popup window when users click a button. This setup offers quick assistance without interrupting the browsing experience.
The Preview button, available for certain embed methods, lets you test how the AI agent looks and works before adding it to your site.
Notes
Embedded AI voice agents will require users to sign up or log in to their Jotform account when the AI Agent’s access setting is set to Private or Company Access. For more details, see How to Share Your Agent.


Send Comment:
1 Comments:
1 days ago
Can I embed my al agent I created to my jot form app I created