Integrating Jotform AI Agents with Google Calendar allows you to automate scheduling, set up event reminders, and streamline appointment management. This ensures your team stays organized and never misses an important event.
Integrating Google Calendar with Your AI Agent
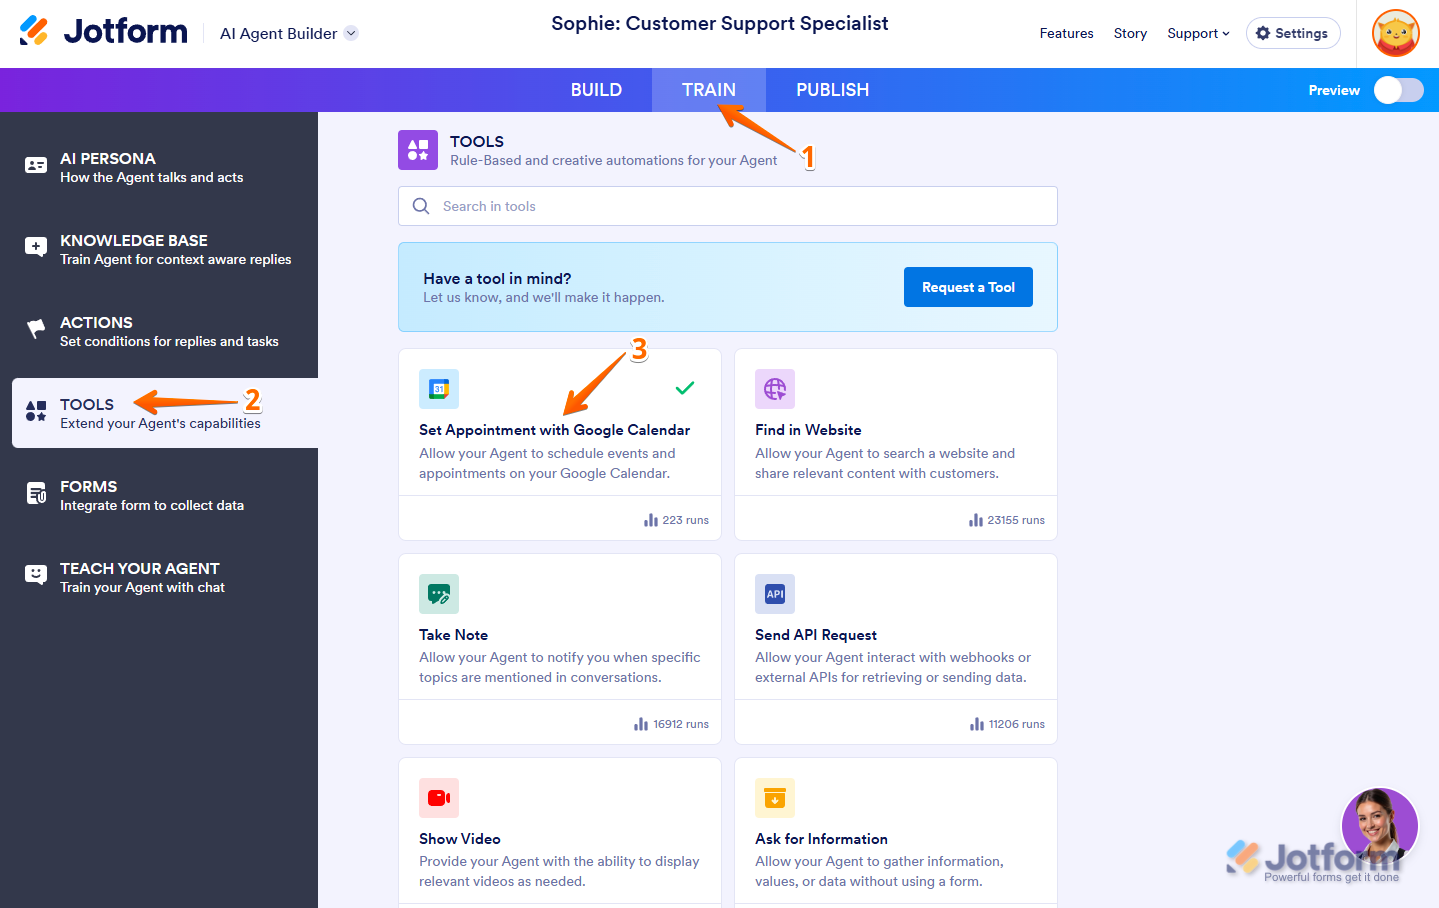
Integrating your Google Calendar with your AI Agent is easy. Let’s do it:
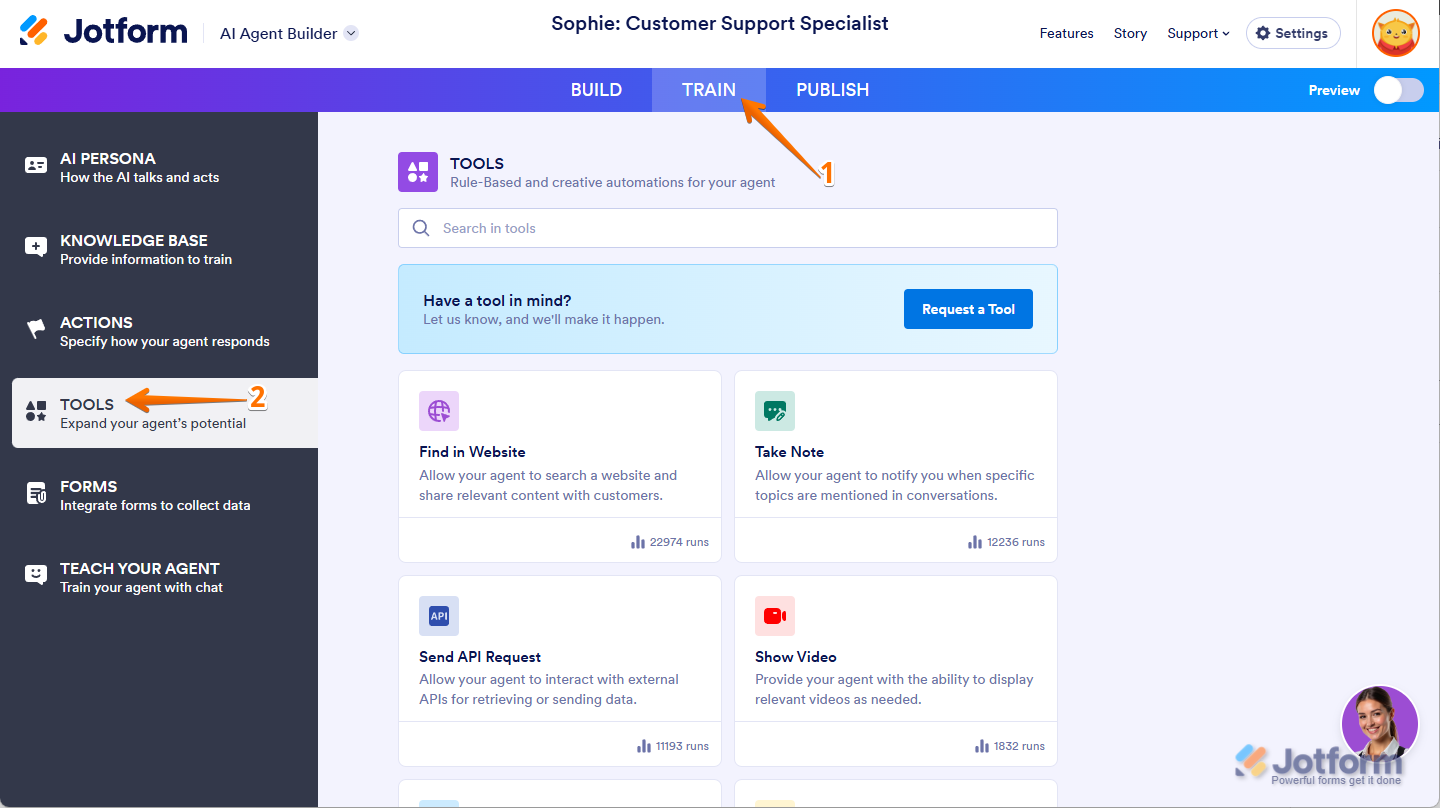
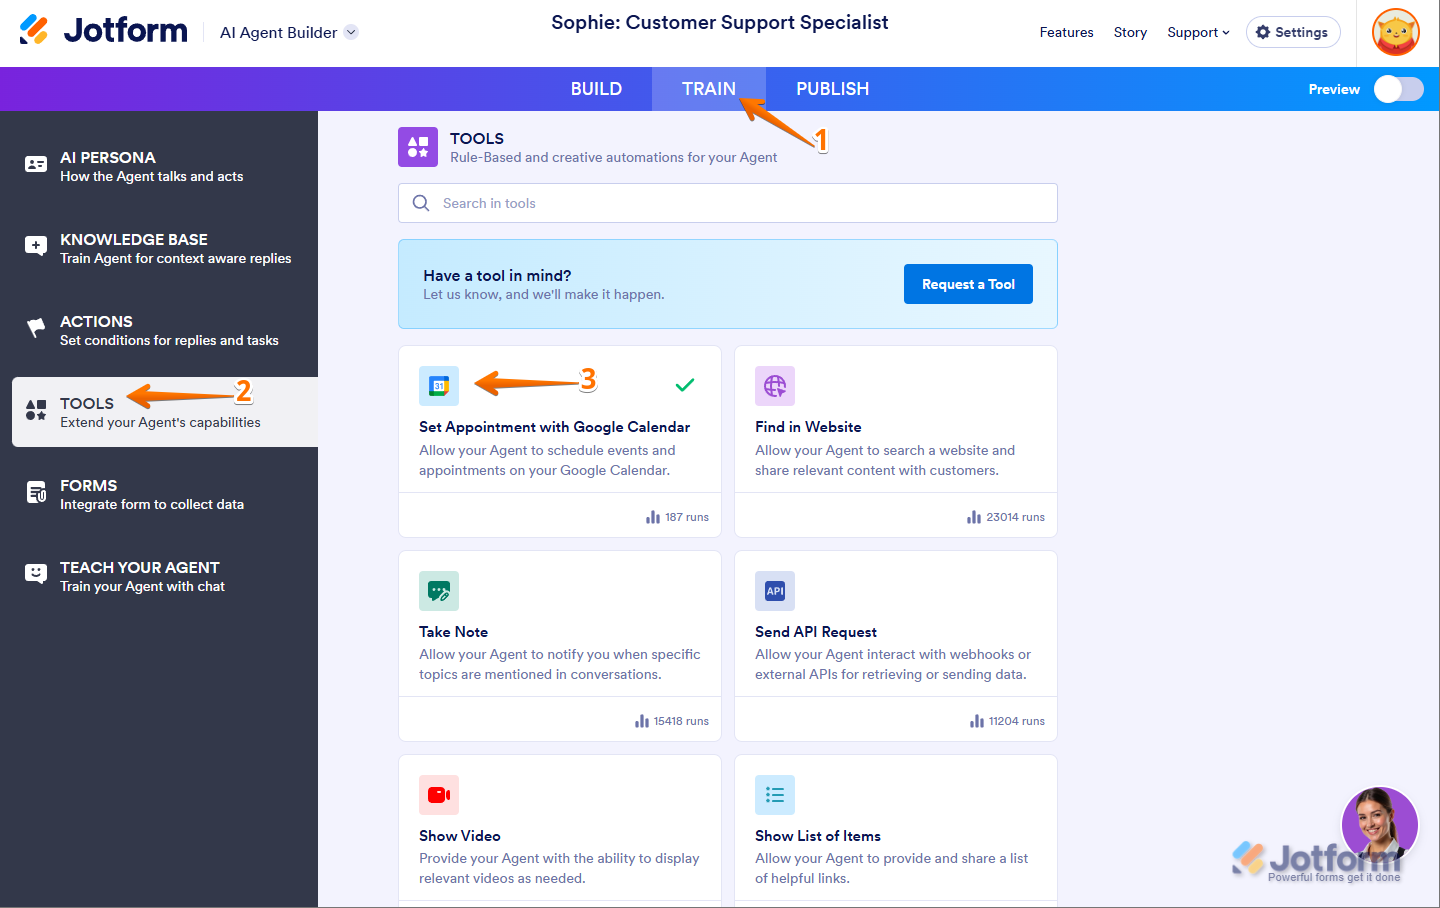
- In Agent Builder, in the blue navigation bar at the top of the page, click on Train.
- In the menu on the left side of the page, click on Tools.
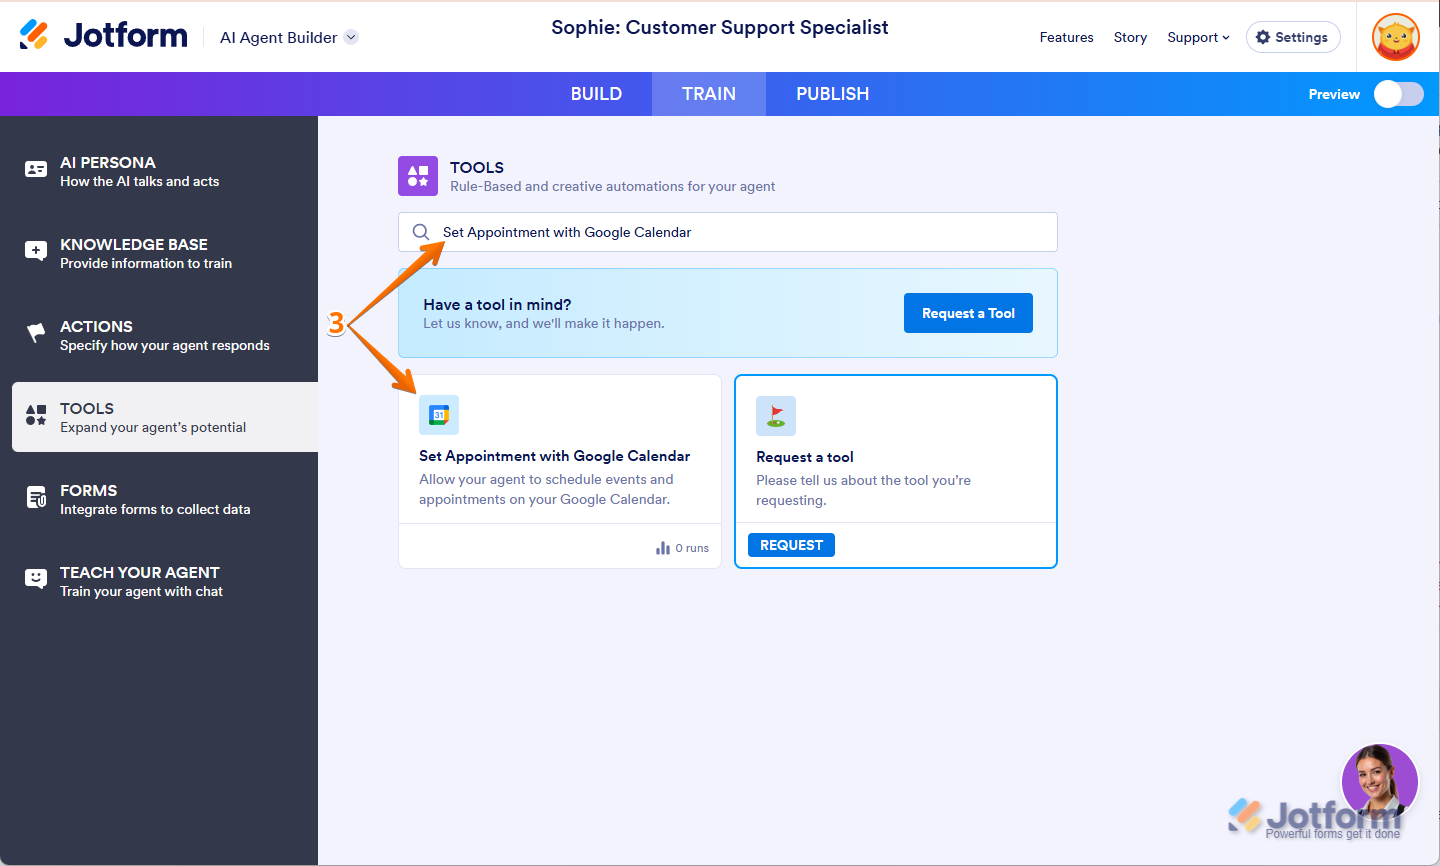
- Then, search for Set Appointment with Google Calendar at the top of the Tools section, and click on it.
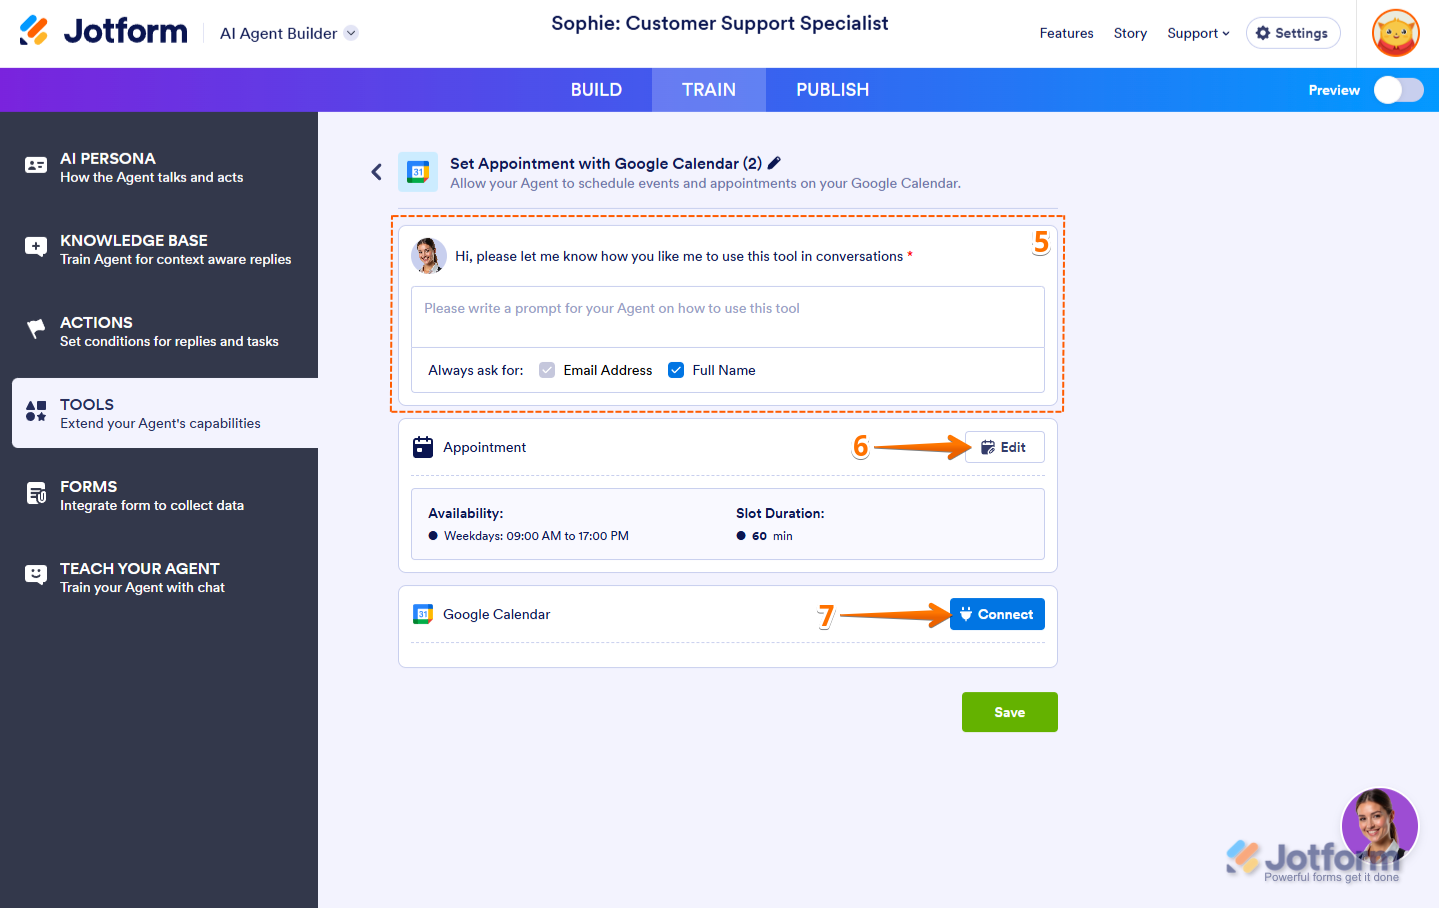
- Write a Prompt for your agent about how to use the tool, for example: “When a user requests to schedule an event, collect key details: event name, date, time, and location”, and then under the Prompt box, select Always Ask For.
- Next, click on the Calendar Edit icon to set up your Appointment Settings.
- Then, click on Connect.
Note
The Email Address option in Always Ask For is locked in and can’t be changed, as it’s required for this tool.
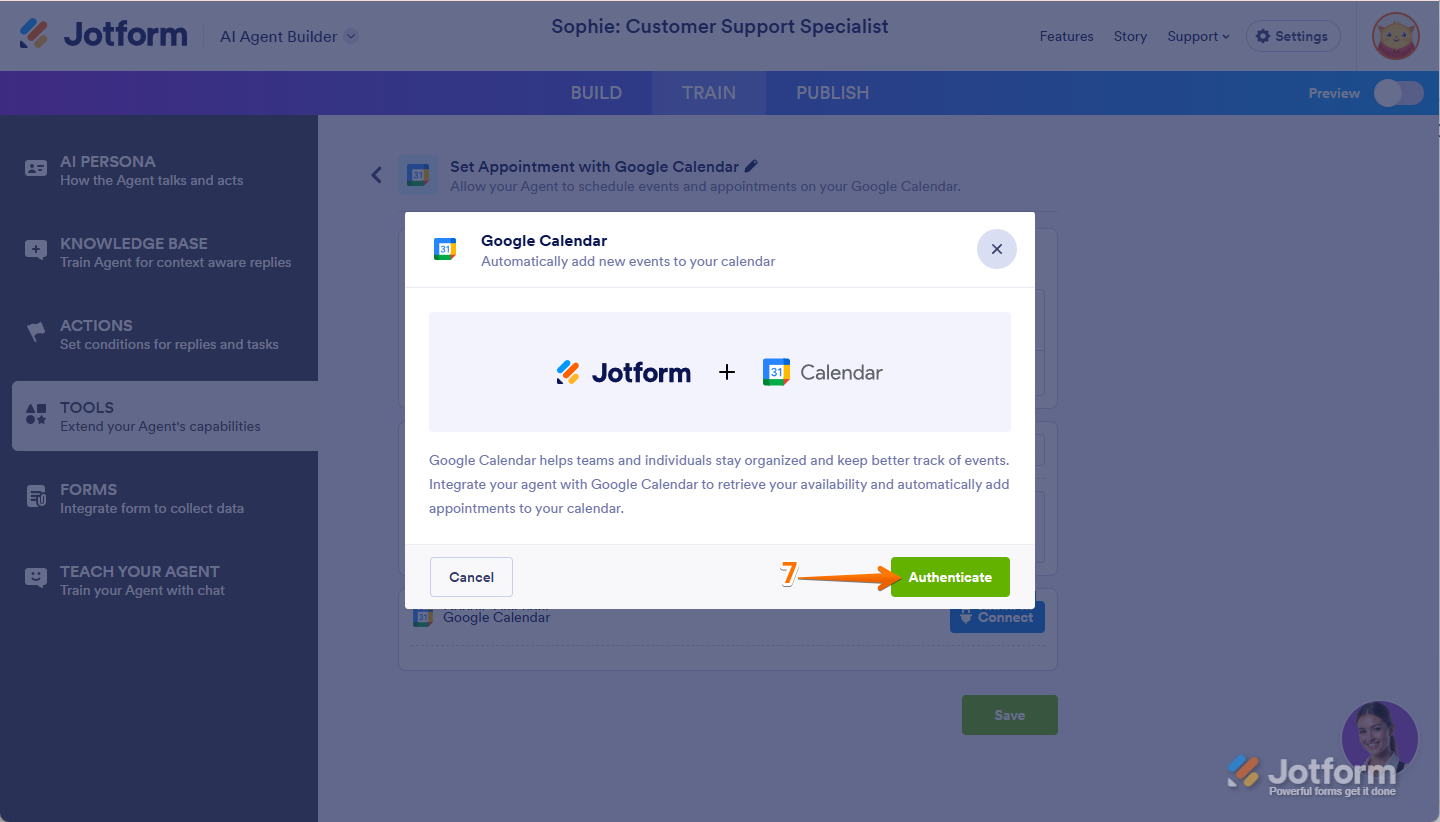
- In the window that opens, click on Authenticate, and then connect your Google Calendar Account.
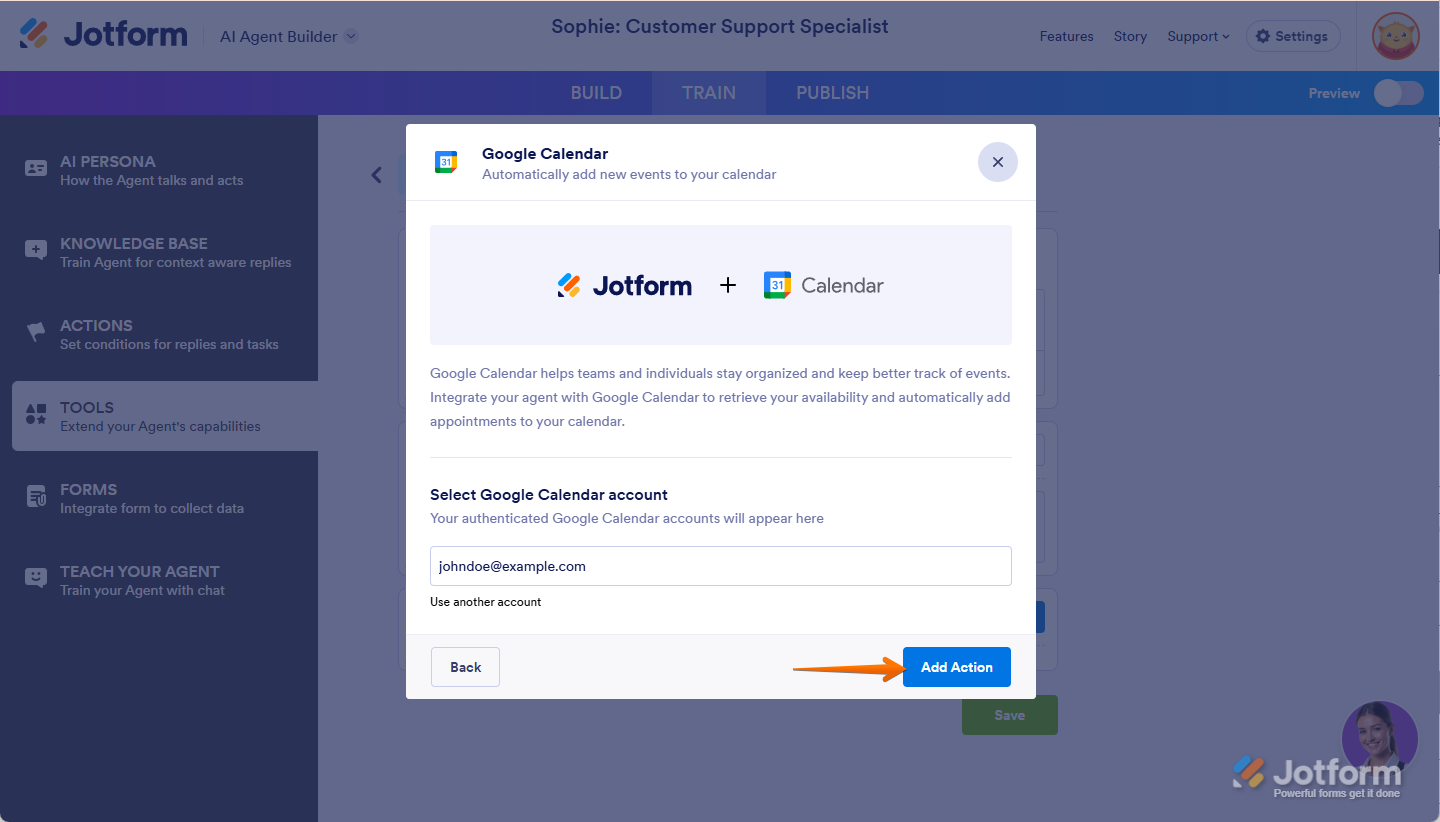
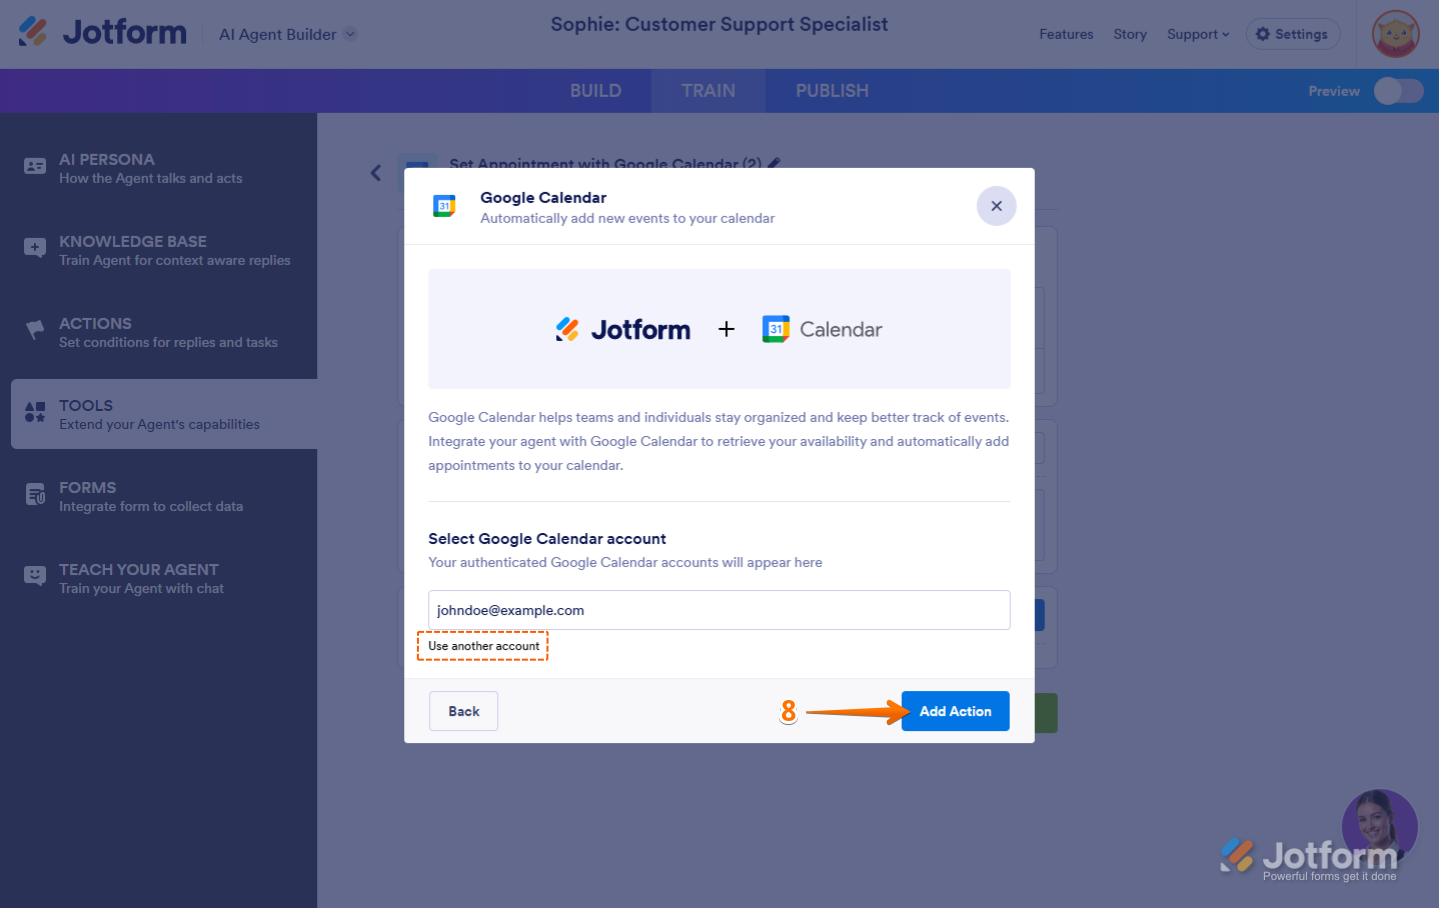
For previously authenticated accounts, choose the account you want to use, and then click on Add Action.
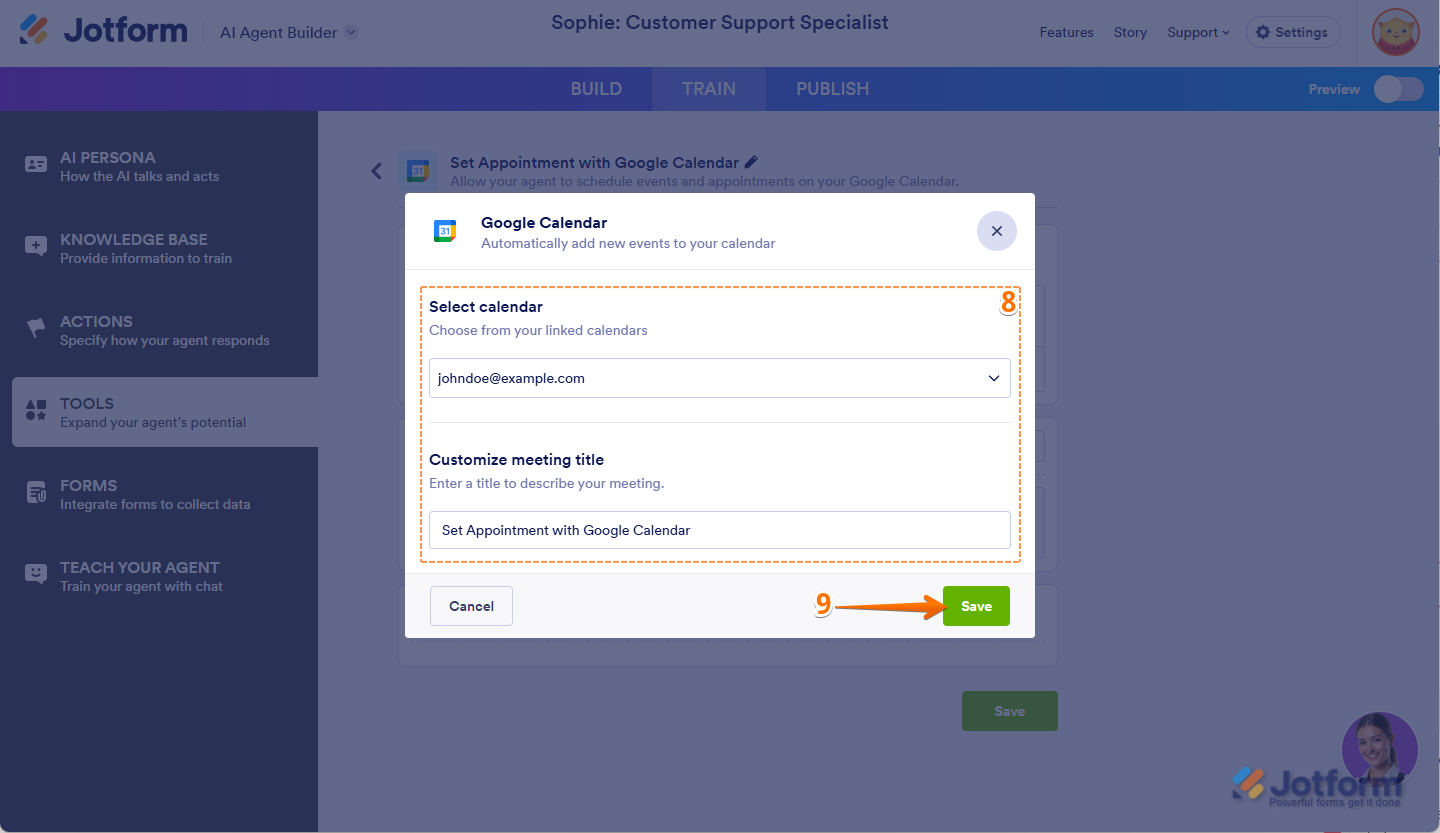
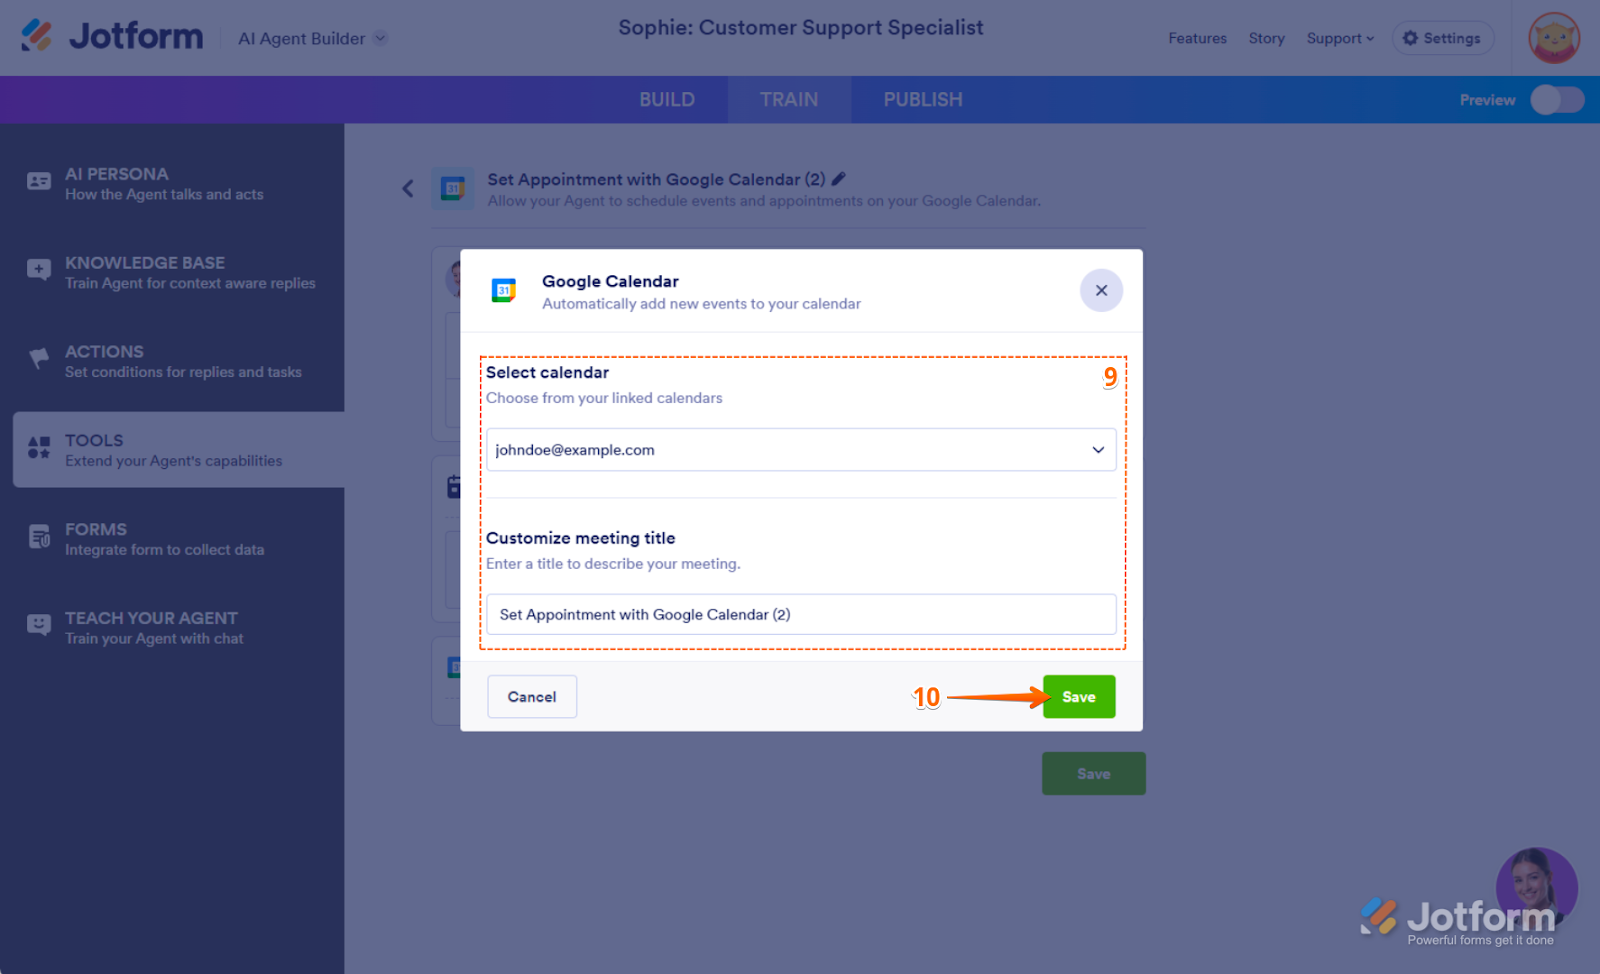
- Here’s how to set up your integration:
- Select Calendar — Select the Calendar account where the event or meeting will be scheduled.
- Customize Meeting Title — Set a clear and relevant title for the meeting.
- Then, click on Save.
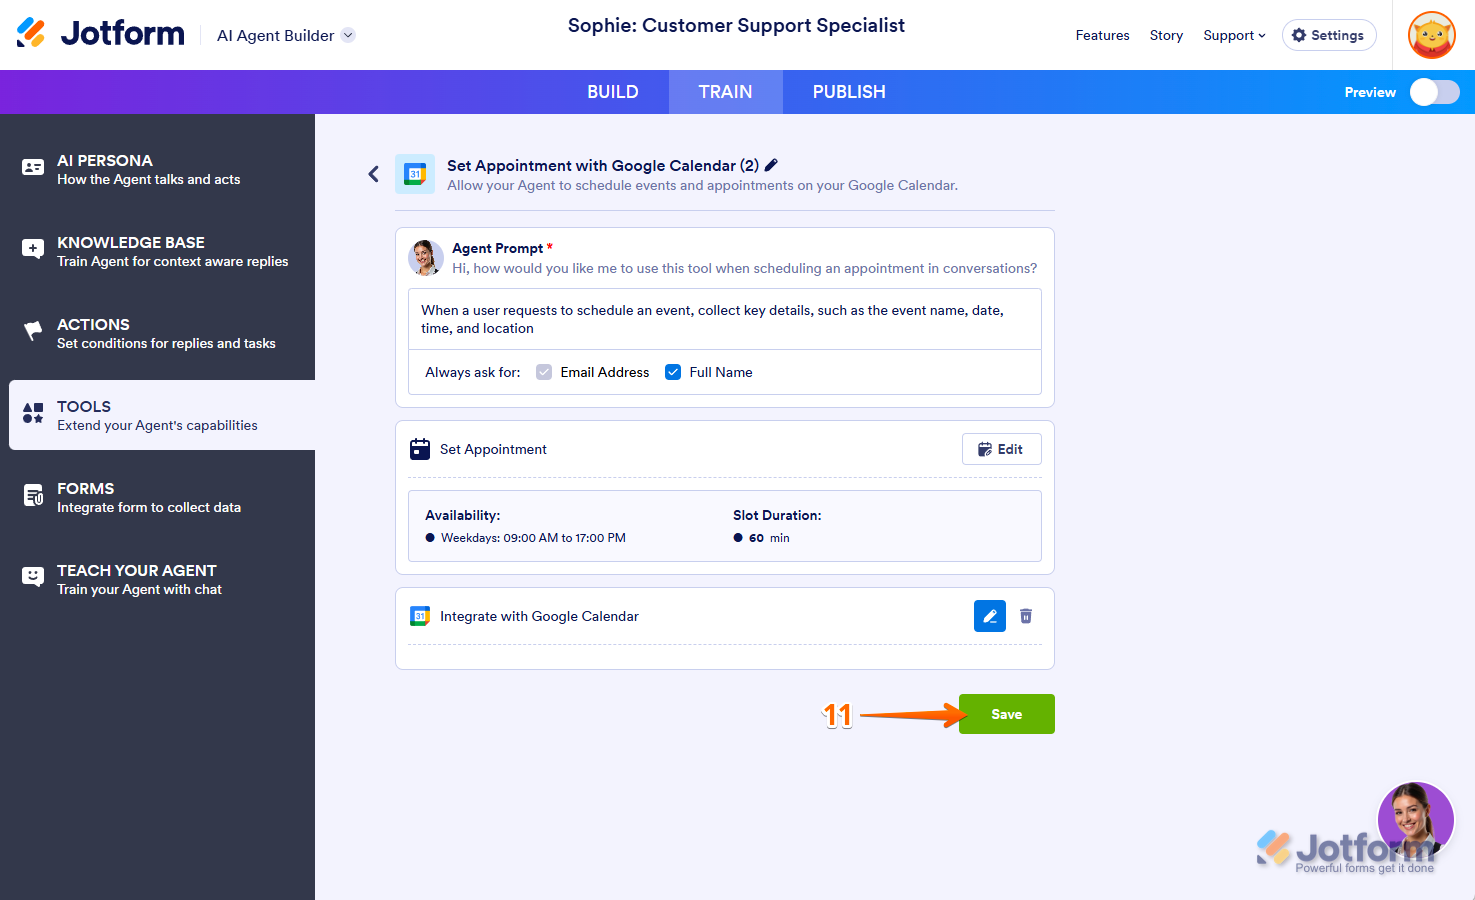
- Now, just click on Save button again, and you’re all set.
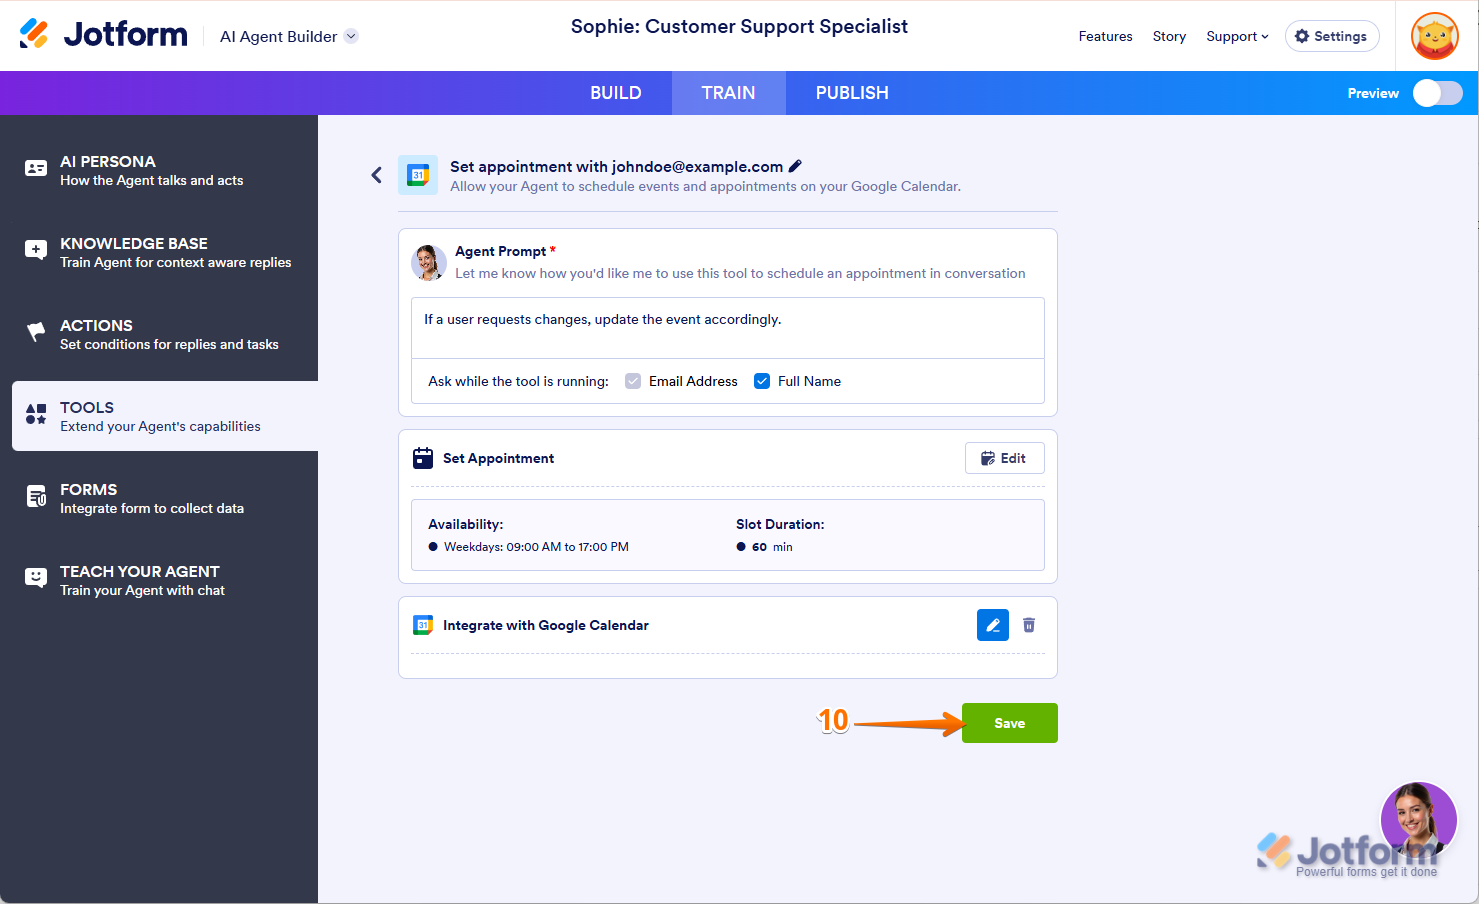
That’s it. Your Google Calendar is now set up and ready to add the appointment.
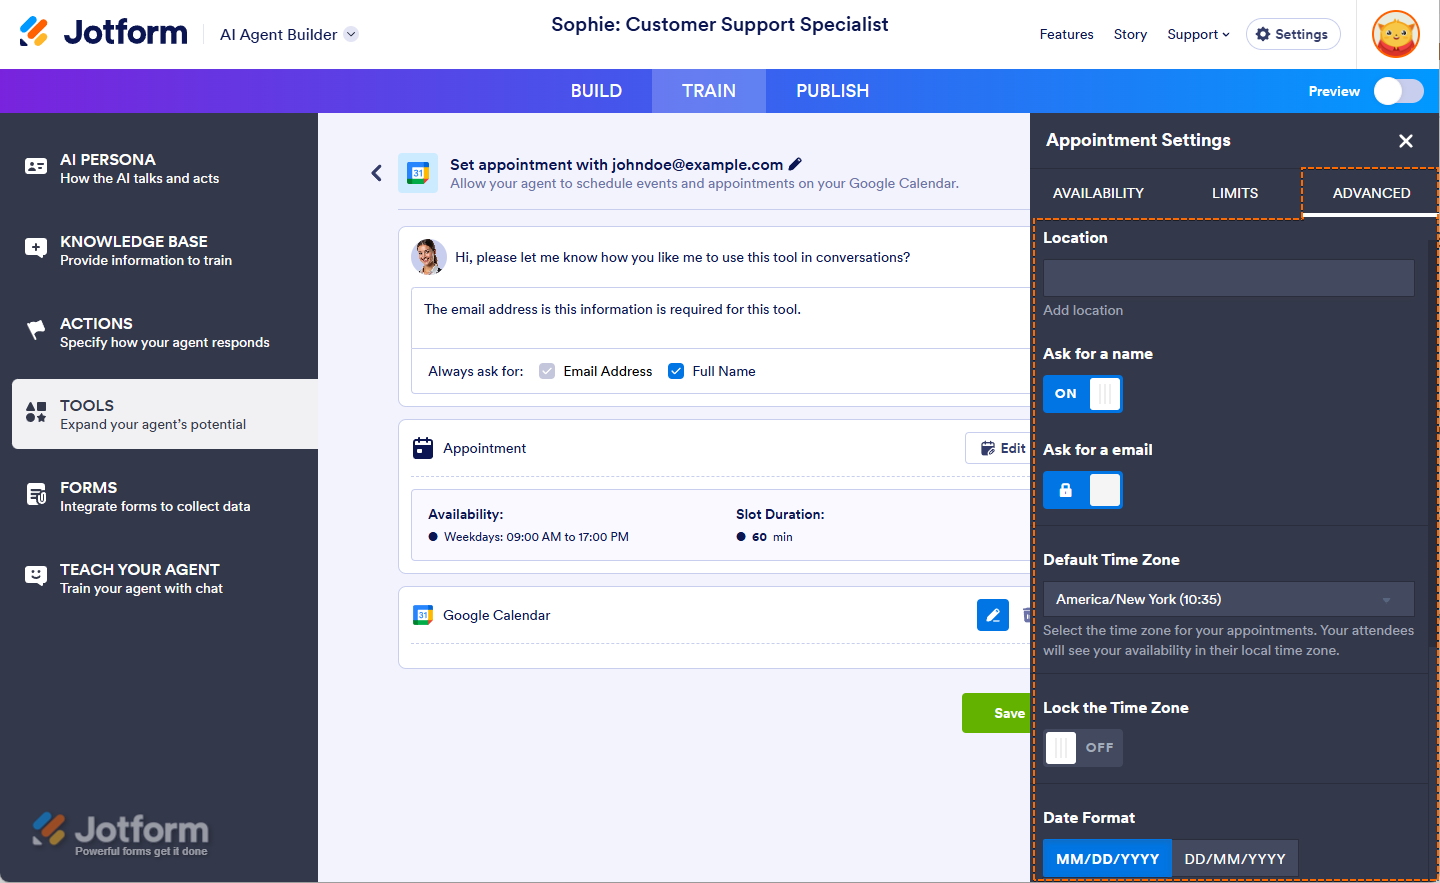
Setting Up Your Appointment Settings
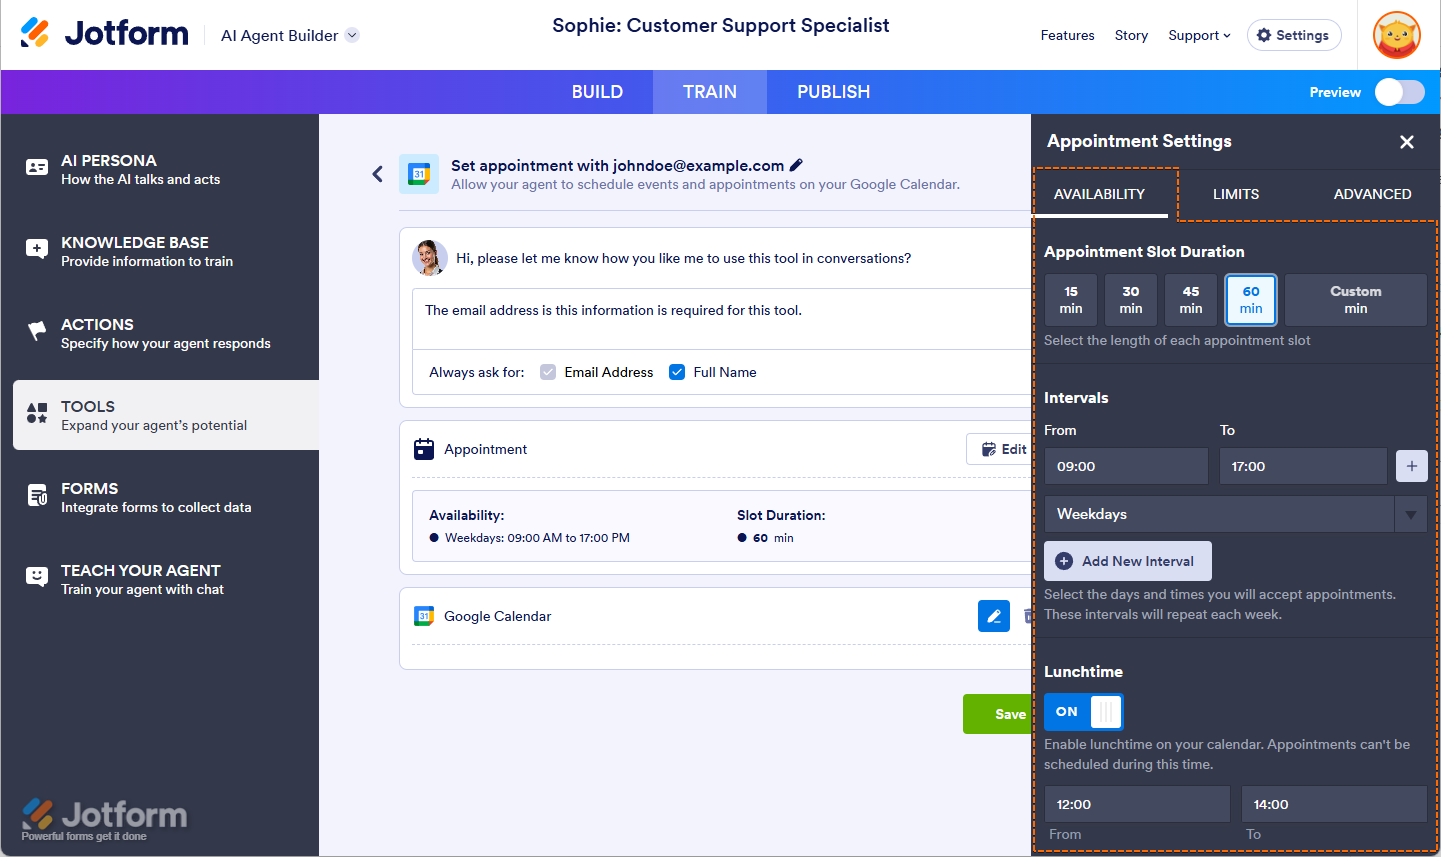
The Appointment Settings section includes three tabs: Availability, Limits, and Advanced. Each tab allows you to customize scheduling preferences to fit your needs.
Availability Tab
Under the Availability tab, you can configure the key settings for your appointment scheduling:
- Appointment Slot Duration — Set the duration for each appointment slot based on what you need (e.g., 30 minutes, 1 hour).
- Intervals — Define the time intervals between each appointment (e.g., 15 minutes, 30 minutes).
- Lunchtime — Block out a lunchtime break to prevent appointments from being scheduled during that time.
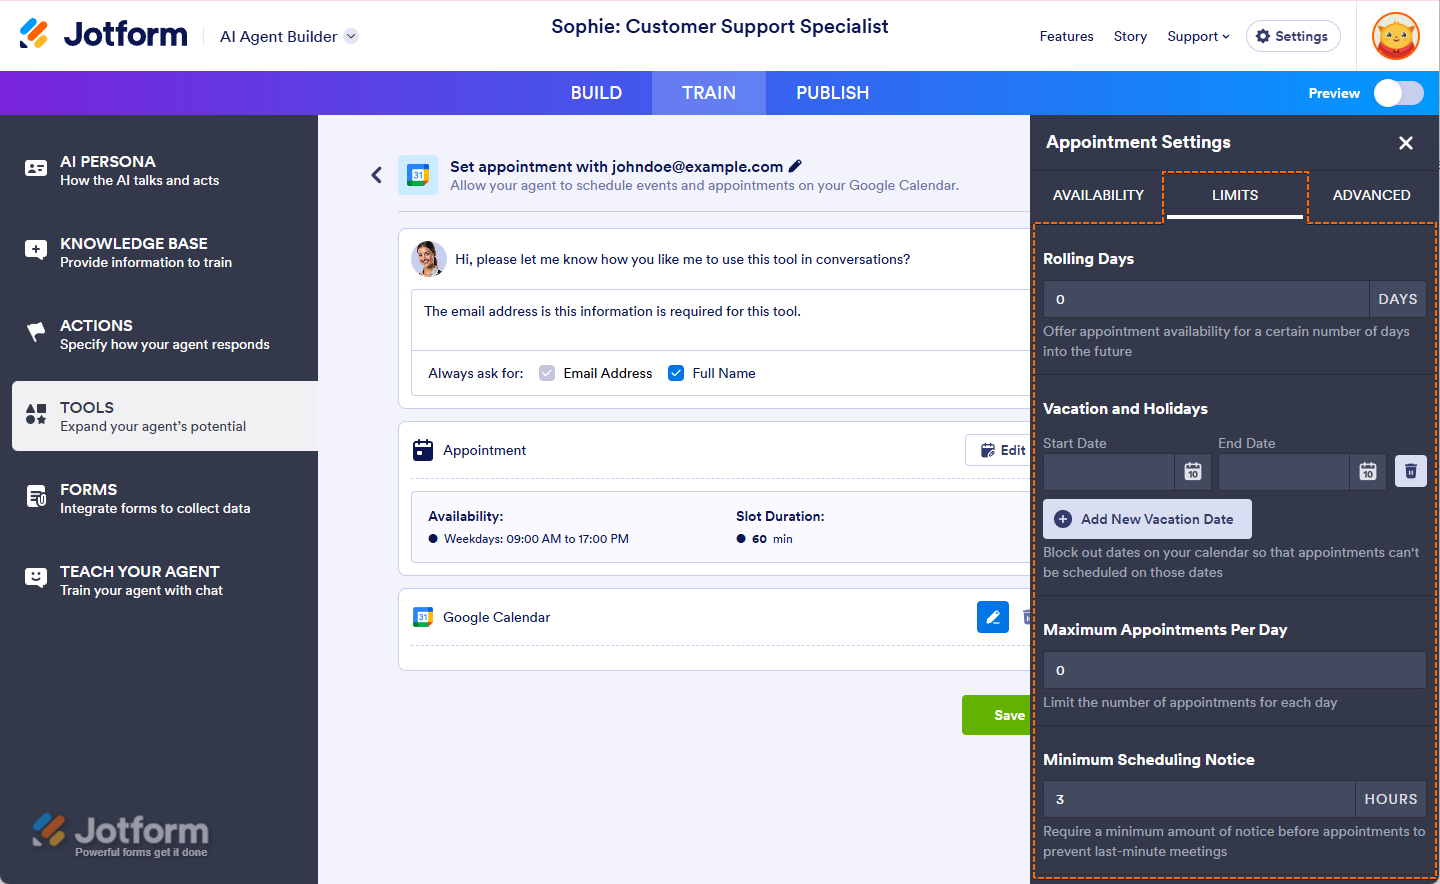
Limits Tab
Under the Limits tab, you can set important rules for appointment scheduling:
- Start & end date — Define the range of dates within which users can schedule appointments.
- Rolling days — Set the number of days in advance that users can book appointments, helping you manage availability effectively.
- Vacation and holidays — Mark vacation days or holidays when users cannot schedule appointments, ensuring your calendar reflects your time off.
- Maximum appointments per day — Set a limit on how many appointments users can book in a single day, preventing overbooking.
- Minimum scheduling notice — Specify the minimum notice required for an appointment to be scheduled (e.g., 24 hours in advance).
Advanced Tab
The Advanced tab provides additional customization options for your appointments:
- Location — Specify the location where the appointment will take place, whether it’s in-person or virtual (e.g., a meeting room, Zoom link).
- Ask for name — Toggle the option to prompt users for their name when booking an appointment.
- Ask for email — This option is locked in to ensure users provide their email addresses for confirmation and reminders.
- Default time zone — Set a default time zone for your appointments to ensure that booking times are consistent.
- Lock time zone — Lock the time zone setting to avoid confusion for users in different regions.
- Date format — Choose the preferred format for displaying dates (e.g., MM/DD/YYYY or DD/MM/YYYY) based on your regional or personal preference.
- Start week on —Select the day your calendar week should begin, such as Sunday or Monday, to match your workflow or regional settings.
- Time format — Set the time format to either 12-hour (AM/PM) or 24-hour based on your preference and audience needs.
Adding a New Google Calendar Action to the AI Agent
You can set up multiple Google Calendar Actions for your AI Agent and connect each one with the same or a different Slack account and use the same or different prompts for each one. Here’s how to do that:
- In Agent Builder, in the blue navigation bar at the top of the page, click on Train.
- In the menu on the left side of the page, click on Tools.
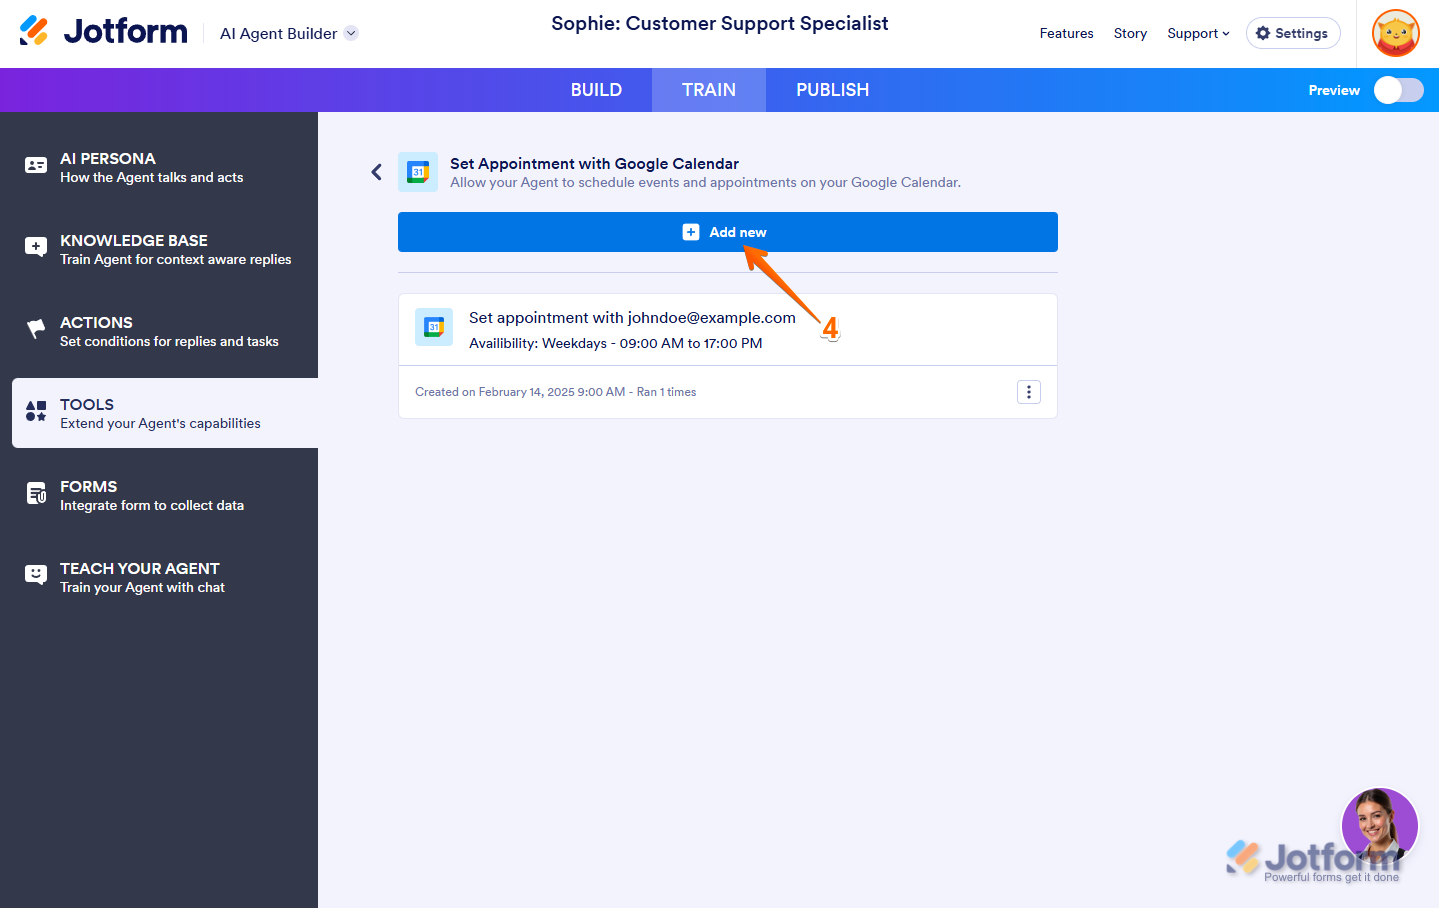
- Then, click on Set Appointment with Google Calendar.
- Next, click on the Add New button at the top.
- Write a Prompt for your agent about how to use the tool, for example: “When a user requests to schedule an event, collect key details, such as the event name, date, time, and location”, and then under the Prompt box, select Always Ask For.
- Next, click on the Calendar Edit icon to set up your Appointment Settings.
- Then, click on Connect.
- Choose an email address from the dropdown to use a saved Slack account and click on the Add Action button on the right. Or, click on Use Another Account below the dropdown to log in and grant the integration access to a different Slack account.
- Here’s how to set up your integration:
- Select Calendar — Select the Calendar account where the event or meeting will be scheduled.
- Customize Meeting Title — Set a clear and relevant title for the meeting.
- Then, click on Save.
11. Now, just click on Save again, and you’re all set.
Managing Google Calendar Integration with AI Agent
Now that you’ve saved the integration, let’s go back to the main page:
- In Agent Builder, in the blue navigation bar at the top of the page, click on Train.
- In the menu on the left side of the page, click on Tools.
- Then, click on Set Appointment with Google Calendar.
Here, you’ll see the list of actions you created. Now, you can:
- Click the Three Dots icon on the right side of your Set Appointment with Google Calendar, and you’ll see these options:
- Rename Tool — Update the tool’s name for better clarity and organization.
- Disable Tool — Turn off the tool temporarily without removing it.
- Edit Tool — Adjust the tool’s settings to refine its functionality.
- Delete Tool — Remove the tool permanently from your integration.


Send Comment: