Integrating Jotform AI Agents with Slack lets you send AI-generated conversations directly to your Slack channels. This keeps your team updated in real time, with streamlines communication, and ensures quick access to important discussions.
Integrating Slack with Your AI Agent
Integrating Slack with your AI Agent is easy. Let’s do it!
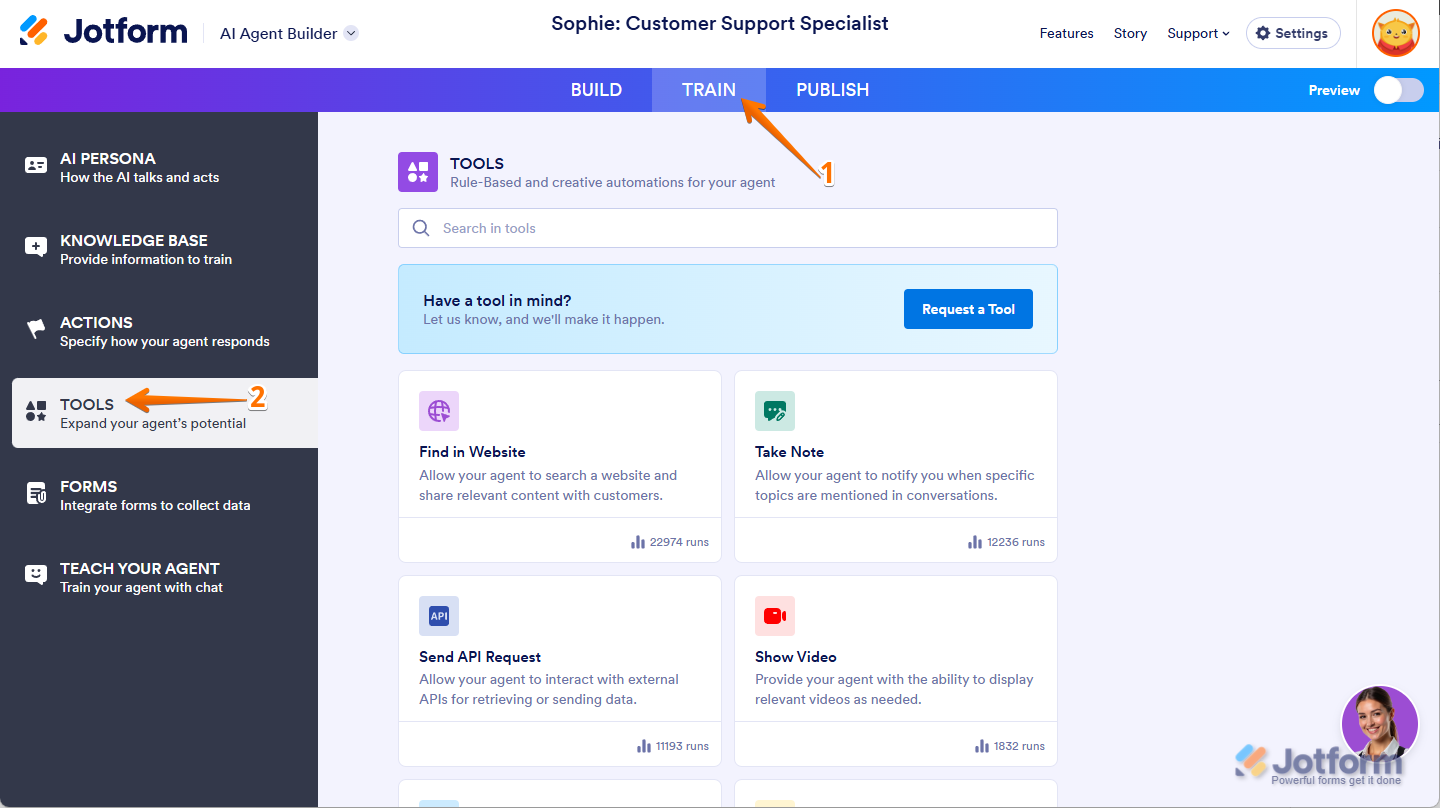
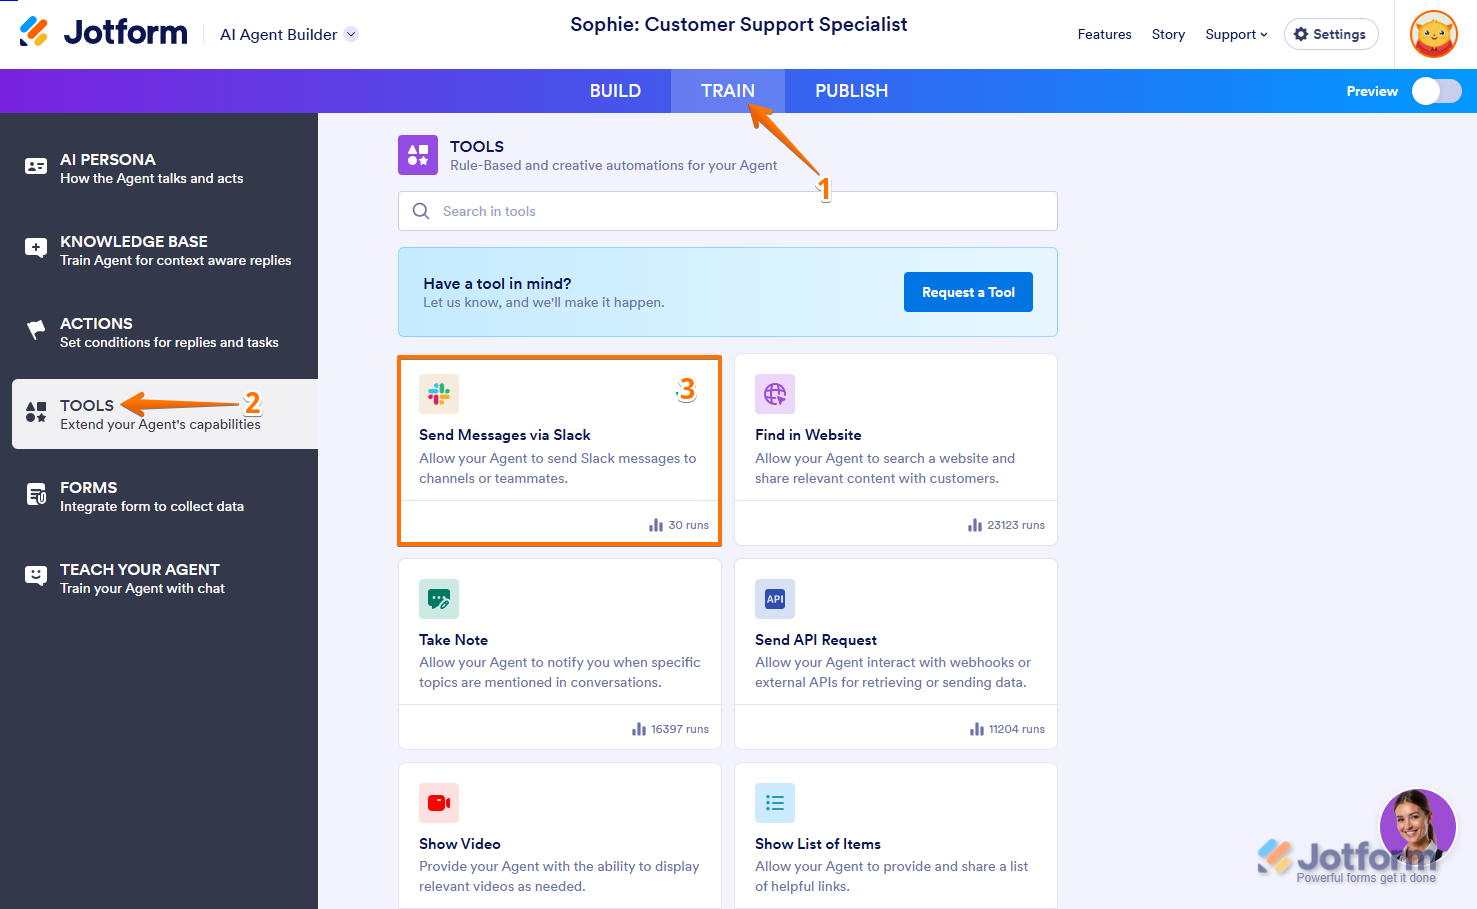
- In Agent Builder, in the blue navigation bar at the top of the page, click on Train.
- In the menu on the left side of the page, click on Tools.
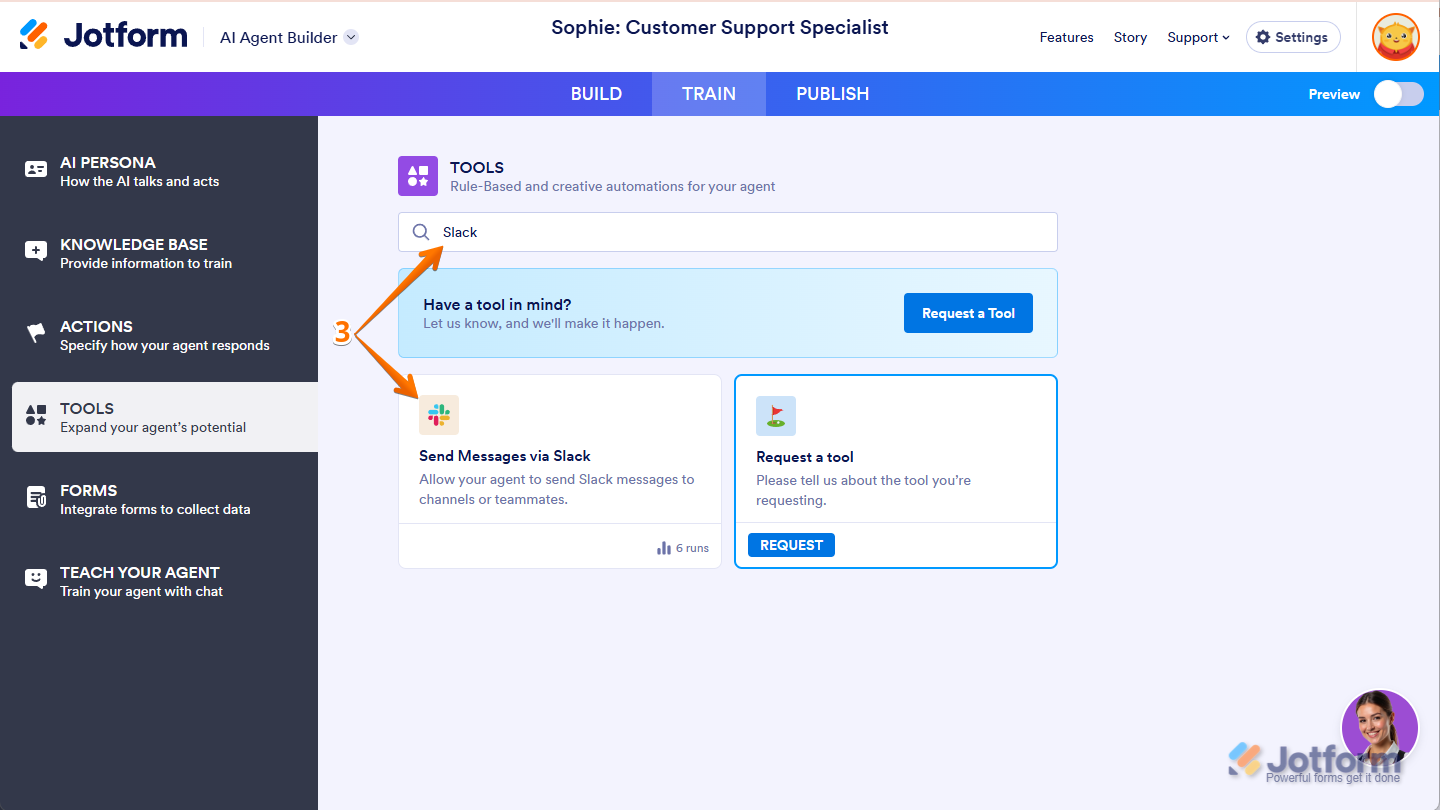
- Then, search for Slack and click on it.
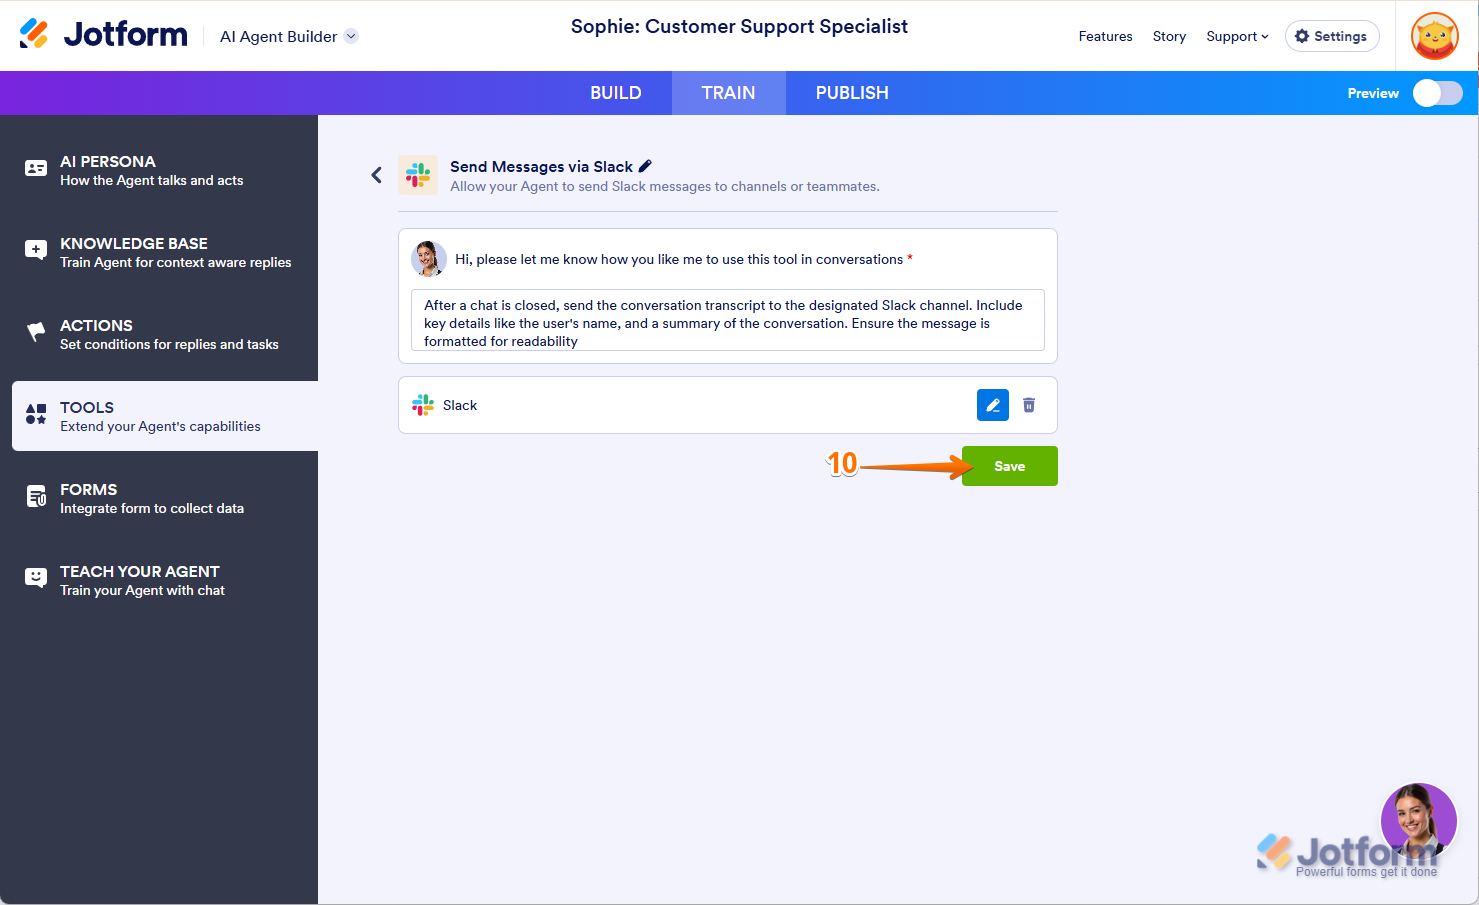
- Write a Prompt for your agent about how to use this tool. For example: “After a chat is closed, send the conversation transcript to the designated Slack channel. Include key details like the user’s name, and a summary of the conversation. Ensure the message is formatted for readability”, and click on Connect.

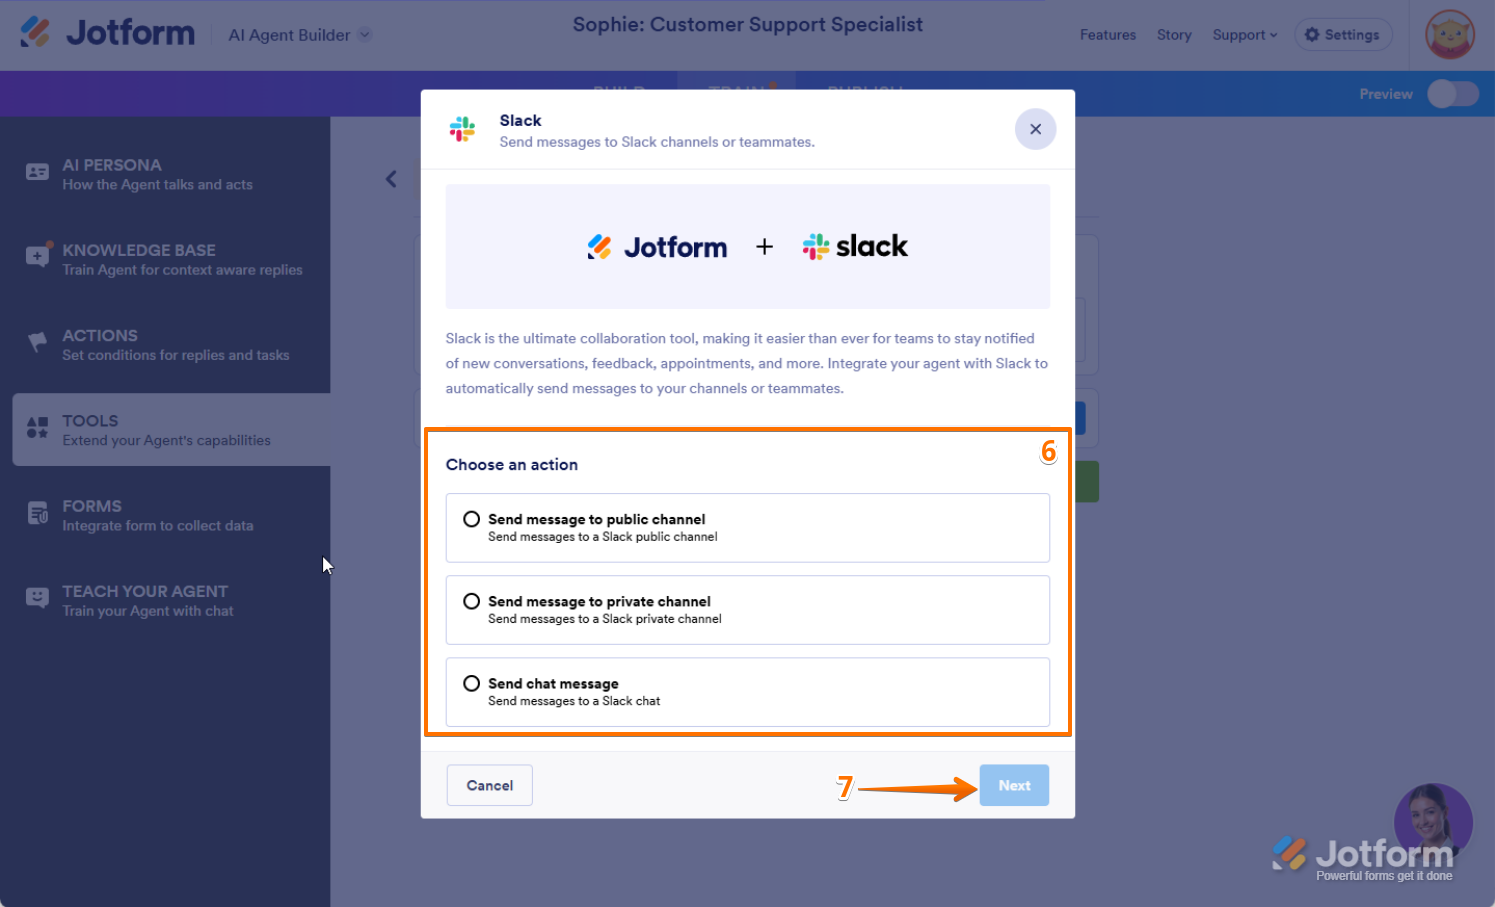
- In the window that opens, Choose an Action from the following choices:
- Send Message to Public Channel — Post a message in a public Slack channel where all members can see and interact with it.
- Send Message to Private Channel — Share a message in a private Slack channel, visible only to invited members.
- Send Message Chat Message — Send a direct message to a specific user or group in Slack for private communication.
- Then, click on Next at the bottom of the page.

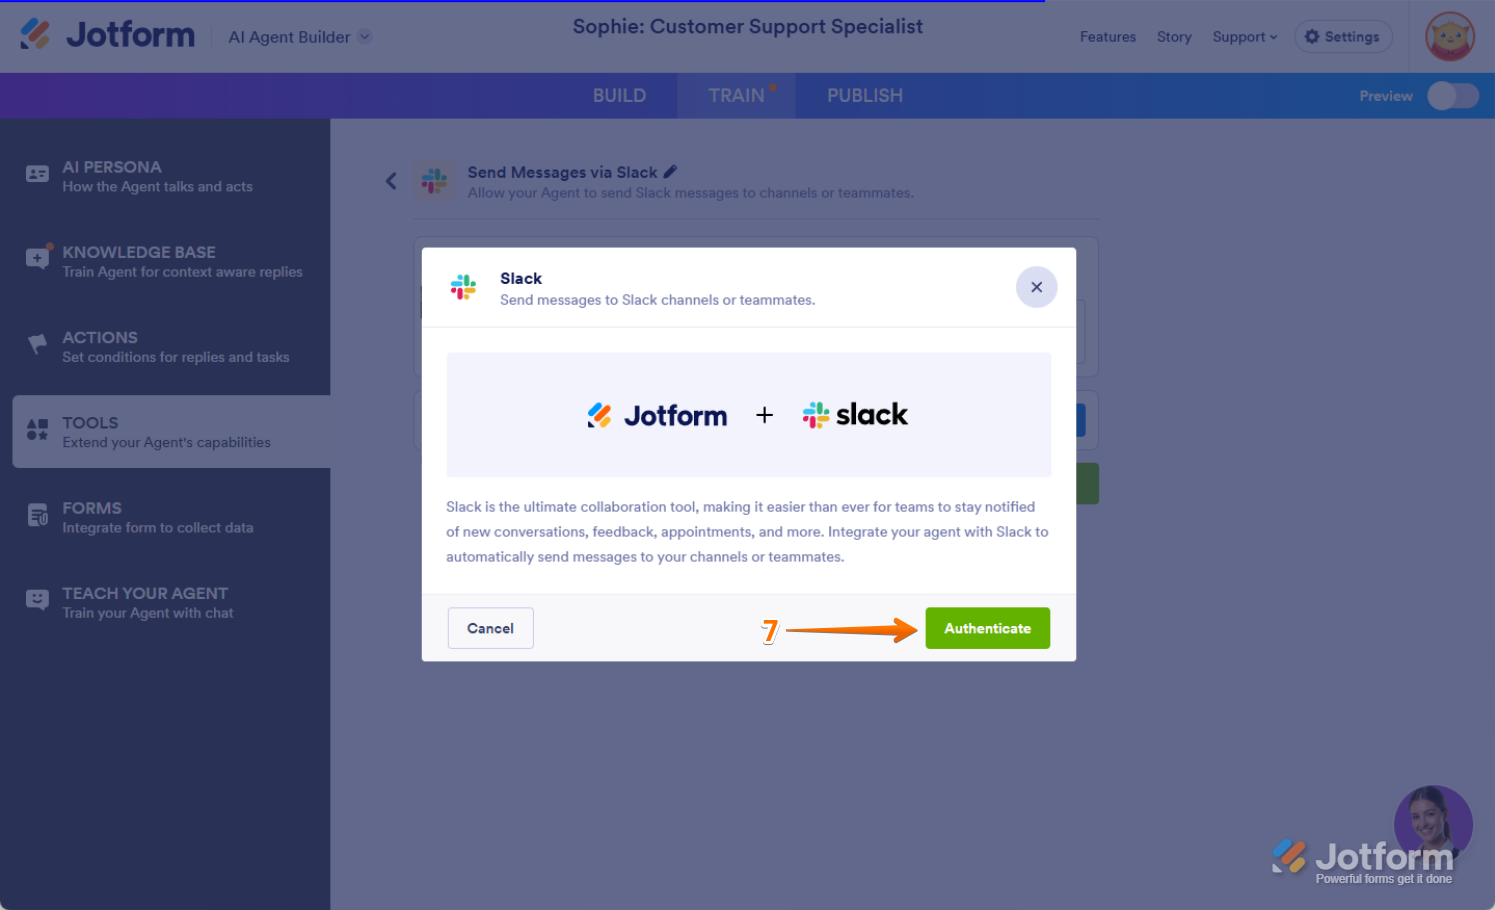
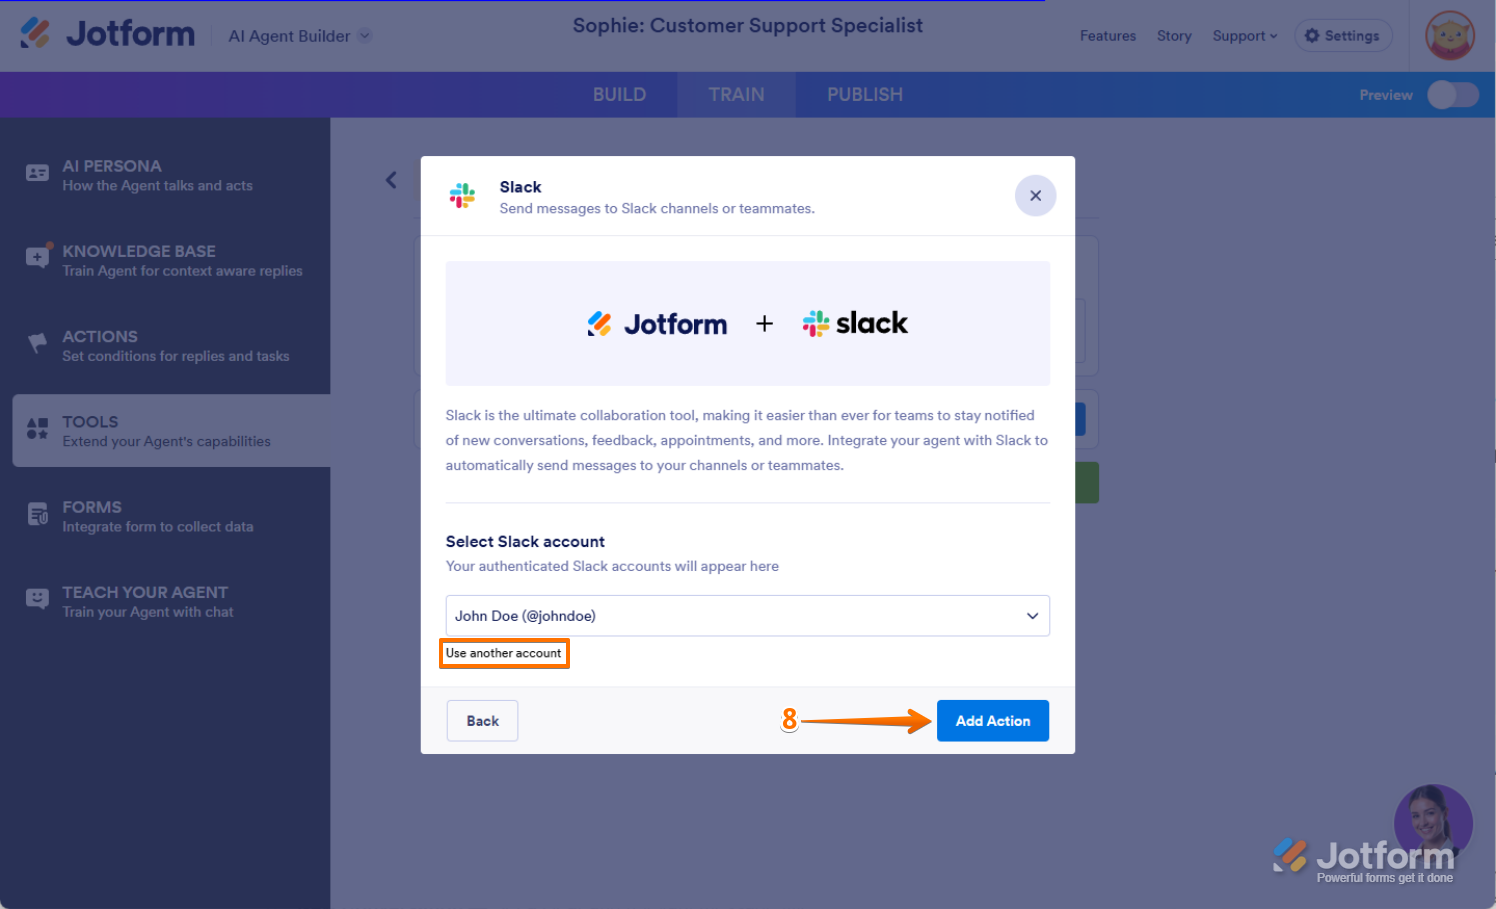
- Click on Authenticate, and then connect your Slack account.
For previously authenticated accounts, choose the account you want to use, and then click on Add Action.

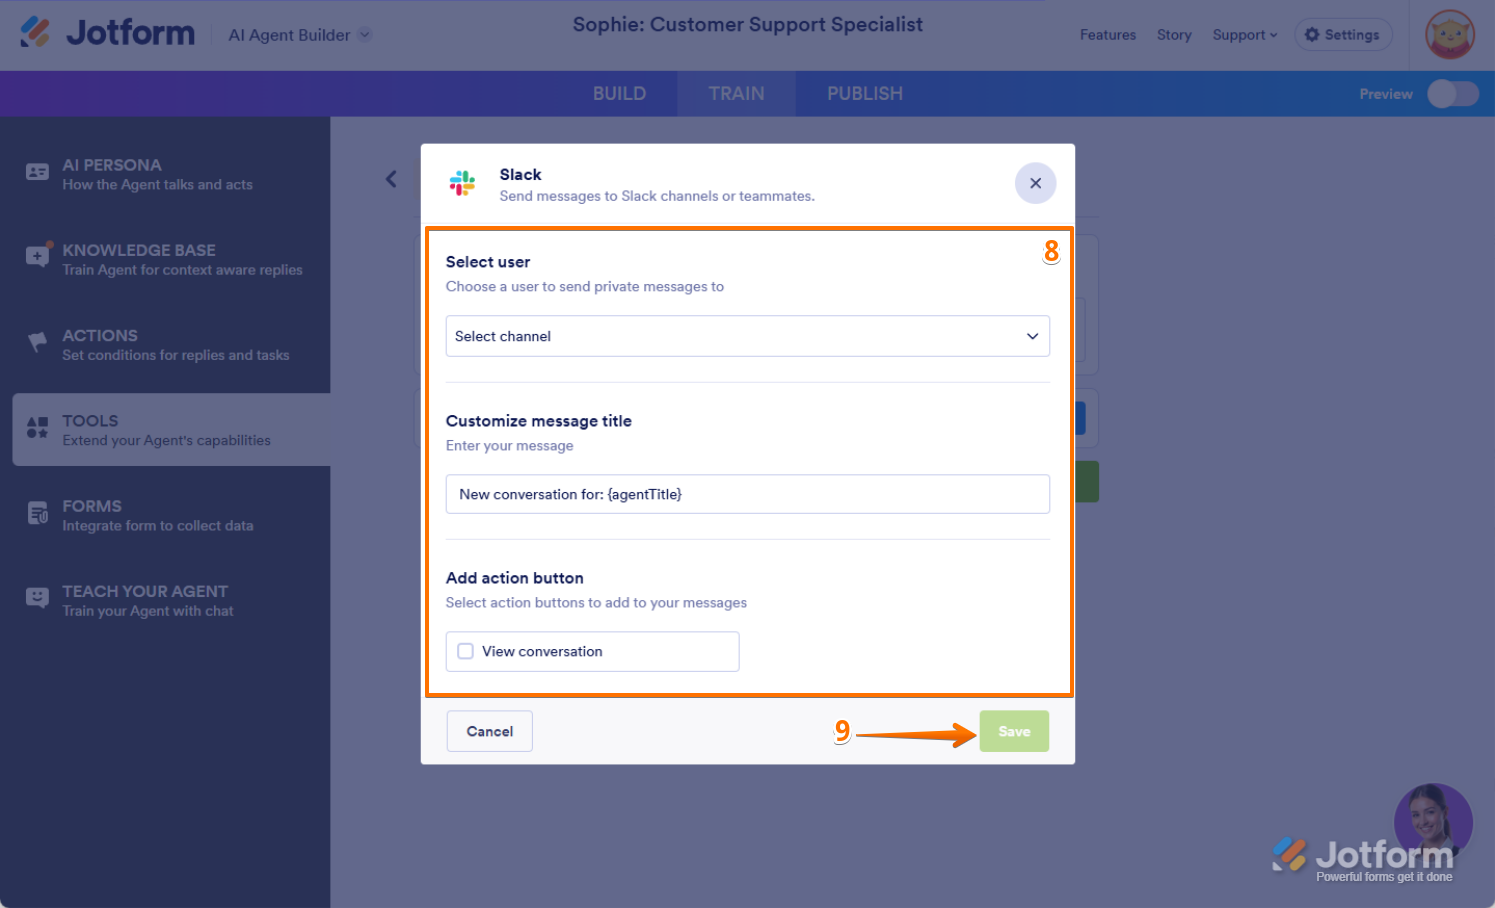
- Here’s how to set up your integration:
- New Channel —Select the Slack channel where conversations with the Agent will be sent.
- New Conversation — Set a clear and relevant message title.
- Add Action Button — Add a button that lets users open and view the conversation directly.
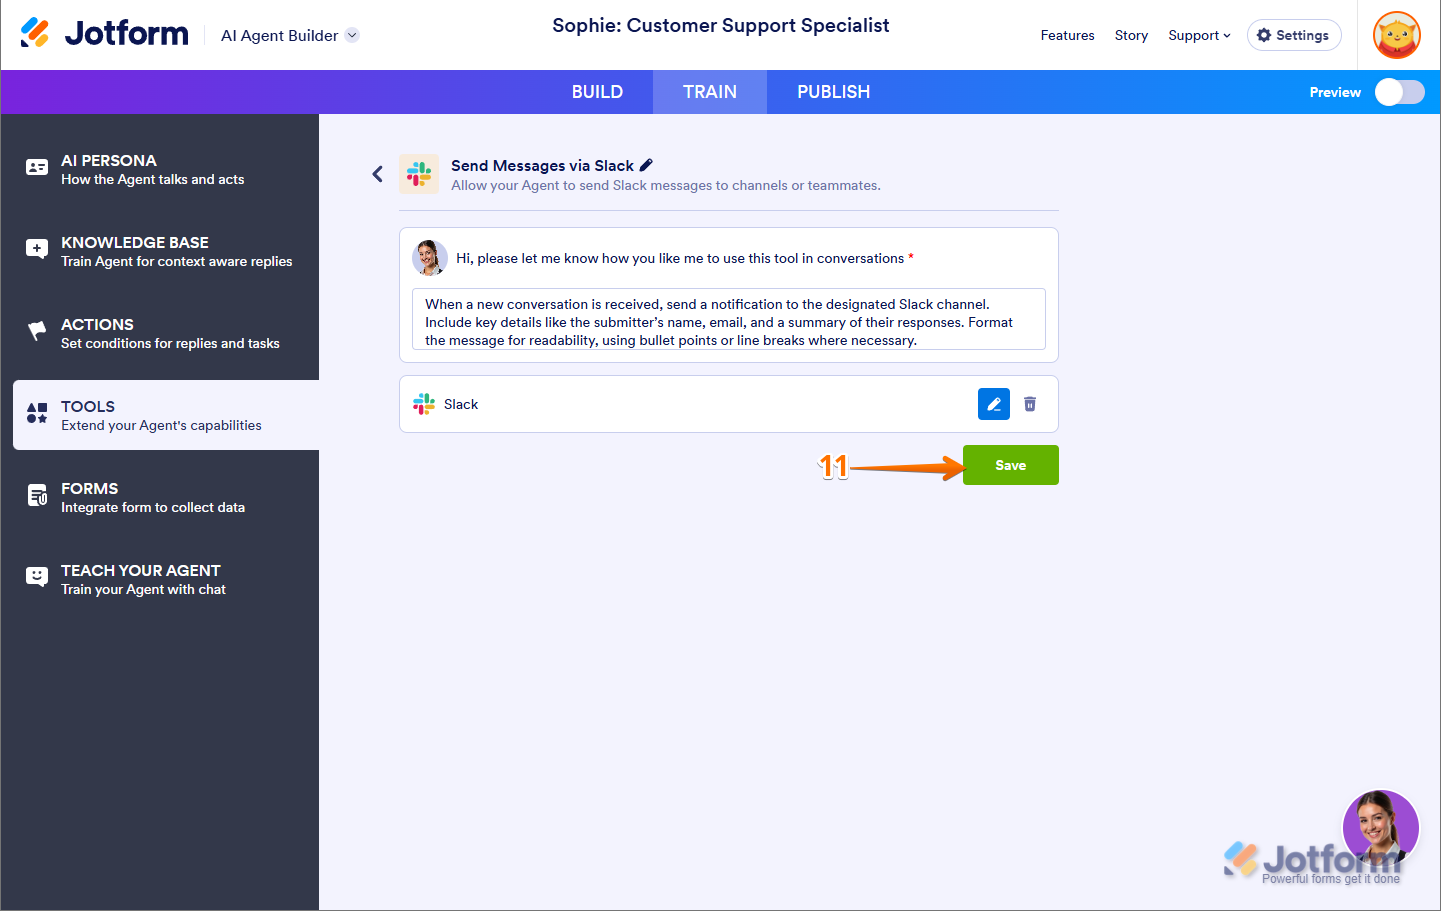
- Then, click on Save.
- Now, just click on Save at the bottom of the page, and you’re all set.
Adding a New Slack Action with Your AI Agent
You can set up multiple Slack Actions for your AI Agent and connect each one with the same or a different Slack account and use the same or different prompts for each one. Here’s how to do that:
- In Agent Builder, in the blue navigation bar at the top of the page, click on Train.
- In the menu on the left side of the page, click on Tools.
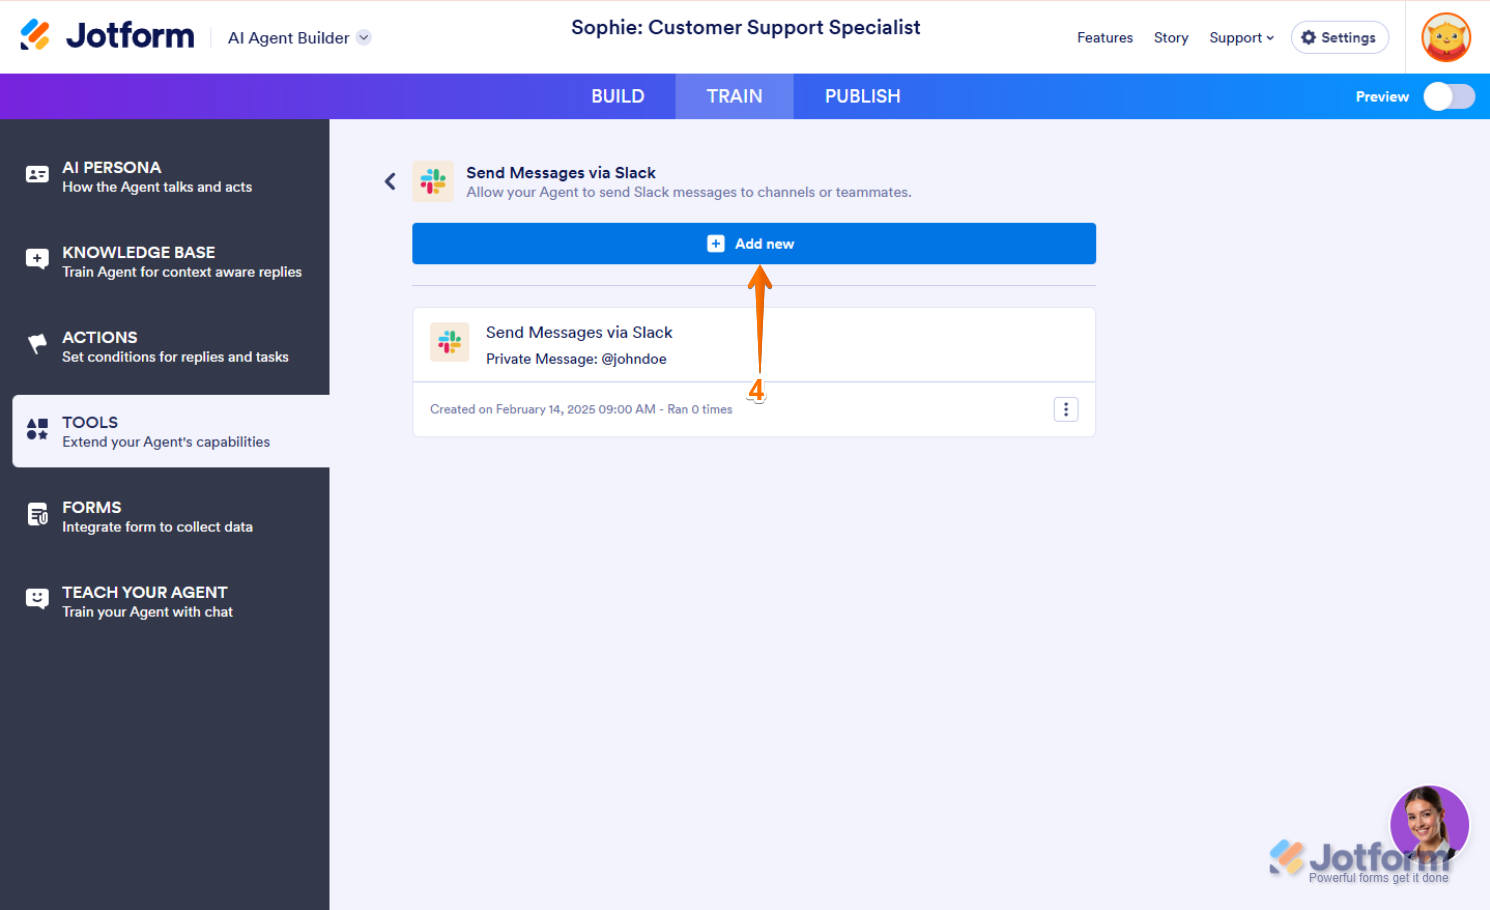
- Then, click on Send Messages via Slack.
- Next, click on the Add New button at the top.
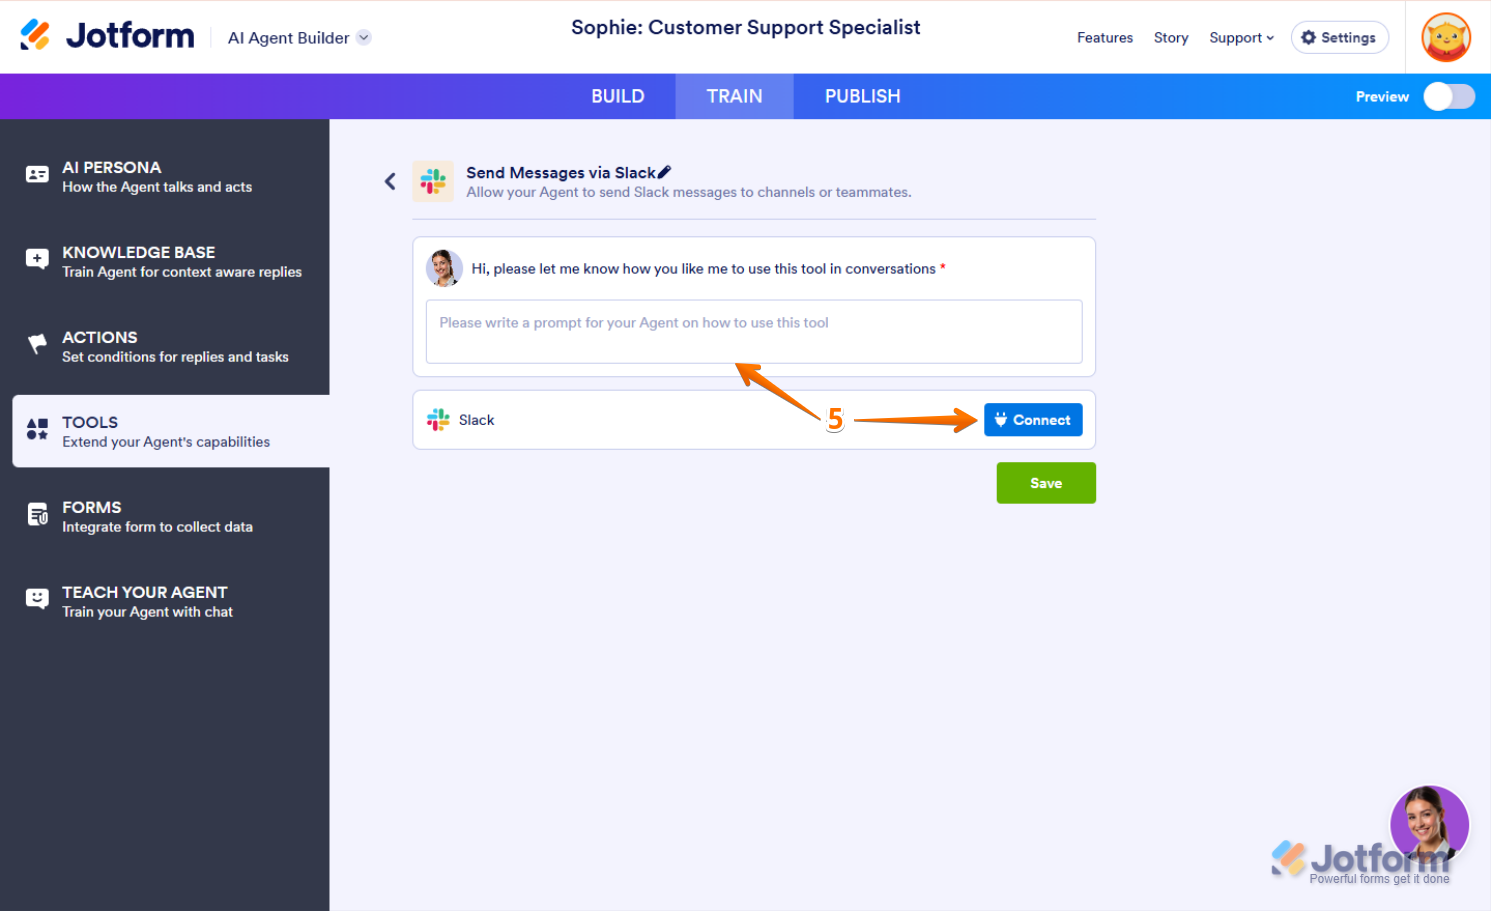
- Write a Prompt for your agent about how to use this tool. For example: “When a new conversation is received, send a notification to the designated Slack channel. Include key details like the submitter’s name, email, and a summary of their responses. Format the message for readability, using bullet points or line breaks where necessary.”, and click on Connect.
- In the window that opens, Choose an Action from the following choices:
- Send Message to Public Channel — Post a message in a public Slack channel where all members can see and interact with it.
- Send Message to Private Channel — Share a message in a private Slack channel, visible only to invited members.
- Send Message Chat Message — Send a direct message to a specific user or group in Slack for private communication.
- Then, click on Next at the bottom of the page.
- Choose an email address from the dropdown to use a saved Slack account and click on the Add Action button on the right. Or, click on Use Another Account below the dropdown to log in and grant the integration access to a different Slack account.
- Here’s how to set up your integration:
- New Channel — Select the Slack channel that conversations with the Agent will be sent to.
- New Conversation — Set a clear and relevant message title.
- Add Action Button — Add a button that lets users open and view the conversation directly.
- Then, click on Save.

- Now, just click on Save at the bottom of the page, and you’re all set.
Managing Slack Integration with AI Agent
Now that you’ve saved the integration, let’s go back to the main page:
- Now that you’ve saved the integration, let’s go back to the main page:
- In Agent Builder, in the blue navigation bar at the top of the page, click on Train.
- In the menu on the left side of the page, click on Tools.
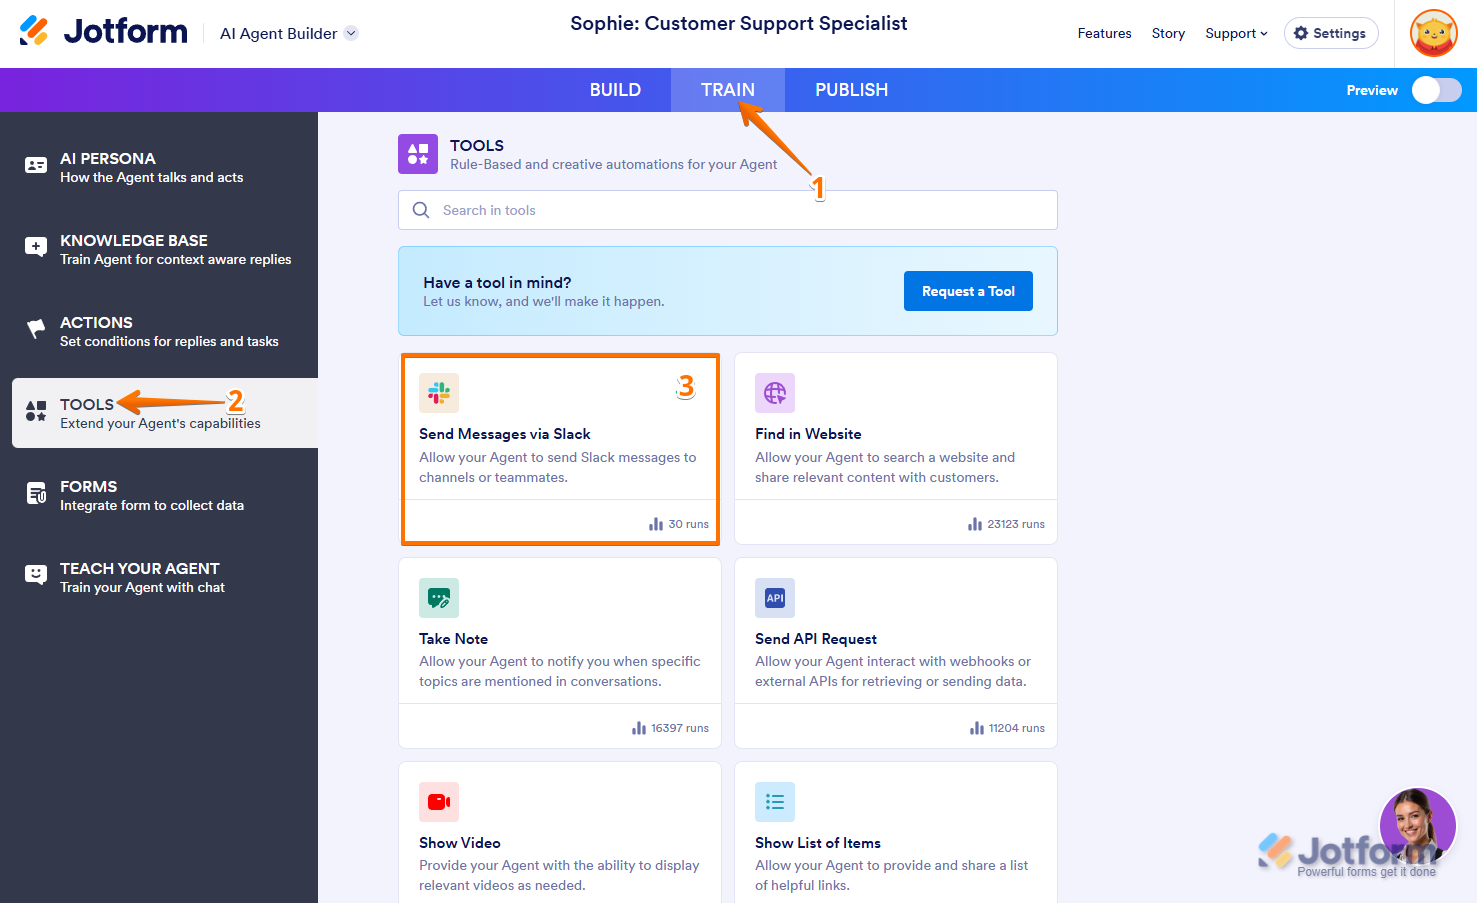
Here, you’ll see the list of actions you created. Now, you can:
- Click the Three Dots icon on the right side of your Send Messages Via Slack action, and you’ll see these options:
- Rename Tool — Update the tool’s name for better clarity and organization.
- Disable Tool — Turn off the tool temporarily without removing it.
- Edit Tool — Adjust the tool’s settings to refine its functionality.
- Delete Tool — Remove the tool permanently from your integration.
That’s it. Your AI Agent is now set up to send messages directly to Slack.


Send Comment: