Airtable is a spreadsheet database that makes it easier for teams to organize their work. With Jotform’s Airtable Prefill feature, you can automatically pre-populate form fields with data from your Airtable bases, particularly the tables.
Prefilling data from Airtable is easy. Let’s get started!
Setting up the Airtable Prefill Settings
First, you must connect your Airtable account and map the fields in the settings. Here are the steps:
- Go to the Publish tab on the Form Builder.
- Click Prefill on the left panel.
- Select the Airtable Prefill from the list.
- Select your Airtable account from the dropdown. If you haven’t connected an account yet, you will be asked to authenticate, and you can do so by clicking the Authenticate button.
- At this step, you need to do the following, as shown in the below image:
- Select a Base
- Select a Table from the chosen Base
- Match your fields
- Click the Add More button to match the other fields. Otherwise, click the Save Settings button to save the Prefill settings and start adding your Airtable Prefill.
Adding Airtable Prefill
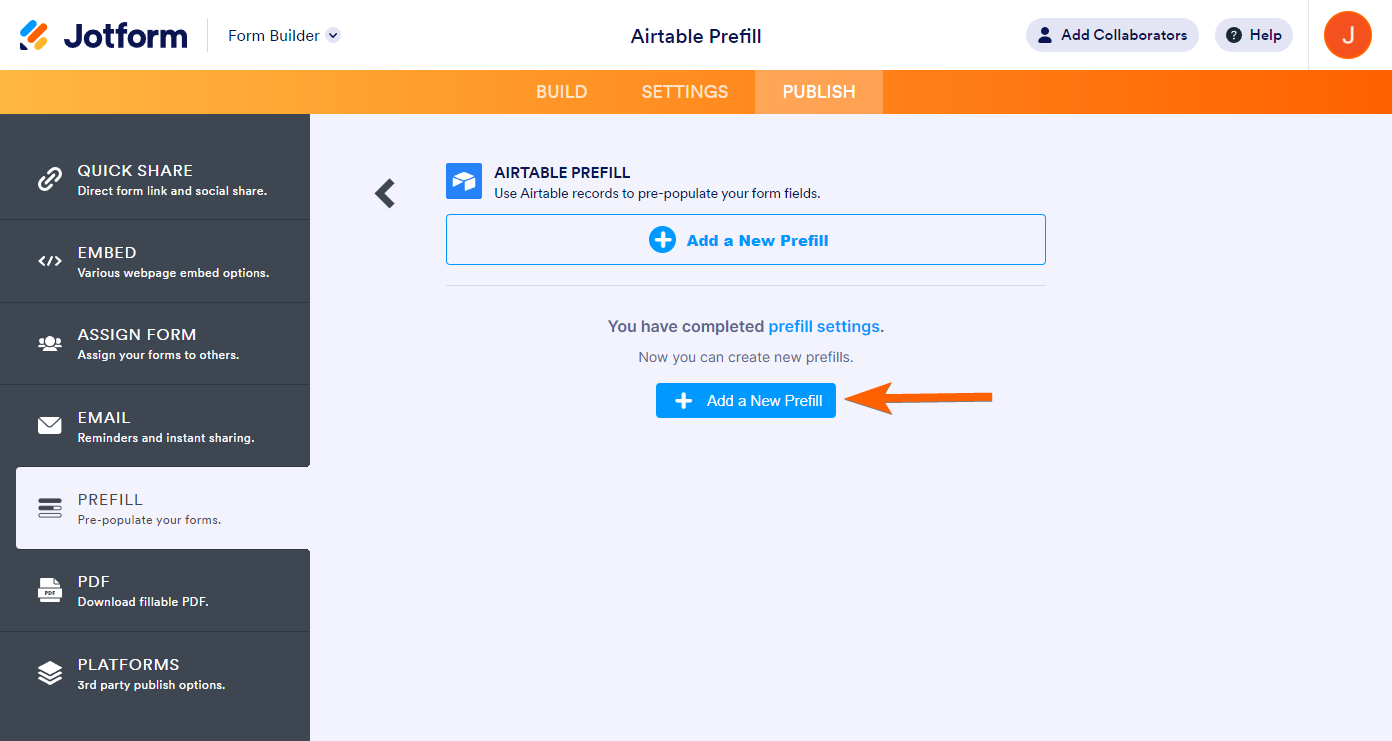
Once you have completed the Prefill Settings, you should be able to add Prefill items.
- Click on Add a New Prefill button.
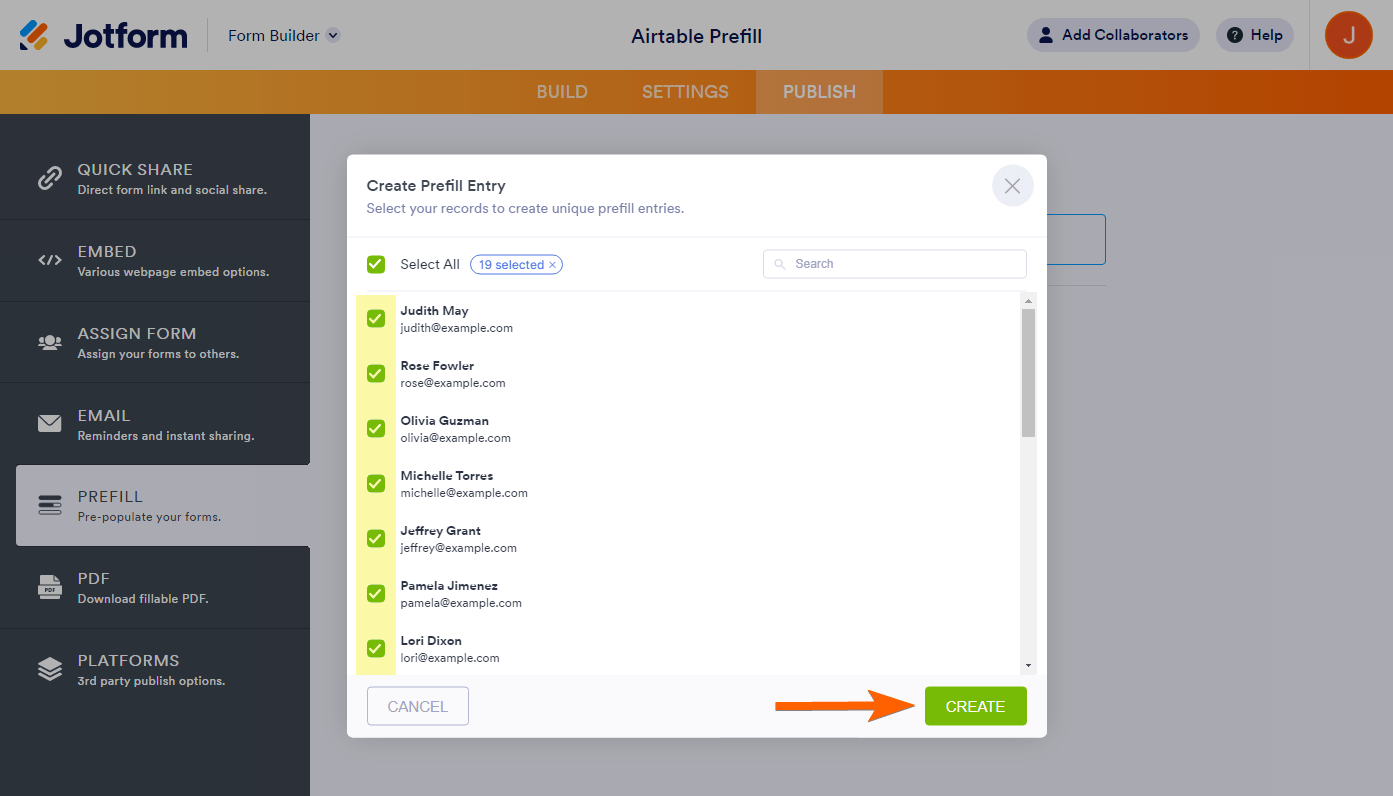
- Select the prefill items on the left.
- Lastly, click on Create button. You will automatically see the prefilled items at this stage.
Note
You can opt to select all records, but note that you can only create 20 Prefilled URLs at a time. Therefore, selecting all and clicking the Create button will not work. You will receive a message indicating the limit instead.
Managing Airtable Prefill Items
Once the prefilled items are created, you can now go ahead and send them or copy the links.
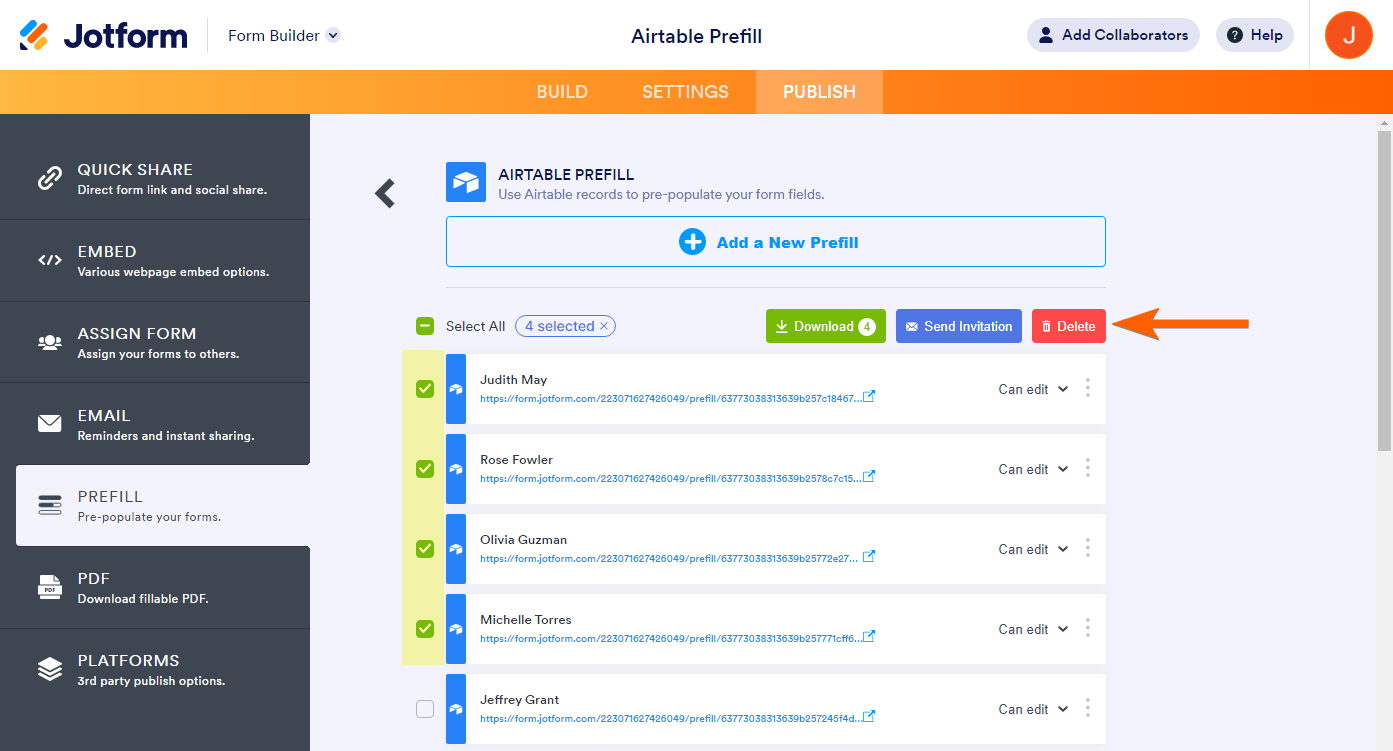
If you want to manage multiple prefill items, select them from the list, and you should see the Download, Send Invitation, and Delete buttons at the top.
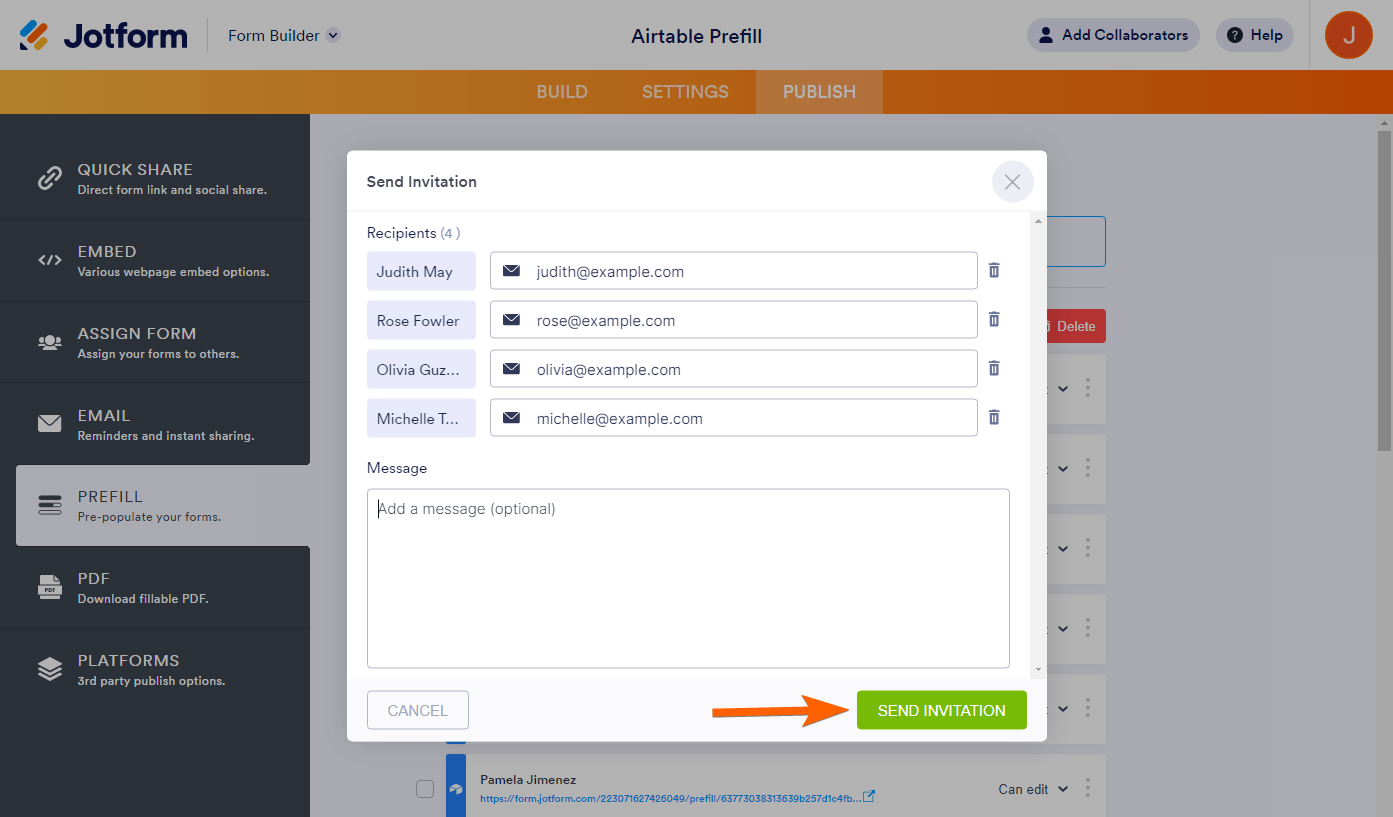
Click on Download to download the selected prefilled items in CSV format. Clicking the Delete button deletes them. Clicking the Send Invitation button will open a new window. You can add an optional message and click the Send Invitation button to send the prefilled items.
Note
You can select all Prefilled URLs, but note you can only send an invitation to up to Five (5) people at a time. Selecting more than this number will display an error message.
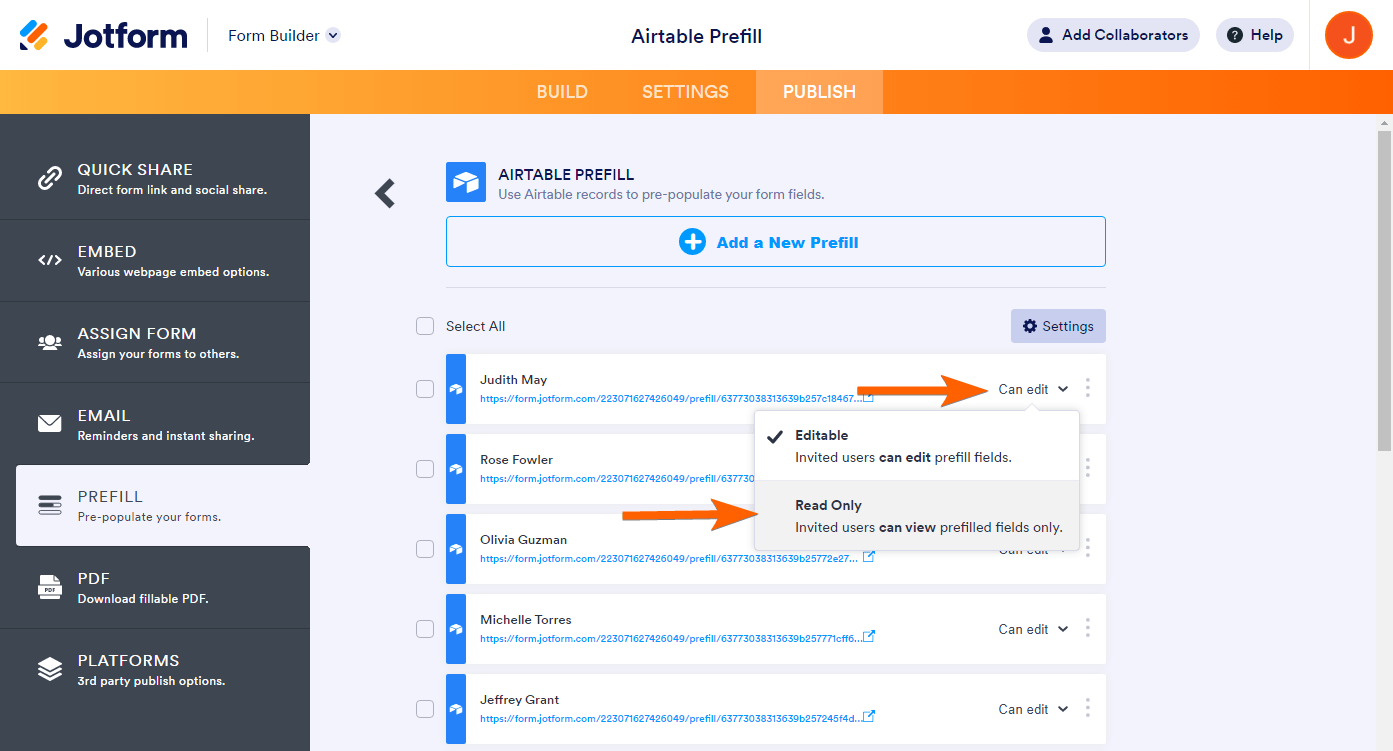
By default, each prefilled item is editable. You can change the permission from Can Edit to Read Only. Click on the dropdown and choose the permission accordingly.
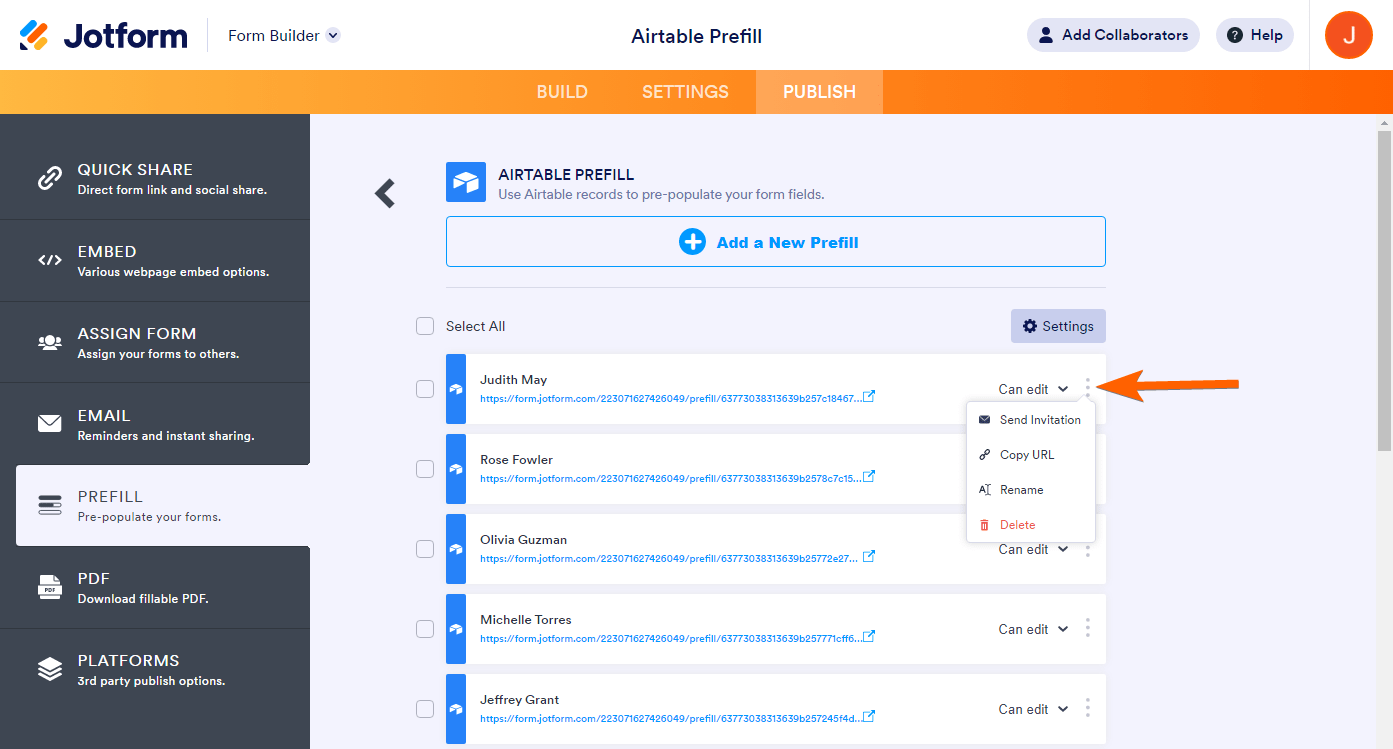
Lastly, you can pull up the individual prefill options by clicking on the Kebab (3-dots menu) on the left side of each prefilled item.
- Send Invitation — If you wish to send the prefilled URL individually or resend it if the user lost the previous invitation.
- Copy URL — If you wish to send the prefilled URL manually.
- Rename — If you want to change the name of the prefilled URL.
- Delete — To delete the prefilled URL.
If you have questions or suggestions or having difficulty setting up the Airtable prefill, kindly comment below or create a support ticket.



Send Comment: