With the functions of Action Buttons, you can send your form’s file uploads and PDF copies of the submissions to file storage services such as Dropbox and Google Drive right from Jotform Tables. This process will help you get your files or attachments to sync through available cloud accounts whenever you need them.
To begin, open your Jotform Tables and do the following:
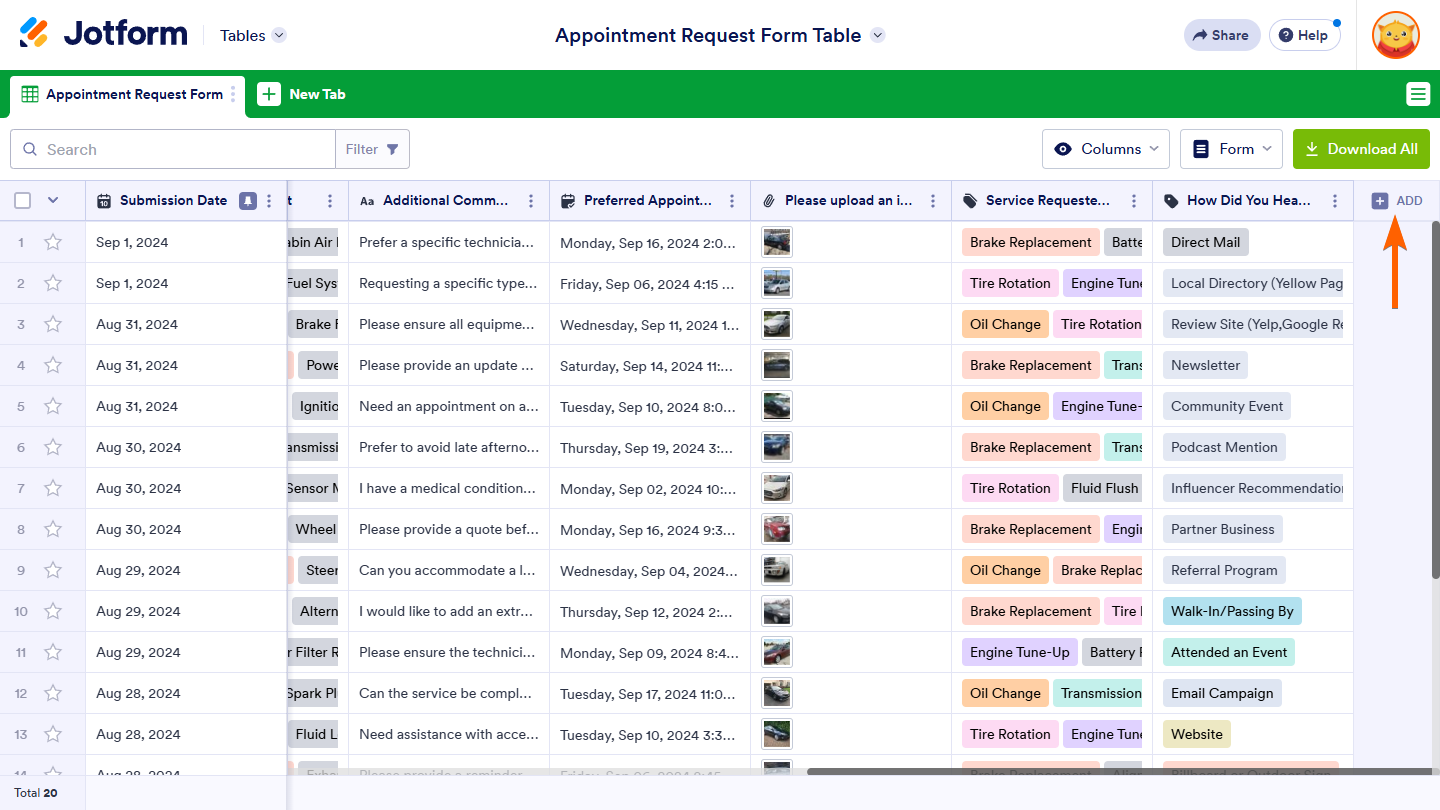
- Click the Add button at the end of Jotform Tables.
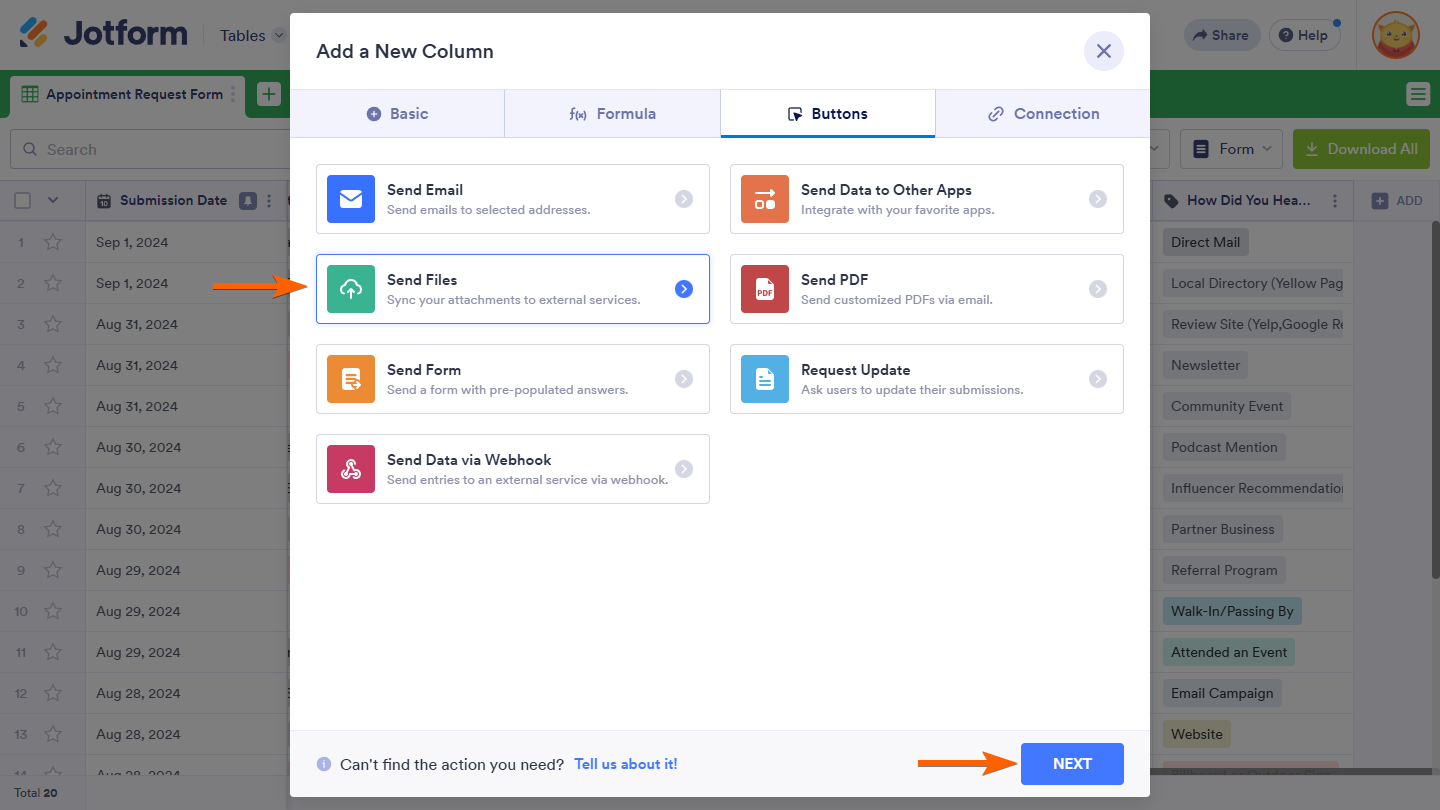
- Under the Buttons tab, select the Send Files option.
- Click the Next button to proceed.
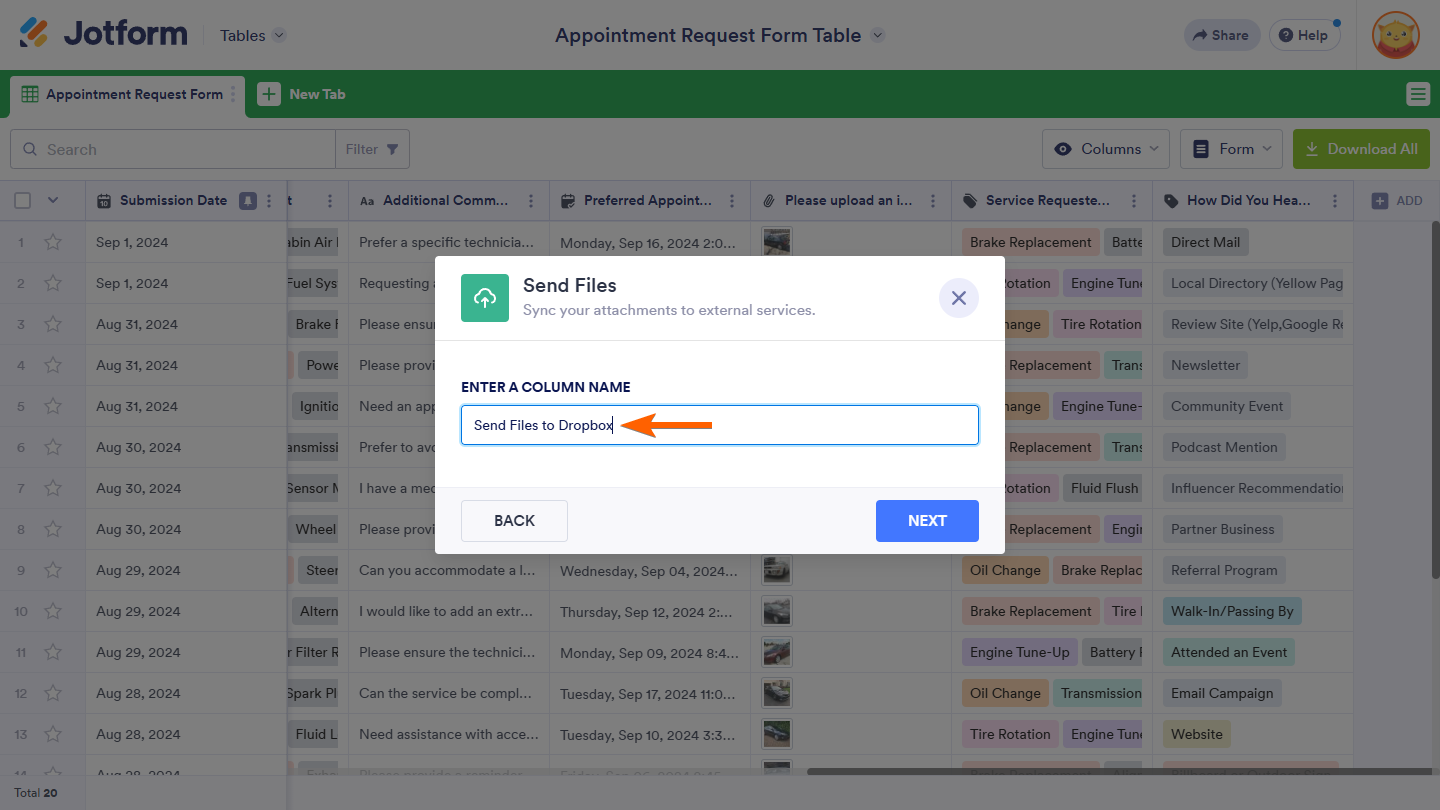
- Give this new column a name, and click the Next button.
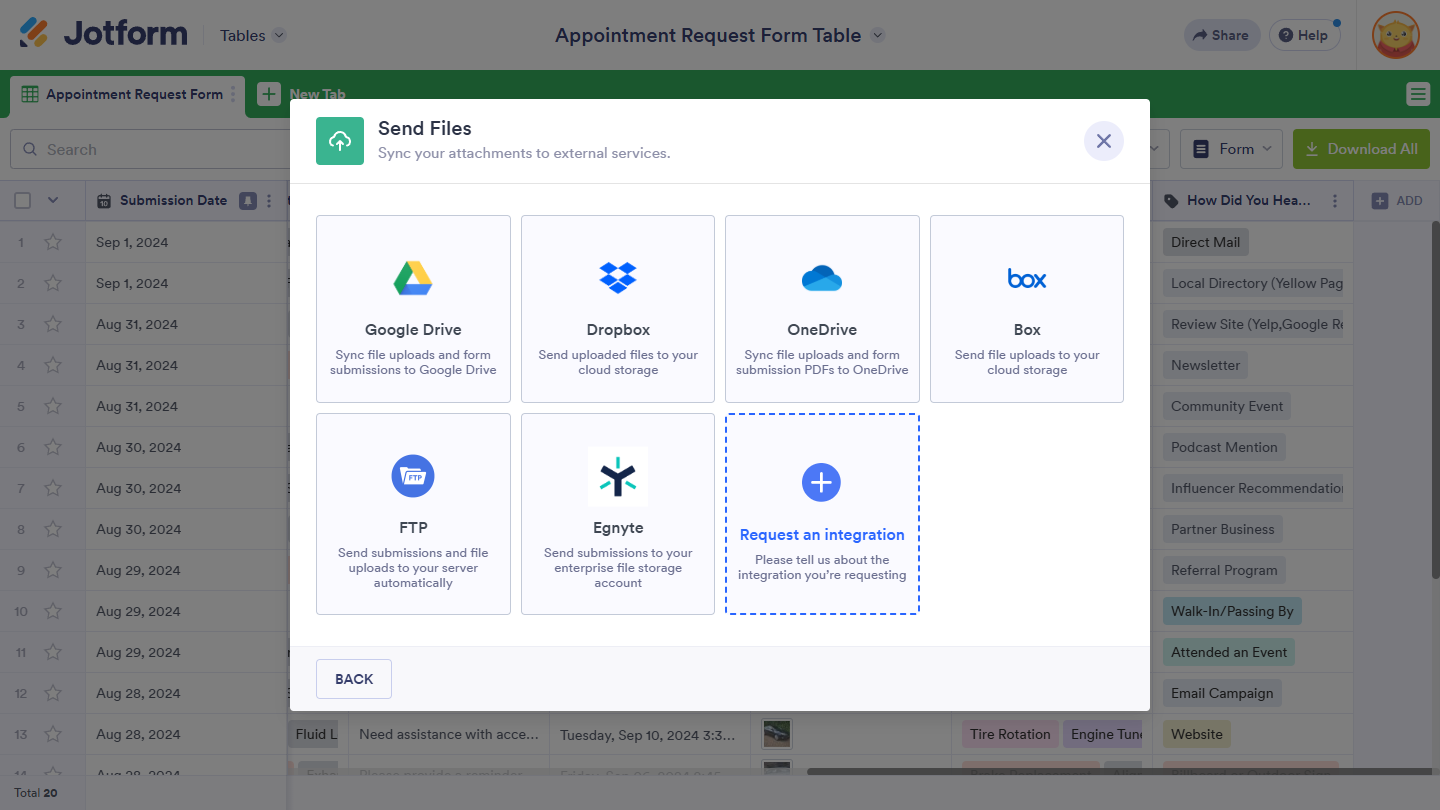
- Select Dropbox from the list of apps as an example.
With this feature, you can select the following 3rd party apps and services:
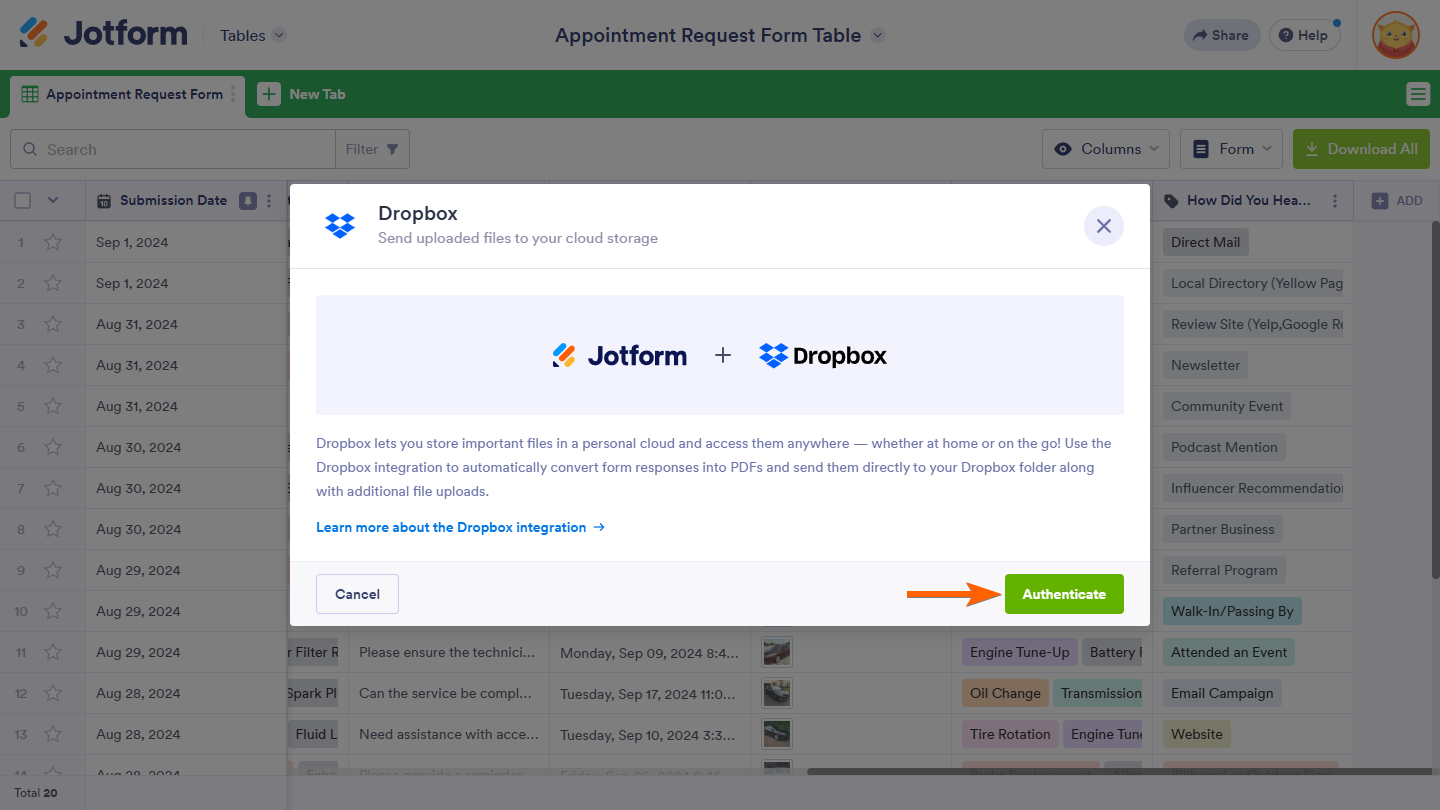
- Click the Authenticate button if you haven’t connected your Dropbox account yet.
If you’ve already connected your Dropbox account, select it from the account selector and click the Add Action button.
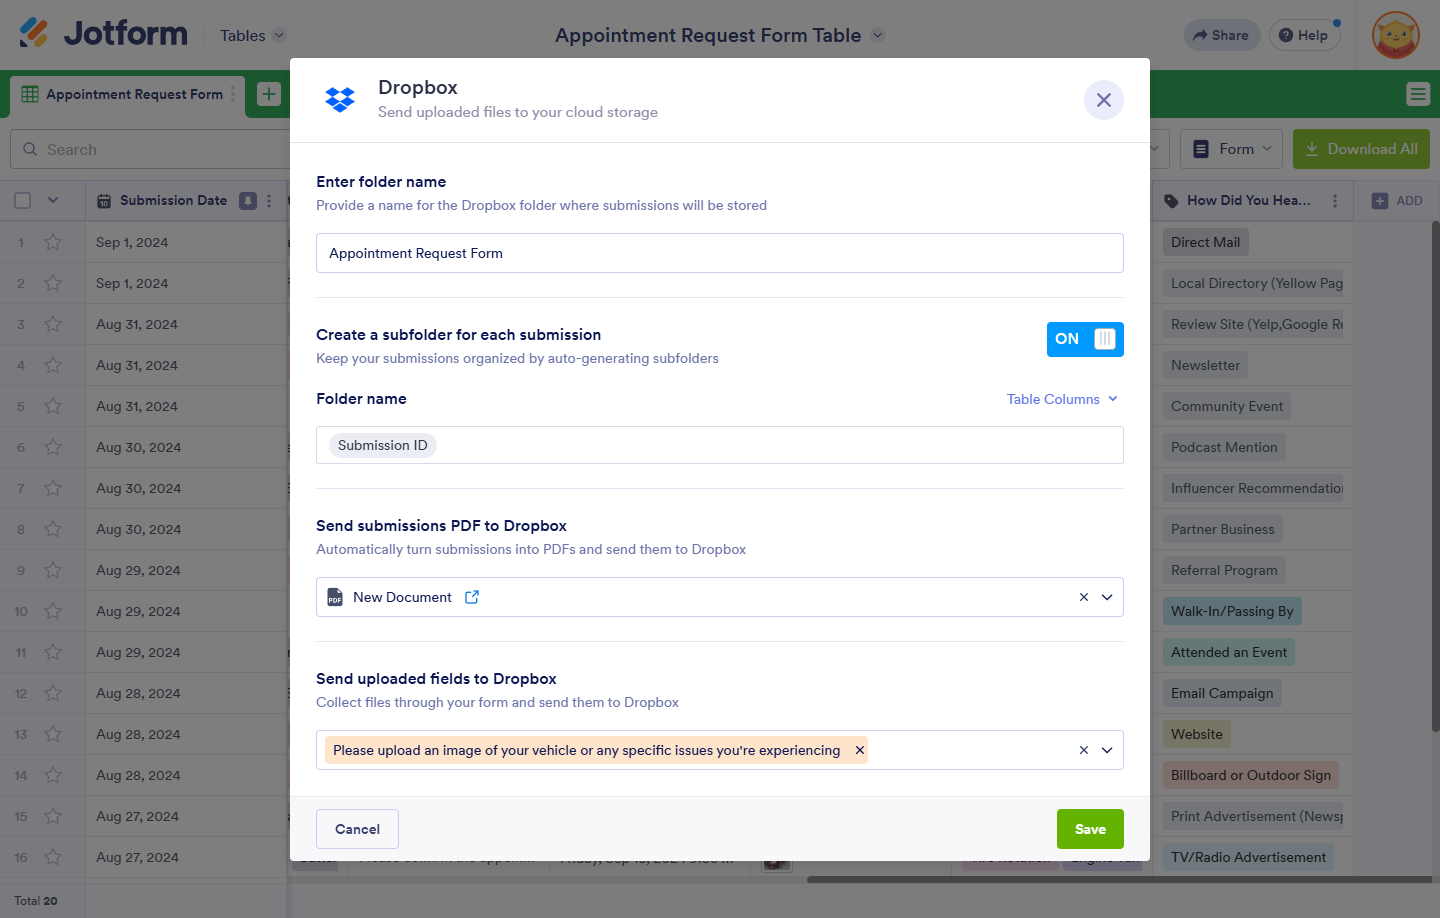
- Set up your Dropbox folders accordingly, and click the Save button to finish the setup.
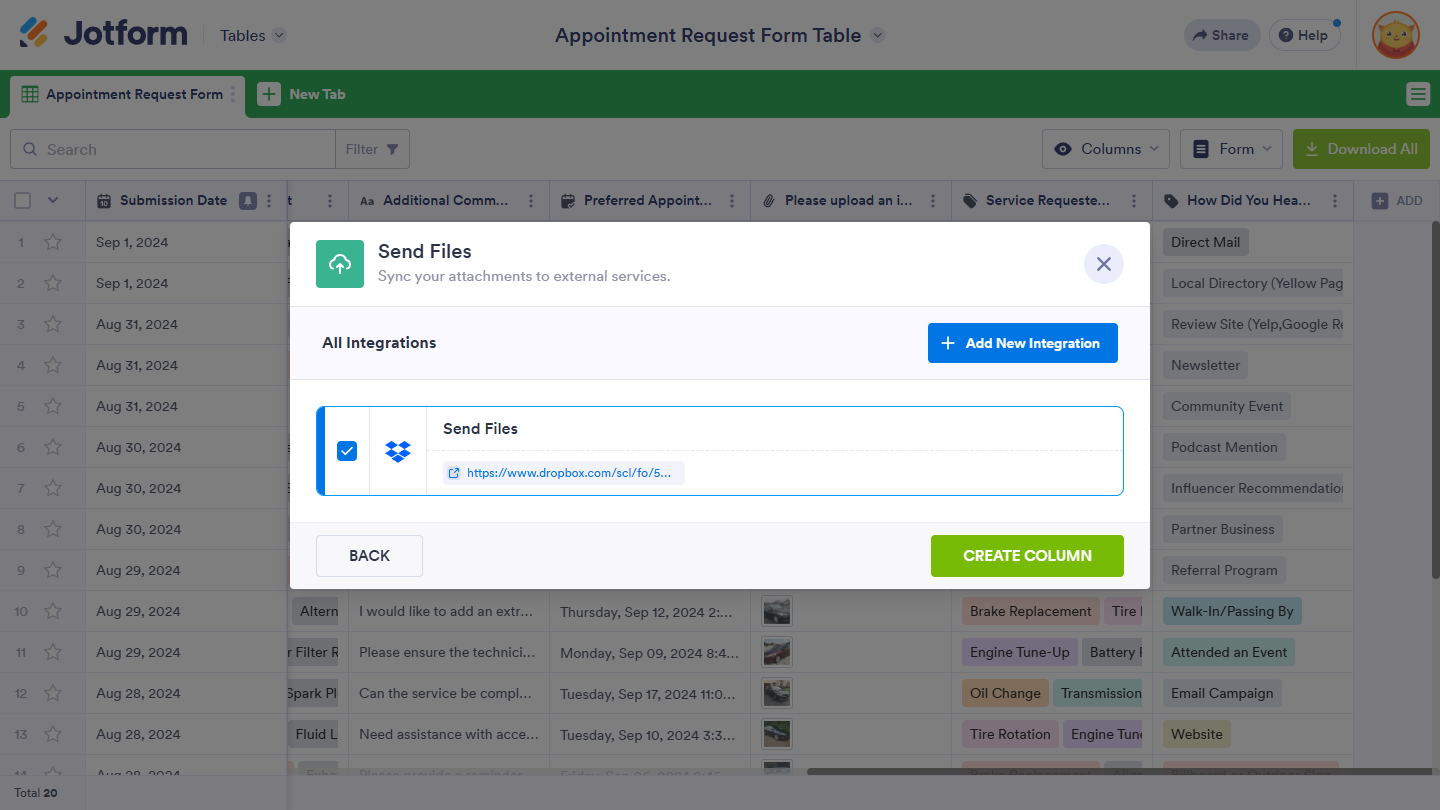
- At this step, you can finally add the Action Button by clicking the Create Column button. Click the Add New Integration button to connect to another cloud app.
After the successful integration, you will see the newly created column with the buttons. The column will contain the following properties:
- Send Files — The main feature of the Action Button. Click this to send the files/PDFs to the selected cloud service.
- Timestamp — The time and date you initiated the action.
- Resend — If there are changes to the data, you can sync it by resending.



Send Comment:
1 Comments:
276 days ago
Can you choose to add the files to your chosen folder on google drive or can you only send to a location determined by jotform/google drive?