Jotform Tables lets you send forms in your account directly to form respondents. By setting up the Send Form Action Button column in your table, you can email forms with prefilled fields using data from your table manually, making it convenient for respondents to complete additional forms. For instance, you could send a prefilled feedback form to event attendees based on their registration data, email a service update form to customers with their contact details and past service requests already included, or share a survey with team members prefilled with project details. This feature is ideal for follow-ups, gathering more information, or sharing forms based on previous submissions, ensuring your forms are relevant and easy to complete while improving engagement and data collection.
Use these steps to add a Send Form Action Button column to your table:
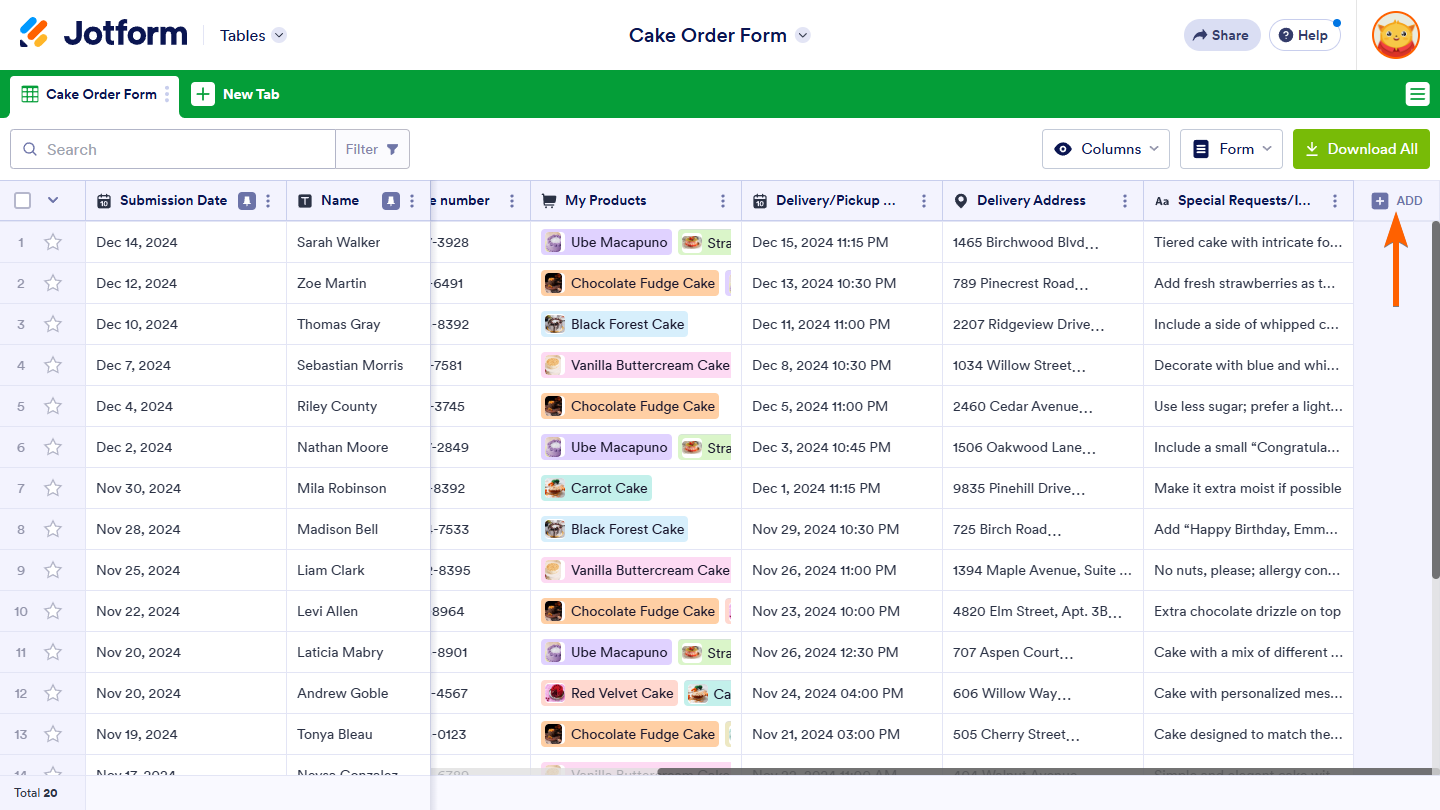
- In Jotform Tables, click on the Add button at the end of the table to insert a new column. See How to Add and Organize Columns for more information.
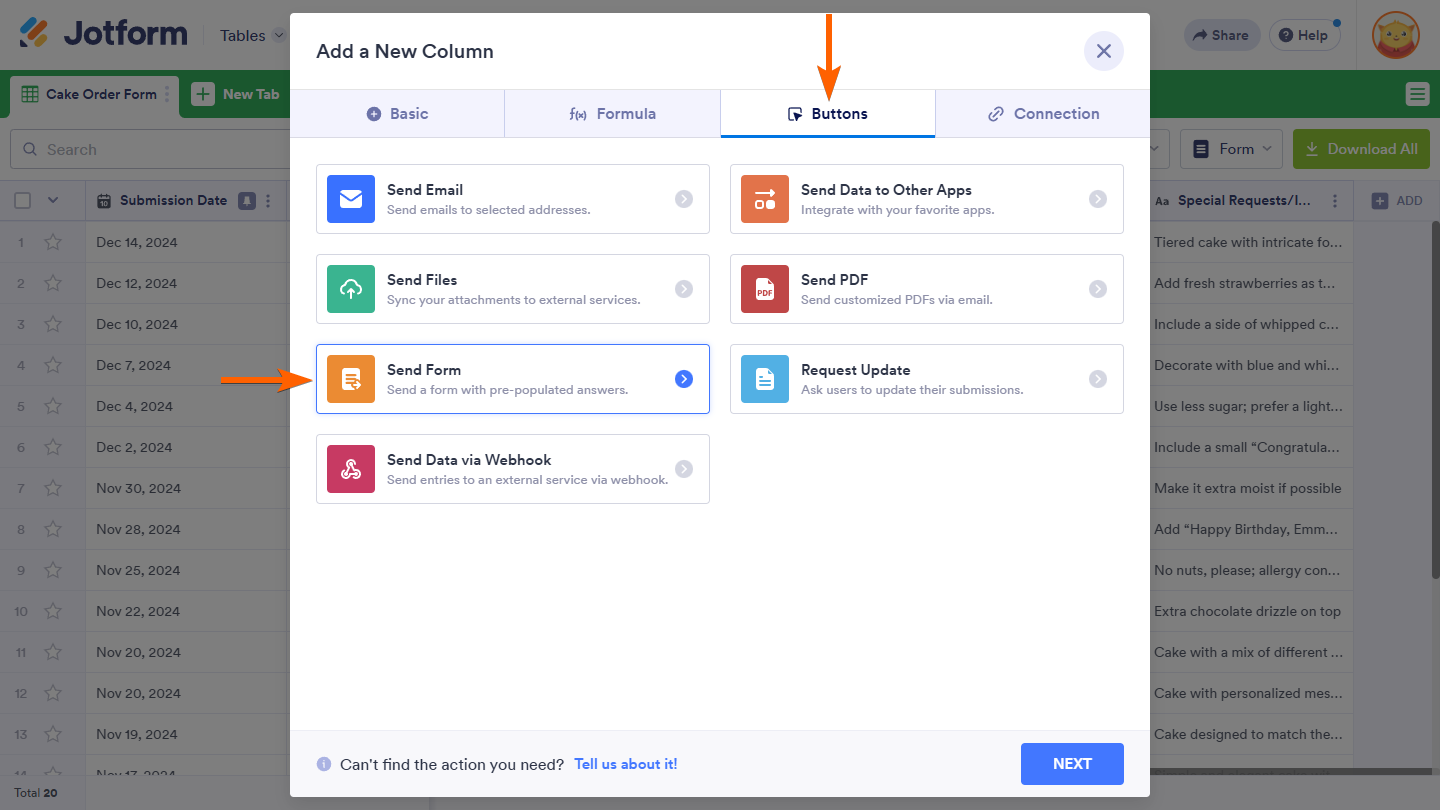
- In the Add a New column window, go to the Buttons tab
- Then, select Send Form and click on Next.
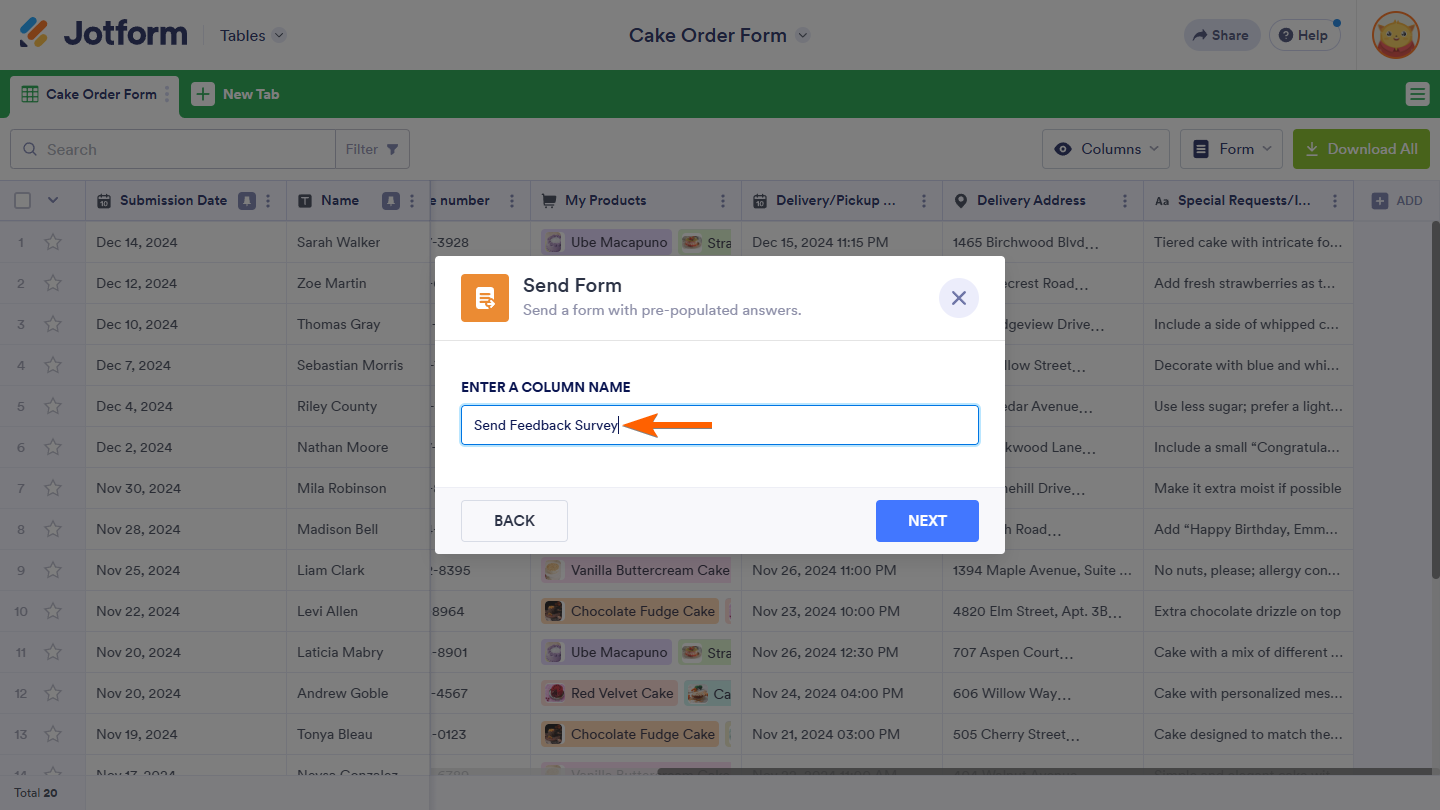
- In the Send Form window, enter a name for your new column, then click on Next.
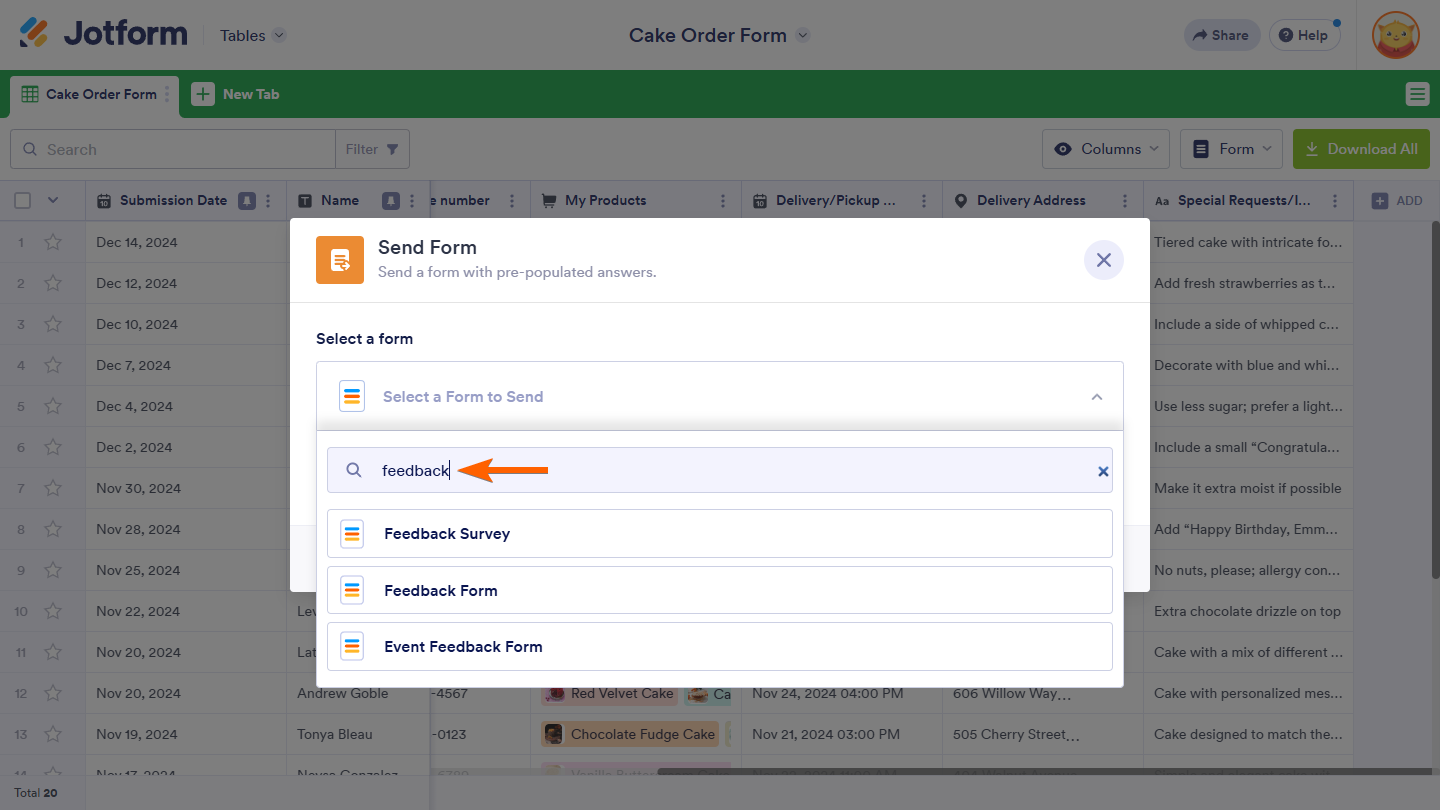
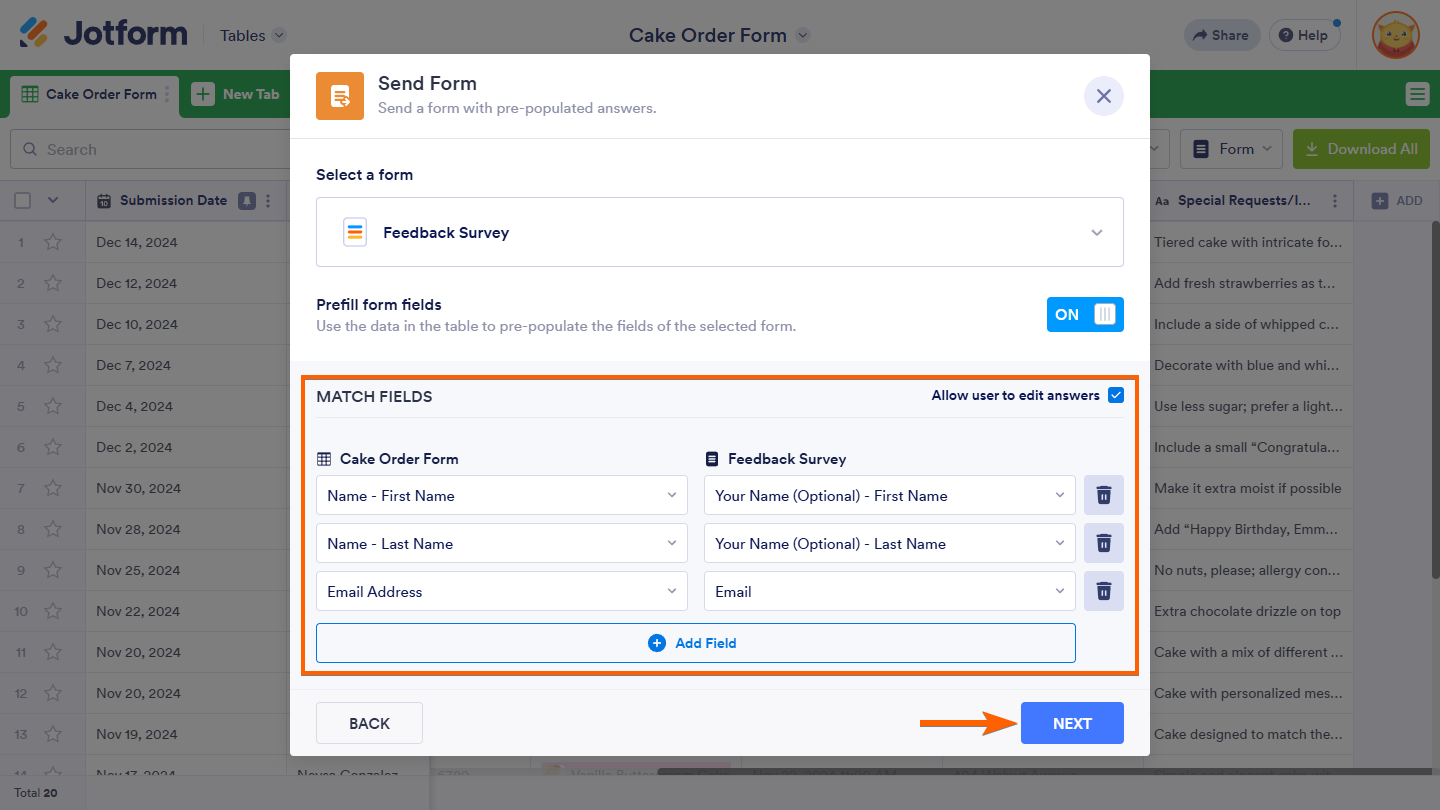
- On the next screen, choose the form you want to send in the Select a Form dropdown. You can use the search bar to find it easily.
- Once the form is selected, match the columns in your table to the fields in the selected form to prepopulate it with data from your table then click on Next again.
Note
To let users modify the prefilled data, check the box next to the Allow User to Edit Answers option. If you prefer not to prepopulate the form, toggle the Prefill Form Fields setting to Off.
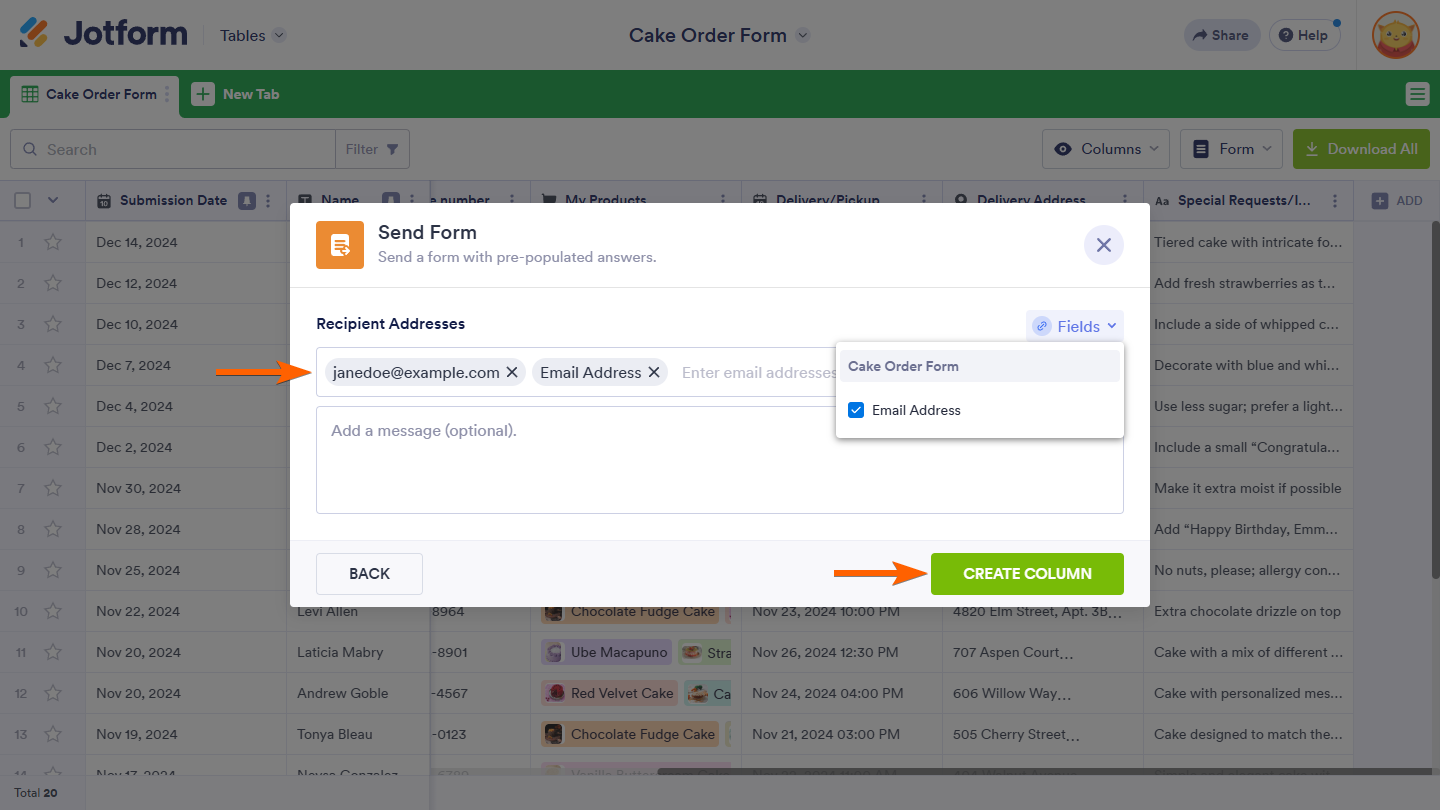
- In the Recipient Addresses section, enter the email addresses or select an email field from your form through the Fields dropdown on the right. You can add up to three email recipients.
- Click on the Create Column button to complete the setup.
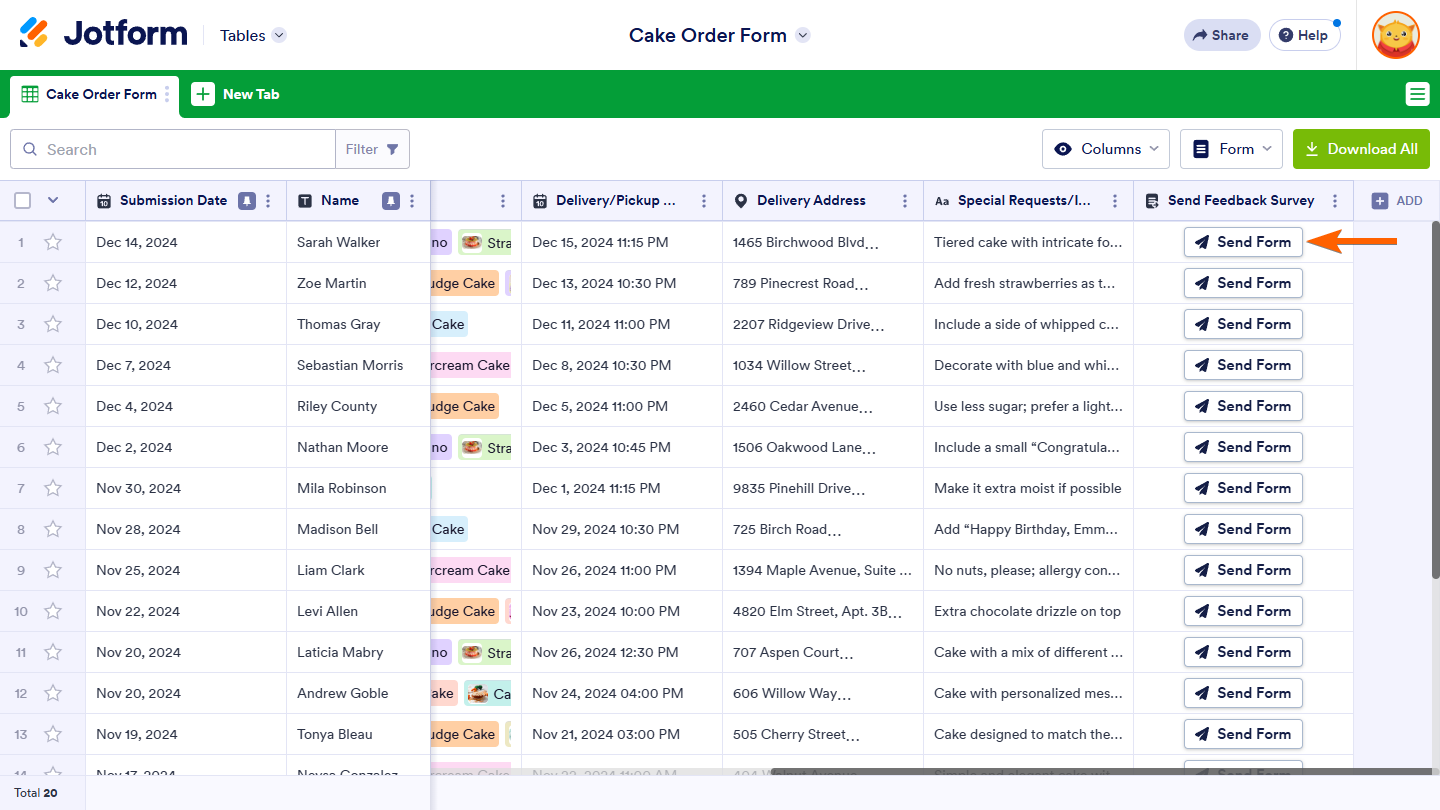
Once you’ve set up the Send Form Action Button column, it’s ready for use in your table. When the button for an entry in that column is clicked, your form will be sent to the recipients specified in that button’s settings.
Recipients will then get an invitation email to fill out your form. They can click on the View Form button in the email to access the form you’ve sent them.
Note
- The View Form button in the invitation email opens your form URL in a new browser tab. Adjust your form’s access settings accordingly to ensure recipients can view it as intended. For more details, refer to How to Change the Access Settings of a Form.
- All recipients specified in the invitation button’s settings will see who else received the invitation to fill out the form.
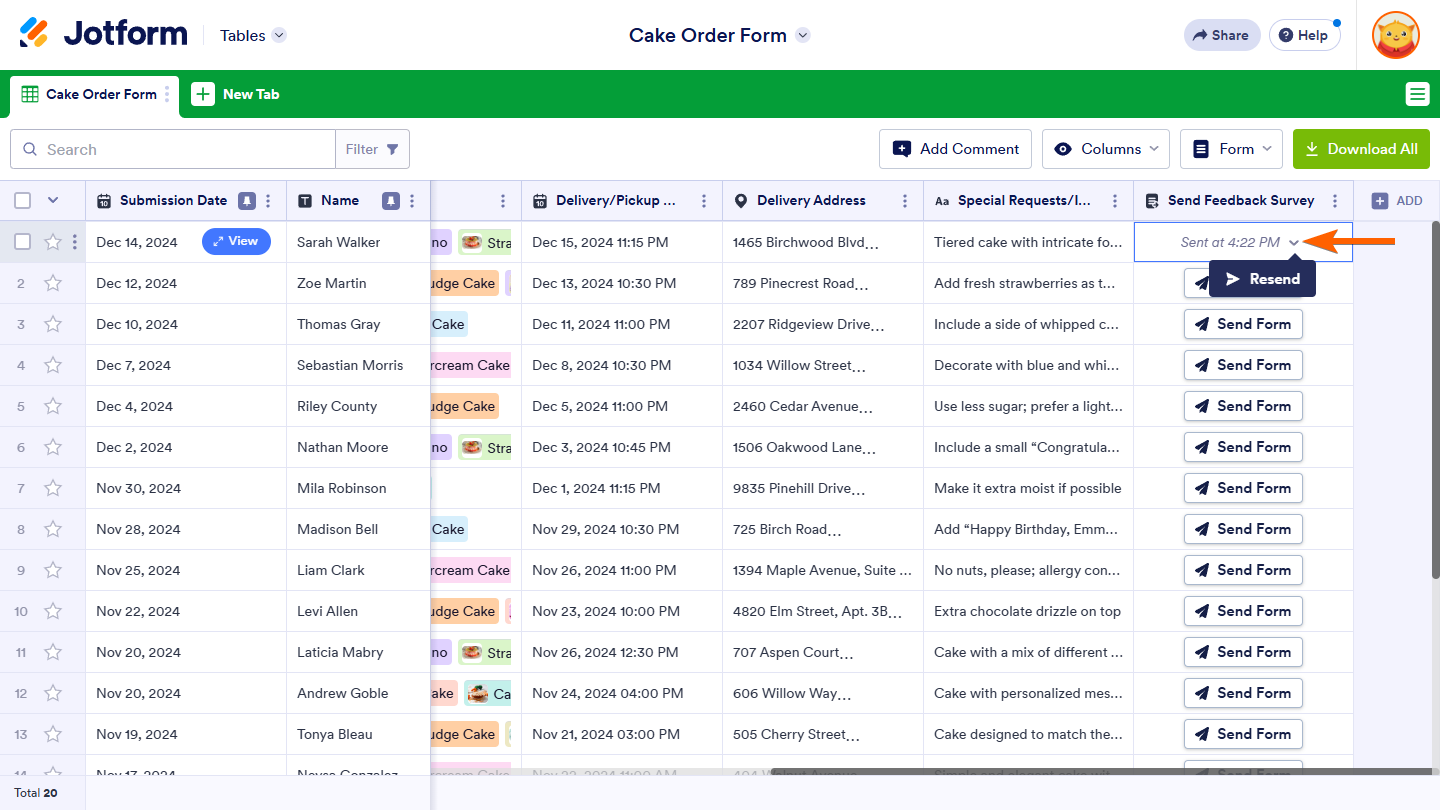
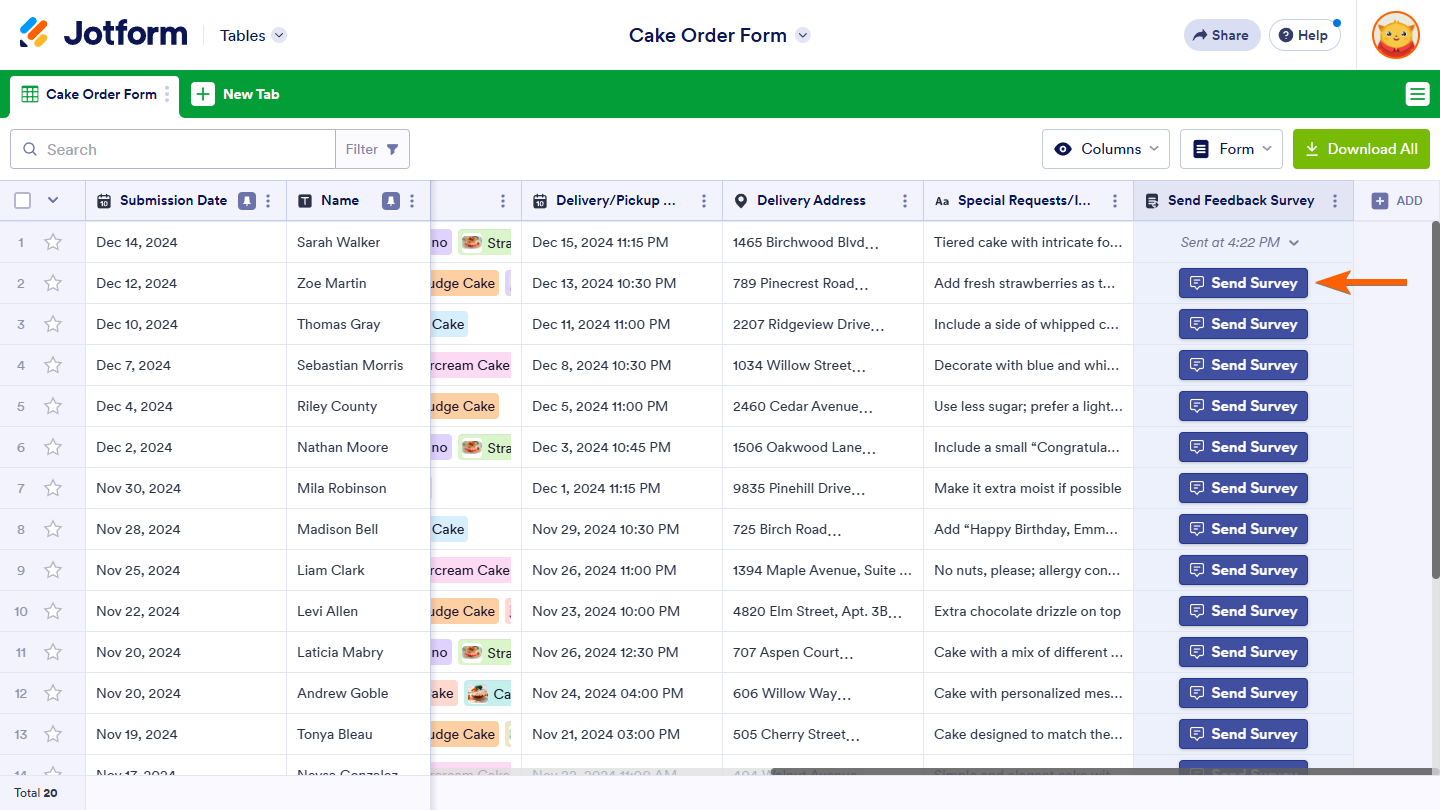
After sending a form, the Send Form button in the column for the corresponding entry changes to show a message with the timestamp indicating when the form was sent. Click on the Downward Arrow icon next to the message, then select Resend to send the form again if needed. If the button’s settings have been modified, the form will be resent using the new configuration.
Jotform Tables also let you send your form for multiple entries simultaneously, saving time and ensuring consistency. To do this, select multiple entries in your table and click on the Three Dots icon at the top. Then, hover over the Buttons option to open a submenu and select the option for the Send Form button you’ve set up. This method can also be used to resend the form for multiple entries at once.
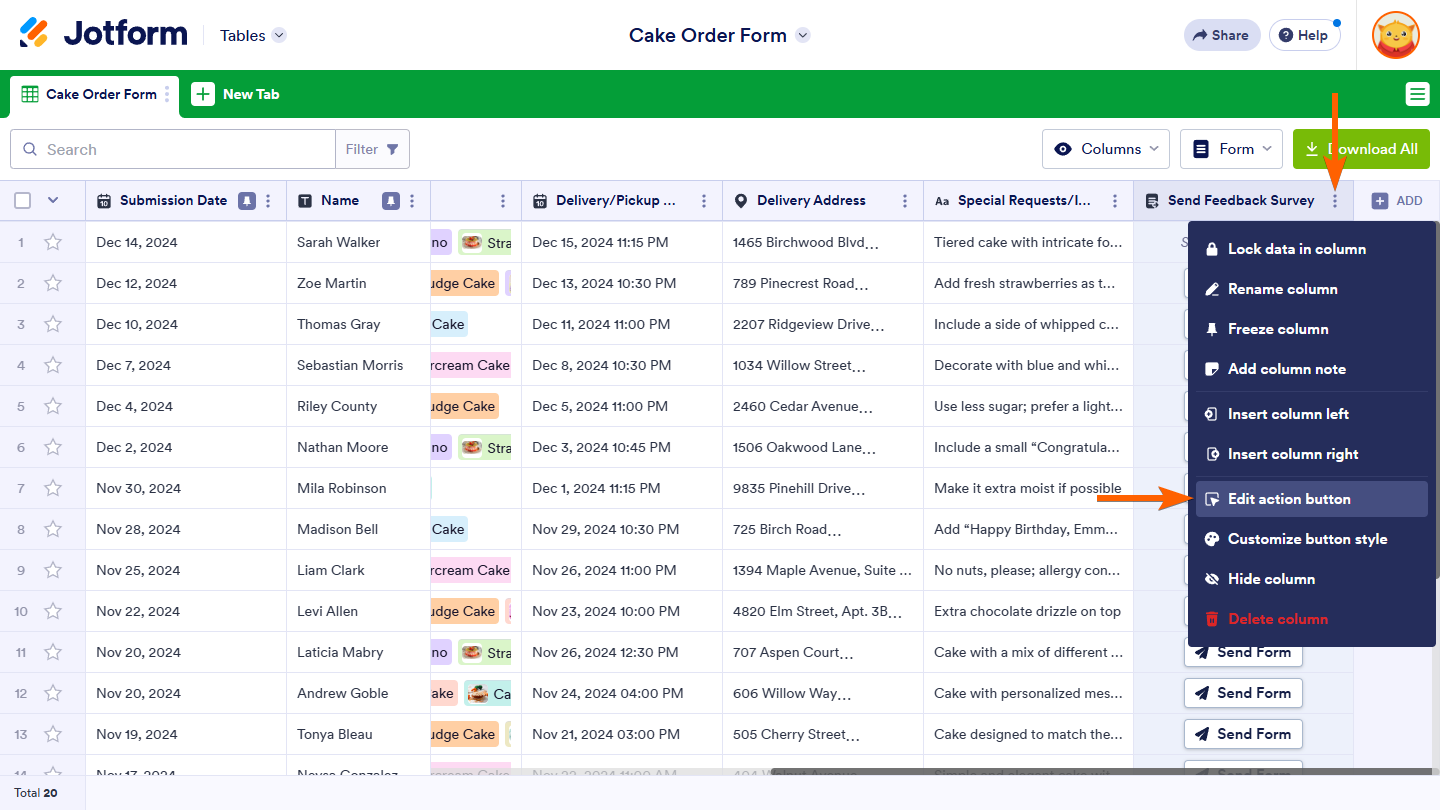
You can reconfigure the Send Form action button in a column if you need to adjust its settings. Click the Three Dots icon next to the column name to open the Column menu and select the Edit Action Button option. This opens the Send Form window, where you can choose a different form to send, update its prefill settings, or change its recipients.
Note
Reconfiguring the button settings does not automatically resend the form or reset the buttons for entries to which your form has already been sent. If needed, you can resend the form with the updated settings for those entries.
You can customize the appearance of the Send Form button in your table. If your table includes other action buttons, styling the Send Form button can make it easier to distinguish from the rest. For more details, see How to Customize Action Buttons in Jotform Tables.
Pro Tip
Just like any other columns in your table, you can also add a note to the Send Form Action Button column, which you can later use for reference or clarification. See How to Add Descriptions to Tabs and Columns in Jotform Tables.



Send Comment:
3 Comments:
257 days ago
How do you do step a) ?
More than a year ago
When using this feature, the email is sent from noreply@jotform.com - is there anyway to customize this or have it sent from the Jotform account owners email instead?
More than a year ago
It would be great to have a simpler solution, this will take ages for a long form.