The Make an Appointment action allows your AI agent to help users schedule appointments. This feature streamlines the booking process by automating appointment scheduling based on predefined conditions and triggers. Whether it’s for consultations, meetings, or any other type of appointment, this action simplifies scheduling for both users and agents.
Setting Up Appointments with Agents
You can easily set up appointments with your AI agent by following the steps below:
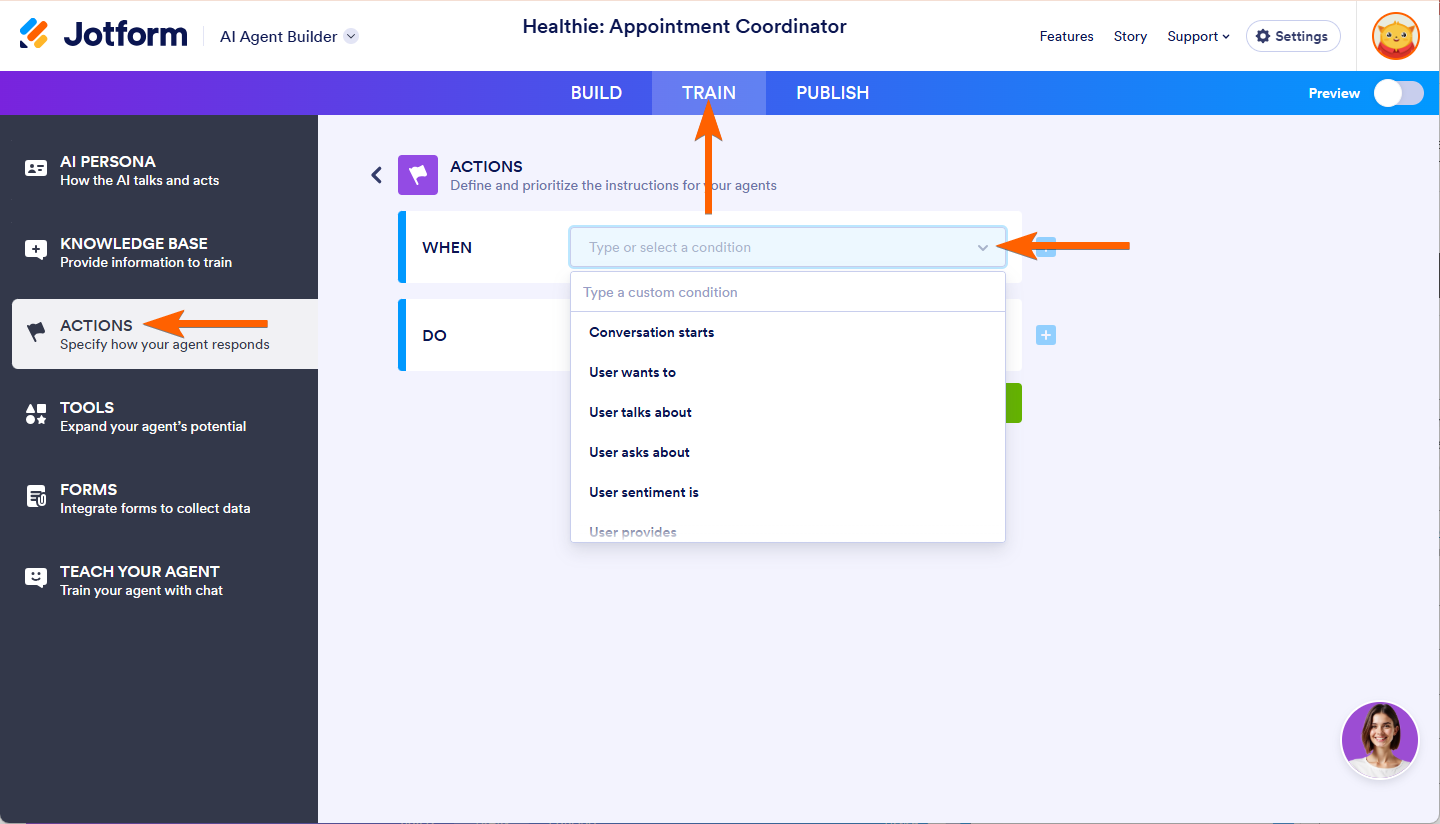
- In AI Agent Builder, click on the Train tab.
- Then, click on the Actions tab in the menu on the left side of the page.
- In the Actions section on the right, click on the When dropdown to select and define a condition that will trigger your agent’s action. If you already have an existing action set, click on Add New Action button instead.
Note
You can also type a custom condition in the dropdown and click on the Add button on the right to create one that isn’t in the list of available conditions.
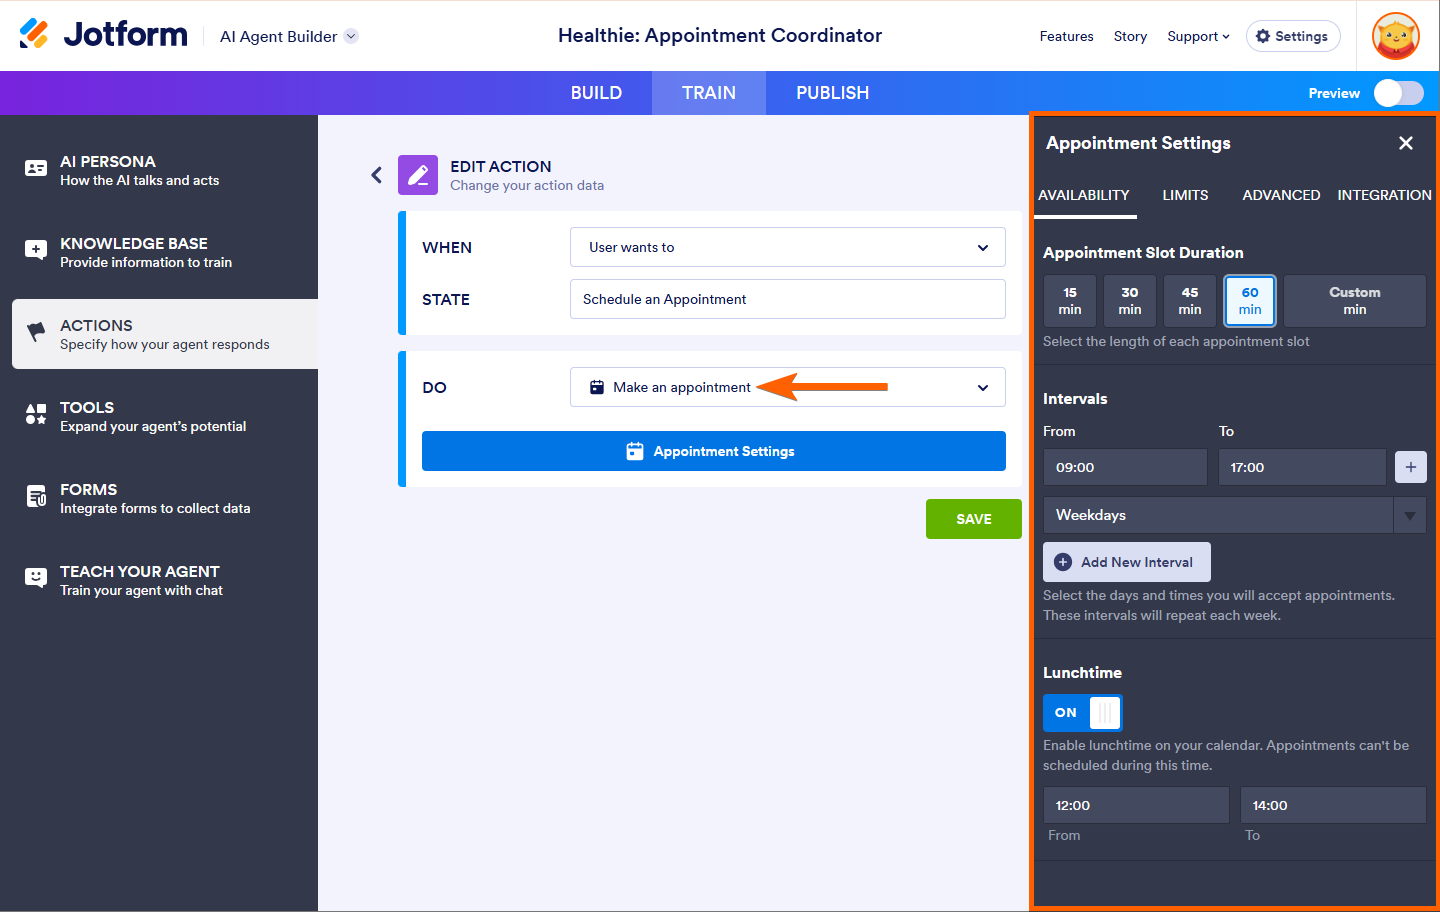
- Next, choose the Make an Appointment option from the Do dropdown.
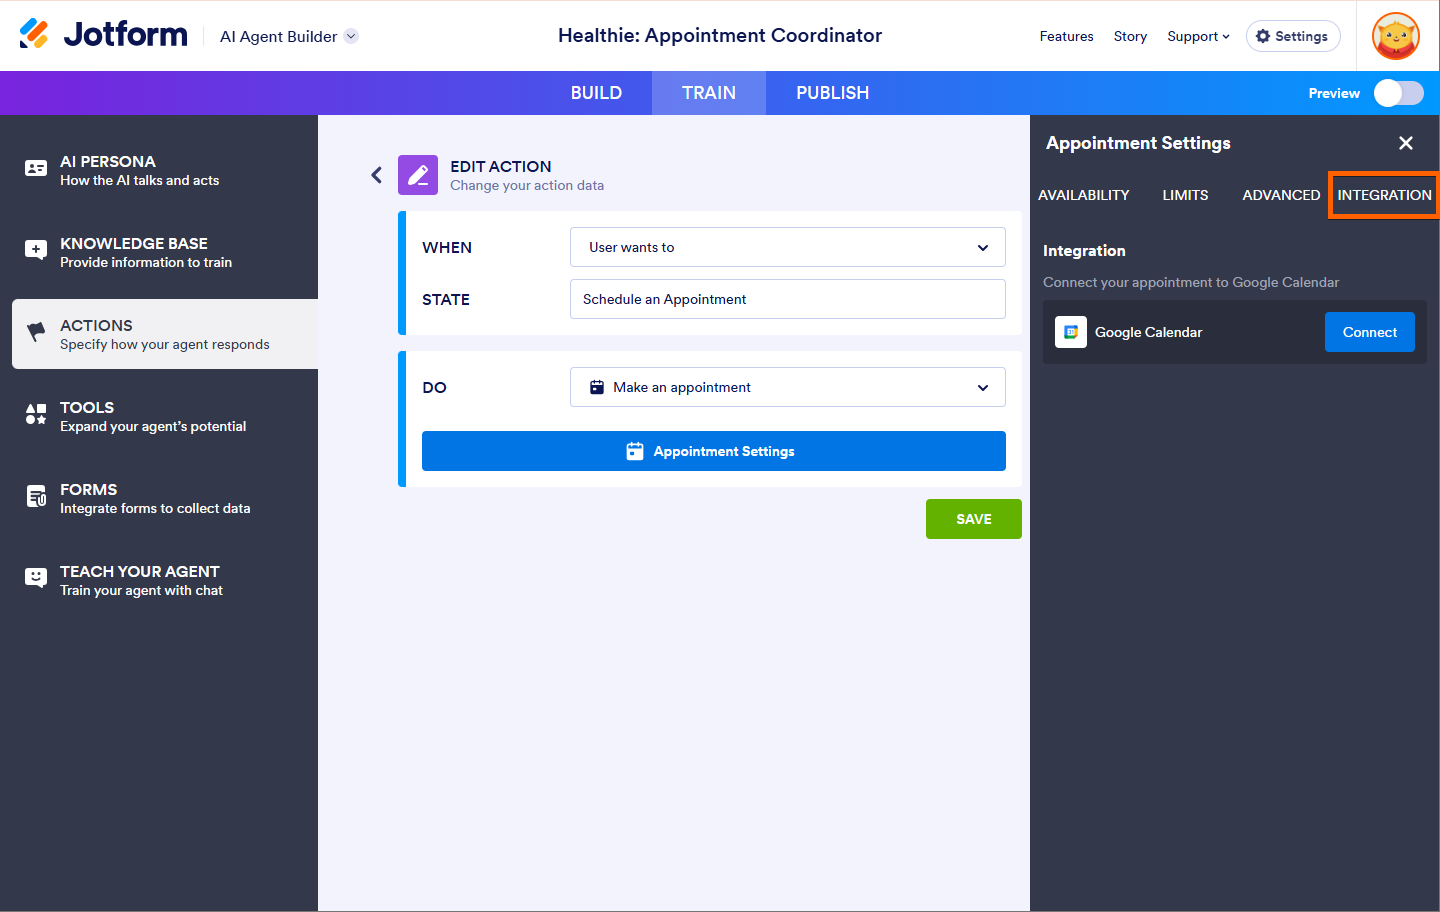
- Then, it will automatically open the Appointment Settings where you’ll be able to configure the Availability, Limits, Advanced and Integrations tab. See more information about appointment settings here.
- Click on Save button to save the changes.
Configuring Appointment Settings
Setting up your appointment is made easy with the following configuration options. These settings allow you to customize appointment availability, manage scheduling limits, and integrate with other tools like Google Calendar to streamline the booking process.
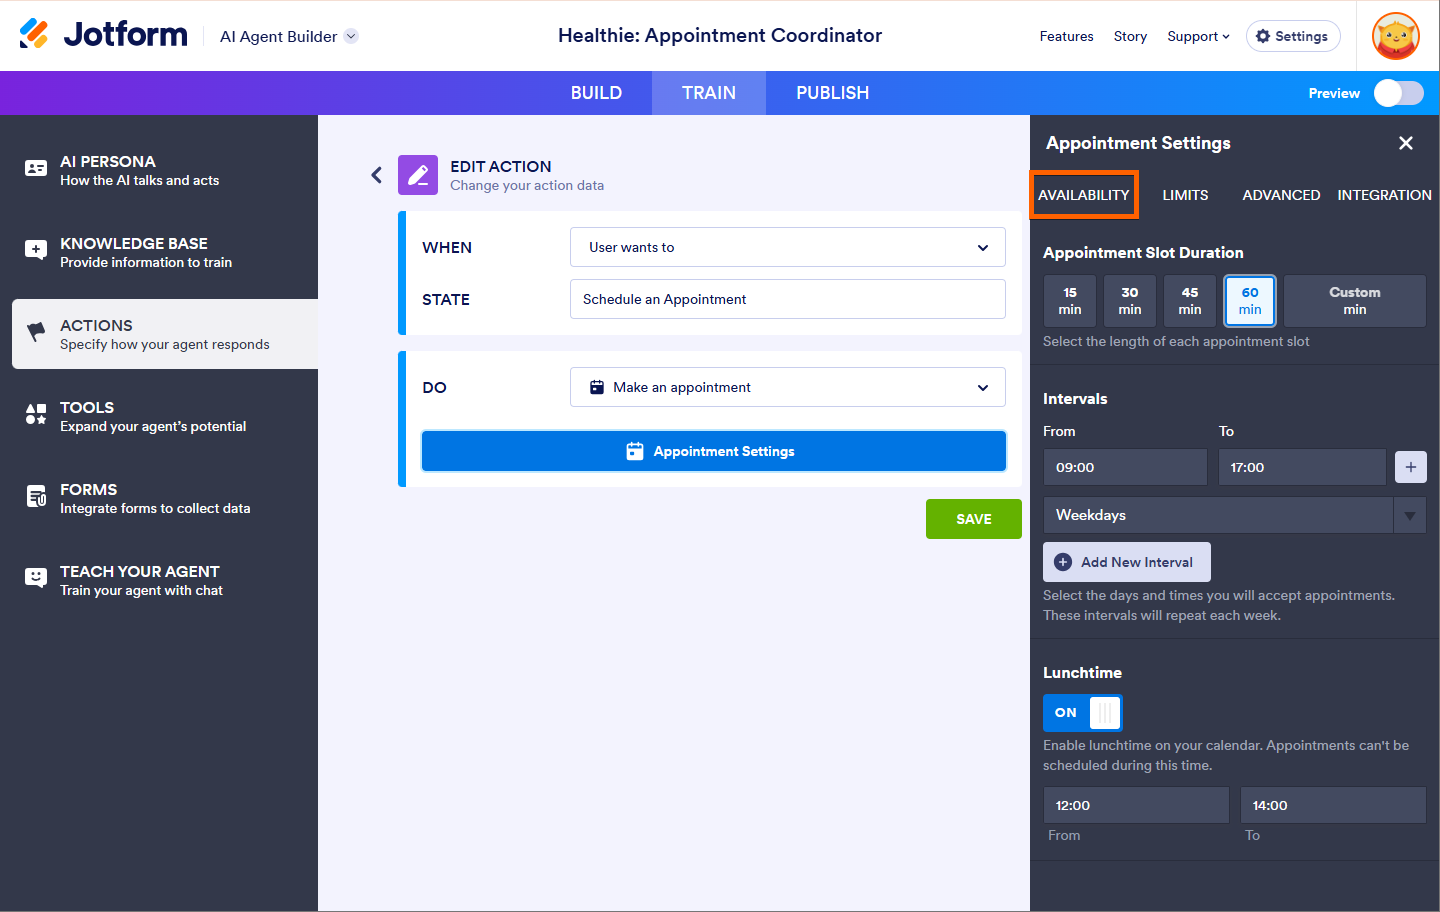
Availability Tab
In the Availability tab, you can configure the key settings for your appointment scheduling:
- Appointment Slot Duration — Set the duration for each appointment slot based on your needs (e.g., 30 minutes, 1 hour).
- Intervals — Define the time intervals between each appointment (e.g., 15 minutes, 30 minutes).
- Lunchtime — Block out a lunchtime break to prevent appointments from being scheduled during this period.
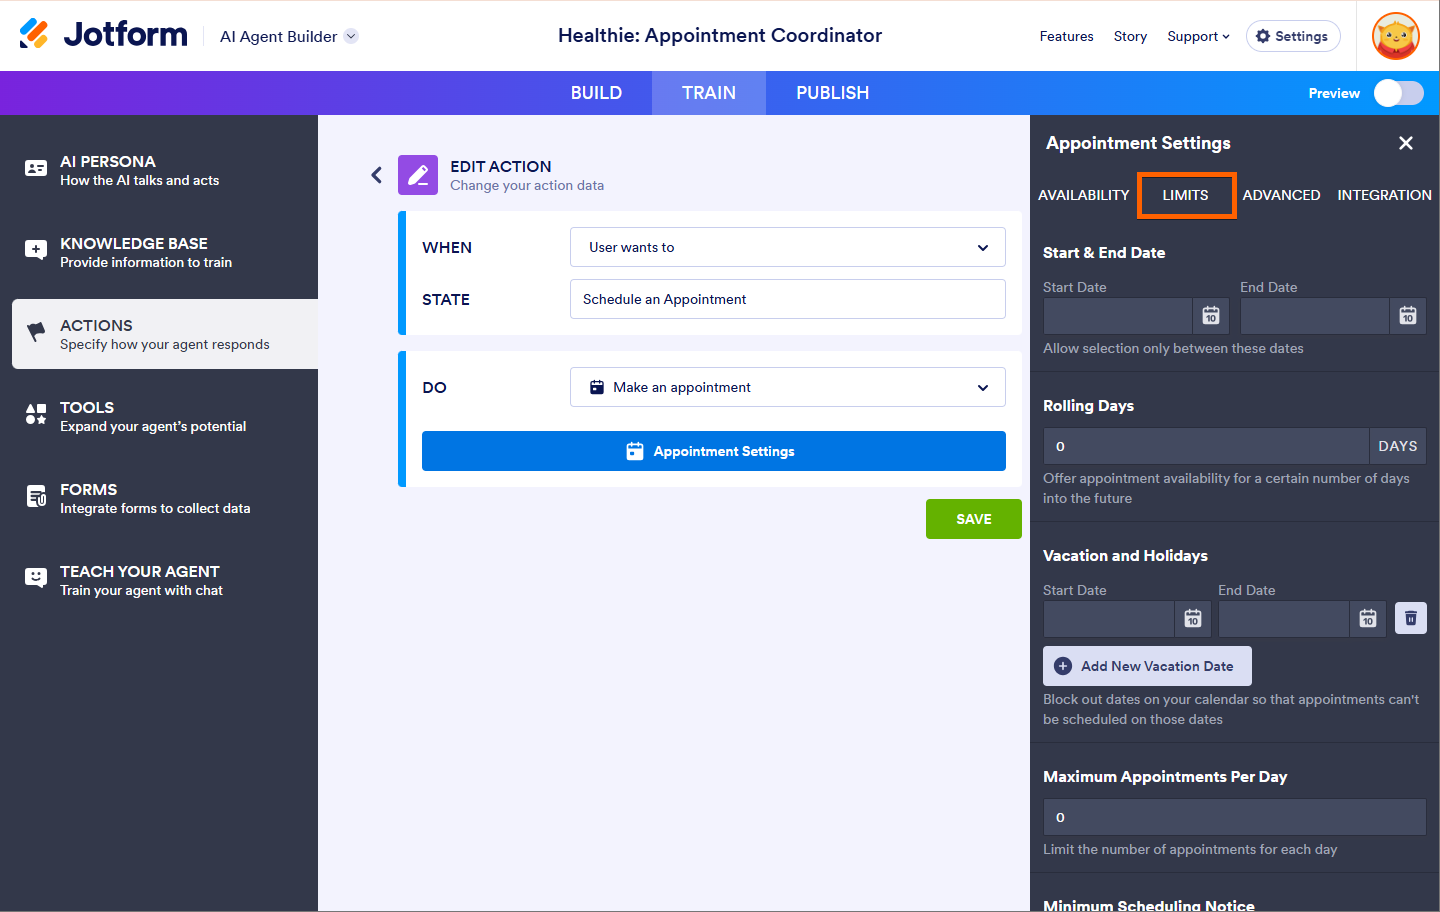
Limits Tab
The Limits tab allows you to set important rules for appointment scheduling:
- Start & end date — Define the range of dates within which users can schedule appointments.
- Rolling days — Set the number of days in advance that users can book appointments, helping you manage availability effectively.
- Vacation and holidays — Mark vacation days or holidays when users cannot schedule appointments, ensuring your calendar reflects your time off.
- Maximum appointments per day — Set a limit on how many appointments users can book in a single day, preventing overbooking.
- Minimum scheduling notice — Specify the minimum notice required for an appointment to be scheduled (e.g., 24 hours in advance).
Advanced Tab
The Advanced tab provides additional customization options for your appointments:
- Description — Add a brief description for the appointment type to inform users about what to expect during the meeting.
- Location — Specify the location where the appointment will take place, whether it’s in-person or virtual (e.g., a meeting room, Zoom link).
- Ask for name — Toggle the option to prompt users for their name when booking an appointment.
- Ask for email — This option is locked in to ensure users provide their email addresses for confirmation and reminders.
- Default time zone — Set a default time zone for your appointments to ensure that booking times are consistent.
- Lock time zone — Lock the time zone setting to avoid confusion for users in different regions.

Integration Tab
Integrate your appointment settings with Google Calendar to automatically sync your appointments and manage your schedule in real-time. This integration allows appointments to be added to your calendar and ensures that your availability remains up-to-date.
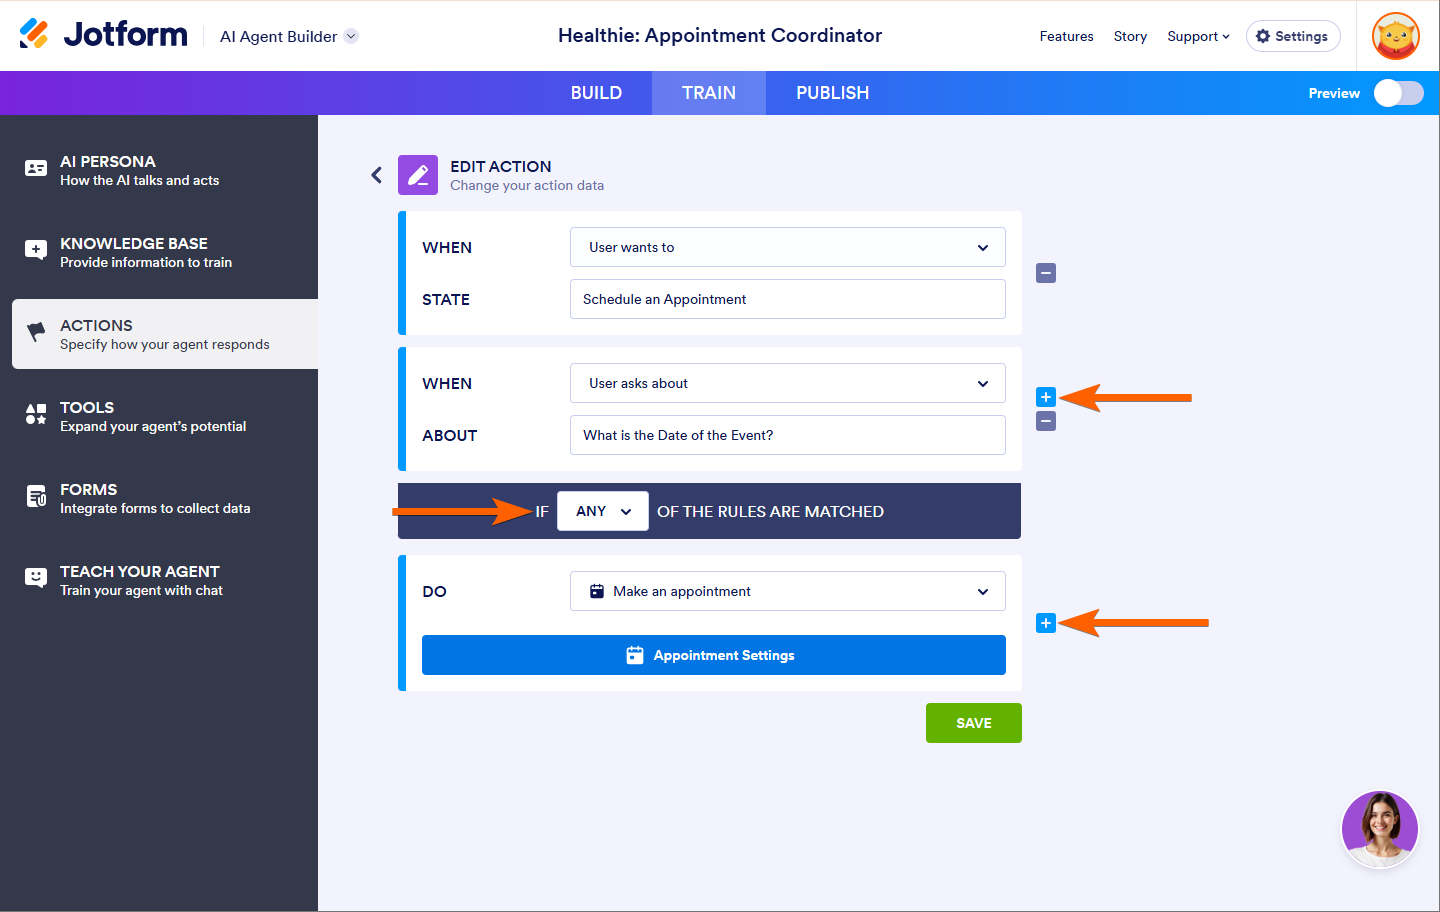
Adding Multiple Actions and Triggers
The Plus Sign icon next to the condition and action in the Actions section enables you to define additional instructions for your agent within a single action. You can add multiple conditions and specify whether ANY or ALL must be met to trigger the action. Additionally, you can add multiple actions, which will be executed simultaneously when the condition is met. For more details on each available predefined condition and action, see How to Customize Agent Actions and Triggers.
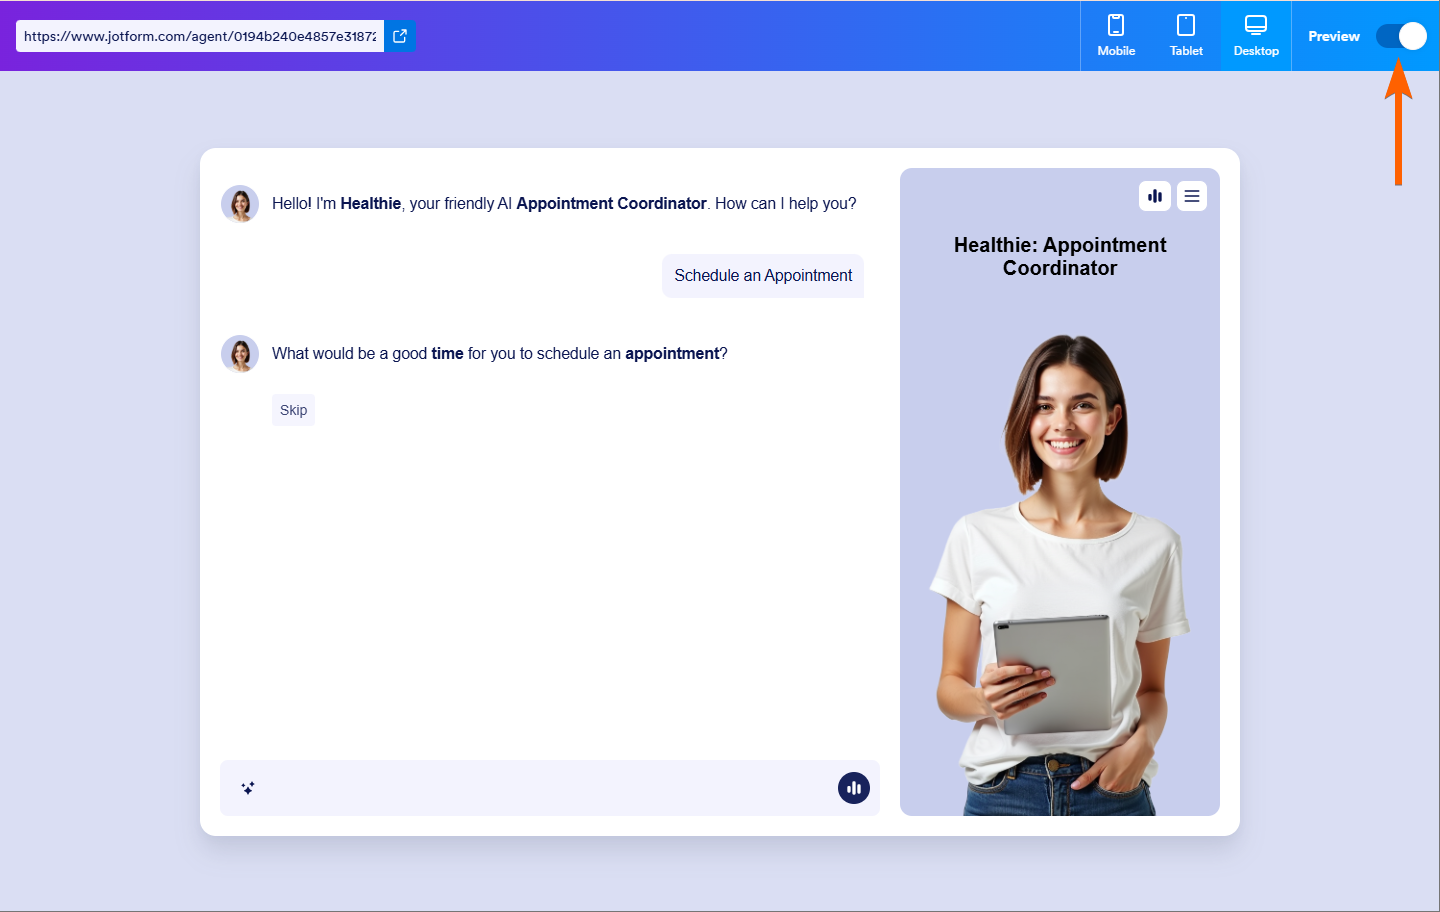
You can also Toggle the Preview switch in the top-right corner of the page to On to test new actions you added.


Send Comment: