Jotform App Builder offers various Actions that enhance your app’s interactivity, making it more dynamic and user-friendly. By leveraging these actions, you can improve navigation, communication, and overall efficiency within your app.
Actions can be found in the settings of specific elements, such as the:
- Card element
- Button element
- Image element
Below is an overview of the available Actions and how to configure them.
Navigate to Page Action
The Navigate to Page action lets you seamlessly redirect users to a relevant page within your app based on their selection. This enhances the user’s experience by guiding them to additional details, next steps, or specific content that matches their needs. Let’s do it:
- In App Builder, click on the Element.
- Then, click on the Gear icon on the right side to open the Properties window.

- Under the Action tab, in the Actions menu, select Navigate to Page.
- Now, in the Page dropdown menu, select the Page you want your users to navigate to.
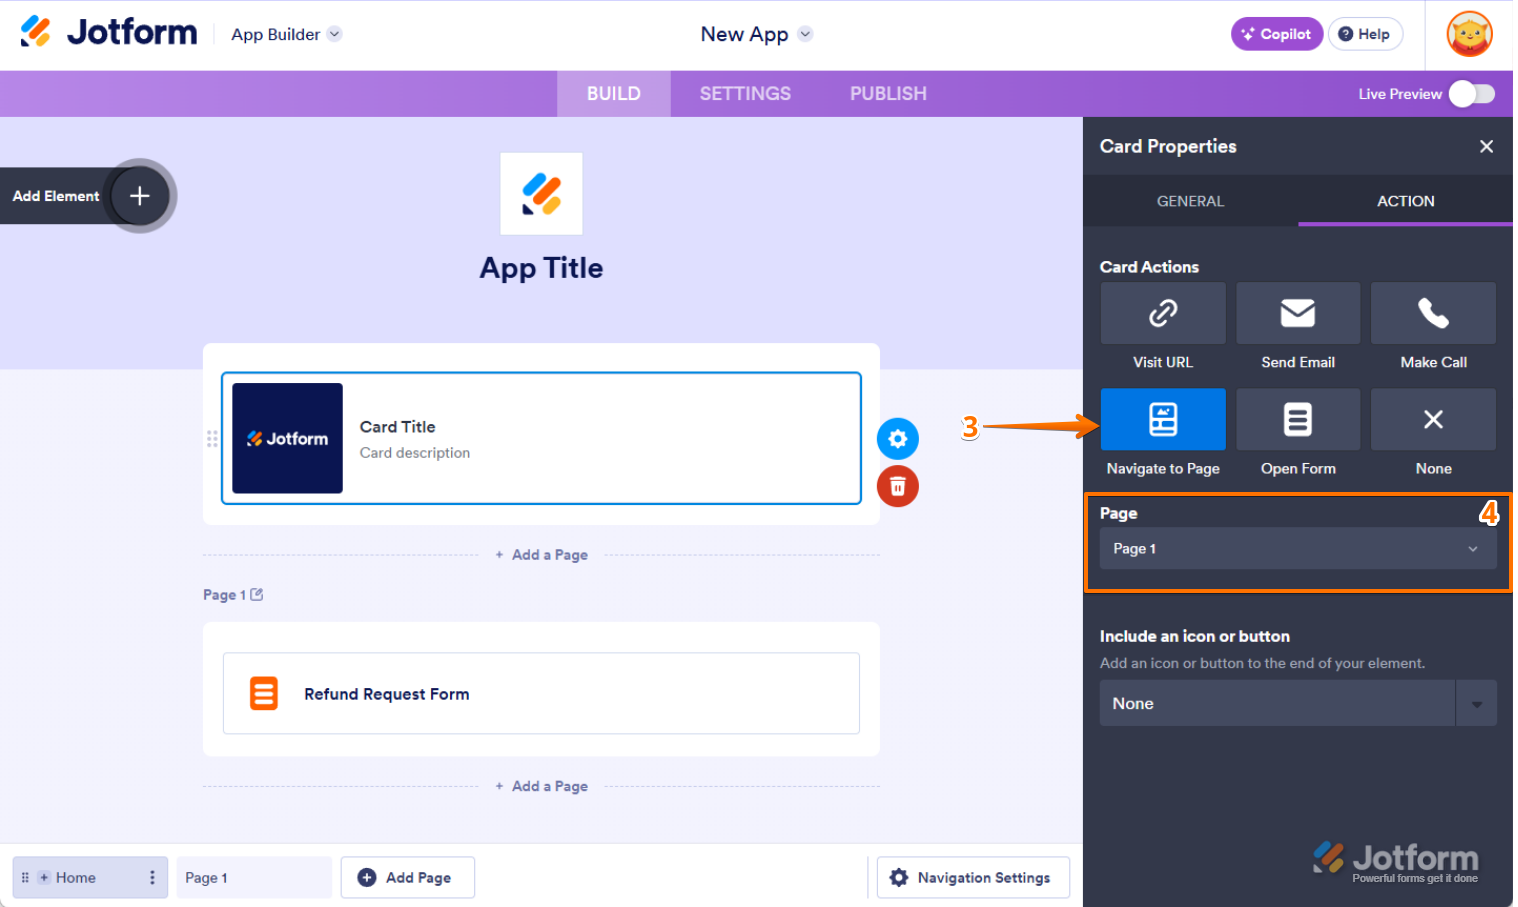
- In the Include an Icon or Button section, select either Icon or Button to add one to the end of your element, and you’re all set.
Note
- Your app needs to have more than one page to use this action.
- When selecting a page from the dropdown menu, you’ll also have the option to create a new page.
Visit URL Action
The Visit URL action redirects users to the link provided in the element properties. This is great for linking to your website, blog, or any external resource. Here’s how to do it:
- In App Builder, click on the Element.
- Then, click on the Gear icon on the right side to open the Properties window.
- Under the Action tab, in the Actions menu, select Visit URL.
- Now, add your target URL in the URL field.
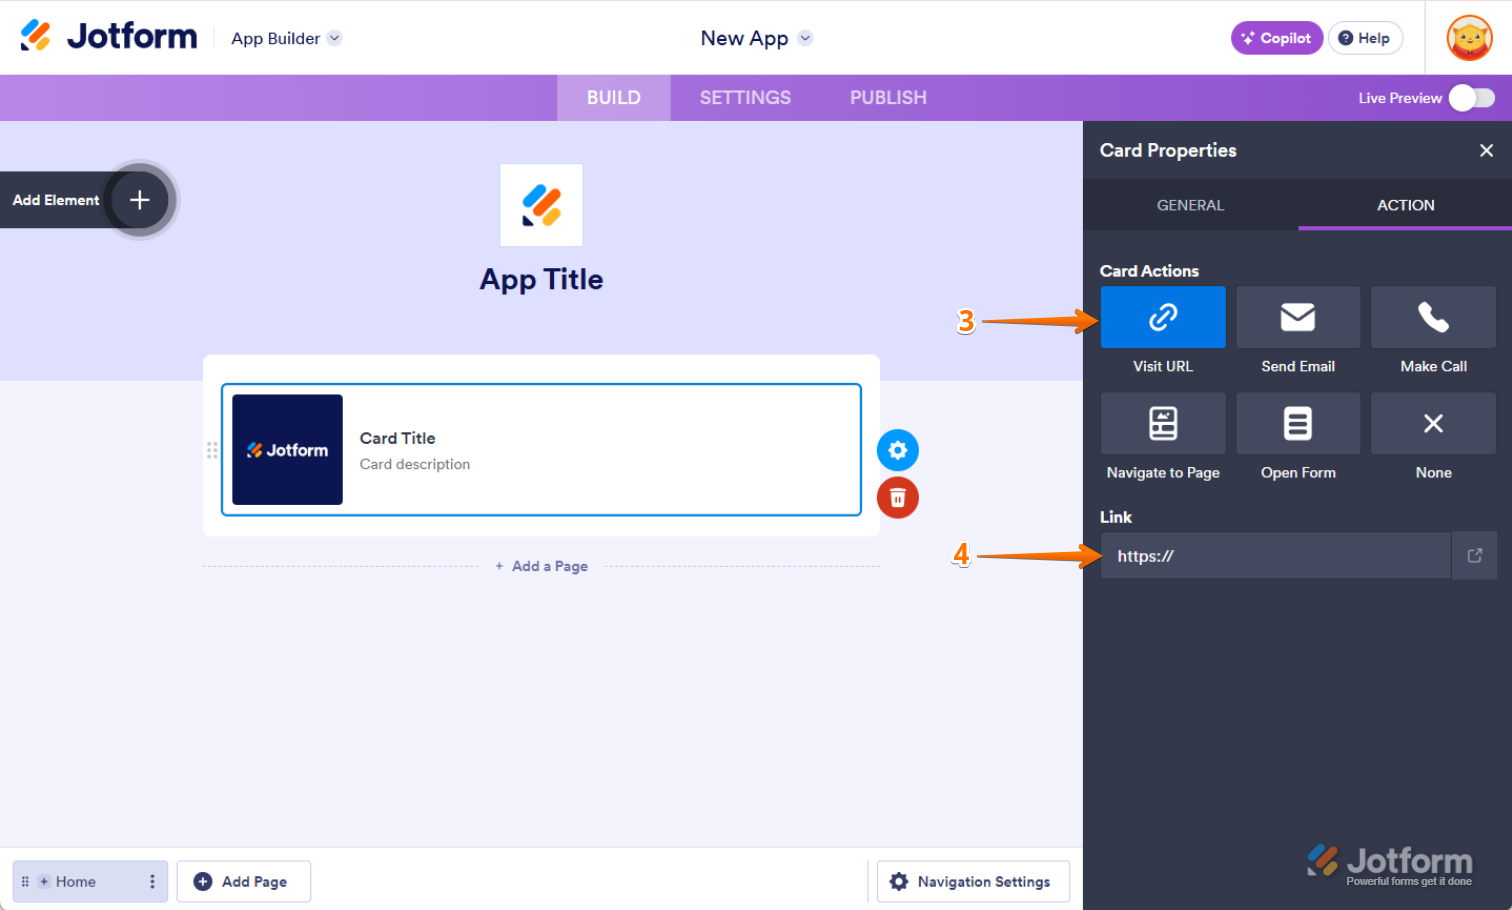
- In the Include an Icon or Button section, select either Icon or Button to add one to the end of your element, and you’re all set.
Send Email Action
With the Send Email action, users can instantly open their device’s default email application with your email address prefilled in the “To” field. This simplifies the communication process, allowing users to contact you with a single click. Let’s do it:
- In App Builder, click on the Element.
- Then, click on the Gear icon on the right side to open the Properties window.
- Under the Action tab, in the Actions menu, select Send Email.
- By default, your email address will be prefilled in the Email Address field. To use a different email, just delete yours and add the other one.
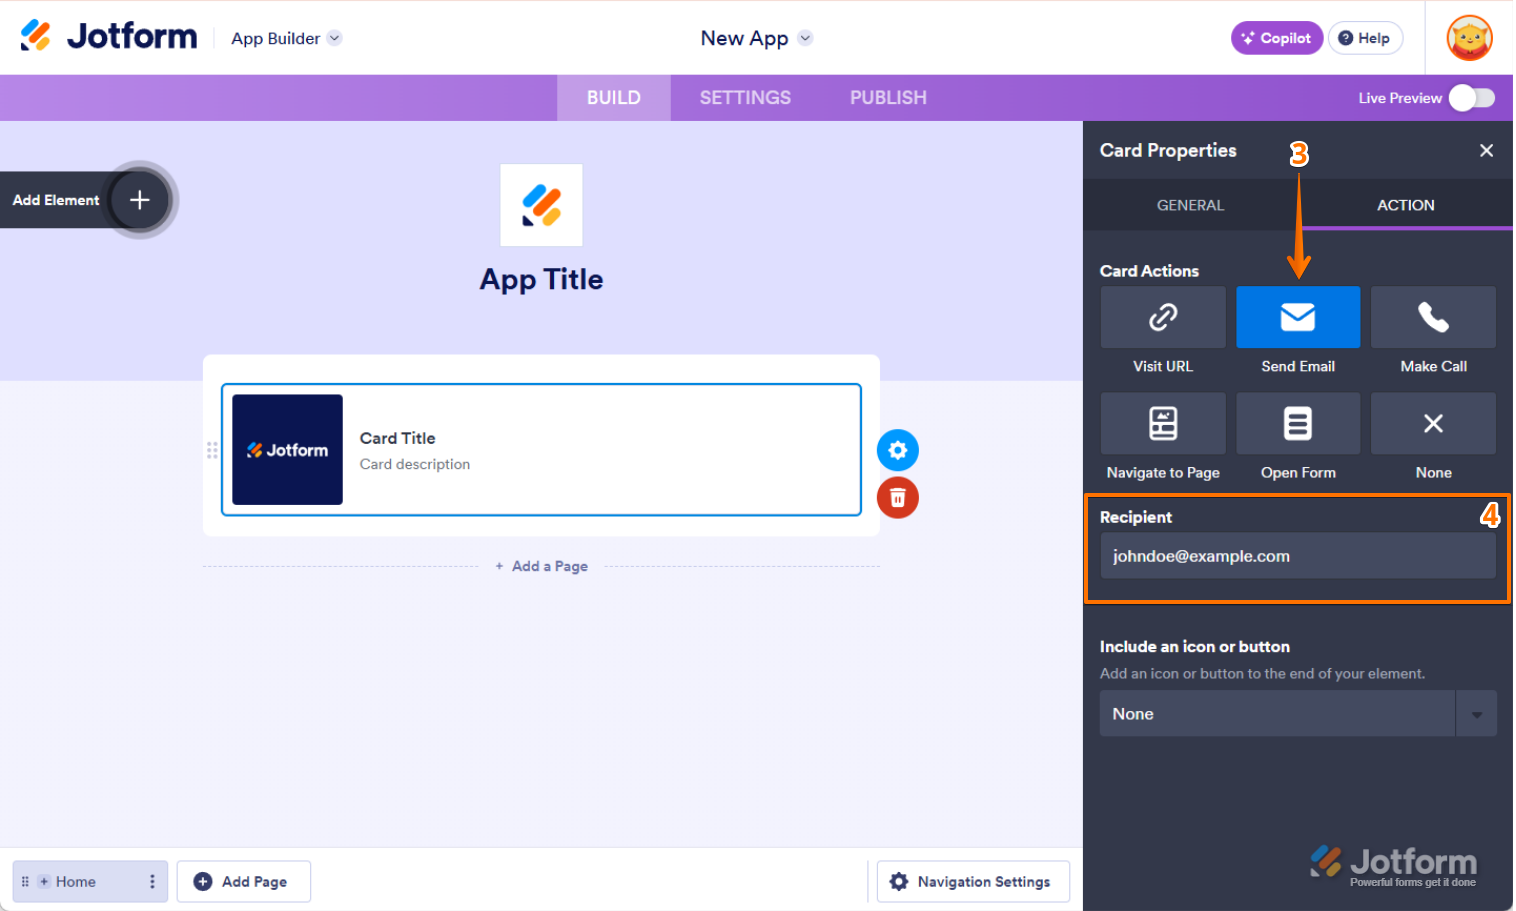
- In the Include an Icon or Button section, select either Icon or Button to add one to the end of your element, and you’re all set.
Make Call Action
When you add the Make Call action to an element, users can contact you instantly with a single tap. Their device’s phone app will open with your number prefilled, allowing them to call without manually entering it. This is especially useful for customer support, inquiries, and appointment bookings, ensuring a smooth and hassle-free communication experience. Check the steps below to see how to enable it:
- In App Builder, click on the Element.
- Then, click on the Gear icon on the right side to open the Properties window.
- Under the Action tab, in the Actions menu, select Make Call.
- Now, add your Phone Number in the Phone field.
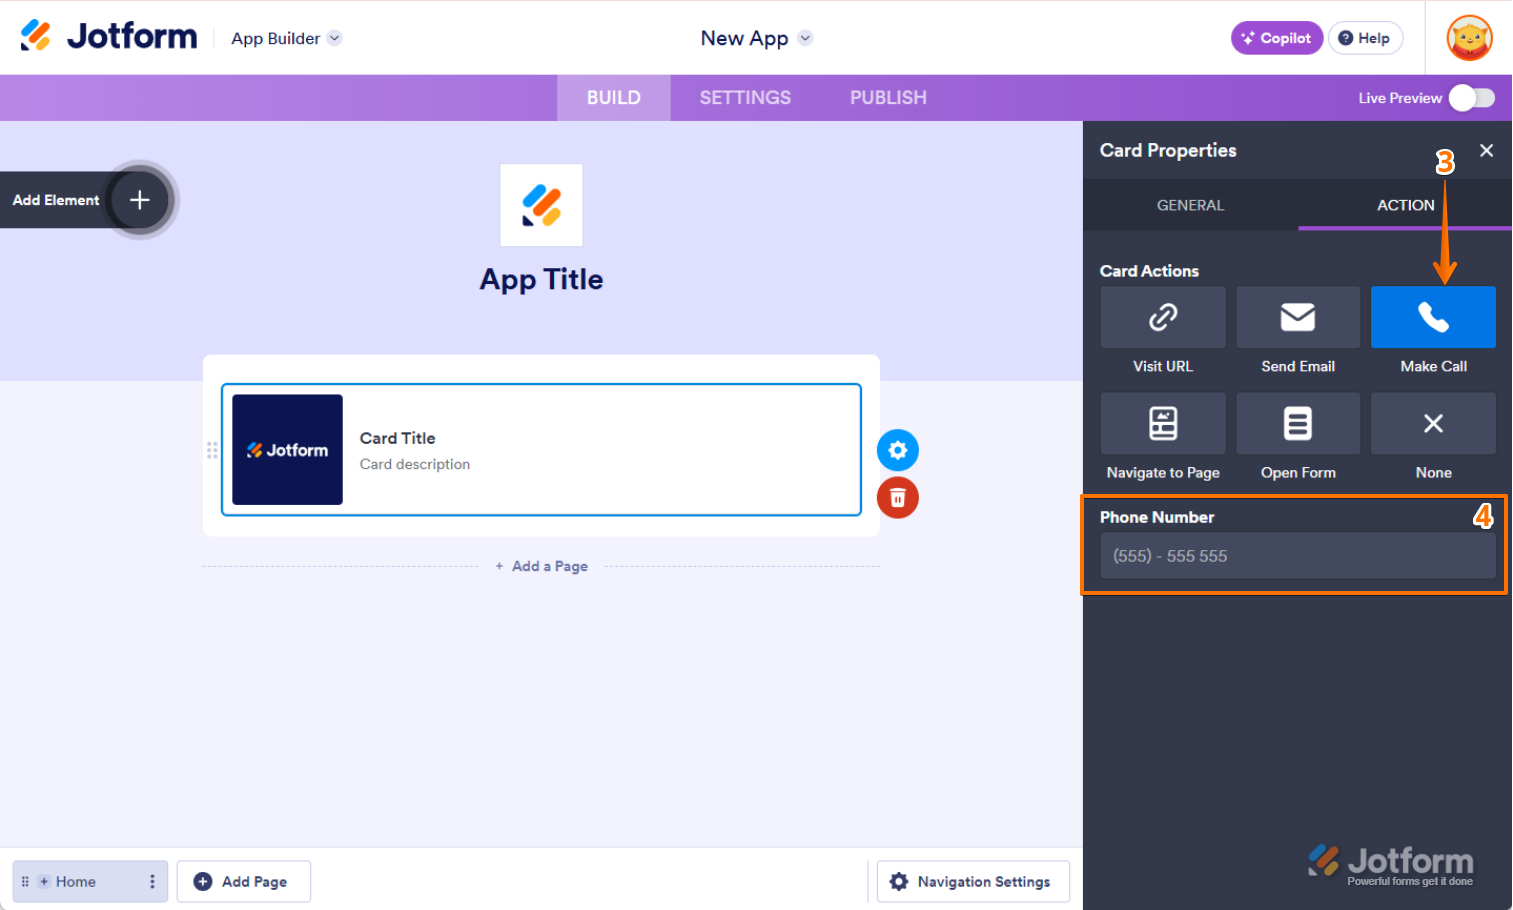
- In the Include an Icon or Button section, select either Icon or Button to add one to the end of your element, and you’re all set.
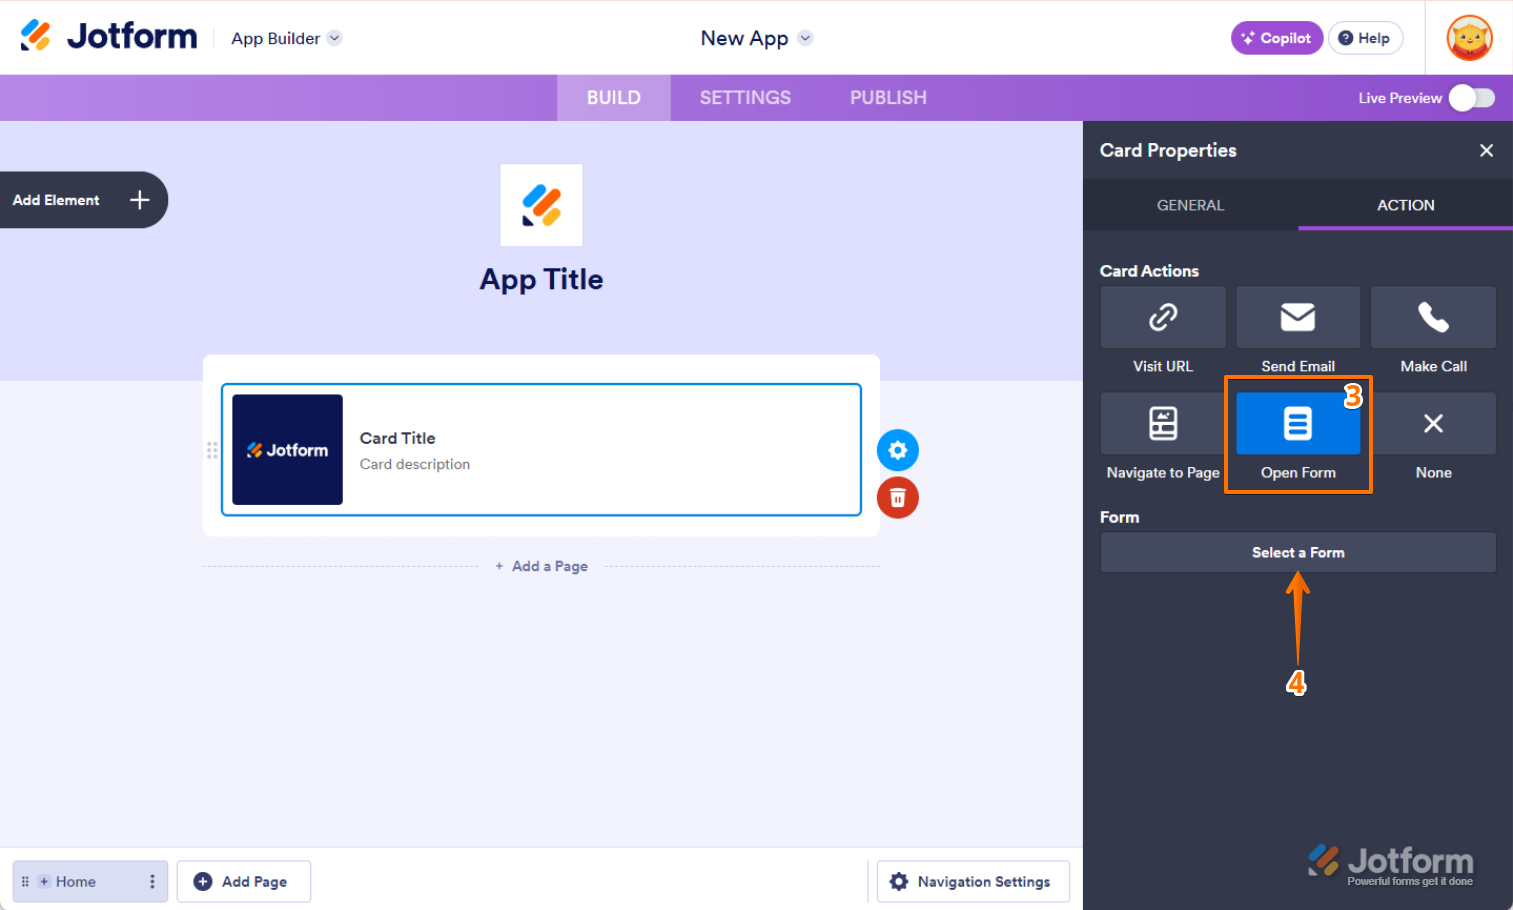
Open Form Action
The Open Form action lets users access a relevant form with just one click, ensuring they reach the right form without any extra steps. Best of all, they can fill it out without ever leaving your app, creating a seamless and uninterrupted experience. Here’s how:
- In App Builder, click on the Element.
- Then, click on the Gear icon on the right side to open the Properties window.
- Under the Action tab, in the Actions menu, select Open Form.
- Then, click on Select a Form.
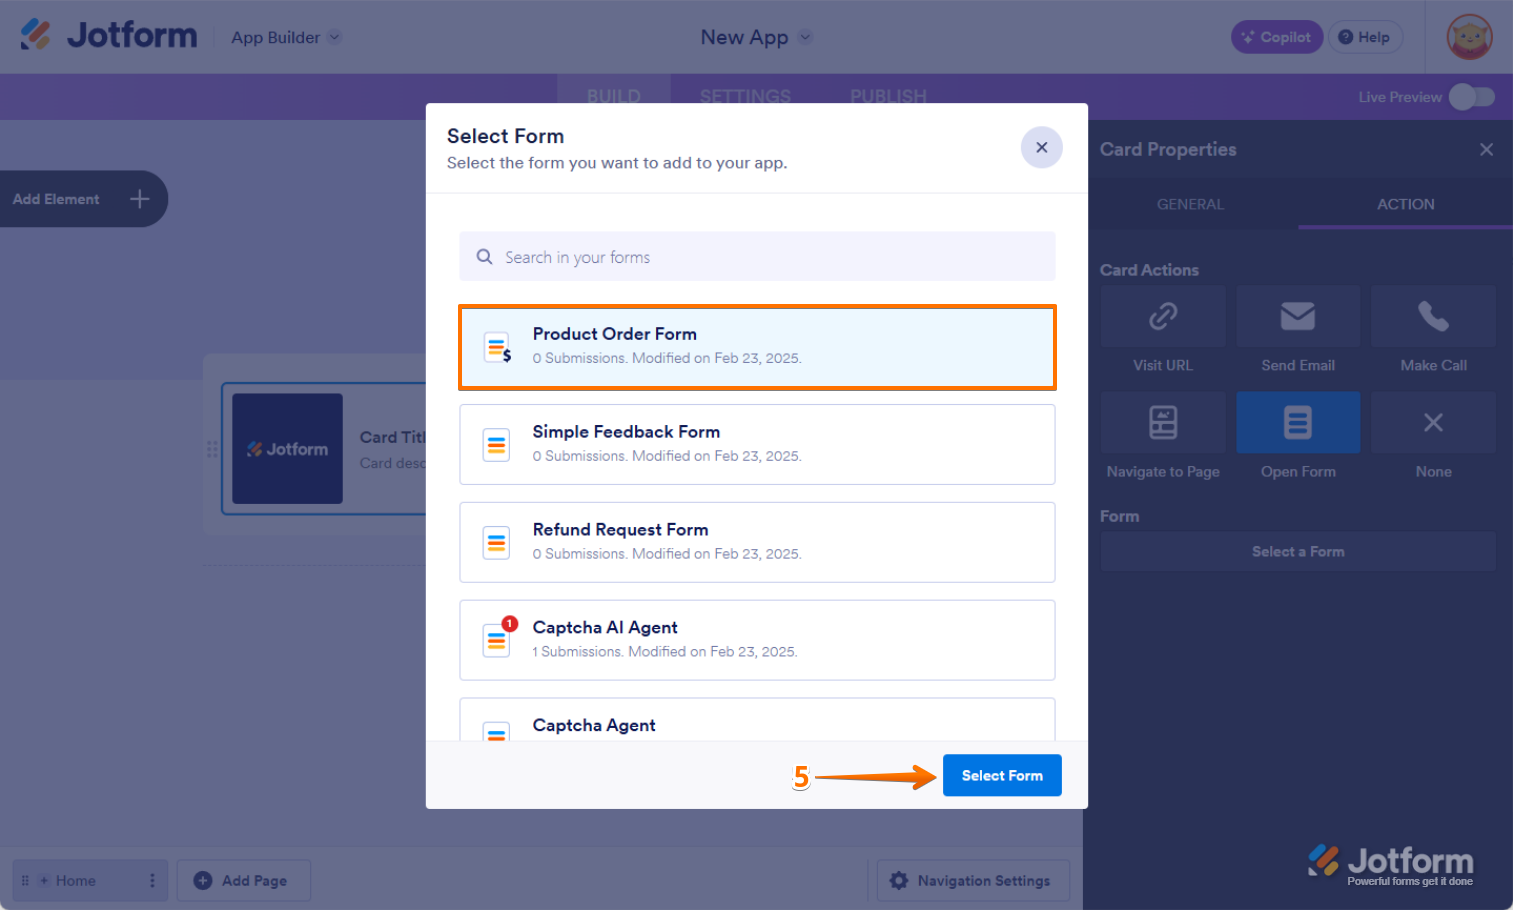
- Now, in the window that opens, select or search for the form that you want to add, and then click on Select Form at the bottom.
- In the Include an Icon or Button section, select either Icon or Button to add one to the end of your element, and you’re all set.
That’s it. Your actions are now set up and ready to go.


Send Comment: