Google Docs is a powerful tool for collaboration, and it now includes a built-in feature to request electronic signatures directly from documents. This feature allows you to handle all document signing needs within Google Workspace.
Using Google Docs’ built-in signature tool
Google Docs’ built-in signature tool simplifies the process for anyone who regularly needs to sign documents. Requesting signatures with this tool is straightforward.
Note that the eSignature tool is currently in beta, available to users on individual Google Workspace plans. If you aren’t on a paid Workspace plan or are on a group plan, you may not have access to it yet.
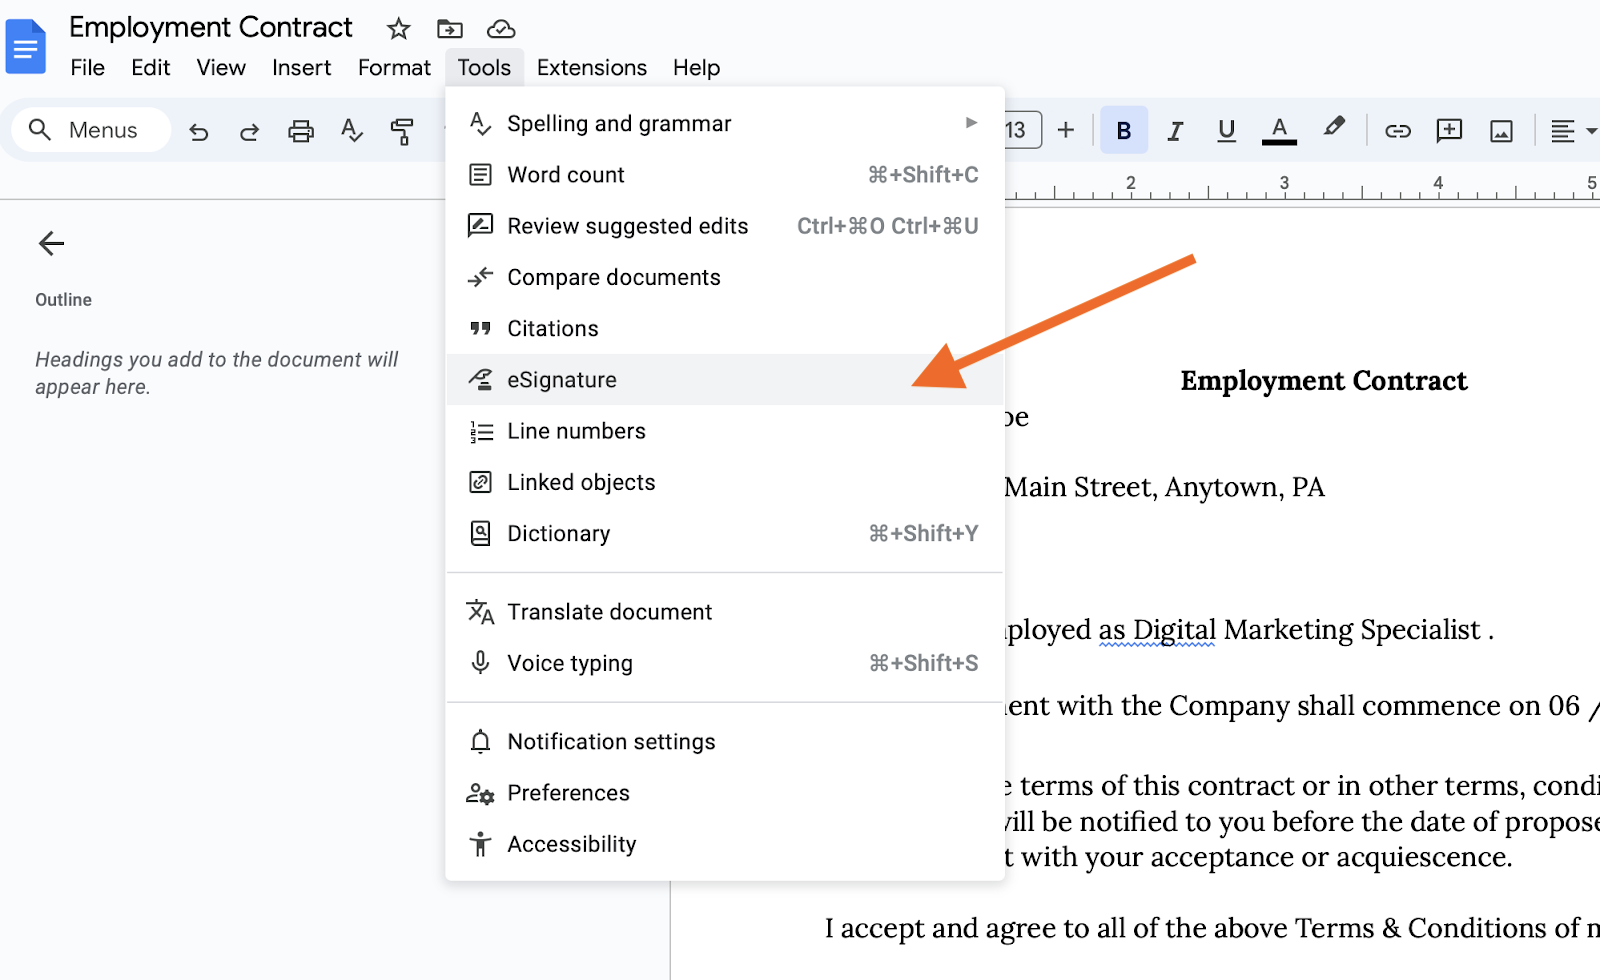
You can easily access the eSignature tool in the Tools menu and add signature fields for one or multiple signers to your document. This feature is not only useful for contracts but also for any document that requires a signature, such as
- Consent forms
- Agreements
- Invoices
- Employment applications
- Event planning documents
- Rental and lease agreements
Google Docs integrates seamlessly with other Google Workspace tools and many useful Google Docs add-ons. This means you can manage your documents, track the status of signature requests, and store completed documents all within Google Workspace.
Pro Tip
You can collect signatures and create, share, and manage e-sign documents using Sign PDF with Jotform Sign.
How to create a document for electronic signature
Creating a document to be e-signed in Google Docs is easy. Here’s how to do it in just a few clicks:
- Go to drive.google.com.
- Create a new Google Doc, open a PDF file, or open an existing document.
- In the Tools menu, select eSignature. For PDF files, select eSignature from the Menu.
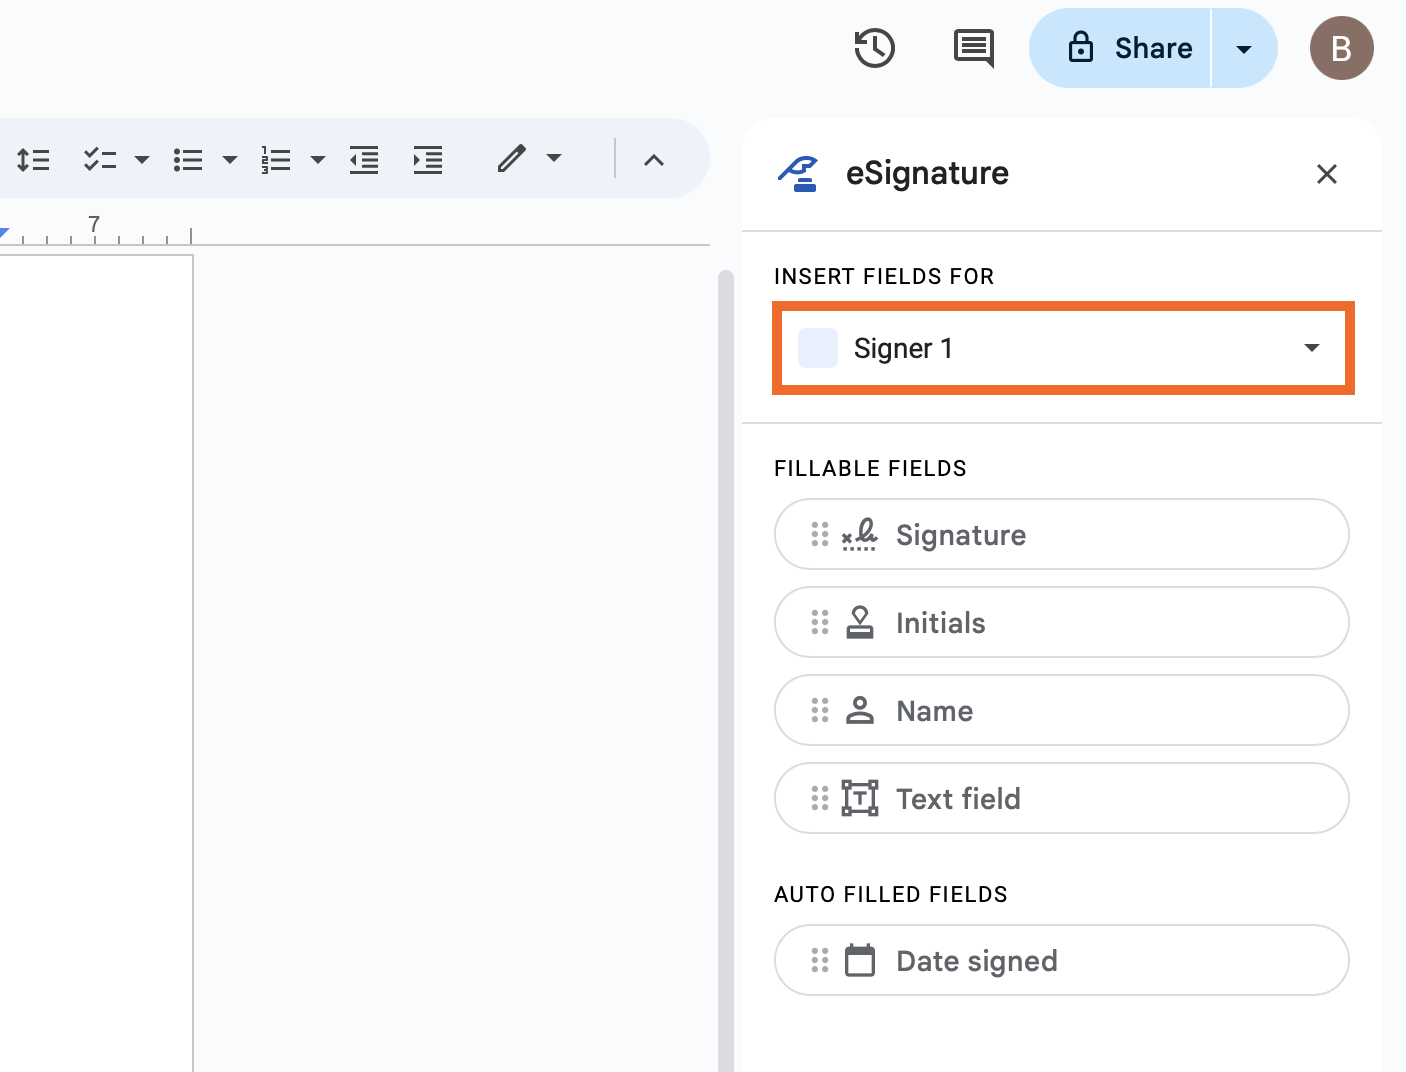
- If you have multiple signers, choose the specific signer you want to add an eSignature field for under Insert fields for.
- To see or edit the list of available signers, select Manage signers.
- Add signature fields as needed (e.g., signature, initials, name, text field, date signed).
For Google Docs only:
- Open the Google Doc you would like to get signed.
- Click on an inserted field to open a popup that shows which signer the field is assigned to.
- To change the assigned signer for the field, use the Assigned to dropdown in the popup.
- To update the list of signers in the Google Doc, click Manage signers in the dropdown.
- Select a Text field to add a description and choose the font size in the popup.
How to e-sign a Google Doc
Signing a Google Doc from a request received via email is simple. Open the email notification, and click on the embedded link. This will take you directly to the document that needs to be signed.
Once the document is open, you may need to complete the following steps:
- Fill out any text fields, such as your job title or email address.
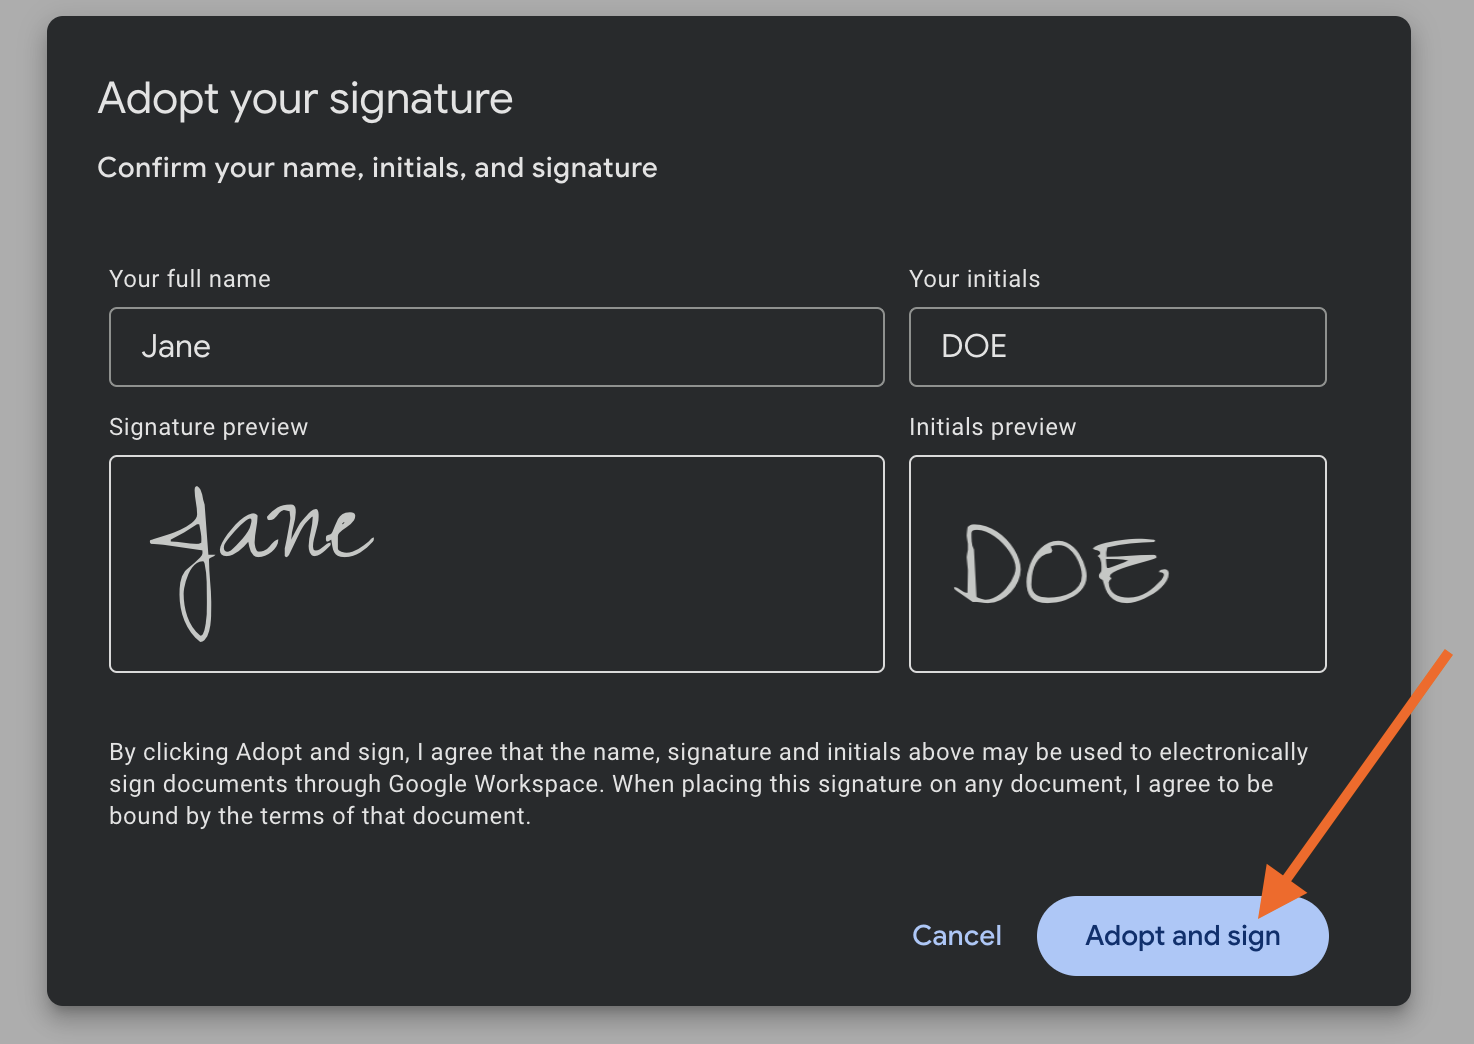
- Click on the signature field. A dialog box will appear, prompting you to enter your full name and initials. An electronic signature will be generated from your input.
- Click Adopt and sign to complete this step.
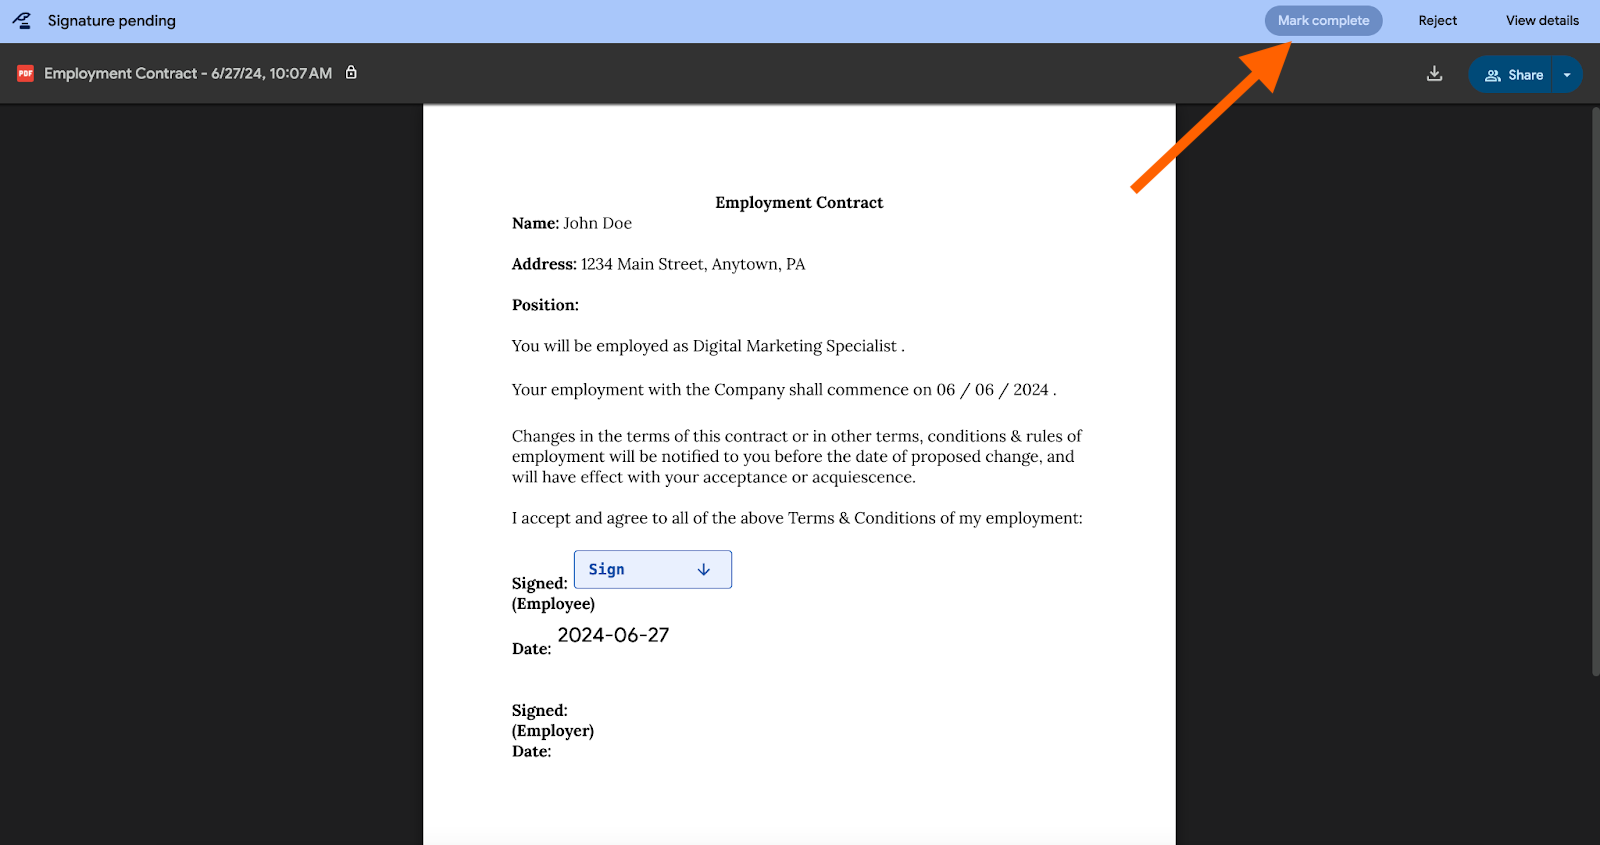
- Click Mark Complete at the top of the page. This will record your signature and notify the requester that you have completed the signing process.
- Review and accept the Terms of Service.
- Click Agree & Continue to finalize the document.
Once all required signatures have been collected, a final copy of the document or a link to the final document is sent to all signers and the requester via email. The final document is also saved in every party’s Google Drive, making it easy to access and store for future reference.
How to reject an eSignature request
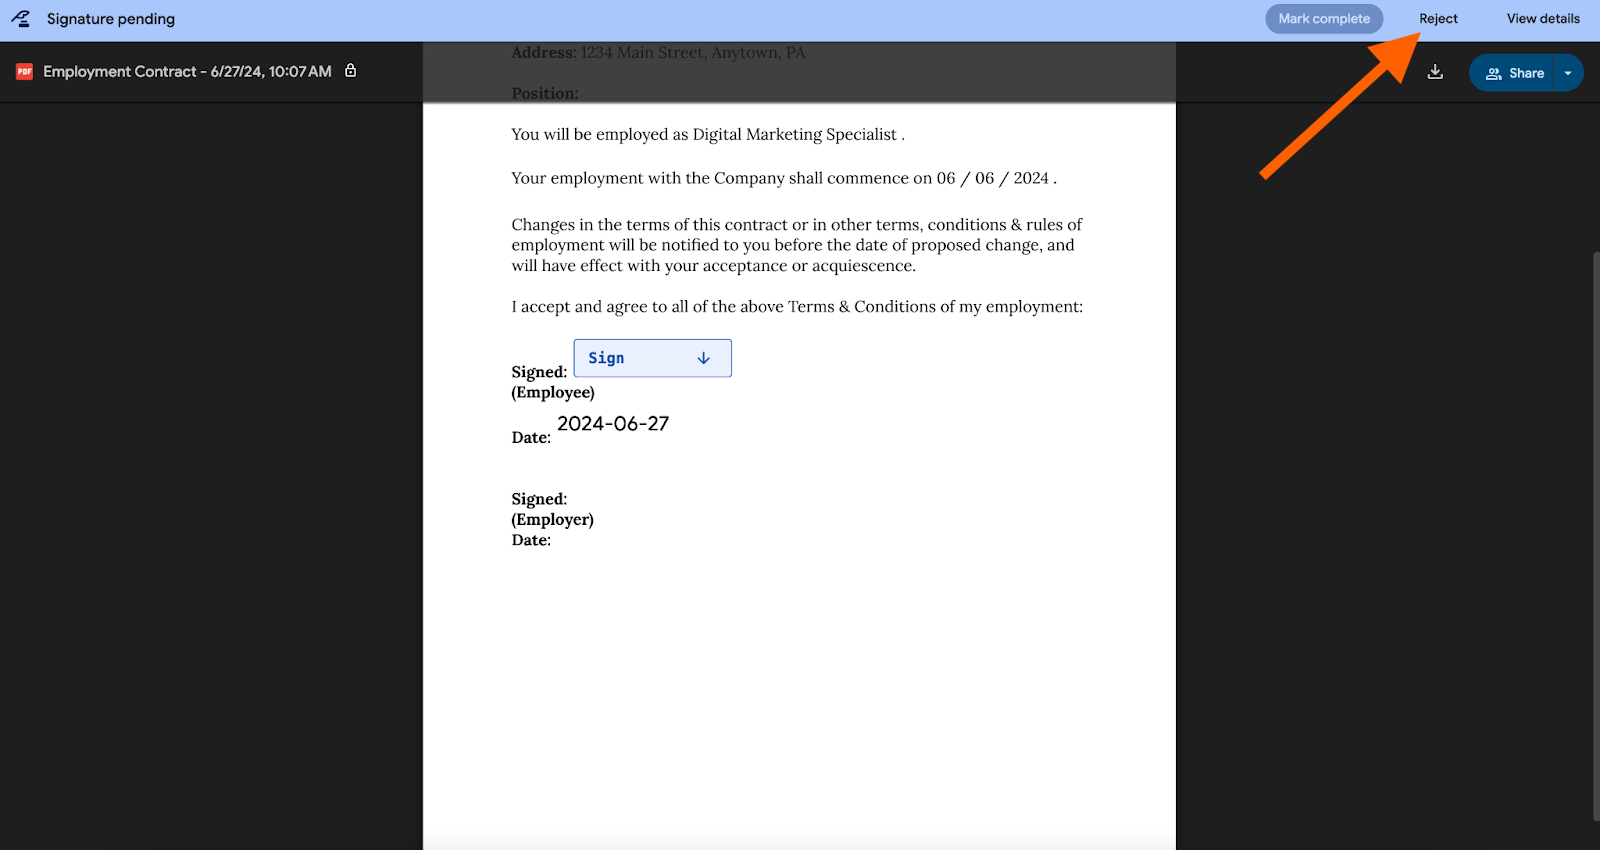
Sometimes, you may need to reject an eSignature request. To do this, follow these steps:
- Open the email notification.
- Click on the embedded link to open the document.
- Once the document is open, click the Reject option.
- The requester will receive an email informing them that the request has been rejected.
How to view the details of an eSignature request
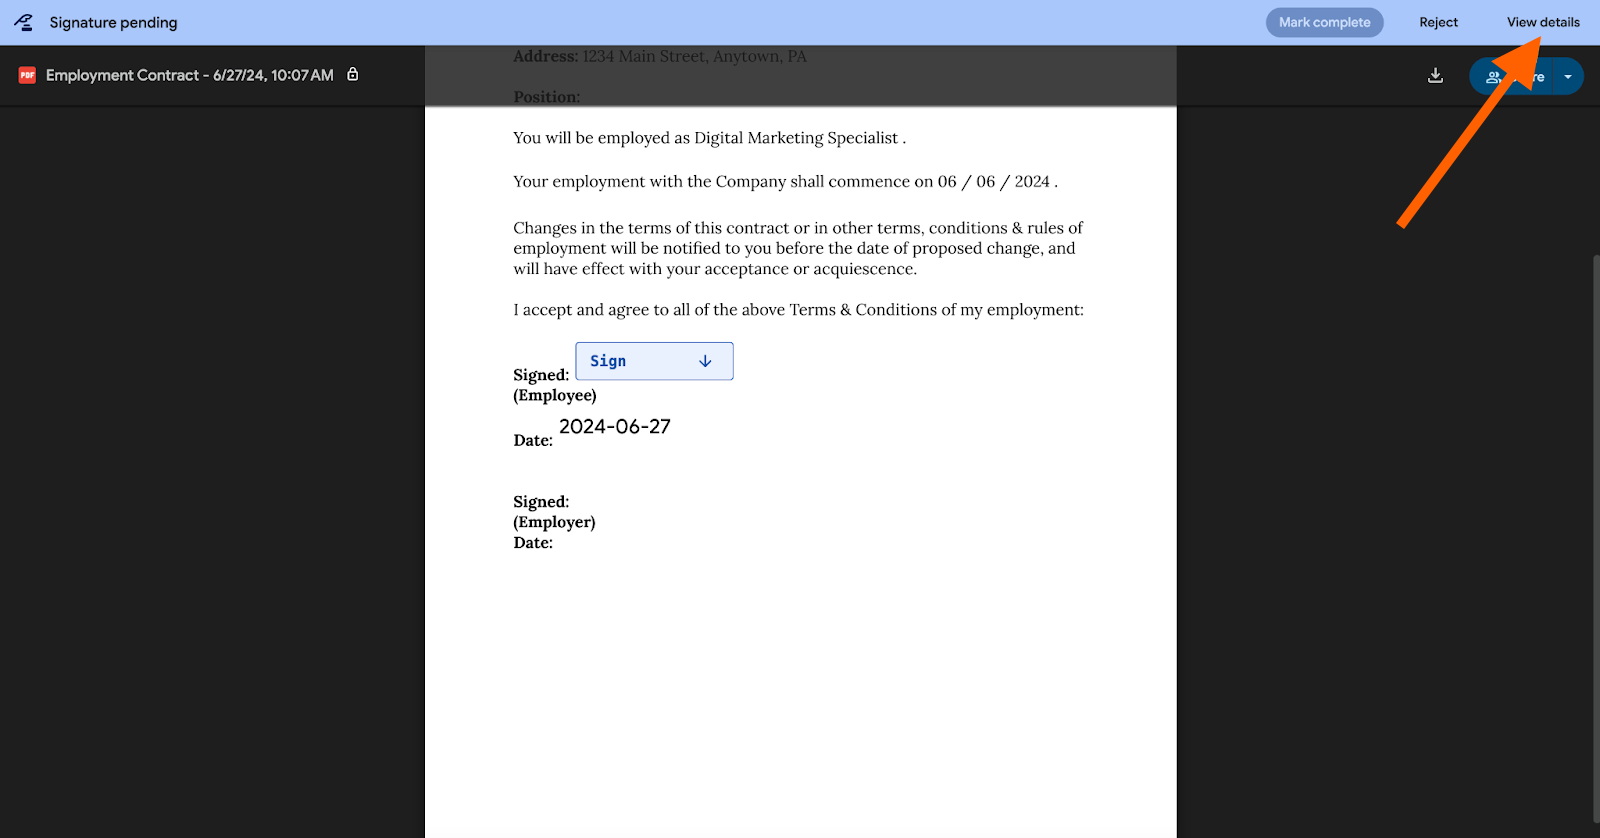
Viewing the details of an eSignature request is crucial for tracking and audit purposes. To access this information, open the email notification and click on the embedded link.
Click View details to see all the information related to the request. This includes the status of the request, any comments or reasons provided by the signer, and the audit trail of the document.
Sign PDF with Jotform Sign for Google Workspace
Jotform Sign for Google Workspace offers a great alternative for signing PDF documents. By connecting Jotform Sign with Google Drive, users can sign PDFs directly in their Drive.
To use Jotform Sign in your PDFs, follow these steps:
- Select a PDF file in Google Drive.
- Right-click on the file and open it with Jotform Sign.
- Select the account you want to use with the app and grant the necessary permissions.
- Once your document is imported into Jotform, you can add signature fields and other elements like names, emails, and dates from the Elements menu.
Documents can be sent to signers via email or link, or embedded from the Send menu in Jotform Sign. This flexibility makes it easy to collect signatures.
Jotform Sign can also improve your signature workflows with automatic reminders and document tracking. These features allow you to keep track of your documents and follow up with signers if needed.
Other Jotform products — including the Form Builder, Approvals, and Tables — enable you to create comprehensive workflows.
Find out more about in our guide, Sign PDF with Jotform Sign now on Google Workspace!
AS ALWAYS, CONSULT AN ATTORNEY BEFORE RELYING ON ANY FORM CONTRACT OR CONTRACT TEMPLATE. THE CONTENT ABOVE IS FOR INFORMATIONAL PURPOSES ONLY.
Photo by Brooke Cagle on Unsplash






Send Comment: