-
SilvaRicardoRicardoPerguntado em 17 de janeiro de 2025 às 08:23
Tenho uma base de dados (em excel), que consigo incluir nas tabelas do Jotform. Quero fazer um envio em massa, para os endereços de e-mail de uma das colunas. NO entanto, cada cliente precisa receber o link específico com os dados pre-preenchidos para atualização de cadastro.
Alguém consegue ajudar com o passo a passo?
Page URL: https://www.jotform.com/250159030695052 -
Mark Alan Jotform SupportRespondido em 17 de janeiro de 2025 às 13:13
Hi Ricardo,
Thanks for reaching out to Jotform Support. Unfortunately, our Portuguese Support agents are busy helping other Jotform users at the moment. I'll try to help you in English using Google Translate, but you can reply in whichever language you feel comfortable using. Or, if you'd rather have support in Portuguese, let us know and we can have them do that. But, keep in mind that you'd have to wait until they're available again.
Now, getting back to your question. That can be achieved by importing your Excel database in your Jotform Tables and Prefill the form with data from it. Then you can add a button in the Table and manually send the form to your users. That way, each form links that they receive is unique, and the form is prefilled with each users' data. Let me show you how:
1. In My Forms page, click the dropdown from the upper-left next to the Jotform logo.

2. In My Tables page, click Create Table from the upper-left.
3. For your new table, select Import data.
4. Next, click the Upload File canvas to upload your Excel file from your computer.
5. Then click Import Data at the bottom-right.
Once table is created, you can then prefill the form with the data from the tables. Here's how:
1. In Form Builder, click Publish from the top.
2. Go to Prefill from the left menu, and then select Tables Prefill from the options.
3. Select a Table from the dropdown.
4. Match Your Fields, and then click Save Setting at the bottom.
Once prefilling the form is done, go back to your newly created tables and add a send button to each row. Let me show you how:
1. In your Tables, click Add in the columns.
2. Go to Buttons tab for your new column, and then select Request Update.
3. Then click Next at the bottom-right.
4. On the Request Update dialog, Enter A Column Name.
5. In the next dialog, click Fields from the right of Recipient Addresses.
6. Select the Email field, and then click Create Column at the bottom-right.
See the screencast below for my results:
Each of your users will receive a unique link on their email addresses where they can edit their information.
Reach out again if you have any other questions.
-
SilvaRicardoRicardoRespondido em 20 de janeiro de 2025 às 07:10
Thanks for the feedback!
This will help me!
Is there a way to send the message in bulk? Without having to do it line by line? I say this because we are talking about updating the records of more than 2 thousand customers.
-
Rene Jotform SupportRespondido em 20 de janeiro de 2025 às 09:27
Hi Ricardo,
Unfortunately, each prefill link needs to be created manually and separately per set of database so the correct information can be included in each of them. Since you already have an Excel file with the data, another workaround you can try is through the use of Spreadsheet to Form widget. How it works is, you will be connecting an Excel file in your form with the data available to be used as prefill for each existing fields in it. And by using a unique code or id, a form user will be able to retrieve their data automatically prefilled for them. Let me show you how to use it:
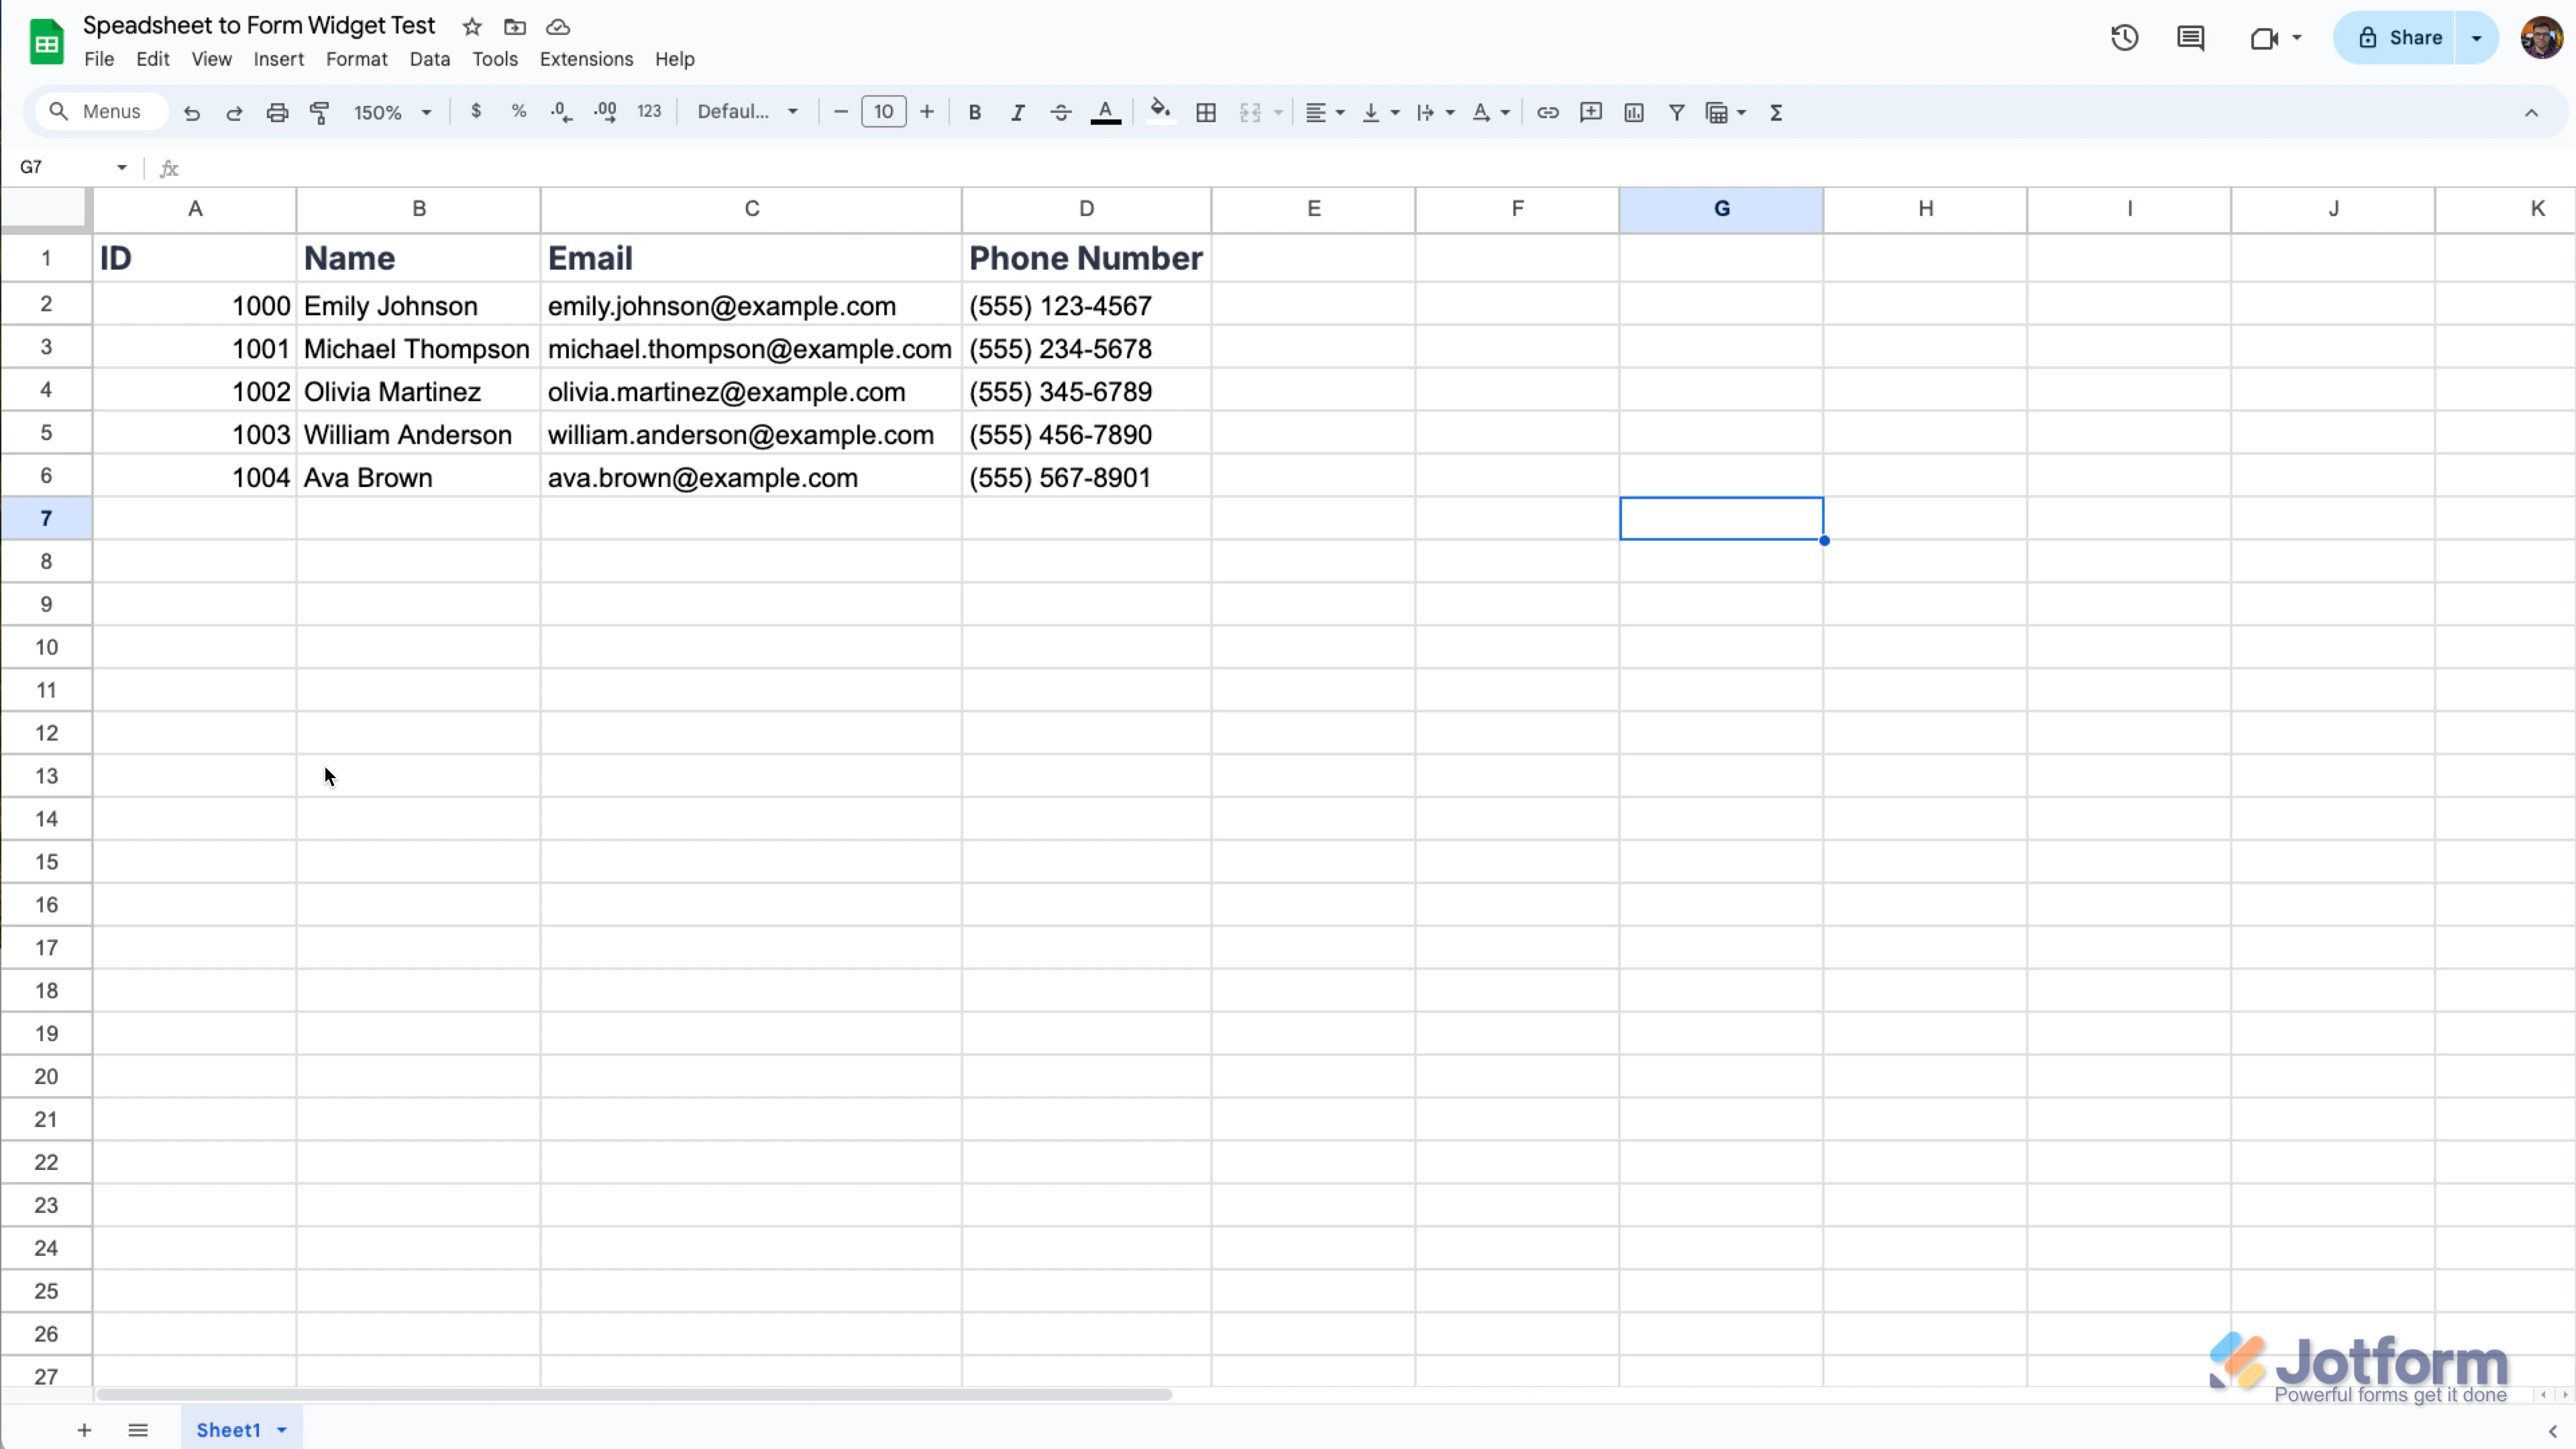
1. Create a spreadsheet with your data structured like you see below. Make sure that the column names in the spreadsheet match the field names on the form, and include a unique column, like an ID, so the data can be distinguished. The same rules apply if you're going to use your native language, or any other preferred language.
2. In Form Builder, click on the Add Form Element menu on the left side of the page.
3. Click on the Widgets tab, search for the Spreadsheet to Form widget and add it to your form.
4. In the menu on the right side of the page, upload your data file. (You can simply drag & drop your excel file to the Upload File area.)
5. Then, click on the Downward Arrow icon in the Access Code Column option and select the unique column.
6. You can also customize texts used in the widget. After you complete everything, click on the Update Widget button at the bottom right of the menu.
This way, you don't have to create thousands of prefill for your form, and just let the form user fill it out with the available data to autopopulate it for them. The only thing you need to do is to share the Unique Code or ID for them to use, so their own data can be retrieved.
Give it a try and let us know if you need any help.